Home
Home PC Game Trailers
 News
News Menu
MenuBlack Desert Guide – 25 Tips & Tricks
Updated: 30 Apr 2024 2:35 pm

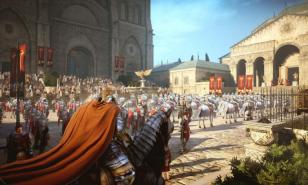
Achieve your ideal gearscore, stop running laps around Heidel!
 BY: Levi M.
Engaging in expeditions within the vast and ever-changing world of Black Desert Online can be a mix of excitement and uncertainty for newcomers. Not to worry—I've compiled a comprehensive guide of 25 essential tips and tricks to help you navigate this mesmerizing MMORPG. From character start-up to proper endgame gear that will fit your needs and preferred playstyle, this article is your must-have companion for unlocking the intel of Black Desert and kickstarting your adventures!
You may have just purchased Black Desert, and now you’re stuck in a state of indecisiveness, staring at your screen, pondering where to begin.
Don’t worry, we’ve all been there... It may be overwhelming initially, but it is more straightforward than it seems!
For the newbies, I’ll show you the steps necessary to get you on track to becoming an artisan at progression.
Now, the moment you’ve been waiting for!
25 Useful Tips & Tricks
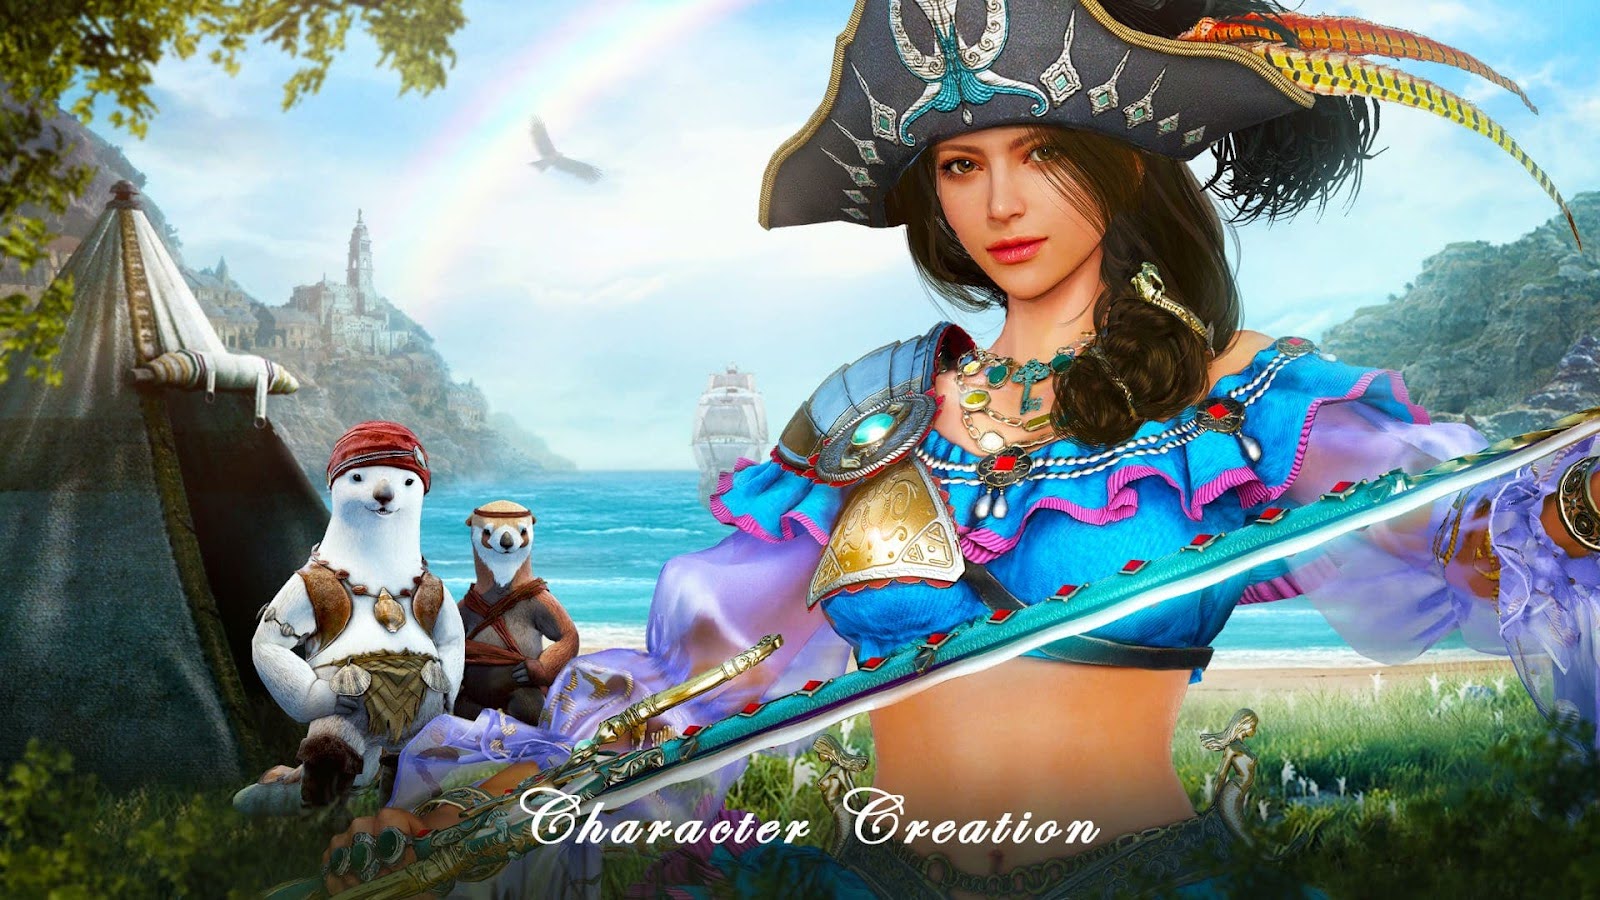
1. Character Creation:

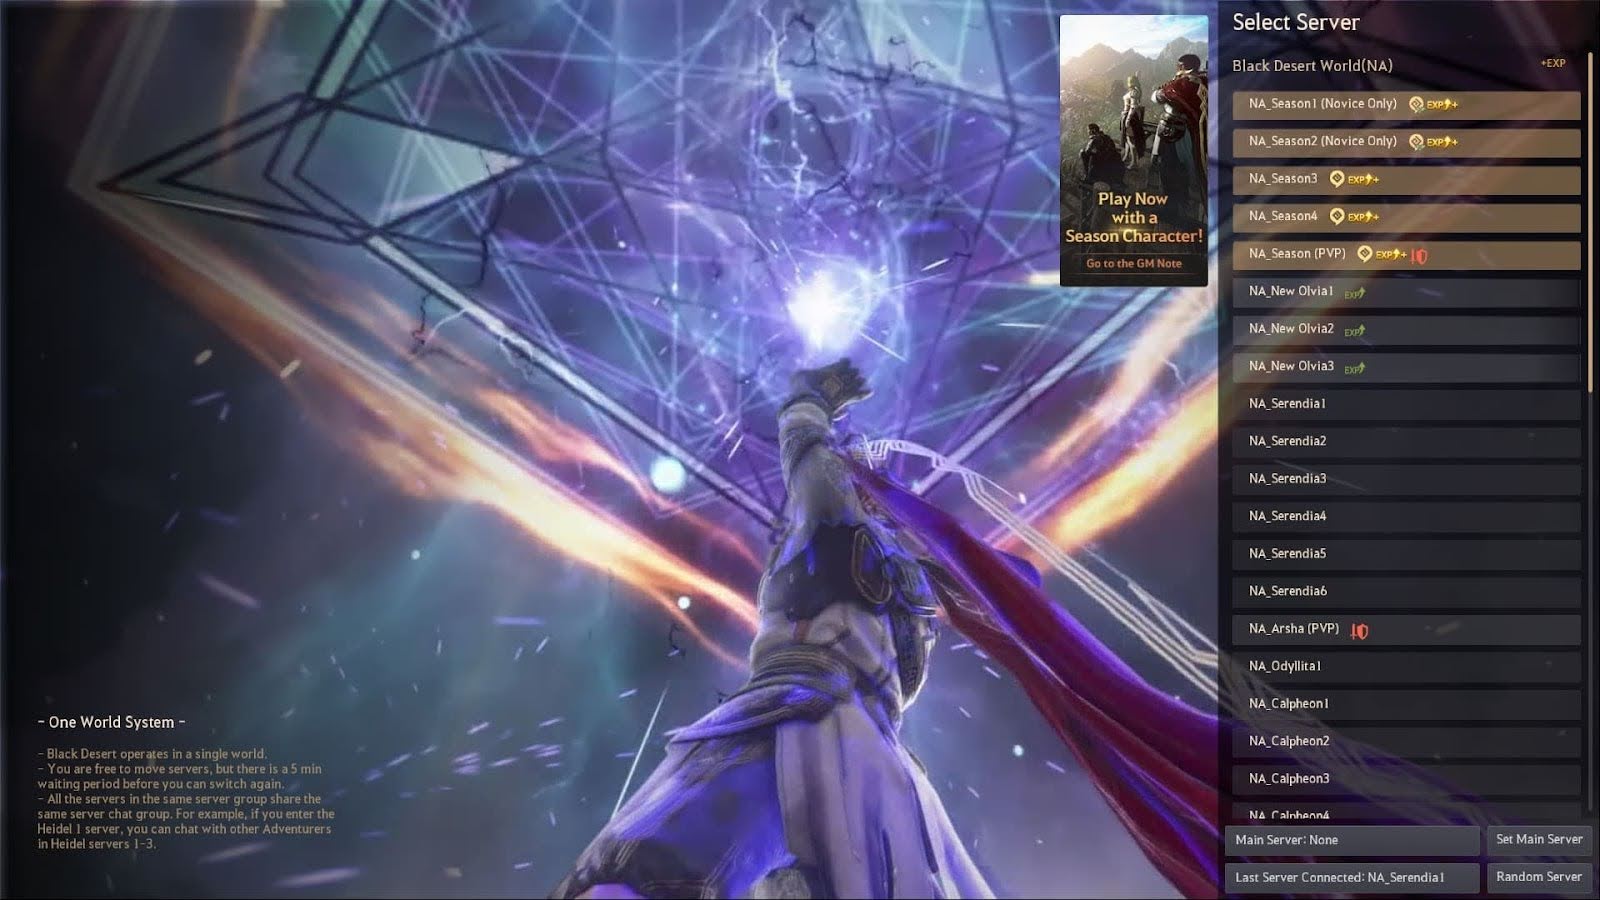
Upon launching the game, you’ll come across a list of servers. Select any server you want—it doesn’t matter which you pick—you can transfer between them freely after creating your character.
For newcomers, I recommend New Olvia servers or Season servers for increased experience gain. These are exclusive servers with limited access, which is very advantageous.
In the bottom right corner, both “Normal Character” and “Season Character”.
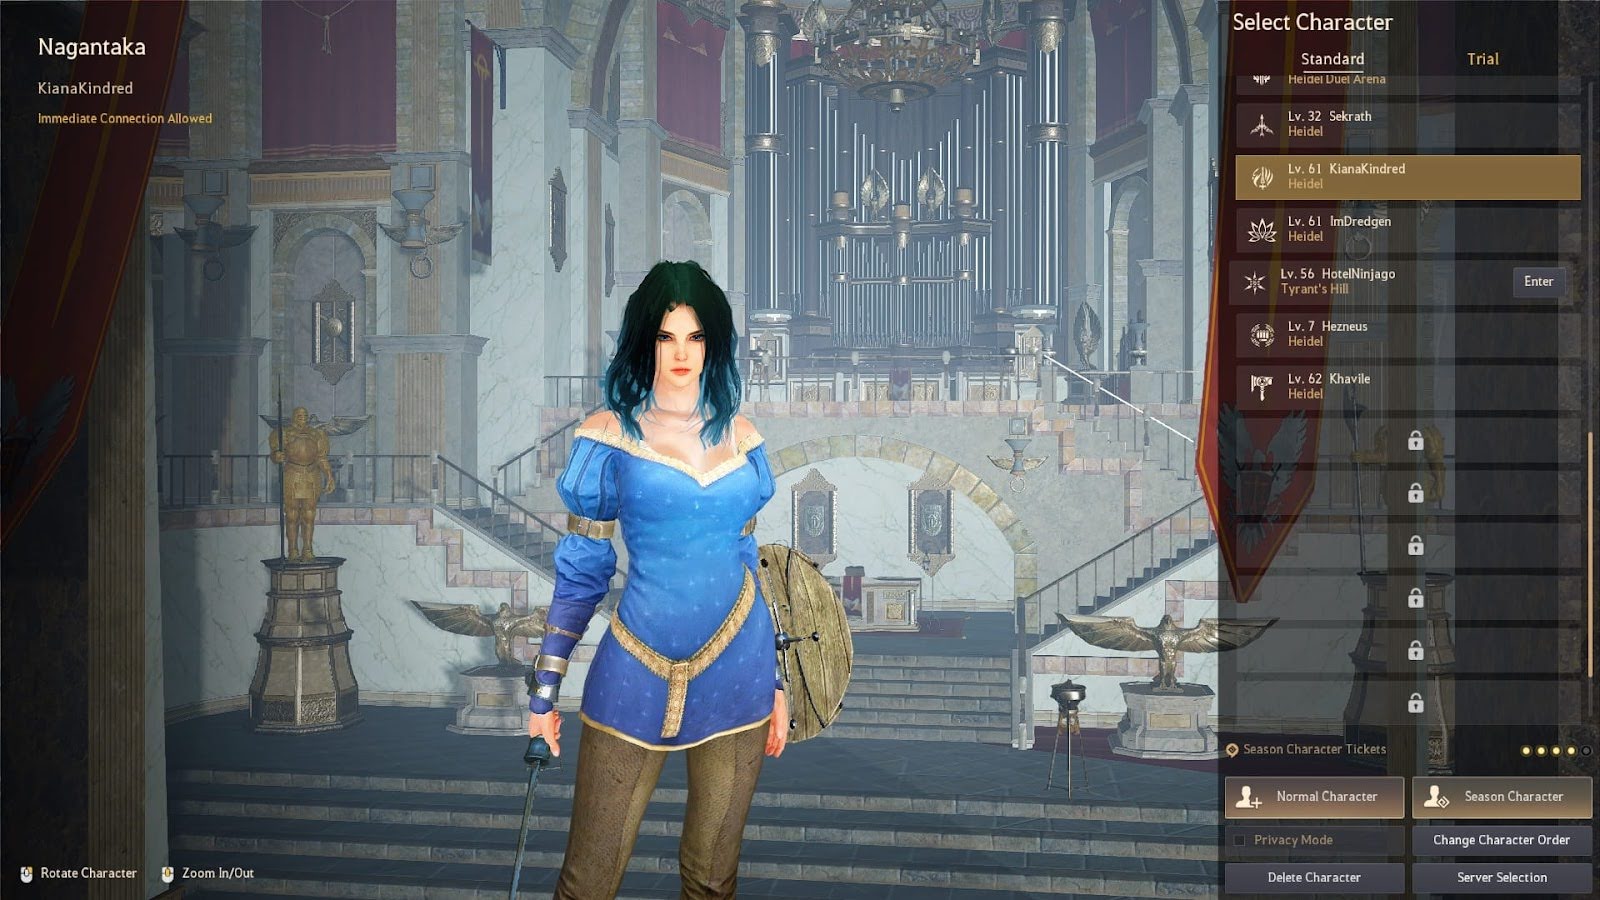
Normal Characters:
- Standard gameplay and experience.
- There are zero limitations for gear.
- Absolutely zero limitations on progression.
- Players can progress the game stages at their own pace.
Season Characters:
- Access to seasonal servers for adherent passive buffs—Combat, Skill, and Life-skill EXP.
- Bring a unique gameplay experience with an accelerated progression system.
- Exclusive rewards pertained to seasonal servers.
- Gear limitations: you only equip gear typically sold on the central marketplace when the season ends or you graduate early.
- Access to TET (IV) Boss gear and PEN (V) Capotia at the END of the season.
- Rewarding Milestones: Complete objectives to receive special rewards that further advance seasonal progression.
- Perfect for both new and returning players!
Simply choose the option that works best for you and jump right in!
Class Selection:
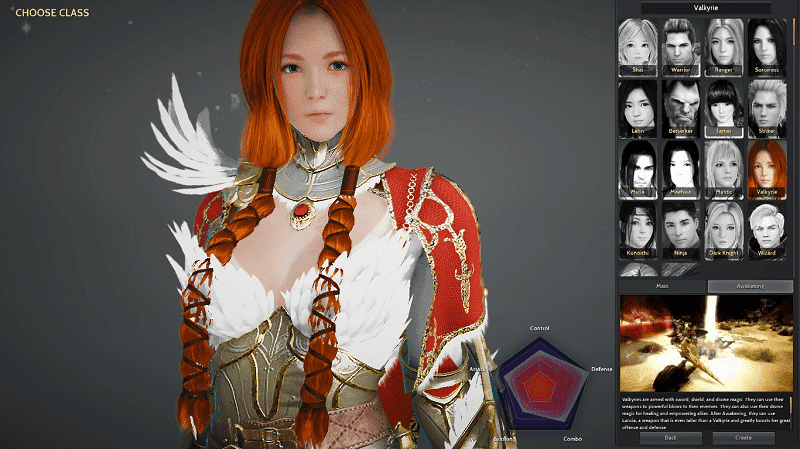
Selecting your initial class can be paralyzing, as there is a slew of classes to choose from. To make things easier, you can use the animated preview to glance at each class’s abilities, weapons, and backstory. The graph and the left-hand side of the preview will show their strengths and weaknesses.
The majority of classes have both “Awakening” and “Main” (Succession) skill trees. Clicking on these tabs will give you a preview of the abilities and weapons each tree offers.
I highly recommend Maegu. She is a jack-of-all-trades yet excels in Area of Effect (AoE) and mobility, making her a great choice for new players.
Come to find out, if you don’t like your chosen class—you can always create another character to swap between them freely!
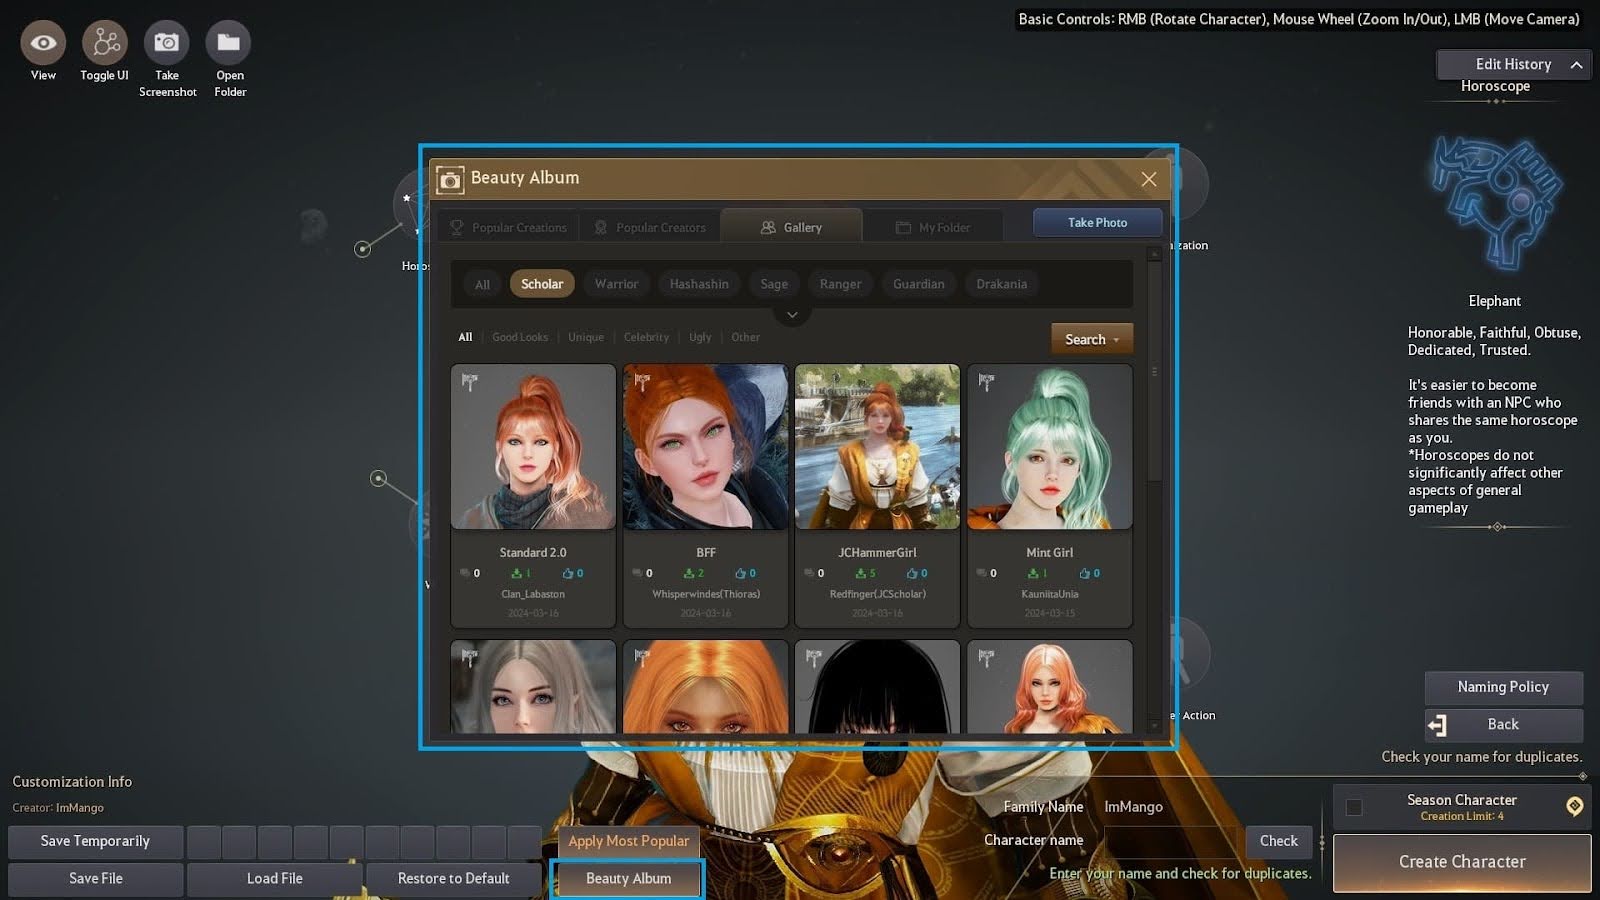
Character Customization: Black Desert has, by far, one of the best character creation systems out there; it gets pretty intrinsic. Here, you can add deep-seated details to your character or select a pre-made creation from the beauty album.
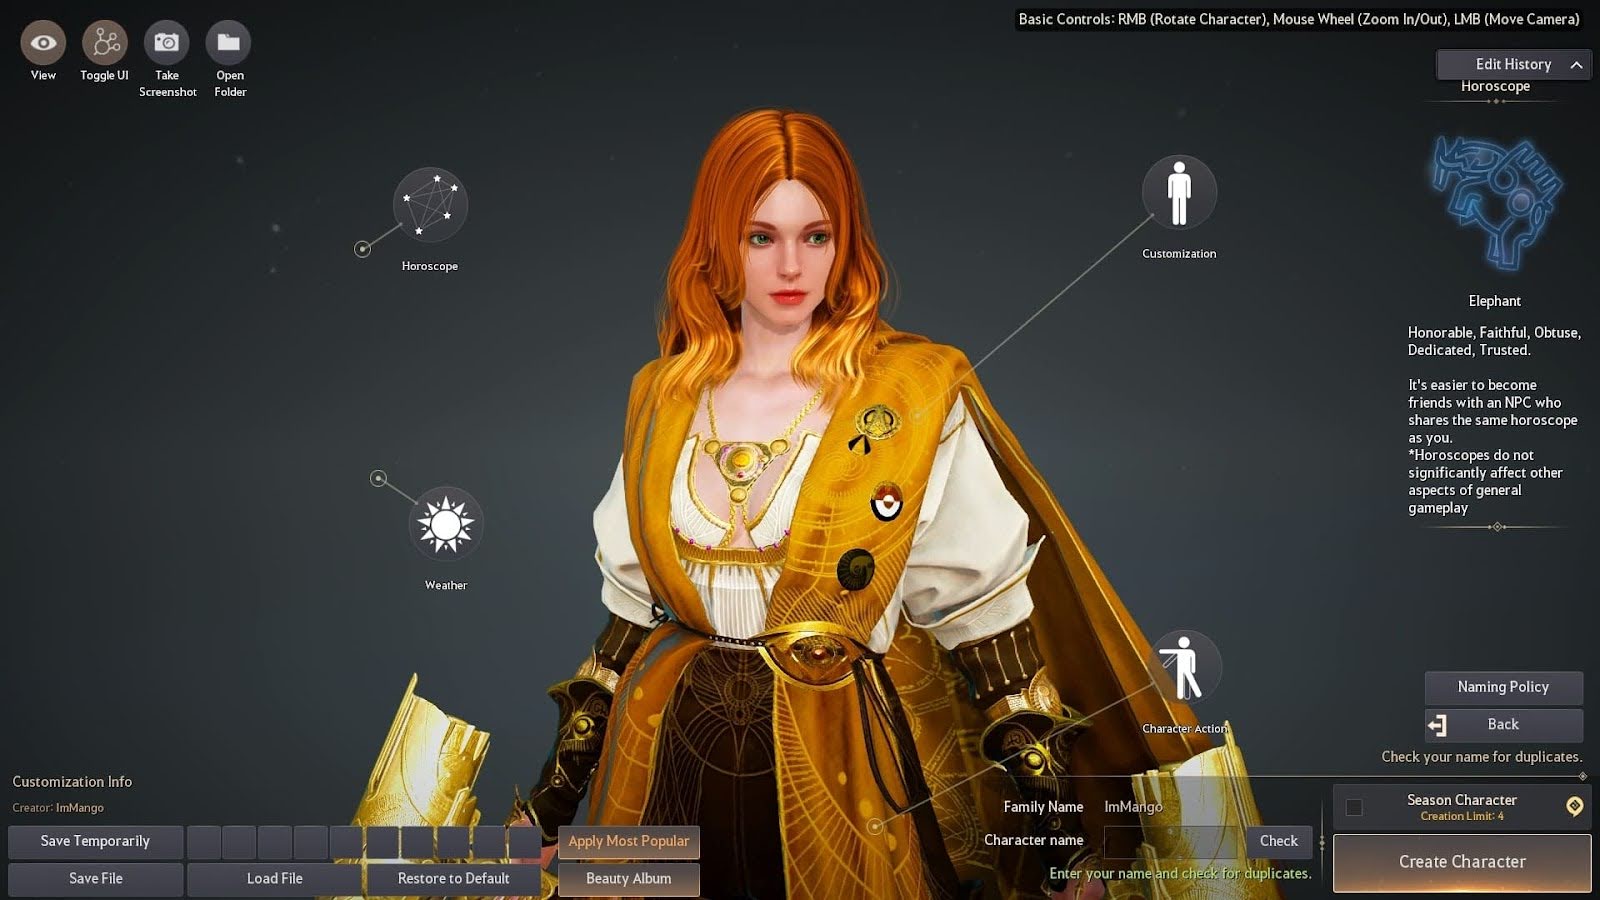
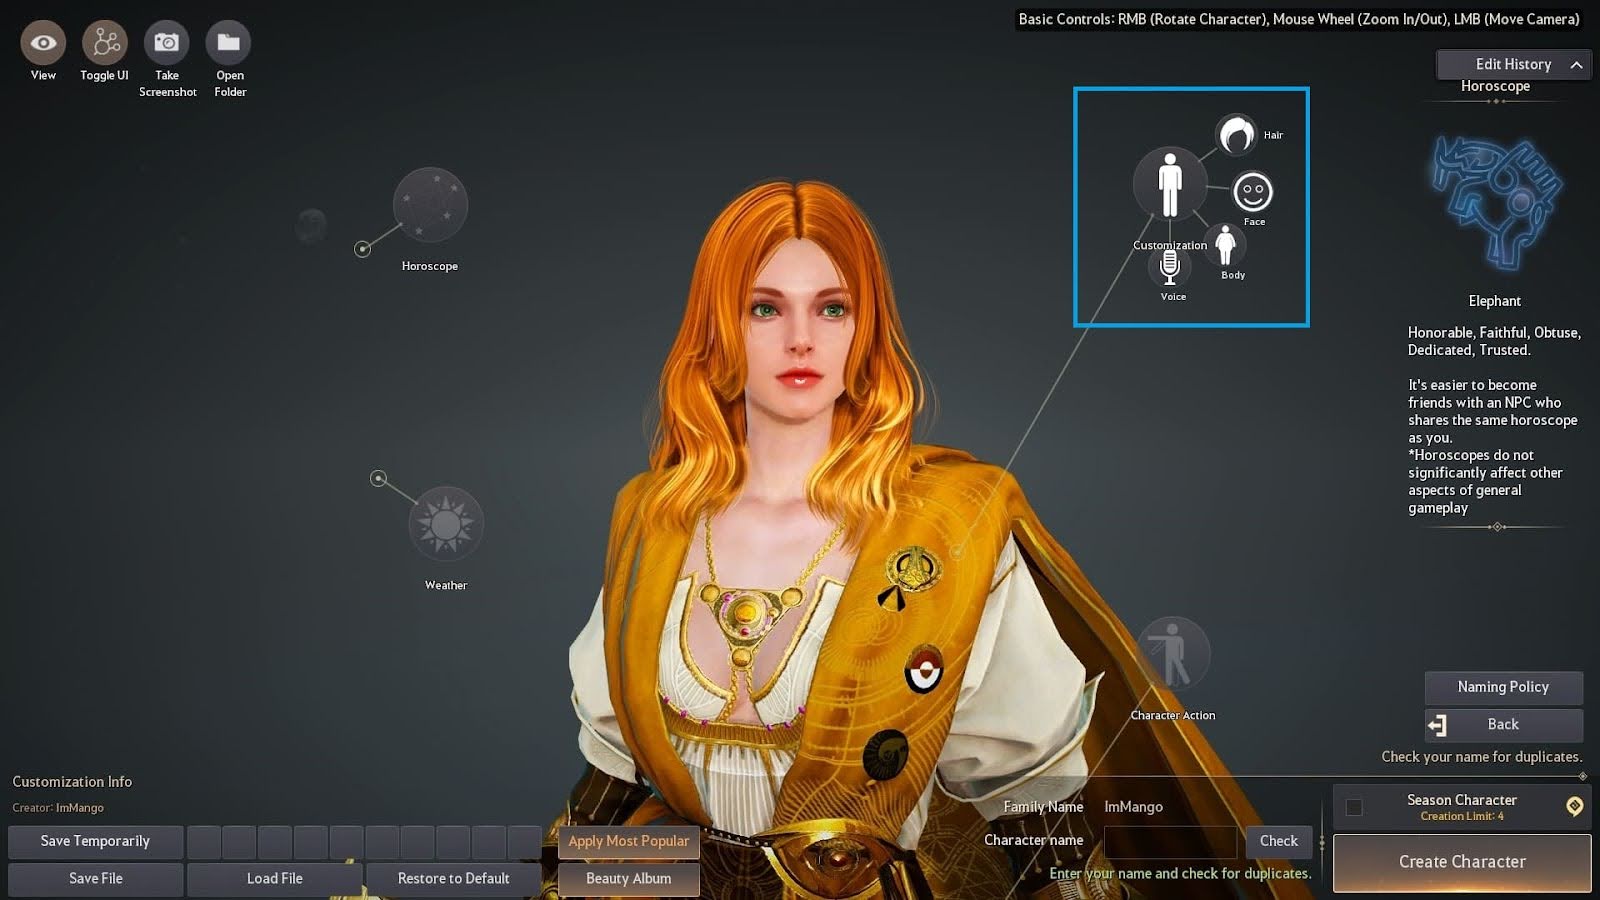
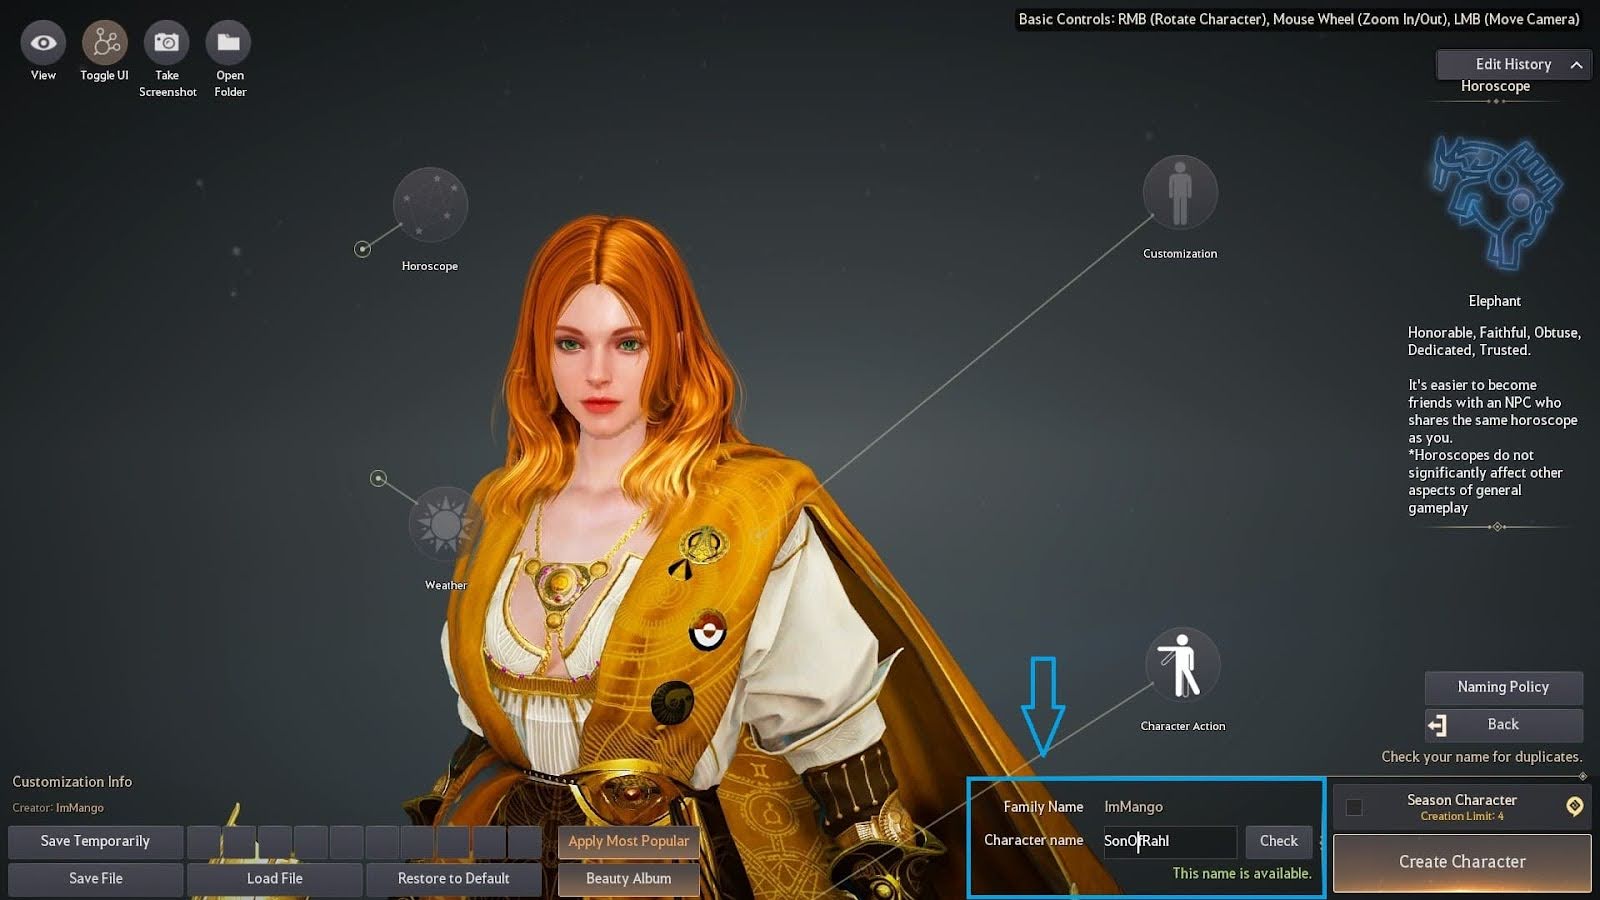
Customization: From here, you can change various options—Hair, Facial Structure, Voice, and Body Shape!
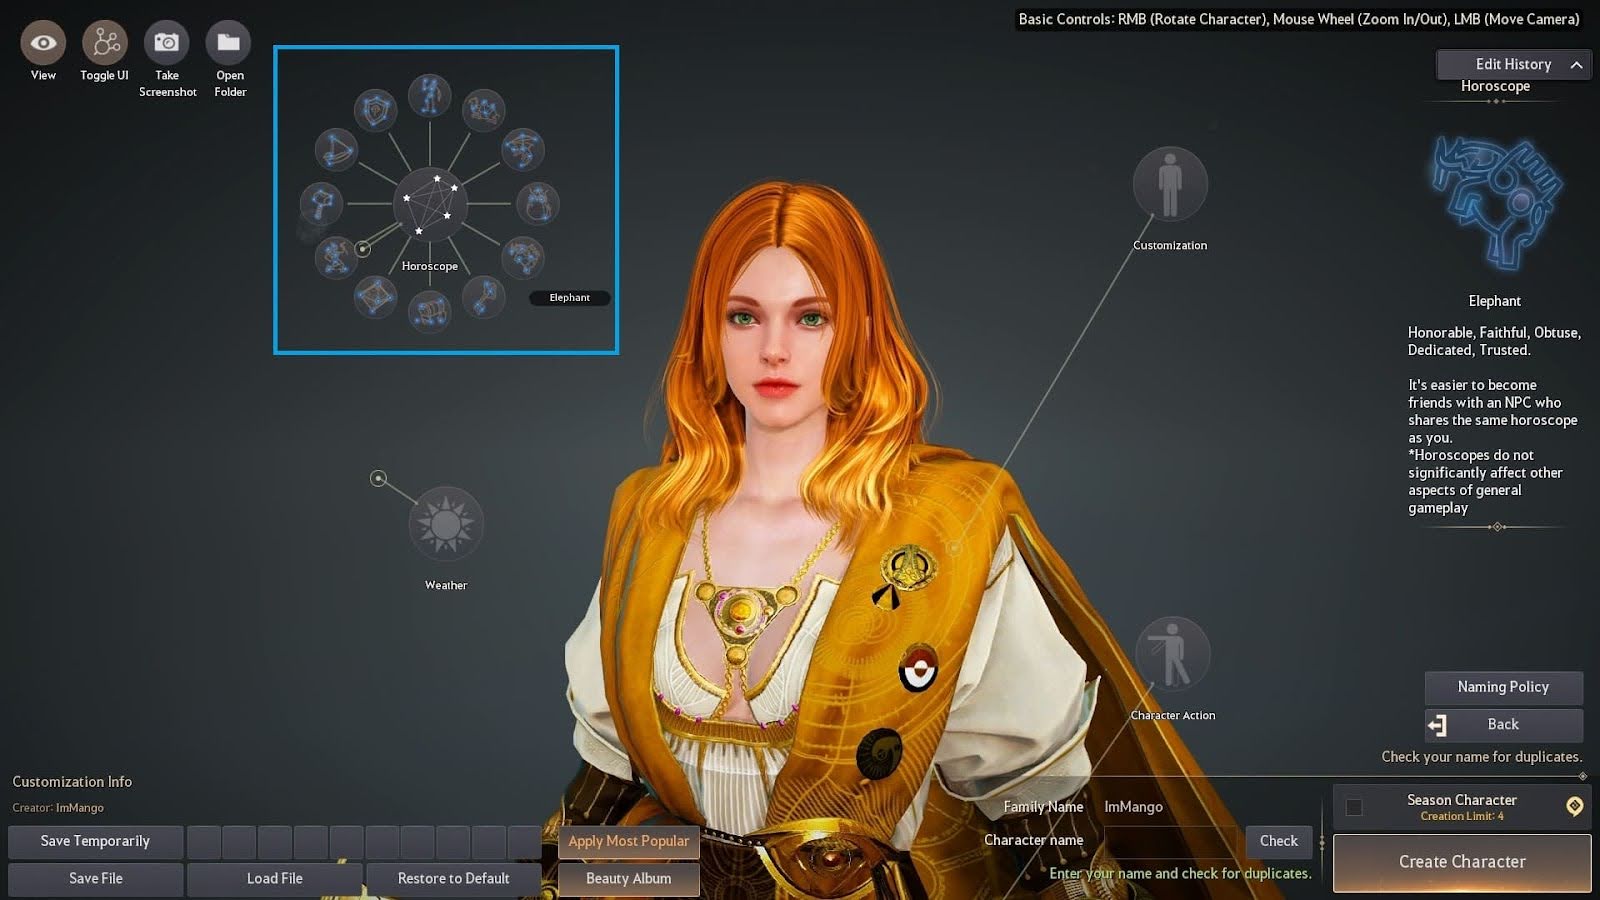
Horoscope: This currently has no determination factor and no significance in gameplay but is used to ultimately signify and define yourself.
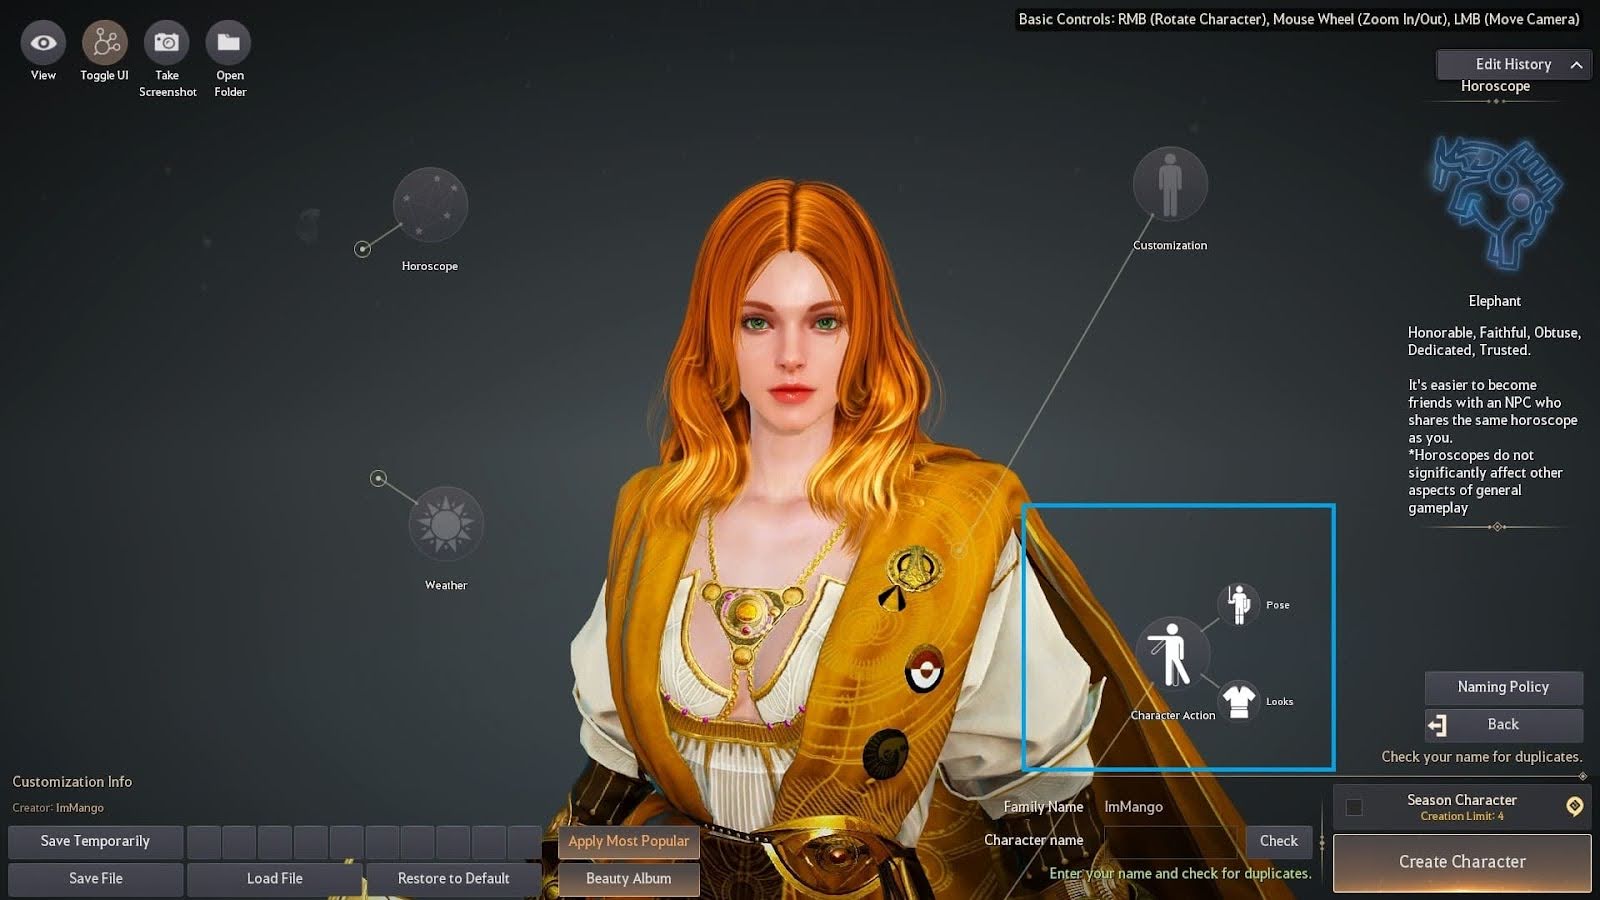
Character Action: Allows you to view your character in numerous poses!
Weather: Change the background alongside lighting—see your customization from a different perspective.
Save File: Don’t lose your customization progress. If you’re like me, you’ll sit in creation for a good hour or two, perfecting everything. So, make sure you save!
Load File: Allows the import of presets or old saved customizations.
Beauty Album: The beauty album—found toward the bottom-center of your screen—can employed to apply player-made presets.
Finally, Name Your Character: Type in your name and click the “Check” button, which validates if another player has taken the name. If it says, “This name is available!” you’re good to go! Hit “Create Character” to start your adventure!
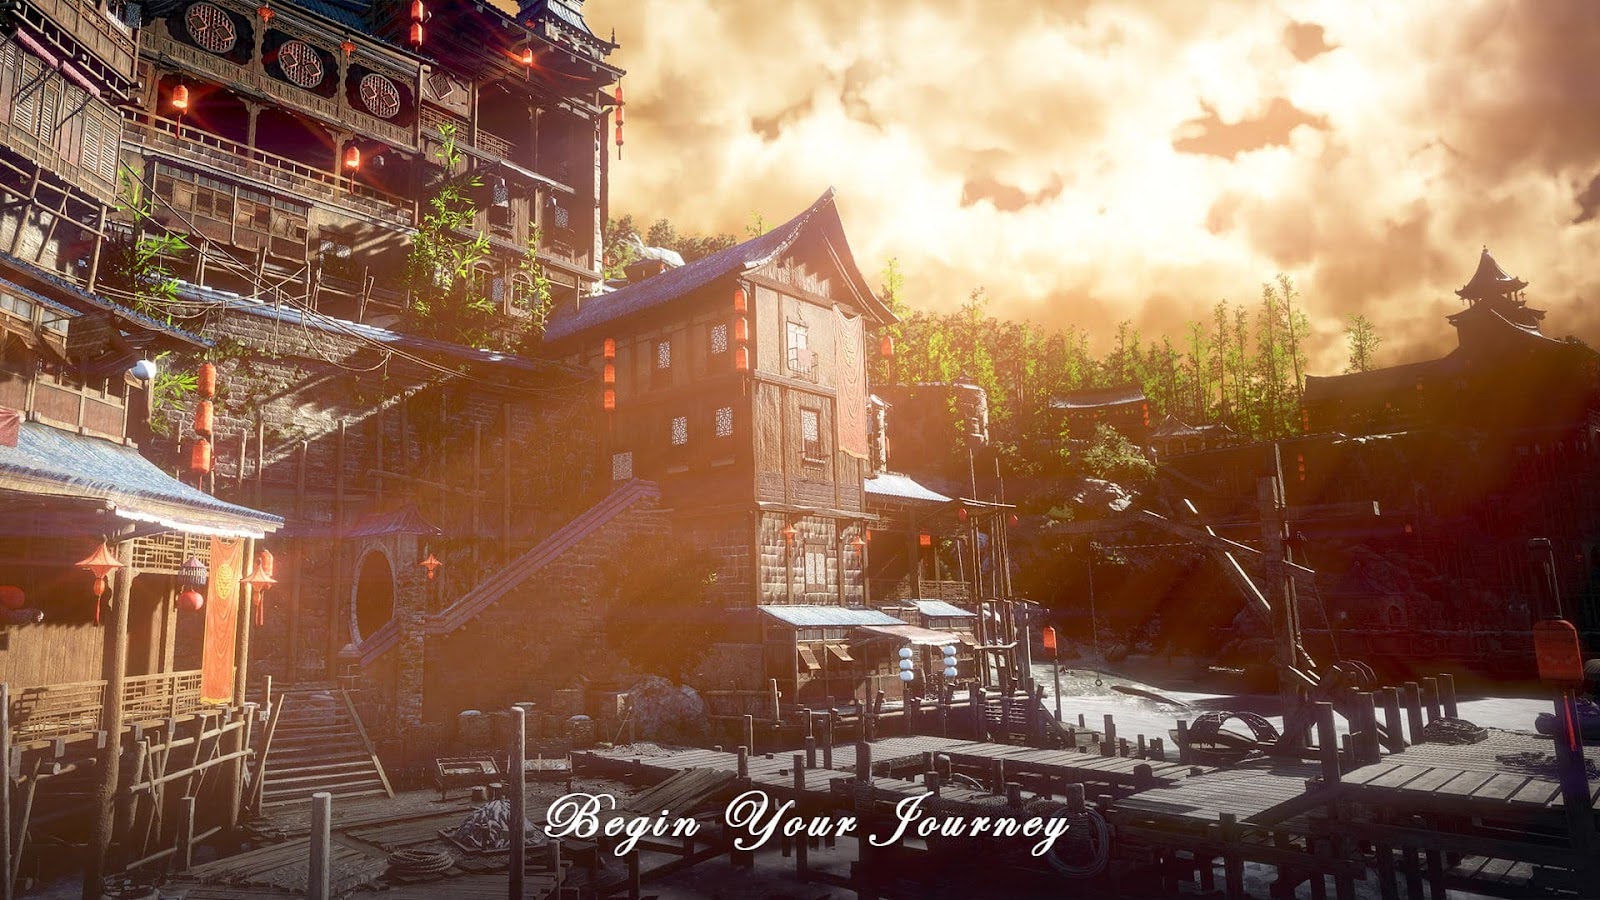
2. Start Your Adventure:
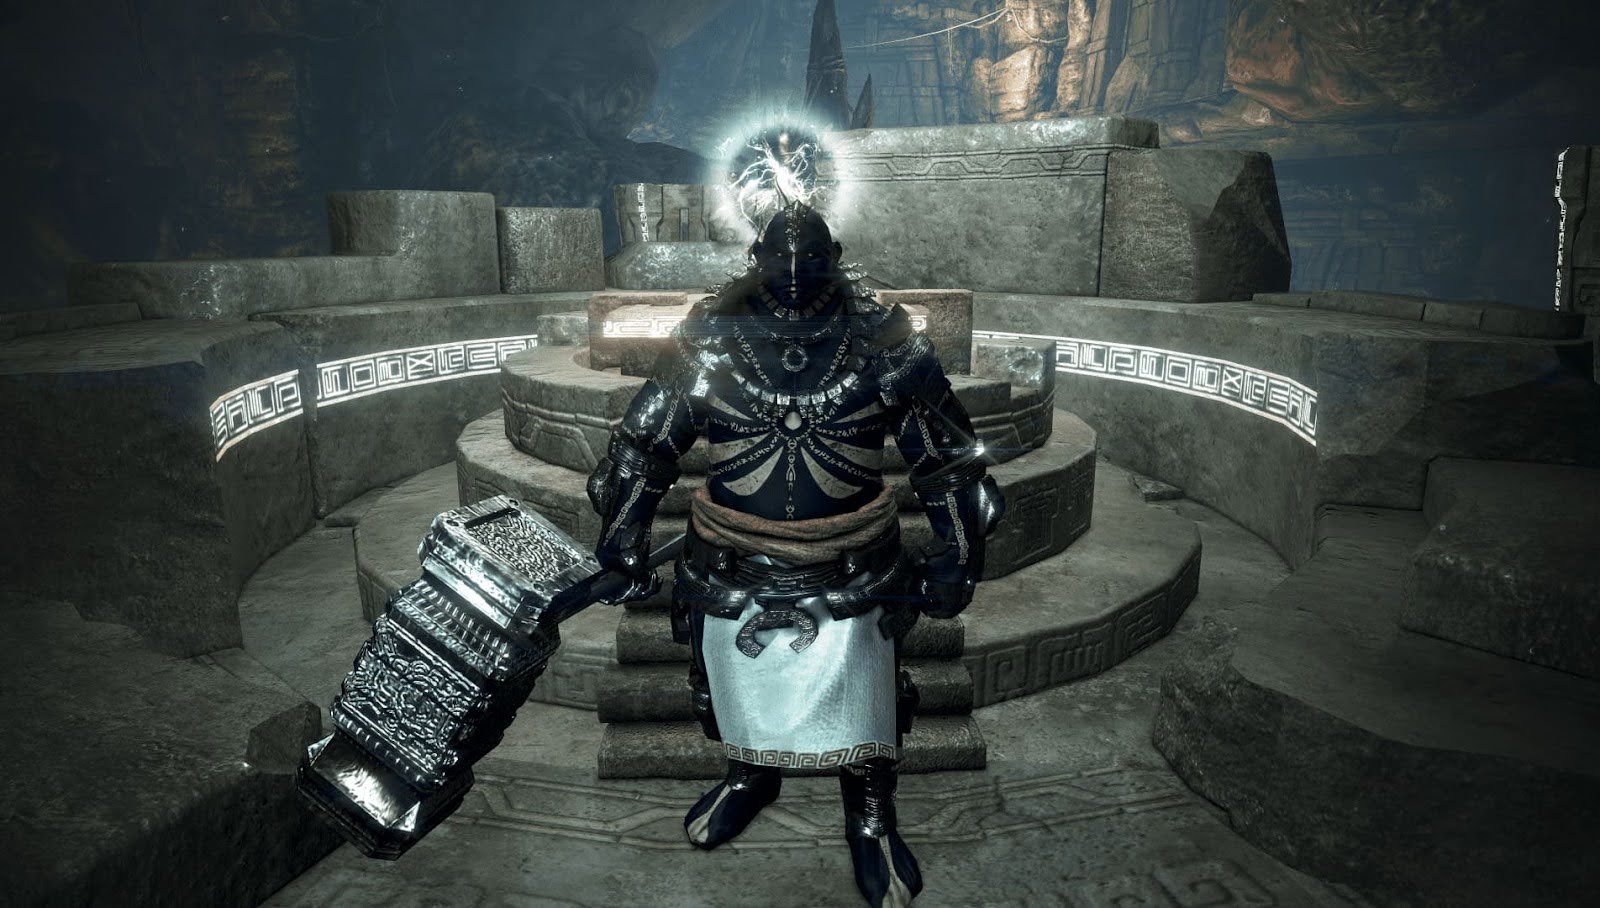
Upon character completion, you’ll see this layout of three zones to start from—Ancient Stone Chamber, Mountain of Eternal Winter, and Land of the Morning Light.
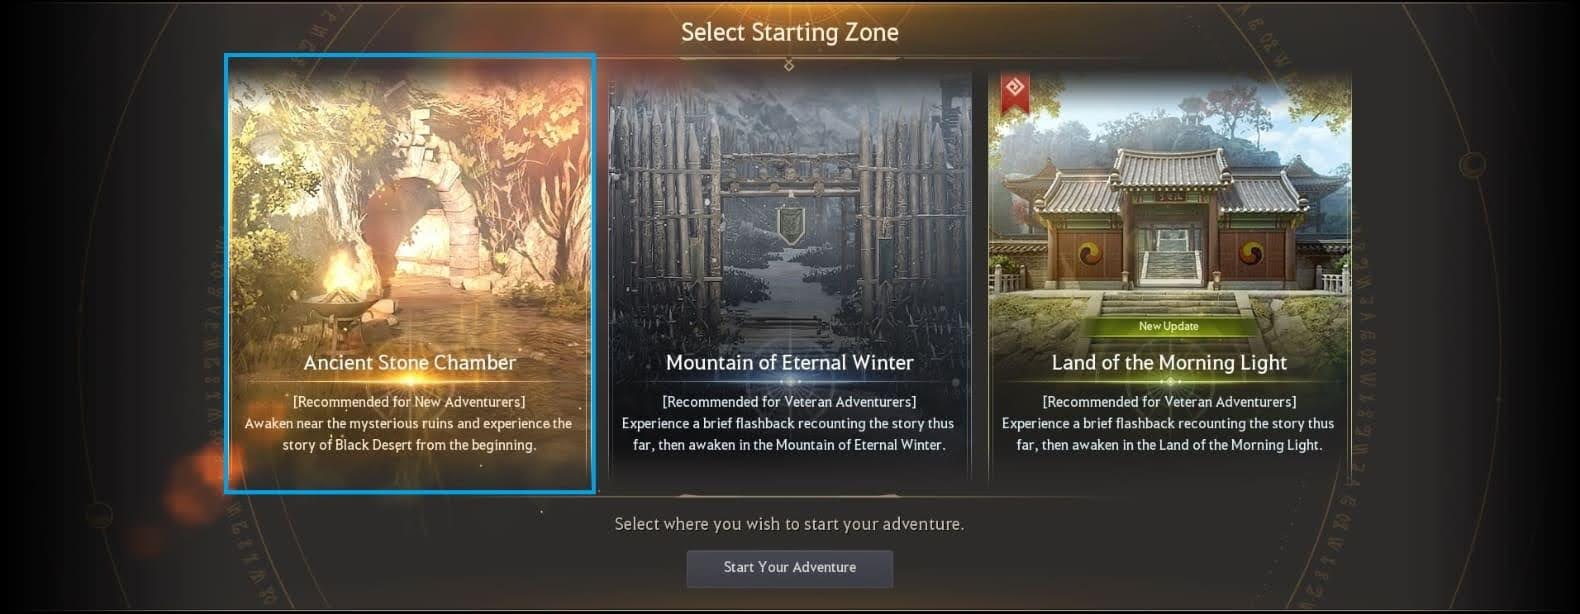
For the best playthrough experience, choose Ancient Stone Chamber. For now, remain oblivious to the rest, as they’re for veteran players who’ve likely completed the main story. Choosing them won’t benefit you; instead, it will make for more grueling gameplay.
3. Focus Main Questline:
This part is where most players become confused and overwhelmed. You’re skimming through the plethora of UI, struggling to find the start. There isn’t exactly a guide within Black Desert; you’re technically free to start however you want.
But, to speed things up, let’s get you on the right path.
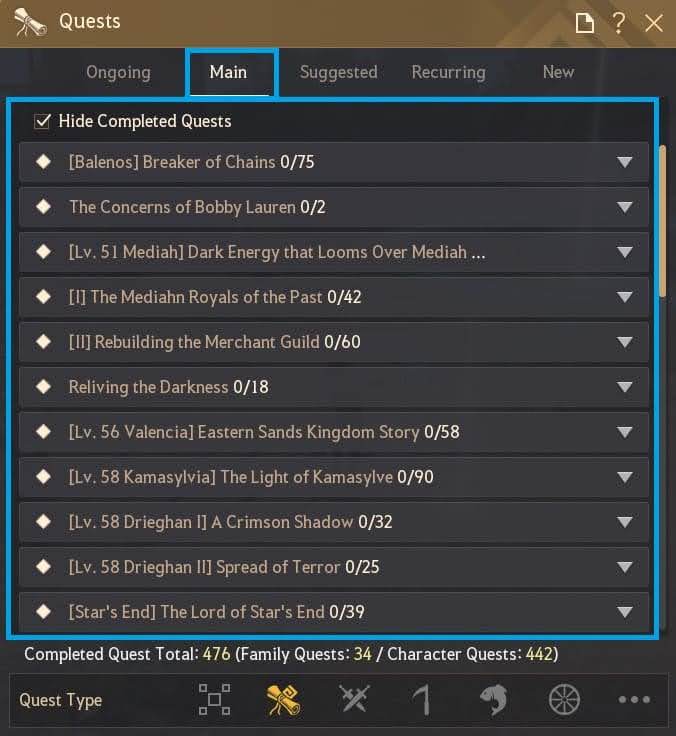
Start by pressing “O” to open the questing tab. At the top of this window, you’ll find the category “Main.” Click on that. You’ll want to follow the listed quests until you achieve character level 56. The quests are relatively painless, though a whole lot of spamming “R” just to skip through dialogue.
Consequent to the main quests, you will earn Skill EXP, Combat EXP, and Energy by naturally clearing mobs. You’ll inherently earn Contribution Points (CP) via quest completion.
Contribution Points: These are primarily used to invest in nodes on the world map (Pressing “M”). Nodes are canonically used to build a worker empire. Each node will cost roughly 1-5 Contribution Points. Furthermore, you can purchase—homes, refineries, workshops, etc—by clicking on the city nodes via the world map.
Skill EXP: An experience-based currency used to acquire new skills in the skill tree (Pressing “K”)—occasionally earned by clearing enemies.
Combat EXP: This directly levels your character, obtained by naturally killing mobs.
Energy: Earned as a by-product of acquiring new knowledge. You will obtain knowledge through exploring new areas, slaying different creatures, and talking to new NPCs. Access what you’ve already discovered by pressing “H.”
Purchase a Horse: After conversely completing your first few quests, you will end up in Veila—press “M” to open your map. Navigate toward the bottom-right of your screen, then select the magnifying glass icon. Click the “Stable” option to set a navigational path to the nearest stable keeper.
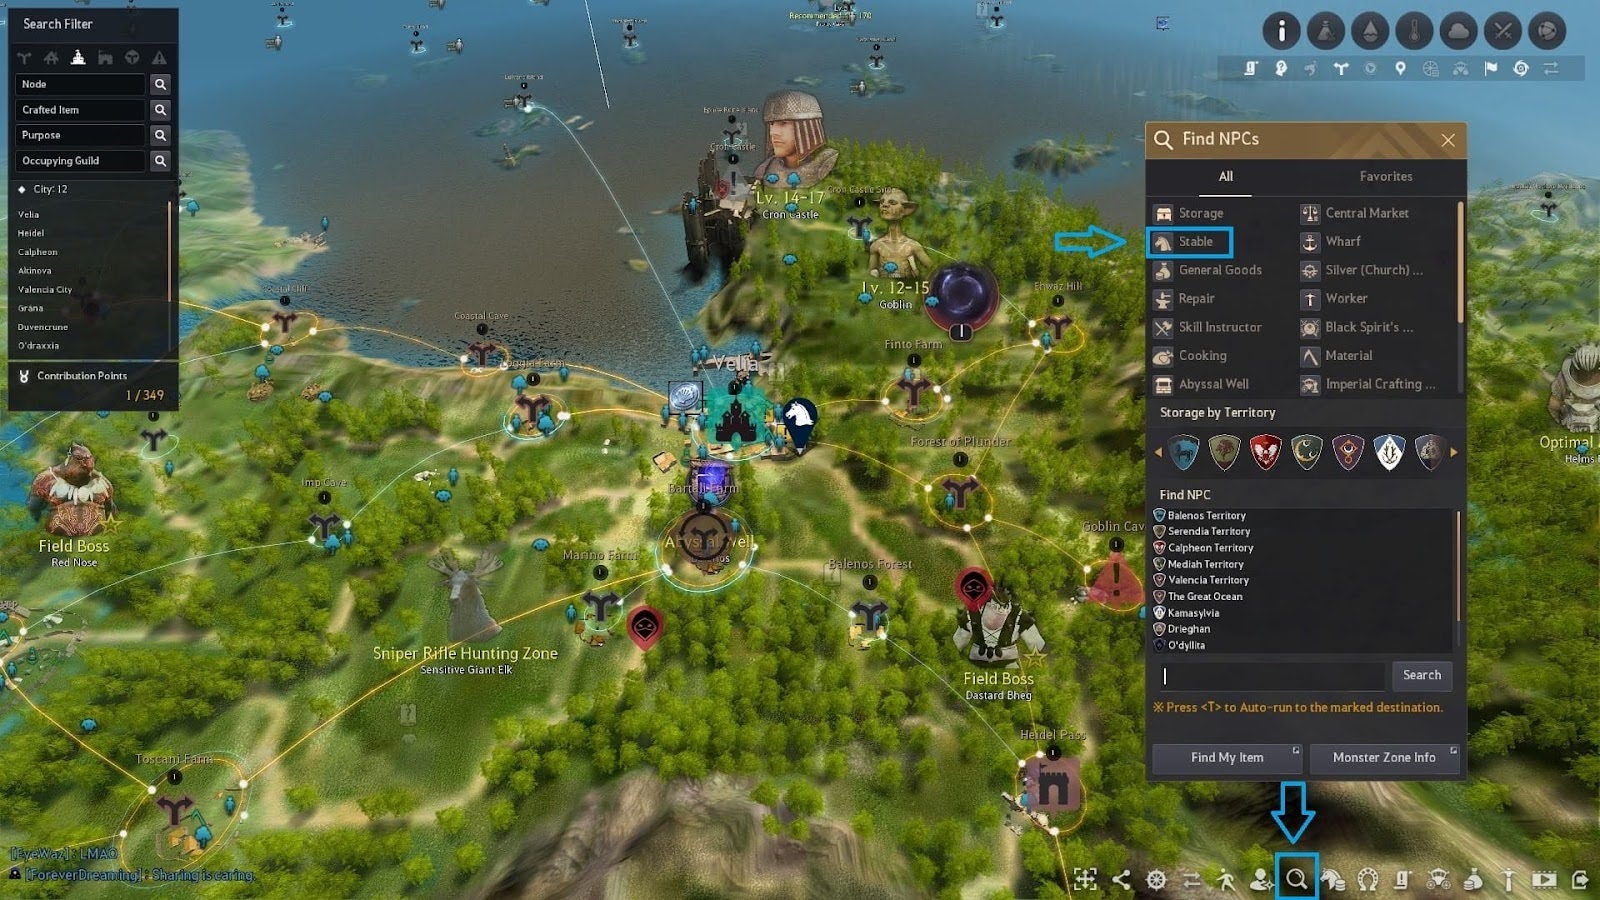
Horses can be found by clicking on “Shop,” where you can buy and register a horse emblem. There is a horse marketplace found under “Stable,” where you may purchase higher-tier horses when you have excess silver to spend.
Now, you can blaze through quests with reliable transportation.
4. Understanding Contribution and Energy:
Contribution Points (CP) are earned directly through questing or turning in by-products from cooking and alchemy. These points are a cornerstone in building your worker empire. They can also be used to rent fences, purchase residences, provide lodging for more workers, and build workshops.
Talk to a node manager to purchase one or access a node remotely with the world map.
5. Investing In Node Management:
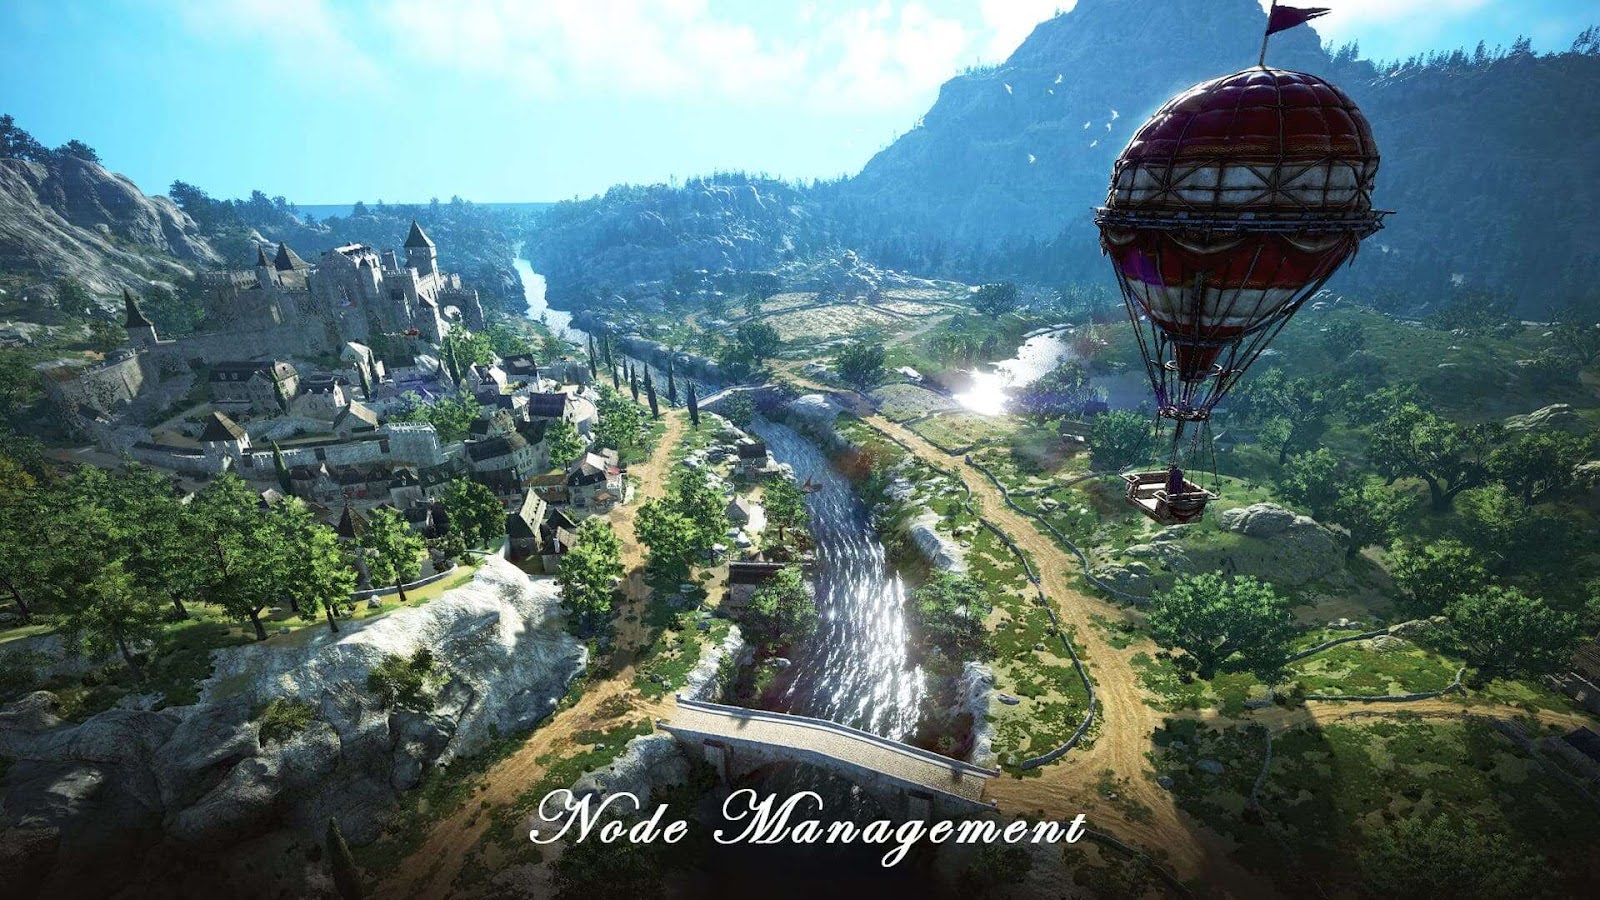
Focus your node investments on materials for future crafting, cooking, alchemy, and gear enhancements. I recommend cooking; it is a relatively easy skill to learn and will yield profits early on.
Start by crafting beer for your workers. Beer is most commonly used to replenish worker energy. Beer isn’t a profitable product to source, but it will most certainly give you the EXP needed to level up your cooking skills. Keep them working—keep generating passive income.
6. Enhancing:

The initial gaze upon enhancements is overwhelming for a new player—or a curse for us veteran players. Don’t panic yet; it's not as complicated as it seems, although extremely costly. The first thing you’re going to learn about is failstacks.
Failstacks are also considered diminishing returns for unsuccessful enhancements. Every time you fail an enhancement, you build a failstack. These are used to increase the probability of succeeding in an enhancement.
For example, if you have 0 failstacks, your enhancement chance of succeeding might be 5%. However, if you have ten failstacks, your chance of succeeding will be 50%.
You can build failstacks through common tactics, such as purposely failing Reblath armor enhancements (Reblath is bought from the Blacksmith in Veila). Otherwise, you can use the Advice of Valks.
Advice of Valks is much more straightforward; you don’t have to burden yourself with enhancement-hell building failstacks with Reblath. These are preset scrolls you can equip. You can earn these scrolls via daily logins, coupon codes, gear extractions, events, and seasonal servers.
Black Stones: Your primary resource in enhancing! There are currently two variations of black stones—weapon and armor. It’s pretty self-explanatory to say which to use these for! Black stones are farmed from any grind spot, bought & sold on the central market, or traded for.
Black stones enhance both basic gear and boss gear up to +15. At that point, you’ll be met with a new gem—Concentrated Black Stone—with the same concepts and variations referred to earlier.
You’re now eligible for PRI (I)! If successful, begin your pursuit of DUO (II). The only thing to note upon reaching DUO (II) is that failure means your enhancement level will revert to PRI. The same goes for TRI (III), TET (IV), and PEN (V).
Example: You make it to TRI, decide to proceed with gear enhancement, and fail an attempt at TET. It drops back down to DUO, and so on.
Thankfully, we have somewhat of a failsafe alongside this mechanic—Cron Stones. These ensure your enhancement won’t drop when further enhancing boss gear particularly. As far as accessories go, they’ll only give you a set chance to halt level drops.
Repairs: After being unfortunate enough to witness your gear break after many imminent failures, walk to the marketplace and search for “Memory Fragments.” Make your purchase and head over to any blacksmith.
Before continuing repairs, you’ll want to check if you have any Artisan Memories. These multiply the repair factor by 5, so you won’t break the bank using hundreds of memory fragments.
Artisan Memories are given out occasionally through events, coupons, and loot boxes or bought inside the pearl shop (F3). Likewise, you can use the loyalty shop to purchase a couple of items daily.
Click on the “Repair” tab and again on “Recover Max Durability.” Check “Use Artisan Memories” if applicable.
Voila! You may have a hole in your virtual wallet, but at least you can use your gear again!
Note: Failstacks cannot be transferred to another character—unless you have access to “Naderr’s Parchment.” The quest to obtain it is called “[Naderr's Band] Black Spirit's New Power],” and can be found under “Suggested” in the quest tab.
7. Enhancing With Caphras:
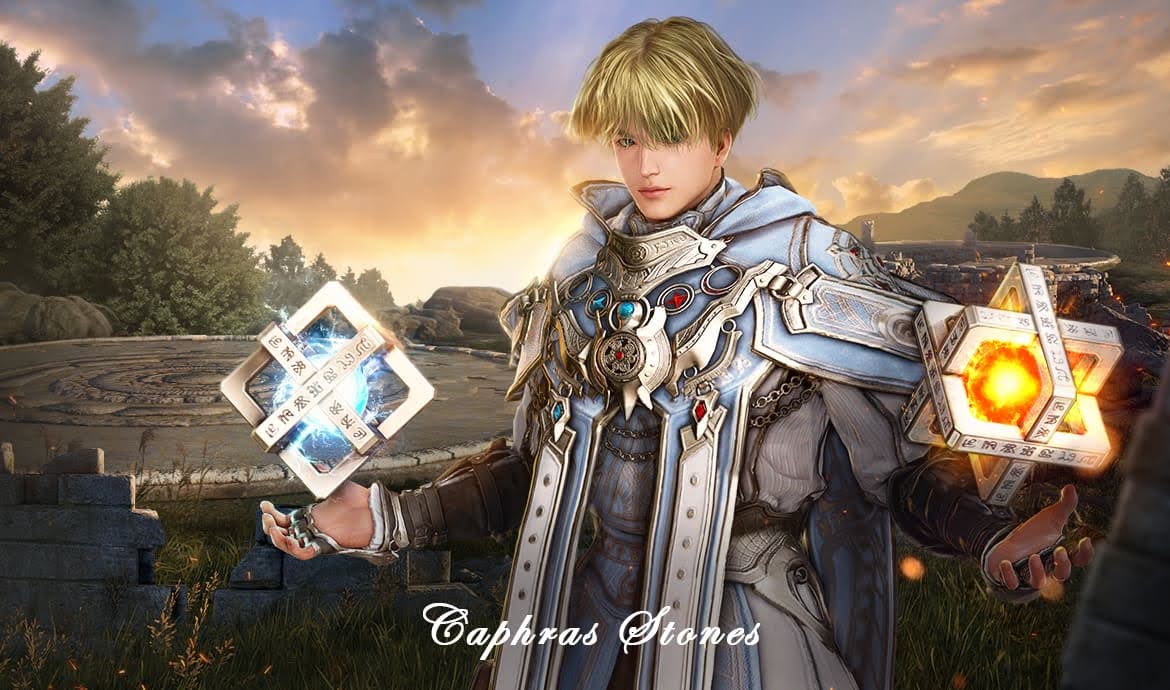
Caphras Stones are used to enhance gear beyond certain levels, known as "PRI," "DUO," "TRI," "TET," and "PEN." These levels represent the enhancement stages of gear in BDO, with PEN being the highest achievable enhancement level.
Unlike traditional black stones, which are used to enhance gear up to a certain level, Caphras Stones are used to add additional stats to already enhanced gear. To use Caphras Stones, players must first enhance their gear to at least TRI level using black stones, and then they can use Caphras Stones to further upgrade their gear.
Each level increased with Caphras Stones adds a small amount of stats to the piece of gear it is applied to. The amount of stats added depends on the type of gear and its enhancement level. These stats can include additional AP (Attack Power) or DP (Defense Power), Evasion Rate, and Accuracy.
Acquisition: Dark Rifts, Coupons, Events, Marketplace, Grind Spots (Manshaums or Aakman give a frequent drop rate), or crafted with Ancient Spirit Dust via Simple Alchemy.
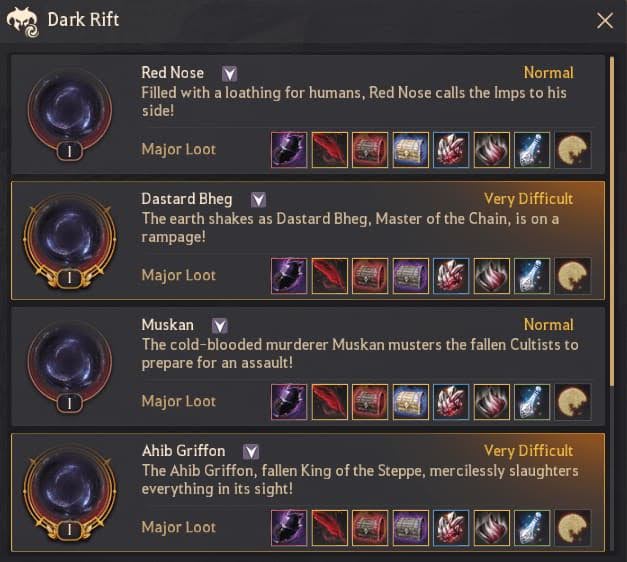
8. Dark Rifts:
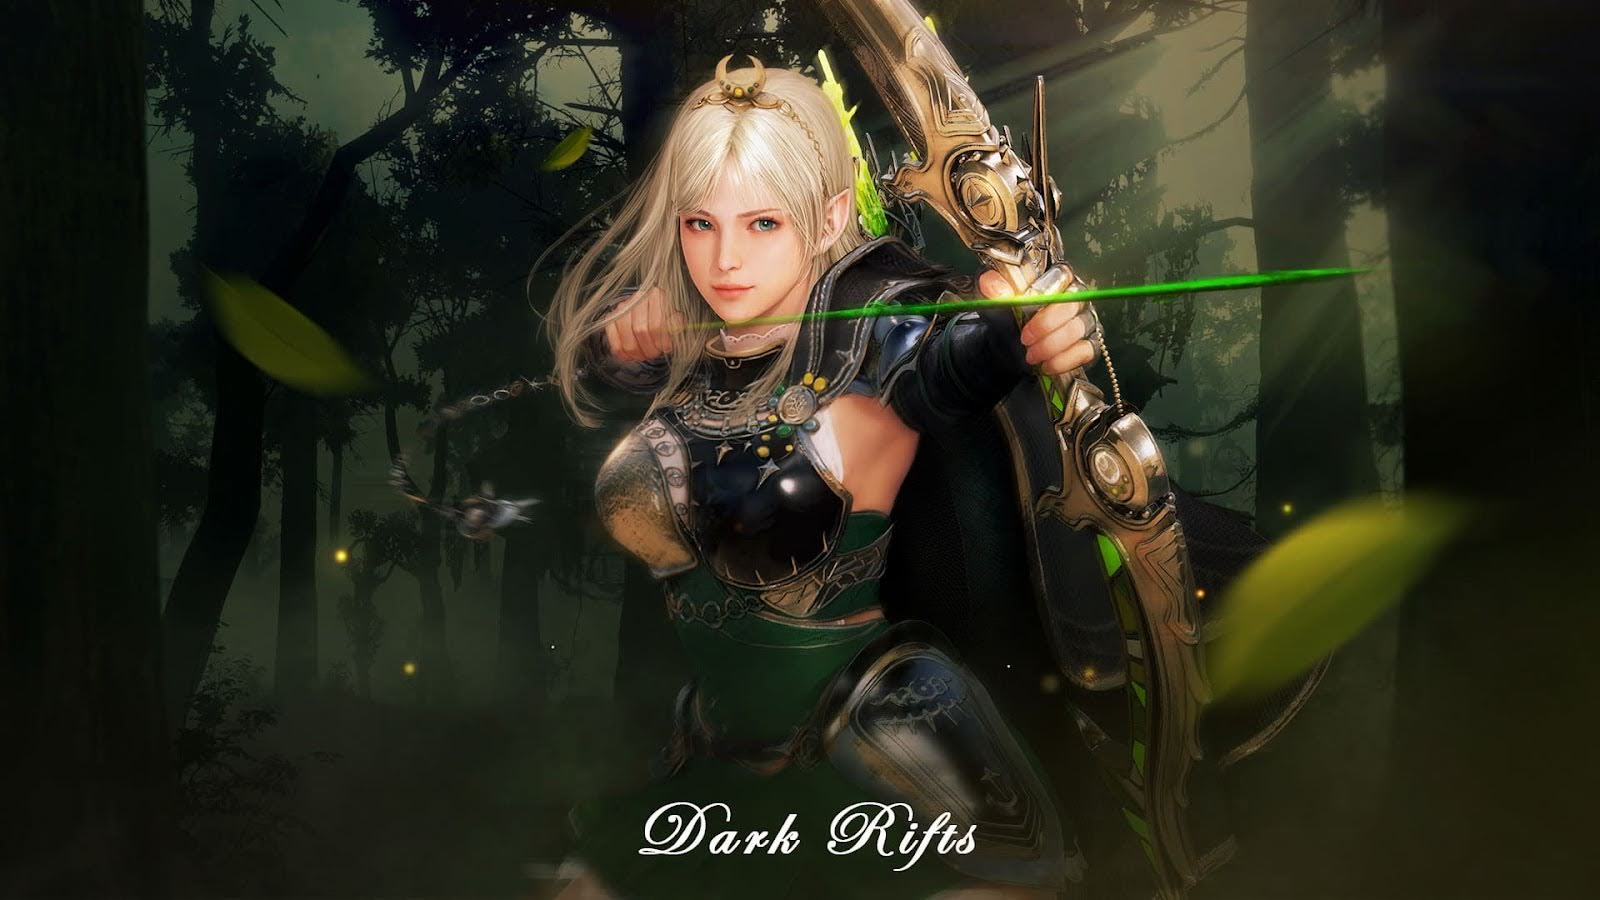
Dark Rifts are a solo activity that provides players with valuable rewards upon completion. These rewards can include Silver, Remnants of The Rift, Caphras, Mythical Feathers, Ancient Spirit Dust, and more. All of these give further upgrades to your armor and provide dream horse materials.
Remnants of The Rift will be your cornerstone in beginning your journey towards a Blackstar Weapon.
Mythical Feathers shouldn’t be sold! Stack up as many as possible—they’re not easy to come by. Mythical Feathers are seldom sold on the marketplace and are time-gated by weekly quests/rifts.
Note: You can find your available Dark Rifts on the bottom-right of your screen in the icon tray by default or by pressing “ESC” and going to “Adventure.”
Thus, engaging in Dark Rifts can be a fruitful source of income and progression.
9. Join a Guild—Don’t Be a Sovereign Outcast:
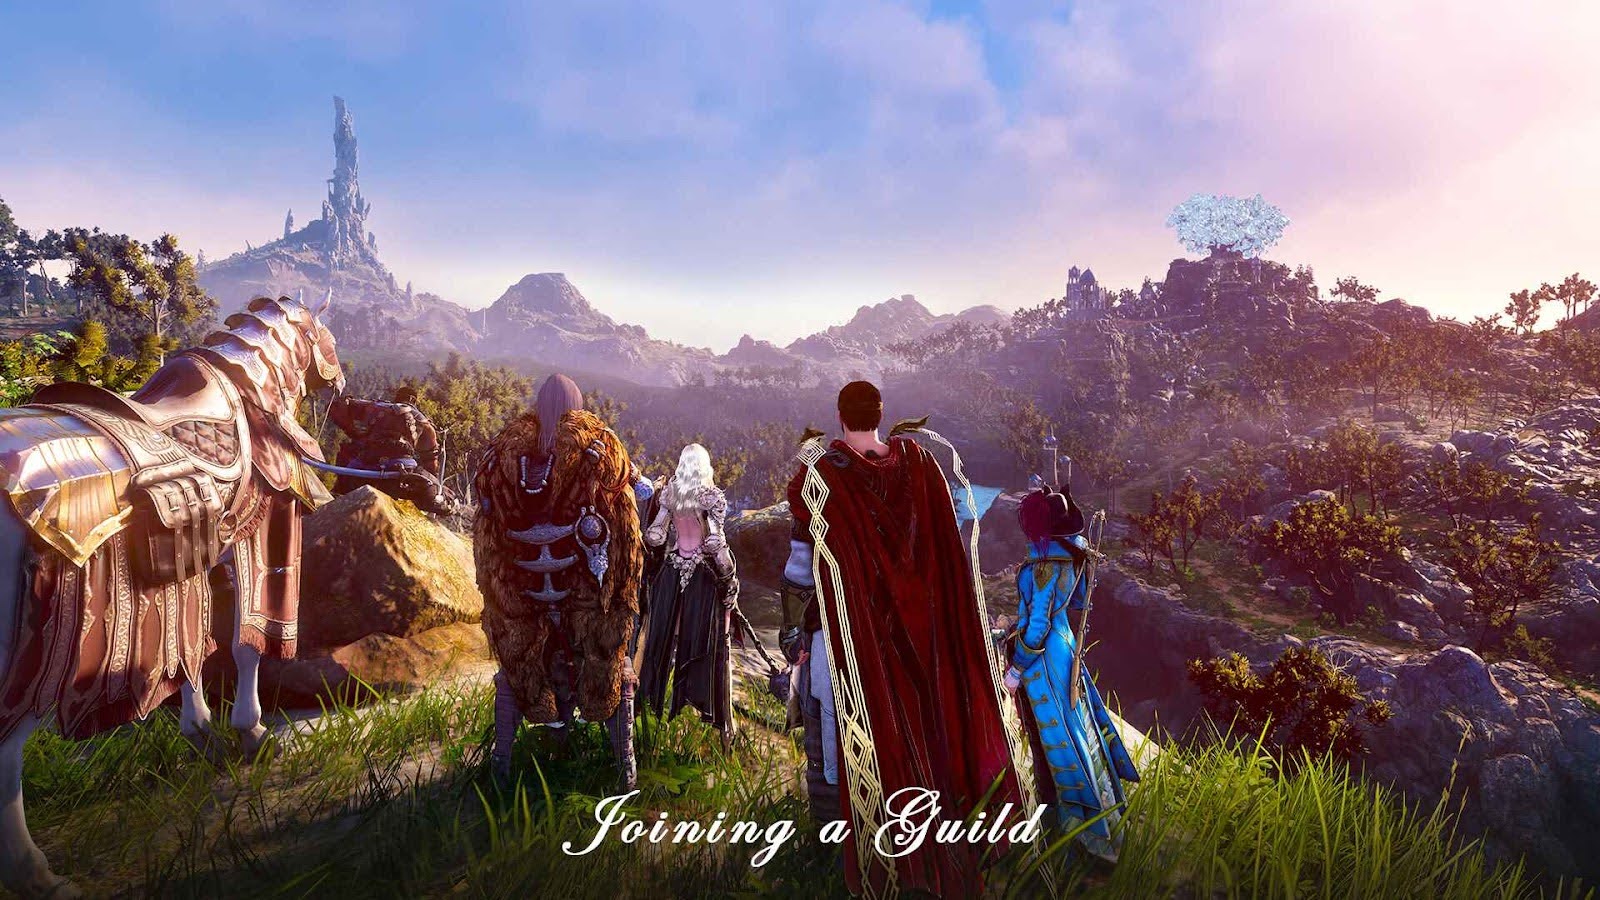
Brace yourself for this not-so-obvious revelation: join a guild! Guilds are inordinately beneficial for a beginner, as you’ll find BDO is more of a solo-multiplayer genre. Having a community by your side is a verily mutual comfort.
By default—pressing “G” will open your guild menu. From here, you may select any guild, small or large, PVP or life skill, to join.
That aside, you'll join a guild for the additional daily silver, life-skilling traits, and weekly guild bosses. You will have more chances of obtaining boss gear, in addition to—making excess silver from guild missions, atop of increased yields, energy recovery, and production rates through inherent life-skill perks.
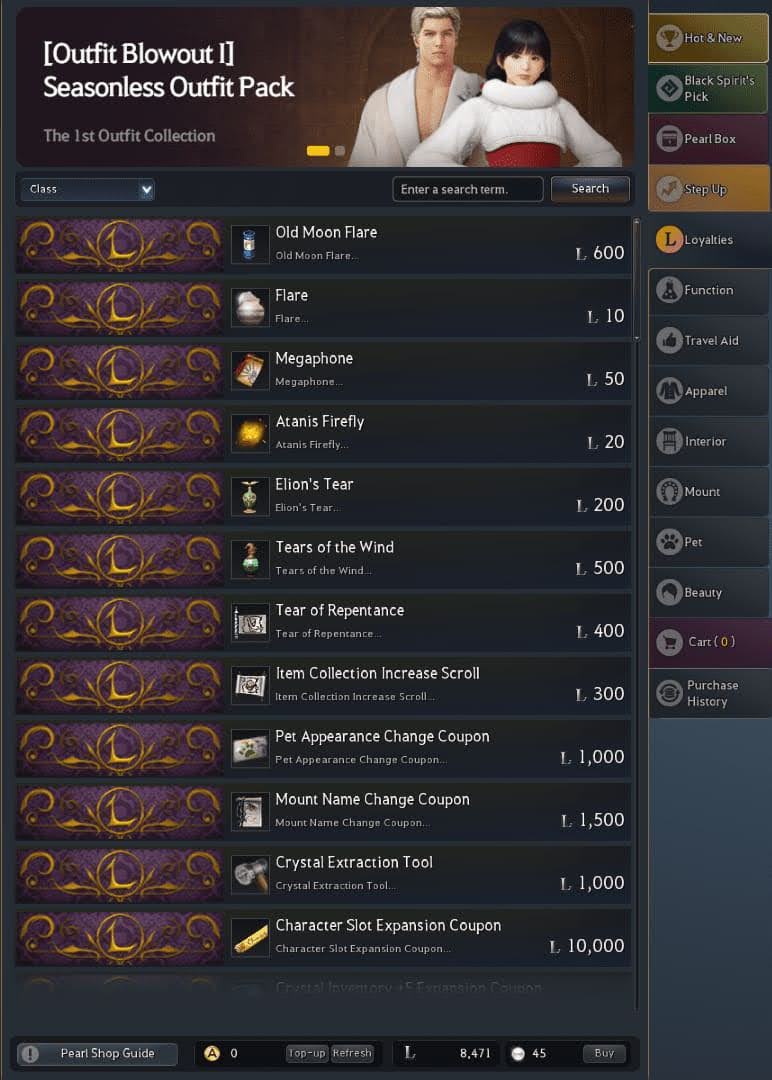
10. Loyalties:
Loyalties can be accumulated by reaching playtime milestones. It is a secondary, non-paid currency for all players. Check the loyalty shop regularly, as new events take place every week. You will find valuable items to aid your journeys, such as Loot Scrolls, EXP Scrolls, Character Slots, Weight, etc.
11. AFK Life Skills:
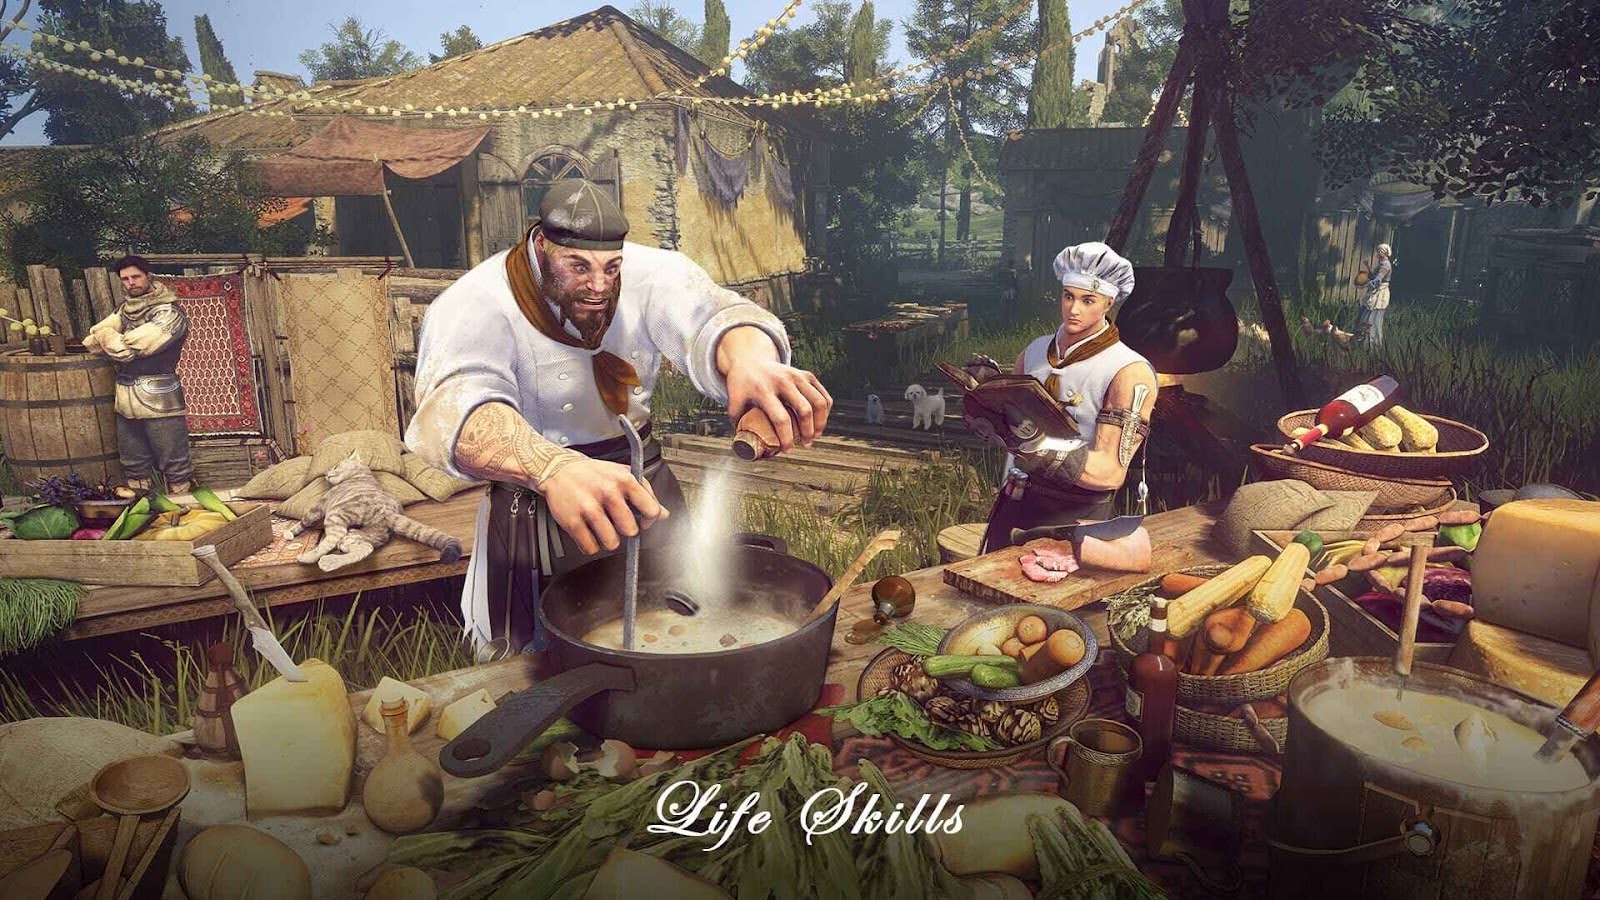
Take advantage of available passive life skills—Black Desert has a built-in minimize feature, allowing you to make silver while away from your computer! You can also play games while BDO is in the background.
Best AFK Life Skills:
- Fishing: Extremely lucrative as there is almost always a fishing event occurring. Make upwards of 100+ million a night just being AFK!
- Cooking: Craft imperial deliveries, cook for Contribution EXP, craft and store materials in bulk. Additionally, earn by-products alongside.
- Alchemy: Fundamentally the same as cooking—deliver imperial medicine, attain Contribution EXP, craft bulk resources. Save for later use or sell for quick profits!
- Processing: Mass produce planks, ingots, or grind down resources for empirical use.
- Training: Level up horses for better breeding results, gain skills for your mount, or perhaps you’d like to increase your training level for extra profits when selling horses.
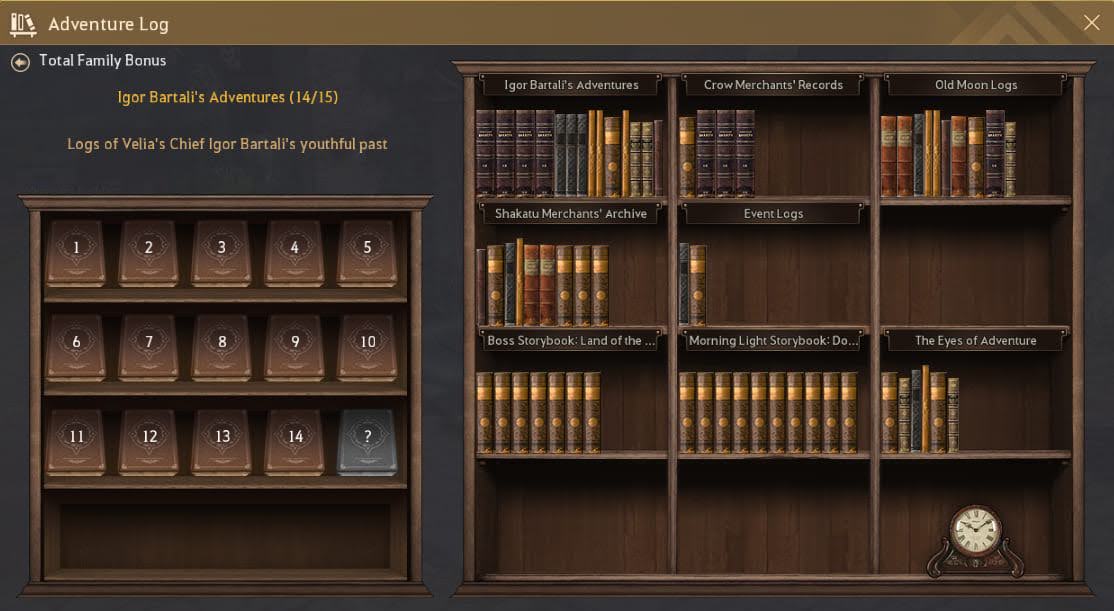
12. Journals:
Journals are a subsidiary part of the game’s progression that can be finished at your own pace, but they are vital if you want to hone your edge further! Surprise your friends with your lightspeed progression and start grinding them out!
It is accessible by pressing “ESC,” going to “Adventure,” and clicking “Adventure Log Bookshelf.”
Knowledge: Completing journals often requires exploration of various regions and interacting with NPCs, which allows players to discover more about the game world and its inhabitants.
Doing such will grant knowledge, which increases your overall knowledge score. Knowledge acquisition is crucial as it contributes to your energy pool and increases maximum energy.
Benefits: Journal entries offer permanent stat increases across your entire family (All characters):
- Increased Accuracy
- Increased Evasion
- Increases in Sheet AP/DP (Fantastic for hitting AP/DP brackets!)
- Increased Maximum Health
- Additional Weight Limit
- Attack Speed
- Caphras, Loot Boxes, and Temporary Drop Rate Buffs
Quest Progression and Unlocks: Certain journal entries are tied to quests or unlock additional content within the game. Fulfilling these entries may unlock new quests, areas, NPCs, or even features such as new crafting recipes or items. By completing journals, players can unlock more of the game’s content.
13. Grind Spots:
Whether it’s for silver, EXP, or power-leveling—I’ve provided a guide below to give you an idea.
Very Early Game: If you’re leveling your first characters and don’t have friends to power-level you, following these spots chronologically will speed up the leveling process.
- Goblin (12-15)
- Altar Imp (16-18)
- Swamp Naga (19-20)
- Swamp Fogan (21-24)
- Orc Camp (23-26)
- Khuruto (27-31)
- Bree Tree Ruins (32-34)
- Keplan Mine (35-38)
- Marnis Lab (40-43)
- Primal Giants (42-45)
- Rhutum (48-50)
You can skip over a few of these by harvesting levels further in one designated area, as it’s a lot easier than moving all over, but for starters, these areas will be sufficient to level your character.
The higher your gear score and accuracy, the easier it will be to level. Once you’ve reached levels 48-50, you can grind Helms or Sausans to 55.
Mid Game: These grind spots aren’t going to yield you billions of silver in a short period—not yet, at least. Your gear score (AP/DP) dictates where you can grind, though accuracy is supplementary to clear time. Getting past that milestone isn’t an easy feat, but we’ve all had to go through this stage.
These spots may only yield an hourly income of 50 to 300+ million, but occasionally, more if RNG is on your side.
- Polly’s Forest (140 AP) - 200-380+ Million Silver/Hour
Polly’s Forest is widely known for opulent gains in Skill EXP. In addition to being one of the top power-leveling spots. Bring a friend with an unranked character. Clear mobs, and watch their level skyrocket!
- Mirumok Ruins (190 AP) - 350+ Million Silver/Hour
A party of 2-3 is recommended for Mirumok, but if you’re feeling confident in your abilities, it is possible to grind here solo. This place also drops Atanis Element, which can be exchanged for infinite pot pieces in conjunction with consistent silver.
- Manshaum Forest (190 AP) - 380+ Million Silver/Hour
Manshaums frequently drop Caphras Stones and have a chance at the Infinite Potion Piece, Narc’s Ear Accessories, and reasonably decent trash loot.
- Biraghi Den [Elvia] (220 AP) - 450+ Million Silver/Hour
Dip your toes in the water—get a taste of the Elvia servers! Biraghi Den is the common starting point for understanding Elvia, where accessory stat upgrades become obtainable through grinding.
- Hystria Ruins (230 AP) - 350+ Million Silver/Hour
Hystria drops Upgraded Compass Parts, Tungrad Earrings & Necklaces, Caphras, and decent trash loot.
- Aakman Temple (230 AP) - 360+ Million Silver/Hour
Similar to Hystria, though, it drops the other necessary Compass Parts to complete Lafi’s Compass in its entirety. Profits in silver are a little higher here.
Late Game: Very popular pre-endgame to endgame grind zones. Some of which drop high-tier accessories and treasure items.
- Thornwood (230 AP) - 350+ Million Silver/Hour
Thornwood drops the Ominous Ring at a price similar to the Black Distortion Earring (300 Million). It is also a decent place to level from 61 to 62. It is also known for dropping pieces to build the La Orzeca costume set.
- Stars End (240 AP) - 450+ Million Silver/Hour
One of the most favored farm spots in Black Desert—easily accessible to late-mid players. It is known for the drop of the Black Distortion Earring. Silver will vary widely here, making a minimum of 250+ million silver an hour to 1 billion, depending on how often the earring drops. Each sells for approximately 300+ million.
- Upper Gyfins (250 AP) - 500+ Million Silver/Hour
I highly recommend this spot—albeit a party of 5 is recommended—for both silver and EXP. The minimum silver here is around 500 million without agris activated. If you have agris to burn, you will make upwards of 1 billion an hour.
This is great for people who want a time-efficient and progressive grind. Remember to turn your pets on “agile,” as rotations are nearly instantaneous.
- Orc Camp [Elvia] (260 AP) - 600+ Million Silver/Hour
It's a consistent spot for silver, but it's very laid back once you get into the rhythm and understand the mechanics. Pay attention to notifications such as, “You hear happy whispers of gentle spirits near you.” Talking to these spirits will bless you with increased AP buffs for a limited time.
- Underground Gyfins (290 AP) - 750+ Million Silver/Hour
A prosperous grind spot involving simple mechanics such as killing color correspondent enemies via the colored text that appears on your screen. Match the colors, kill the group, and earn a temporary buff.
Silver is yielded in significant opulence here at roughly 750+ million or more an hour. The Underground Gyfins (A.K.A. Lower Gyfins) grind spot is among the most favorable for farming combat EXP—especially for those completionists going beyond level 63.
- Ash Forest (300 AP) - 700+ Million Silver/Hour
Love it or hate it, Ash Forest is an area where players sink hundreds of hours into farming the Deboreka Necklace. If you’re min-maxing all of your gear, you might be met with this tribulation. Knowing all too well, Deboreka Necklaces are rarely sold on the market, and if you want a PEN (V), you’ll likely have to enhance it yourself.
Summary: The spots listed are only a small selection of numerous others. There are plenty of alternate spots you’ll visit along the way. However, these will be the most popular areas contested by the community.
14. Alternate Characters:
Stop limiting yourself! An alt is an absolute MUST if you want to multitask proficiently! Creating alternate characters is incredibly advantageous and should be among your top priorities.
Every character has a separate inventory and energy. If your warehouse is cram-packed with materials, you can use your alts as extra storage. If one character's energy is low, switch to another and use their energy instead.
Finally, make an alt and place it at a world boss spawn. This method lets you manage your time precisely without stressing about missing loot! World bosses spawn every day—frequently, so just swap to your alt when needed. Boom! No more valuable time wasted on travel!
15. World Bosses:
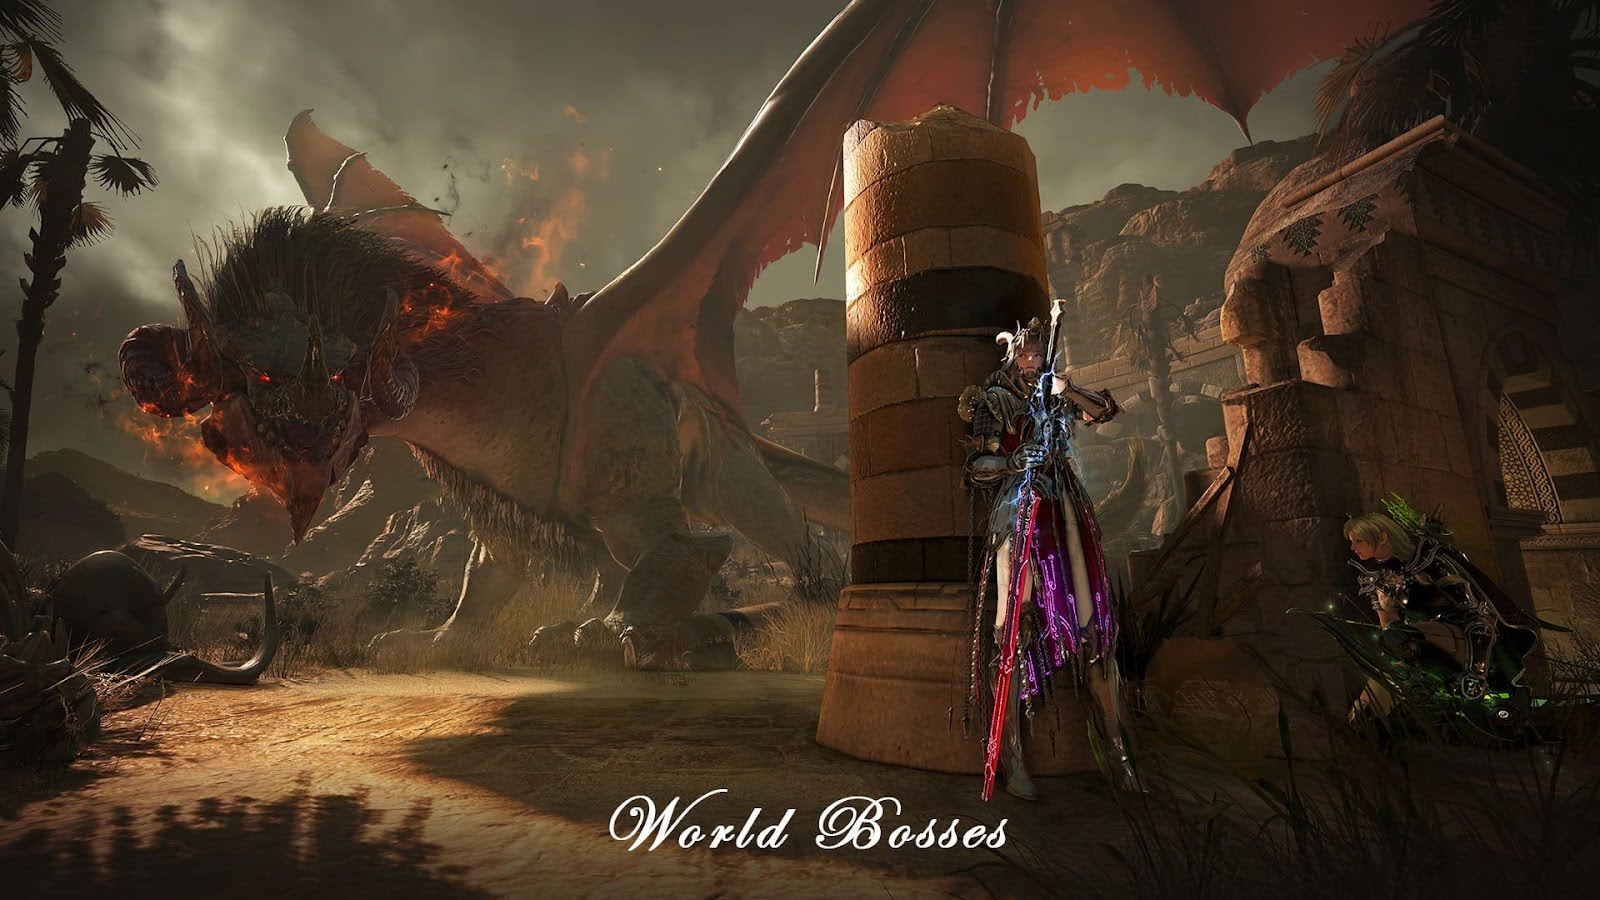
World Bosses spawn regularly every day. Attending them in your free time provides you a chance at Boss Gear, Hearts, Silver, and Enhancement materials.
Boss Gear Acquisition: World bosses are your primary source for obtaining boss gear pieces, which are highly sought-after. With boss gear being crucial for character progression and enhancing grinding effectiveness, defeating world bosses provides an opportunity to acquire these valuable items.
If cursed with misfortune, you don’t get a drop, but you’ll invariably earn boss-specific Latent Auras. Save them—reaching one hundred Latent Auras allows you to exchange them for a boss drop!
Enhancement Materials: Bosses drop various enhancement components upon defeat, including Memory Fragments, Concentrated Magical Black Stones, and Advice of Valks. These materials are essential for enhancing gear and facilitating gear progression whilst strengthening characters.
Silver Income: World bosses yield valuable loot that can be sold for silver, providing a significant source of income. This additional silver can be used to purchase gear, enhance equipment, or invest in various aspects.
16. Night Vendor:
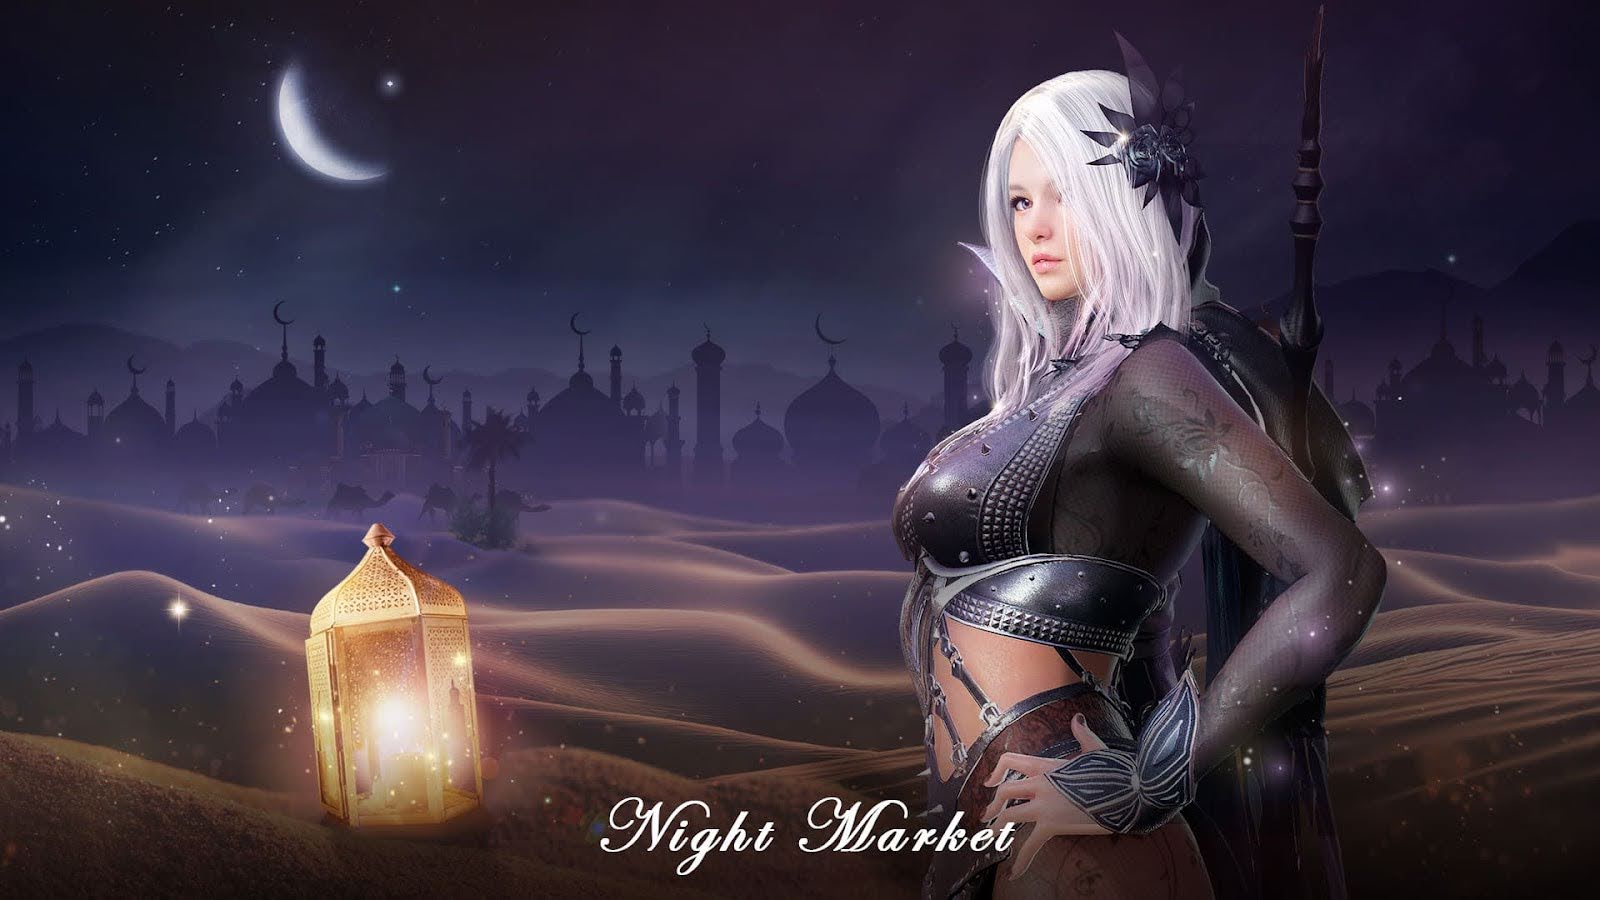
An NPC—also known as “Patrigio”—can be found in every major city. He occasionally sells materials, accessories, and boss gear for prices lower than that of the central marketplace. His market only opens from 10 P.M. to 7 A.M. game time.
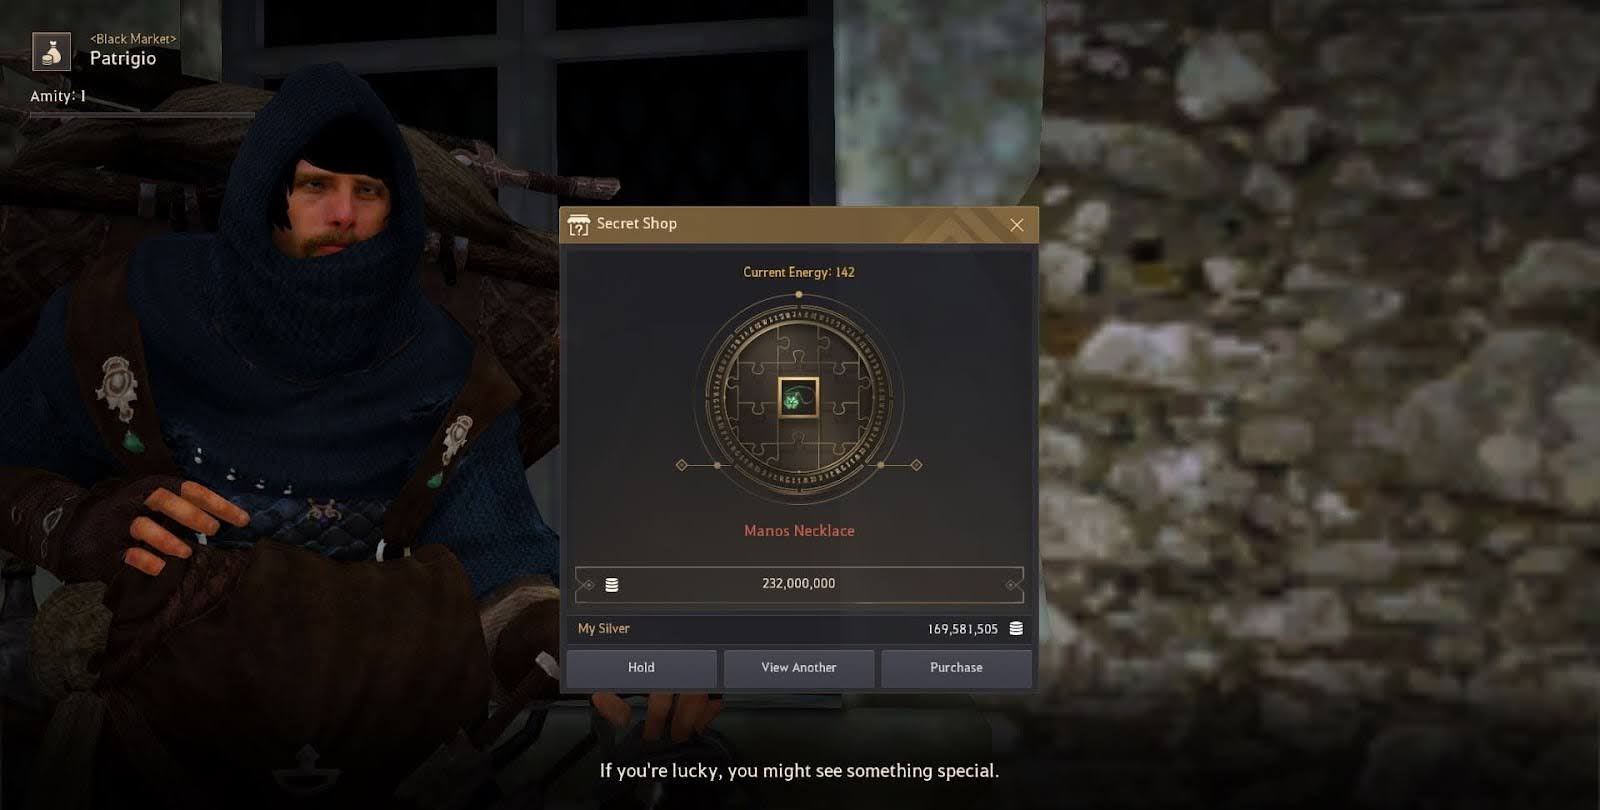
If you have the extra energy to burn, there is no reason not to try this!
17. Magic Crystals:

An edge for your edge, further gear advancements for an exceptional boost in stats alongside myriads of variations. Maximize your damage output or increase mastery in life skills. Once you dip your toes in the water, there is no going back.
Magic Crystals will assist you in your expeditions. With the market overflowing with an abundance of Magic Crystals, you can combine and structure any kind of build to fit your preferences.
Build for Human Damage, Monster Damage, Life Skills, Weight Limit, Health Increases, Evasion, etc. The list goes on.
Acquired through various activities—grinding virtually any area, heating, or loot crates.
To access your crystal inventory, click on this crystal icon located at the bottom of your personal inventory.
You will then arrive at this screen:
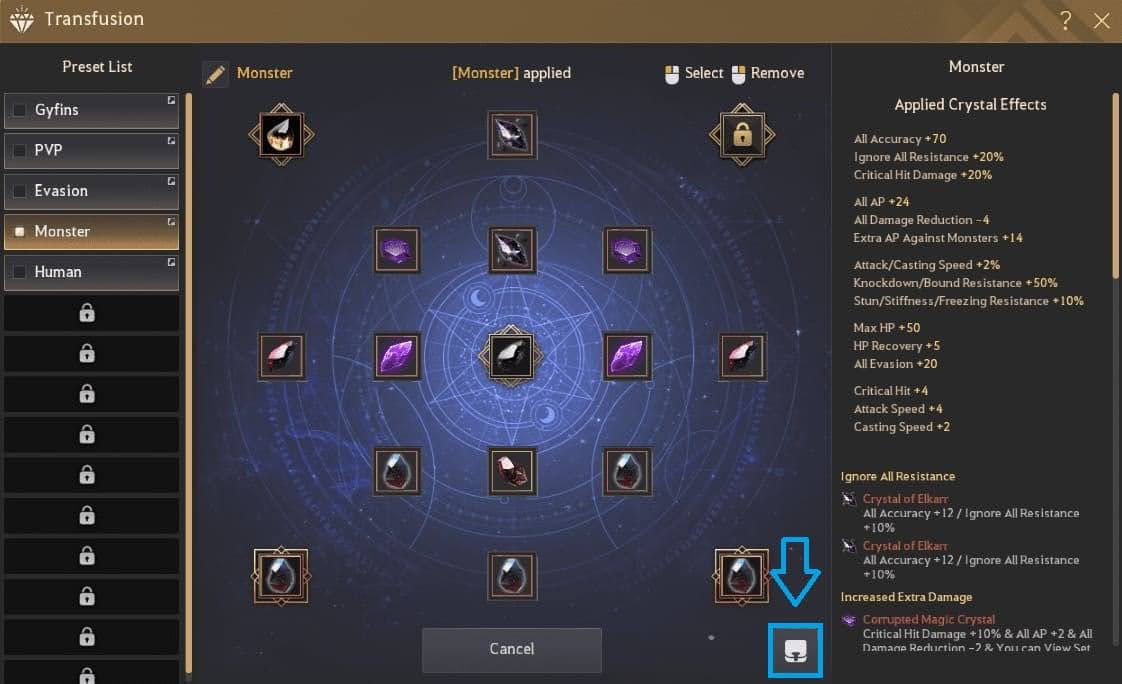
Clicking on the diamond-shaped icon in the bottom right of the transfusion menu will allow you to add any owned crystals to your transfusion.

You can add any crystal fitting to your needs, but I will list some budget-friendly examples to aid in diverse aspects.
PVP:
- x4 Hoom for Resistant Set Effects (Preferably HAN)
- x2 JIN Vipers for Accuracy
- x2 Ancient Magic Crystals of Nature for Knock/Bound Resistance
- x2 Corrupted Magic Crystals for Critical Damage
- x2 BON Glorious Crystal of Honor for Special Evasion
PVE:
- x2 Crystals of Elkarrs for Accuracy & Resistance
- x2 Corrupted Magic Crystals for Critical Damage
- x2 Ancient Magic Crystals of Nature for Knock/Bound Resistance
- x2 JIN Viperss for Accuracy
- x4 Macalod for Set Effects (Preferably HAN)
Life Skill:
- x14 Life Crystals
Alternatively, for increased life skill mastery:
- x14 Vital Crystals
18. Artifacts:
We’re not done with min-maxing yet. It’s time for another incremental stat boost! Artifacts refer to extraordinary items that players can obtain and equip in their gear slot to enhance their abilities and stats.
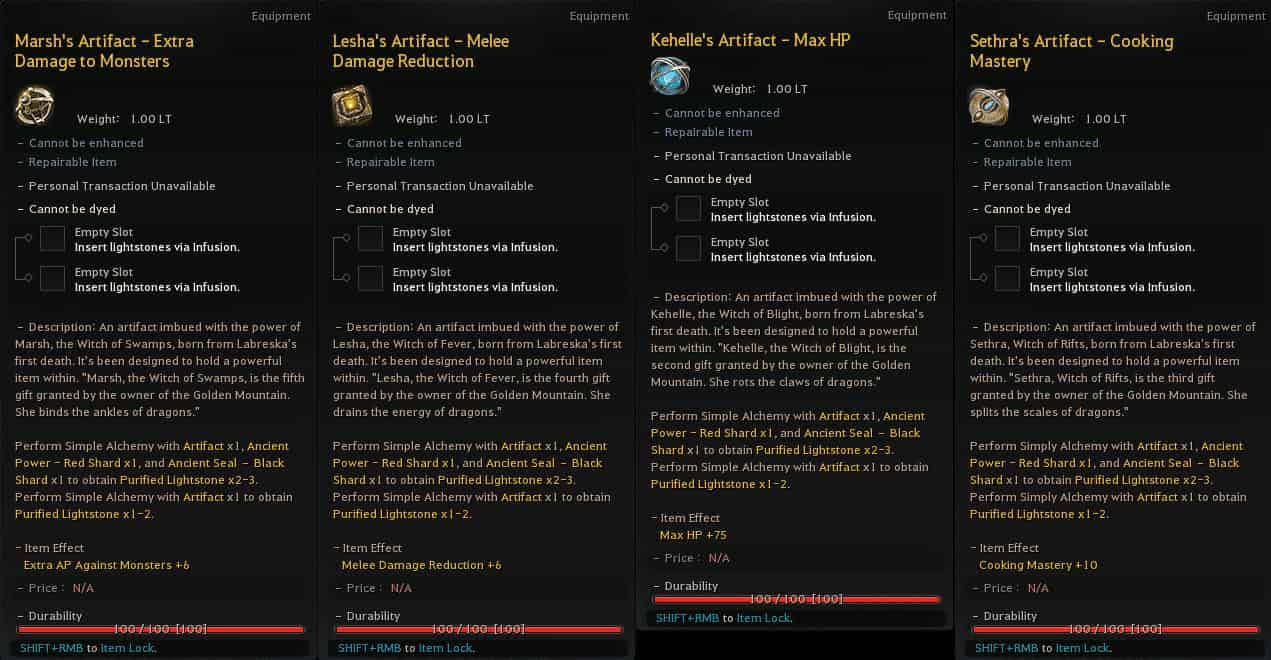
These artifacts are primarily obtained through various in-game activities, such as defeating powerful enemies, completing quests, and participating in events, with only one exceptional artifact—Kabua’s Artifact—that can be bought from the central market.
Each artifact has its effect when equipped. Still, on their own, the effects aren’t supremely beneficial—artifacts are more or less “containers” to hold combinations of lightstones.
Note: Artifacts will NOT be lost on death!
19. Lightstones:
Bought off the market, farmed in mid-game to end-game grind spots, crafted via alchemy, and dropped from guild bosses. Lightstones have hundreds of combinations to toy around with, boosting character stats and growth. They can only be destroyed on death if you have negative karma.
There are five total types of lightstones:
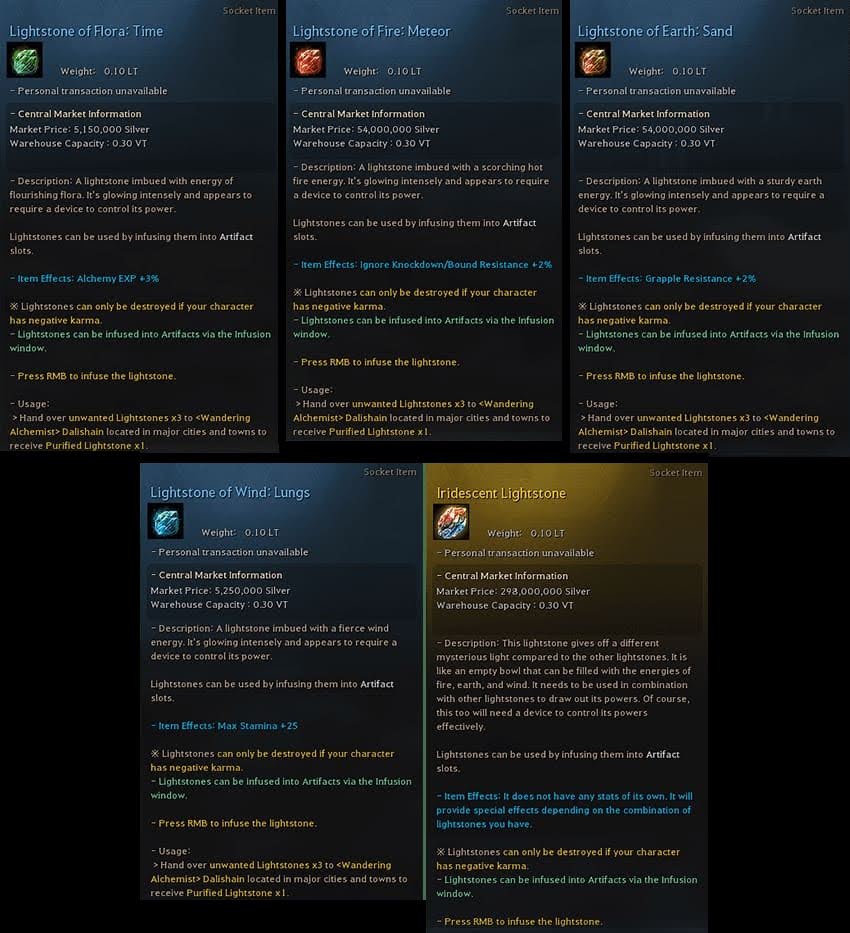
- Lightstone of Fire - Attack
- Lightstone of Wind - Functional
- Lightstone of Earth - Defense/Resistance
- Lightstone of Flora - Life Skilling
- Iridescent Lightstones - Used for compelling combinations, also costly.
Right-clicking on any lightstone will open the artifact menu.
To remove a lightstone, you’ll need a Lightstone Extraction Tool. You can purchase these from any blacksmith vendor. Proceeded by clicking “Extract” via a blacksmith.
Removing one without an extraction tool will destroy the lightstone. So be careful!
Some Popular Combinations:
[Dedication]
- x4 Wind: Alert (Combat) - Gives +400% Combat Experience Gain
[Predation]
- x1 Earth: Iron Wall - All DR +18
- x1 Earth: Waves - All Evasion +33
- x1 Wind: Heart - Max HP +200
- x1 Earth: Sand - Grab Resistance +10%
Gives a combined stat boost to defense and evasion.
[Stomping]
- x1 Fire: Rage - All AP +10
- x1 Fire: Marked - All Accuracy +16
- x1 Wind: Lungs - Maximum Stamina +100
- x1 Fire: Ground - Down Attack Damage +6%
It is a generalized build, with boosts in accuracy and down attack damage. Considerable for all classes. Swap out Fire: Ground for Fire: Shadows if you prefer Back Attack Damage.
[Enhanced Focus]
- x1 Fire: Rage - All AP +7
- x2 Fire: Marked - All Accuracy +24
- x1 Wind: Lungs - Maximum Stamina +75
If you are deprived of accuracy, this combination will treat you with a hefty +24 accuracy overall, boosting your hit rate!
Life Skilling Combinations:
[Excellent Chef]
- x3 Flora: Secret - Cooking EXP +25%
- x1 Iridescent Lightstone
Equip this combination and transcend to a Guru Cook!
[Mysterious Alchemist]
- x3 Flora: Time - Alchemy EXP +25%
- x1 Iridescent Lightstone
[Hand of Manos]
- x2 Flora: Paradise - Life Mastery +40
- x1 Wind: Fortune - Luck Level +1
- x1 Iridescent Lightstone
The list gets pretty expansive. If none fit your niche, you can check out the Black Desert wiki page for a complete lightstone guide!
20. Alchemy Stones:
Alchemy Stones vary in functionality from attack, defense, and experience gain, to life-skilling tasks.
Crafting Alchemy Stones:
Head to your residence, grab your alchemy tools and install your utensils into your home. Open your utensil by walking up to it and pressing “R.”
Combine Shining Powder, Sinner's Blood, Powder of Time, Pure Powder Reagent, and Clear Liquid Reagent to craft an alchemy stone. Shining powder is a possible by-product of alchemical crafting. The rest can be purchased from the marketplace unless you prefer crafting them.
Firstly, open your alchemy tool, mix them up, and hope for the best—you have a chance to get one of three stones—protection, destruction, or life stone! If things blow up in your face, don't worry—you'll still achieve a broken alchemy stone shard which can be sold for a measly 5,000 silver.
Remember, the higher your alchemy level, the more likely you are to succeed in crafting, and the less likely your experiment will explode. Unless you're a pyromaniac, of course, this will be right up your alley.
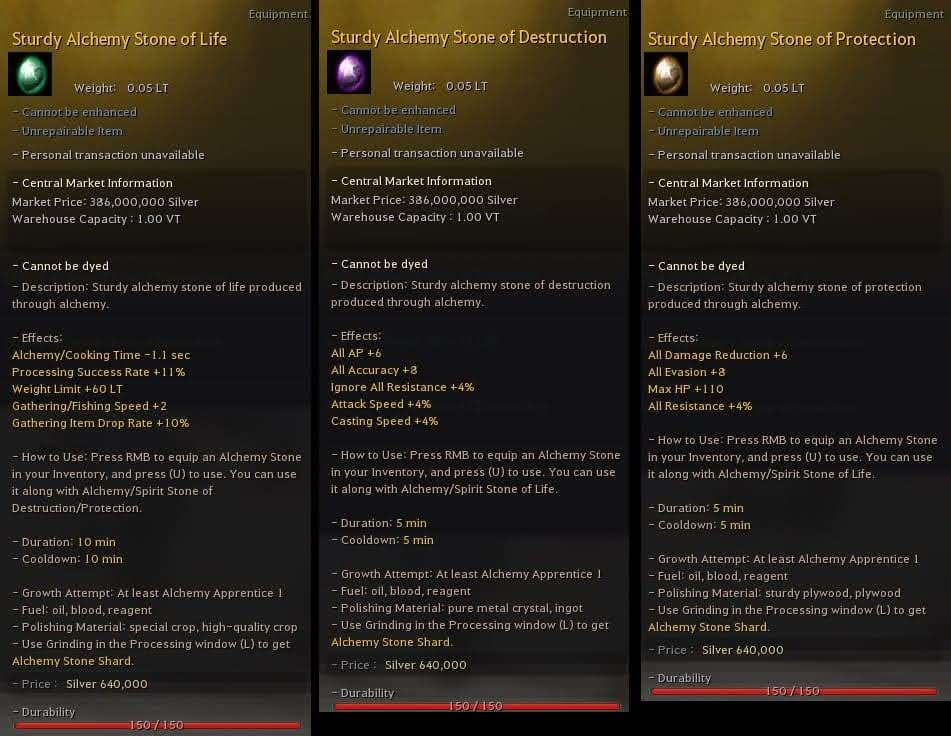
You will receive one random variant of alchemy stone after a successful craft:
- Imperfect
- Rough
- Polished
- Sturdy
- Sharp
- Resplendent
- Shining
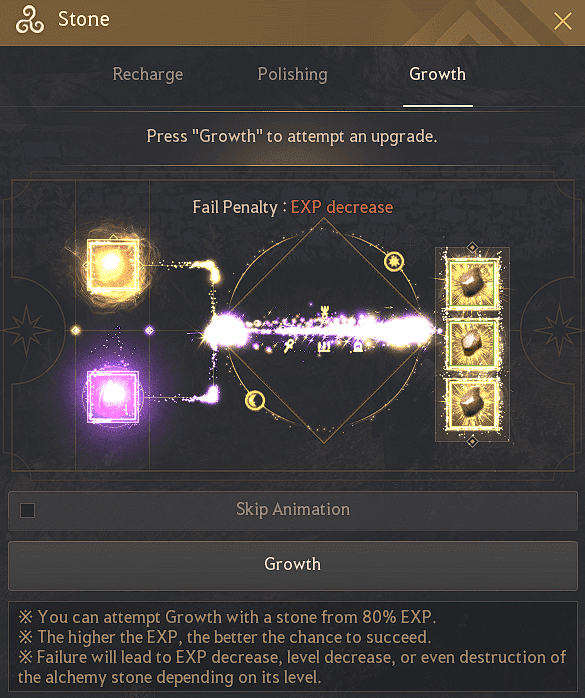
If you didn’t receive an invaluable alchemy stone, you can upgrade the stone via the “Recharge/Polish/Growth” tab at the bottom of your inventory in the future.
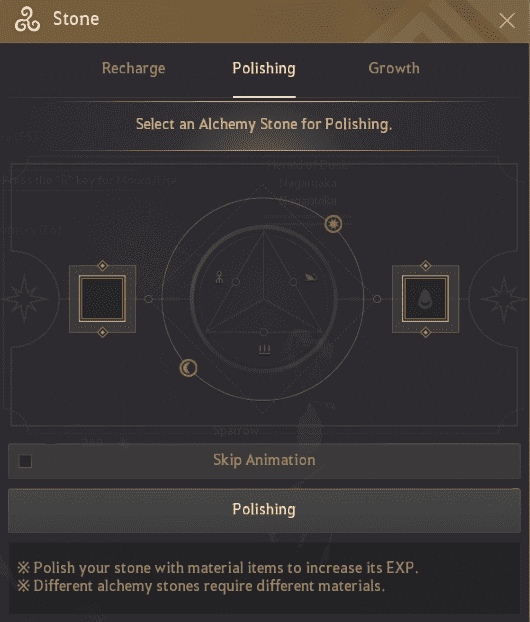
Here, you’re able to Polish, Grow, and Recharge your stones.
Polishing just means you can increase your alchemy stone’s EXP, allowing for a higher success rate in Growth. You’ll have to be in the 80%-150% EXP range to attempt.
What You Need to Polish:
- Life Stones - Require Crops to polish
- Destruction Stones - Need Ores
- Protection Stones - Use Plywood
Growth: Before attempting, bear in mind the detrimental expenses. If failed, your alchemy stones can be destroyed.
After a successful upgrade to your stone, you may also have to increase your Alchemy level to continue providing improvements.
Recharge your stones by using any of the materials listed below.
Repairs 1 Durability:
- Clear Liquid Reagent
- Pure Powdered Reagent
Recovers 4 Durability:
- Clown’s Blood
- Legendary Beast’s Blood
- Sinner’s Blood
- Tyrant’s Blood
- Wise Man’s Blood
Recovers 10 Durability:
- Oil of Corruption
- Oil of Fortitude
- Oil of Regeneration
- Oil of Tranquility
- Oil of Storms
21. Magnus Questline:
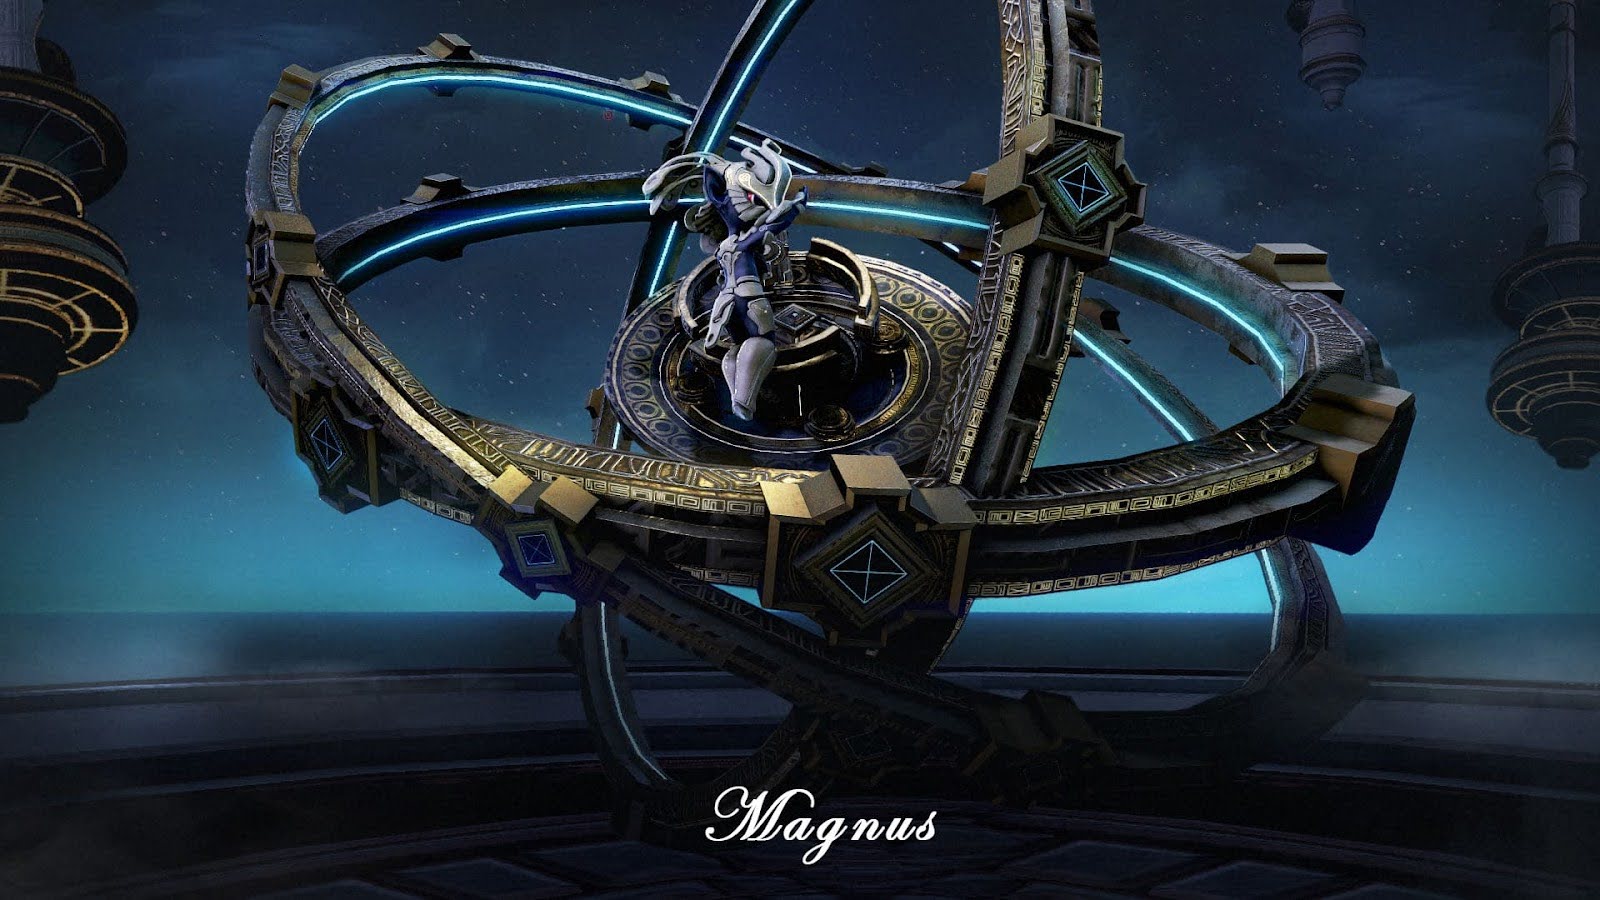
Magnus Questline is paramount to accessing the Drieghan region, a significant area in the game that offers new quests and monster zones. Magnus is also known for unlocking instantaneous travel via “well-hopping” and obtaining a free PEN (V) Boss Gear of your choice.
To access you must have completed one of the following:
- Completed Balenos Main Questline
- Finished Mountain of Eternal Winter Questline
- For veteran adventurers, complete the Simplified Questline to “[Special Growth] Fughar’s Memorandum – Chapter 1”
Once you’ve completed at least one of these, talk to your Black Spirit to get started! The quest is called “[The Magnus] Nostalgic for Velia.”
Note, you cannot enter with:
- Negative Karma
- PVP Active
- An Active Party
- Trial Characters
The Magnus is a lengthy questline, crammed with puzzles, traps, and tons of back-and-forth trips between cities. Prepare yourself for the long haul before diving in!
As for rewards, you’ll get to select one PEN (V) boss piece upon questline completion.
- Pen (V) Boss Gear:
- PEN (V) Giath’s Helmet
- PEN (V) Dim Tree Spirit’s Armor
- PEN (V) Muskan’s Shoes
- PEN (V) Bheg’s Gloves
- PEN (V) Griffon’s Helmet
- PEN (V) Red Nose’s Armor
- PEN (V) Urugon’s Shoes
- PEN (V) Leebur’s Gloves
You'll receive access to instantaneous travel via Wells through the listed locations:
- Balenos
- Serendia
- Calpheon
- Mediah
- Valencia
- Kamaslyvia
- Dreighan
- O’dyllita
- Everfrost
- Land of the Morning Light
- Ulukita
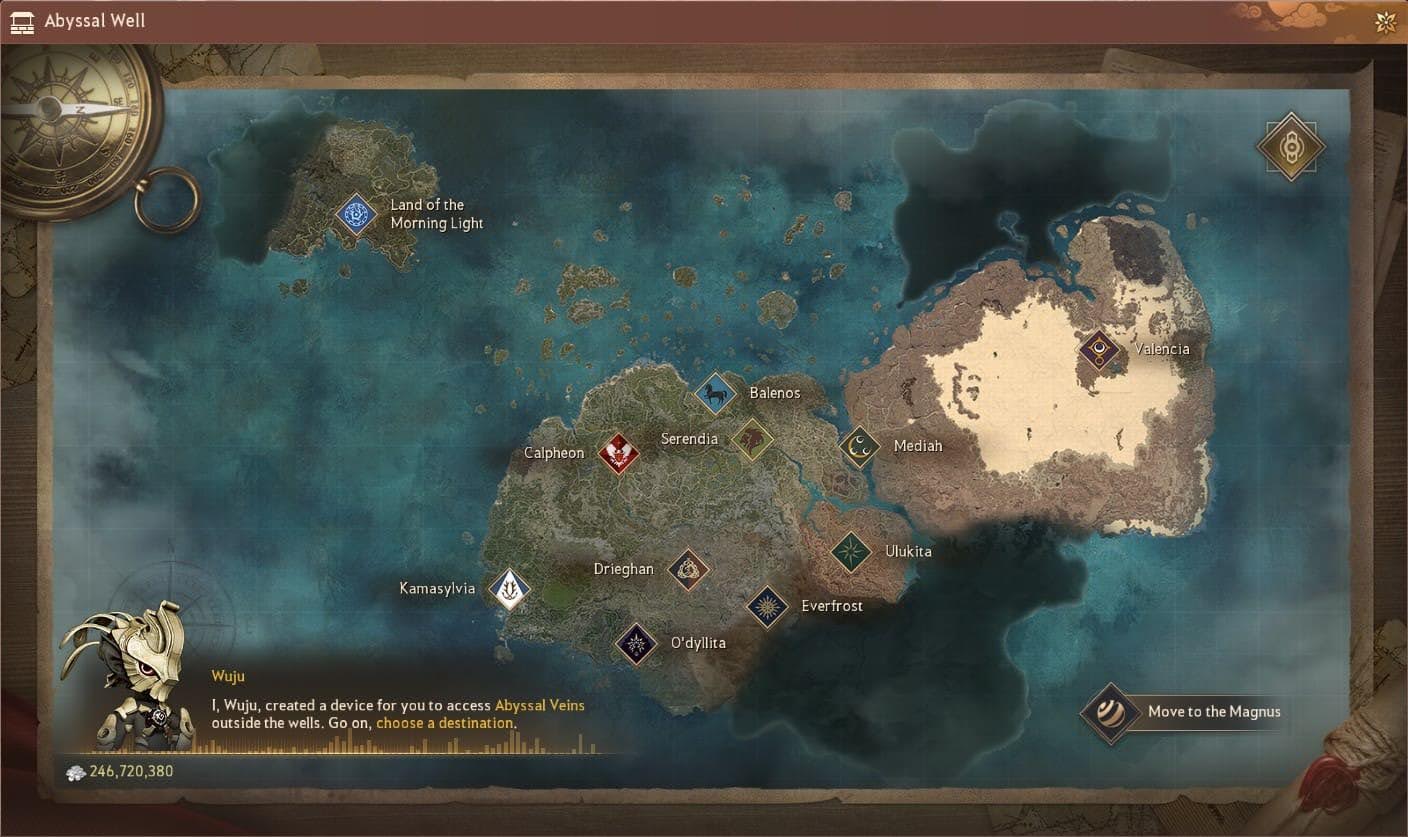
Thirdly, you’ll ultimately gain access to worldwide remote storage! No continuous trotting halfway across the world just because you forgot something in Valencia! Remote Access will instead use any available Storage Maids/Butlers.
Finally, acquire a new, exclusive skill through the Abyssal Legacy quest.
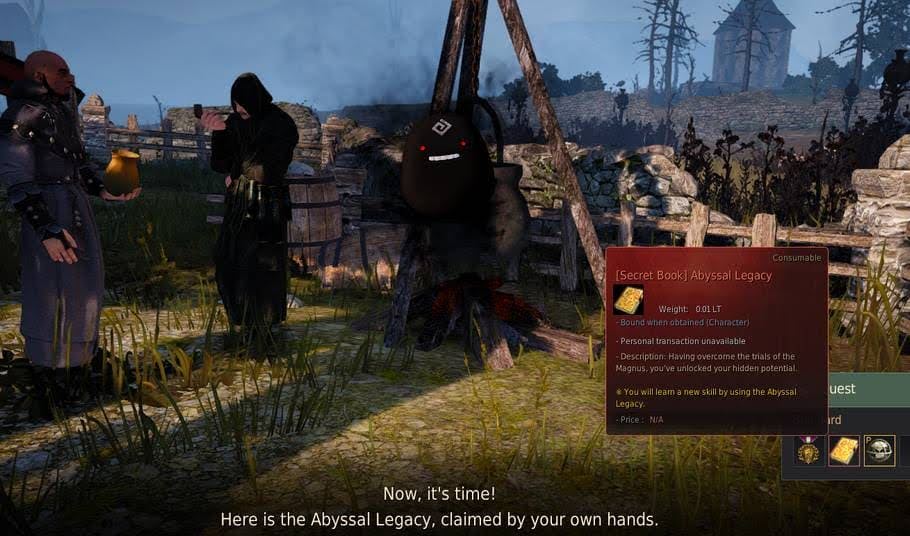
Requirements:
- Character Level 60
- Completed Chosen Main Questline
22. Tier 9 & Tier 10 Dream Horses:
Obtaining a Dream Horse is a challenging and trivial process, but it's incredibly rewarding due to the unique abilities and aesthetics these horses possess. I’ve provided a quick guide to help you in your endeavors.
To begin, you need a Tier 8 horse that has reached level 30. Tier 8 horses are the highest tier available in the game outside of dream horses, and they are obtained through breeding or purchasing from the Horse Market.
Obtain Courser Skills: A Courser is a unique type of horse that has learned every required trait to begin dream horse awakening. To turn your Tier 8 horse into a Courser, you need to train it to learn specific skills known as "Courser Skills."
Required Skills:
- Sprint
- Instant Accel
- Drift
- Charge
- Sideways Move
- S: Instant Accel
- S: Sideways Move
- S: Drift
Training a horse to learn these skills can be time-consuming and requires patience. You can train your horse while AFK by setting a navigational loop on your world map and auto-running (Pressing “T”) or by purchasing Skill Change Coupons from the Pearl Shop to level your horse’s skills to 100%.
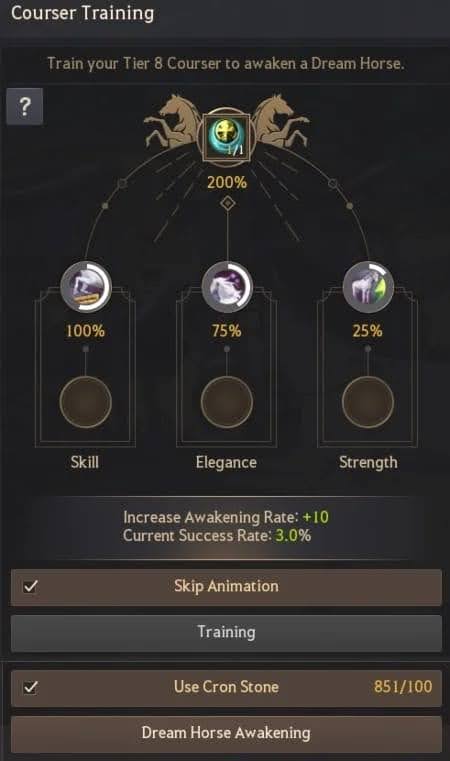
Awakening: Once your Tier 8 horse has learned all the required Courser Skills, you can attempt the Awakening. To start, run over to the Stonetail Horse Ranch stable keeper NPC located in Mediah.
Materials Needed:
- Krogdalos Origin Stone
- Rainbow Gem Fruit (Pegasus)
- Stonetail Fodder (Pegasus)
- Fruit of Yianaros (Pegasus)
- Breezy Conch Seaweed (Unicorn)
- Spirit Pouch of Ferocious Beast (Unicorn)
- Mysterious Blue Conch (Unicorn)
- Deep Blue Hoof Root (Doom)
- Pure Forest Breath (Doom)
- Brilliant Crimson Fire Flower (Doom)
These are acquired by gathering or directly purchased from the central marketplace. If you have a hole burning in your pocket, you can spend real money on lustrous packages in the pearl shop.
Once you have obtained all the necessary materials, you must place your horse in the Stable, click on your horse, and select “Courser Awakening.” Here, you will insert available materials to build Awakening EXP (Max 200%) and attempt your awakening! You have the option of using Cron Stones to keep half of the awakening EXP.
Available T9 Dream Horses:
- Pegasus (Arduanatt)
- Unicorn (Diné)
- Hell Horse (Doom)
You will see that each Dream Horse has an innate skill called “Courser's Spirit.”
Each Dream Horse has its own set of skills that can be obtained by leveling up your Dream Horse through riding, training, and using mount skill training coupons.
23. Blackstar versus Godr-Ayed:
Achieving the status of having a TET (IV) Blackstar can be a pain, but getting to PEN (V) is another story. Thankfully, the devs implemented a “bridge,” carving an easier path to obtaining a PEN Blackstar.
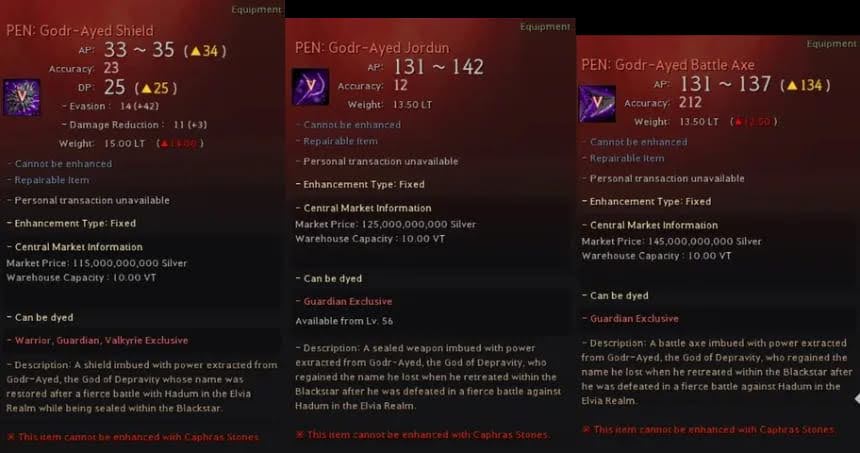
Godr-Ayed weapons are the alternative to Blackstar weapons. They act as a bridge to PEN without the hassle and can help you finally achieve those pesky AP brackets. Though, it has a slightly lower success rate than Blackstar as a trade-off.
To get a Godr-Ayed, you must trade in a TET Blackstar. You are free to use the TET Blackstar provided by season servers. Godr-Ayed follows the same enhancing rules as everything else: Base > PRI > DUO > TRI > TET > PEN
To accept the quest, travel to Grana and talk to the NPC “Merindora.” You’ll be tasked to finish a short quest line, “[Godr-Ayed Weapon] Merindora’s Calling.” If unable to find this quest, press “O” and select “All Quests.”
Note: PEN Godr-Ayed can be exchanged for PEN Blackstar freely if you prefer the color difference.
24. Black Shrines:
Black Shrines are relatively new, open-world boss zones in Black Desert brought alongside the release of Land of The Morning Light. You must have completed the Land of The Morning Light questline to partake in the weekly boss blitz.
This new boss system introduces new bosses as a whole, boss auras, new gameplay mechanics, challenges, and more enjoyable content. Land of The Morning Light can be traveled to and from via Wells—or by sailing there if you’re a masochist.
Bosses:
- Golden Pig King (Sun)
- Oduksini (Sun)
- Apex Changui (Sun
- Bari (Moon)
- Songakshi (Moon)
- Bamboo Legion Lieutenant (Moon)
- Sangoon (Earth)
- Gumiho (Earth)
- Duoksini (Earth)
Calamities: Calamities is just another word for difficulty level. There are currently seven playable calamity levels, each offering a subset of rewards for completion with better rewards for high calamity levels.
Boss Auras:
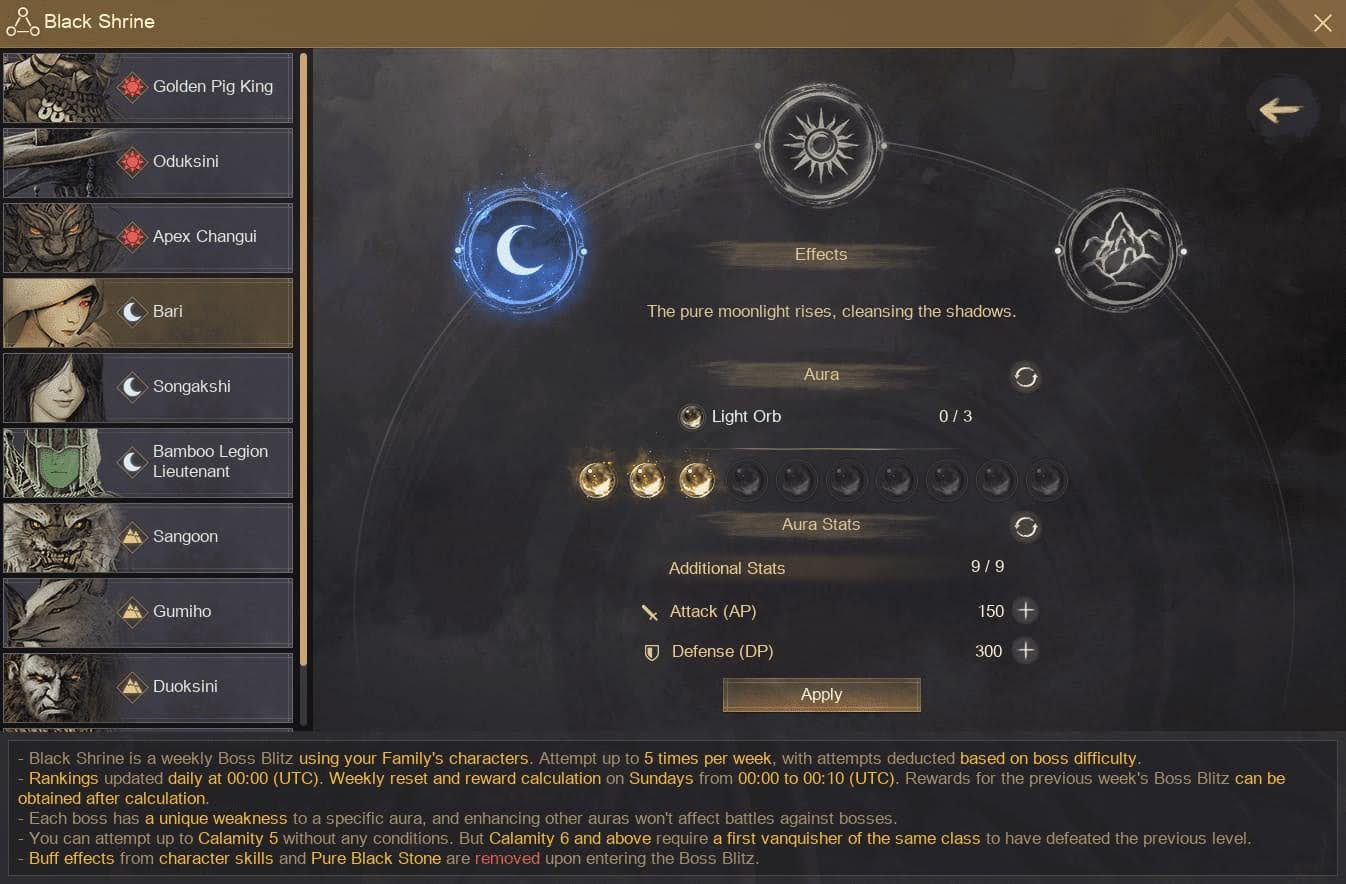
You can think of these as elements. Each boss has its elemental weakness—Sun, Moon, or Earth. Choose the necessary element correlating to the boss’s element (next to their name). You’ll also see a set AP/DP under “Aura Stats,” which can be upgraded incrementally to help you succeed.
Reset your stats at the cost of silver, and re-apply any stats you need.
Completing your first boss will yield extra rewards through journal entries.
Possible Rewards:
- Dahn’s Gloves
- Flame of Hongik
- Bonghwang’s Tear
- Haetae’s Tear
- Girin’s Tear
- Bonghwang’s Crystal
- Haetae’s Crystal Girin’s Crystal
- Bonghwang’s Fragment
- Haetae’s Fragment Girin’s Fragment
- Deboreka Earring Tear of Illusion
- Essence of Taebaek
- Crystal of Harmony
- Crystal of Darkness
- Crystal of Bitterness
- Crystal of Decimation
- Resplendent Lightstone of Fire
Guaranteed Rewards:
- Imperfect Lightstone of Fire
- Sealed Black Magic Crystal
- Memory Fragments
- Sangpyeong Coin
- Trace of Battle
- Embers of Hongik
- Black Stone (Weapon)
- Black Stone (Armor)
25. Ulukita, The Exalted Land:
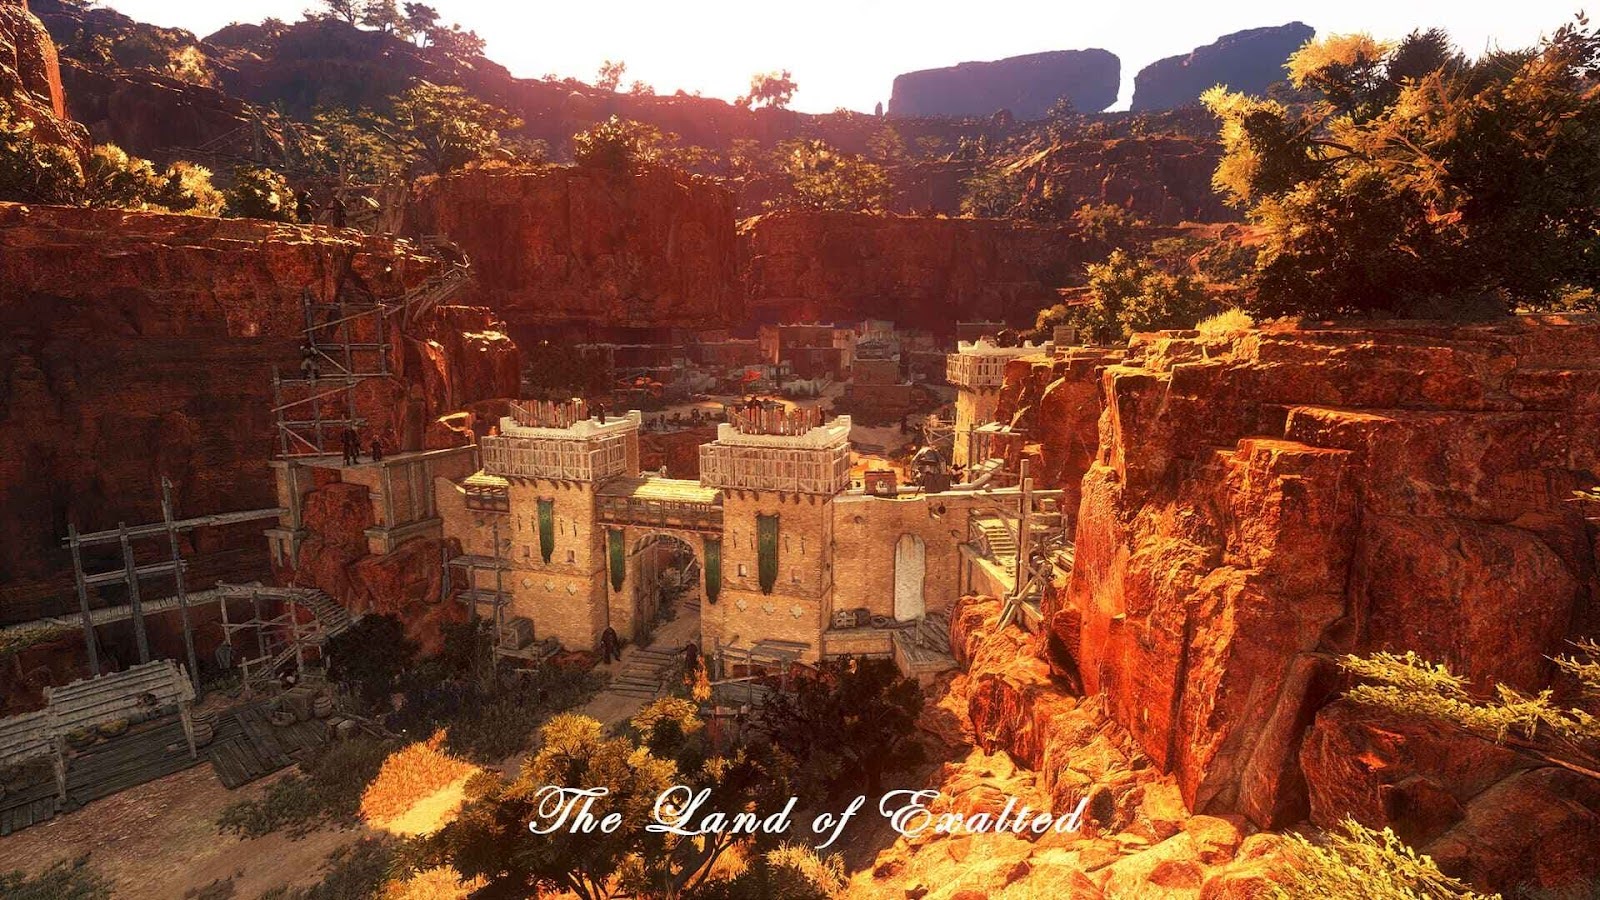
Welcome to your final destination! The grind here is real. High gear score players technically live here, slaving away for loot like Kabua’s Artifact, Flame of Resonance, and high silver profits. Your resting place of which you complete your Slumbering Origin set—or not, I wouldn’t blame you.
Recommended AP/DP is around 310 AP & 420 DP. While potentially getting away with only 300 AP & 400 DP, you will want to maximize your crystals, lightstones, and buffs—perhaps grind somewhere else meanwhile, unless the class you play is furnished with high damage output. Grinding in Ulukita is no easy tribulation.
Aside from needing 720+ gear score, here are some tips for those who will grind their hearts out.
Pick-up Church Buffs:
- Attack (120 min)
- Defense (120 min)
- Experience (120 min)
- Attack (300 min)
- Defense (300 min)
- Experience (300 min)
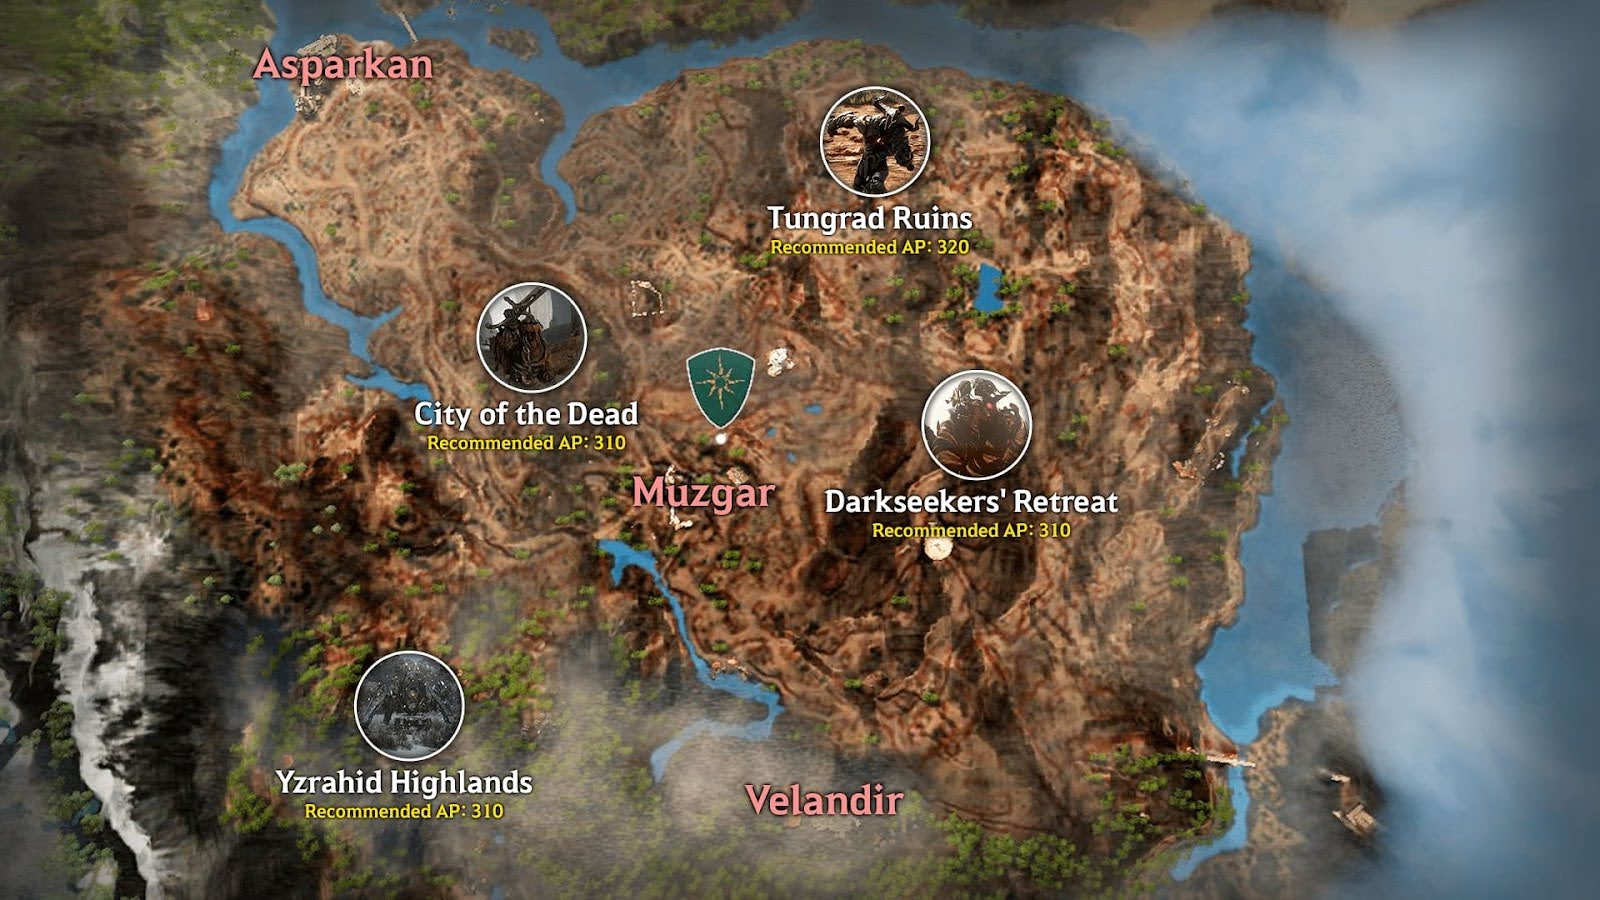
Tread to the new city of Asparkan, located in the north-western region of Muzgar. Search for Dematur—he will provide buffs in exchange for silver.
Upgrade Your Accuracy: For a 100% hit rate, an accuracy of 940 is recommended. Eat your essential cron meals, activate your alchemy stone, and villa buffs for extra AP/DP.
The recommended level for an enhanced hit rate is around 61-62. Being under-leveled can diminish your damage and cause misses.
Self-Buff: Every class has some form of ability-activated buffs. Hot slot them into your hot bar, or remember them through combo! This is important—every buff is incremental to your overall hidden stats.
For example, just to grind in the City of The Dead, 900 Monster AP is a must; otherwise, you might as well be tickling the mobs. It is not like Ash Forest, where the necessary Monster AP is fundamentally halved.
What People Are Grinding For:
Ators Shoes is the last piece to finish the Slumbering Origin armor set. Brought alongside the set is a four-piece set effect that increases maximum health, damage reduction, evasion, stamina, movement, attack, and casting speed.
Ators Shoes will be obtained through grinding these spots for the Flame of Resonance—or pity pieces of it—which in turn can be used to upgrade your current Caphras Level 10 PEN (V) Urugon/Muskans Shoes into Ators Shoes.
Alternatively, they can be bought off the central marketplace if you have, oh, I don’t know, 50 billion silver lying around. To be fair, if you’re this far into the game, you're probably scoffing at 50 billion.
New Treasure Item:
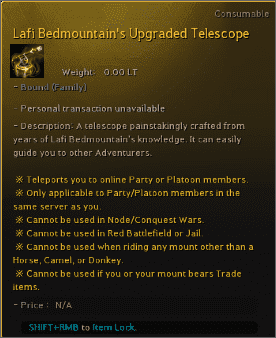
Lafi Bedmountain’s Upgraded Telescope—comprised of three variants needed to craft—farmed from both Tungrad Ruins and City of The Dead.
The telescope works similarly to the compass treasure piece but instead allows YOU to teleport to a party or platoon from anywhere on the map.
All in All:
I’d naturally be commending you for reaching it this far, but knowing Pearl Abyss—there might never be an end to the end game. At the very least, you’ve come a LONG way and can now consider yourself one of the top 5% of players who’ve attained this milestone.
If you thought you were finished with Black Desert, don’t panic, it gets worse—HAHA, just kidding! There is a seemingly infinite void of content awaiting your completion. This game will drive completionists mad; everything is gated by RNG, from the steps you take to the gear you curate.
Gear score isn’t superficially end-game; there are still subsidiary quests and hardships to scale, like—mythical horses, treasure items, life skill mastery, titles, ships, and PVP. Conversely, it creates a cycle of endless content I haven’t experienced elsewhere.
Find this guide helpful? Check out our other guides:
- Black Desert: Best Ways To Make Money (Top 10 Ways To Earn Silver)
- Black Desert PvE Class Tier List [Strongest and Weakest Classes Revealed]
- Black Desert Fairy Guide - Everything You Need To Know About Fairies!
- [Top 10] Black Desert Best PvP Classes (Ranked)
Share this Article:

Image Gallery
- Log in or register to post comments


")