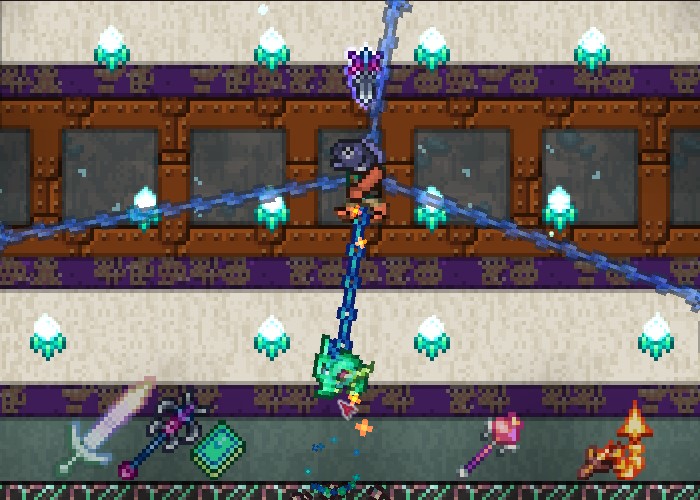
The boss progression of Terraria can be a difficult thing to handle for newer players, or even seasoned players attempting harder difficulties or different weapon classes. Here, I will be breaking down each of the bosses, including the ones necessary for progression as well as the optional bosses, and will give you a summary of what to plan for with each one.
Pre-Hardmode
King Slime
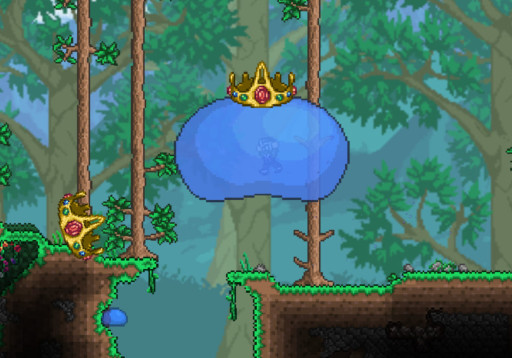
Location: The King Slime can spawn naturally in one of two ways. The King Slime has a 1% chance of spawning if the player is above ground near standard grass in the far thirds of the map. Alternatively, if the player kills 150 slimes during the Slime Rain event, the King Slime will spawn near the player. The King Slime can also be spawned anywhere at any time using the Slime Crown, which can be crafted at a Demonic or Crimson Altar with 20 gel and a gold or platinum crown.
How To Beat: The King Slime is optional, and it is intended to be defeated prior to the Eye of Cthulu, meaning that the boss has pretty low health and poses a minimal threat. However, due to the quality of some of his drops like the Slime Hook, Slimy Saddle, and Ninja armor set, it might be worth your time. Fast movement is a must for this fight as the King Slime is pretty slow but has a painful jump-attack that should be dodged at all costs, so getting your hands on things that will give you a speed-boost like Hermes Boots and Swiftness potions will be very helpful. Having a double-jump is also very helpful for dodging the King Slime and the minions that he spawns as the fight goes on.
» How To Beat King Slime Video Guide
Eye of Cthulu
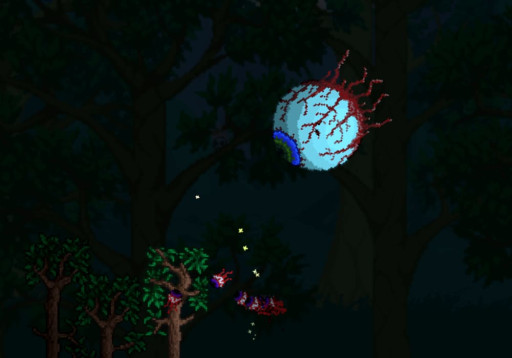
Location: The Eye of Cthulu can spawn naturally once the player reaches at least 200 max health, gained from finding and using Life Crystals underground. It will only spawn if the player is somewhere on the map on the surface and if it has not been defeated in the world yet. The Eye of Cthulu can also be spawned anywhere on the surface using the Suspicious Looking Eye, which can be found in underground chests or crafted at a Demon or Crimson Altar with six lenses. Note that this is one of many bosses in the game that only spawn at night, starting at 7:30 PM in-game to 4:30 AM in-game, and will despawn in the morning.
How To Beat: The Eye of Cthulu (EoC) is the first of many progression bosses, so defeating it is a must, but is not too terrible of a challenge. Similar to the King Slime, you’ll want some speed-boosting accessories and potions as well as at least one double-jump to dodge its dash attacks. Creating an arena for yourself with several platforms that can easily be jumped between will help remove the EoC’s main advantage, which is that it can travel through solid blocks; The Eye has a tendency of getting underneath the player and dashing up from under the ground, which is difficult to predict and dodge. Also, due to the EoC being your first major challenge, you may want to consider setting up campfires and Heart Lanterns for increased health regen where you plan to fight it, as well as Sunflowers to boost your movement speed and Star Lanterns if you plan on using any magic. As far as equipment goes, you’ll want to try and snag armor at the highest ore tier you can manage (platinum or gold) and something with high damage output since you have to race against the clock.
» How To Beat Eye of Cthulu Video Guide
Eater of Worlds
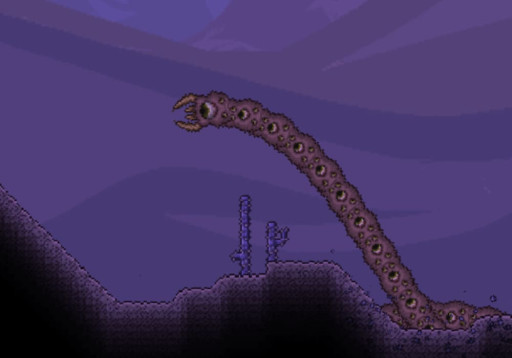
Location: The Eater of Worlds will spawn naturally only in Corruption worlds after the player has destroyed three Shadow Orbs in the underground Corruption biome at any time of day. The Eater of Worlds can also be spawned manually using Worm Food, which can be crafted with 30 Vile Powder and 15 Rotten Chunks at a Demon or Crimson altar. Please note that the Eater of Worlds can only be spawned in the Corruption biome, but it is possible to create artificial corruption biomes around your map if you want a more opportune location to fight in.
How To Beat: The Eater of Worlds (EoW) can be a tricky boss to face due to its natural spawn location and its method of attack. Like other worm-type enemies, the EoW will launch out of solid blocks at the player, but due to its length and size and the long tunnel-like cave systems it will typically be fought within, it can easily box a player into tight places if they aren’t careful. Because of the EoW’s tendency to leave several segments exposed in a row, piercing weapons like Jester’s Arrows are extremely useful for fighting it. One thing to keep in mind is that, despite it being considered a progression boss, the special drop that allows further progression can start to pop out as individual segments of the EoW are destroyed, meaning that actually killing the EoW is technically optional; if you wish to kill the boss but get stuck, it is completely possible to focus on farming enough Shadow Scales to open up molten armor and weapons to the player before actually trying to defeat it for good.
» How To Beat Eater of Worlds Video Guide
Brain of Cthulu
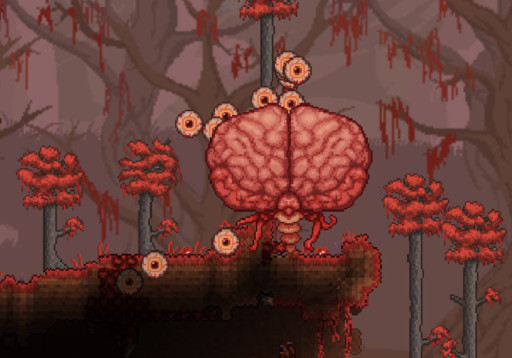
Location: The Brain of Cthulu will spawn naturally only in Crimson worlds after the player has destroyed three Crimson Hearts in the underground Crimson biome at any time of day. The Brain of Cthulu can also be spawned manually using a Bloody Spine, which can be crafted with 30 Vicious Powder and 15 Vertebrae at a Demon or Crimson altar. Please note that the Brain of Cthulu can only be spawned in the Corruption biome, but it is possible to create artificial corruption biomes around your map if you want a more opportune location to fight in.
How To Beat: The Brain of Cthulu (BoC), like the Eater of Worlds, does not need to be fully killed in order to progress to the next stage of the game, meaning that a player having a rough time can focus on squashing enough of the Creeper enemies that the BoC spawns to craft a Crimtane pickaxe; this process, in my opinion, is far easier to do for the BoC than the Eater of Worlds. However, for those that want to take down the BoC, you should definitely prepare a large, open arena with many platforms prior to spawning the boss and deck it out with objects like campfires, Heart Lanterns, and Star Lanterns if you are a magic user. Because the BoC will teleport around the player, having a dodge or dash ability can be very helpful for making tight turns. For the trickier second phase of the boss, a tip I find extremely helpful regardless of weapon class is to have a weapon that will consistently inflict a status effect, such as setting the boss on fire. This is because, in addition to giving the player a benefit like tick damage, only the BoC entity will show the status effect and its projections will not, making it far easier to target as the projections become less and less transparent.
» How To Beat Brain of Cthulu Video Guide
Queen Bee
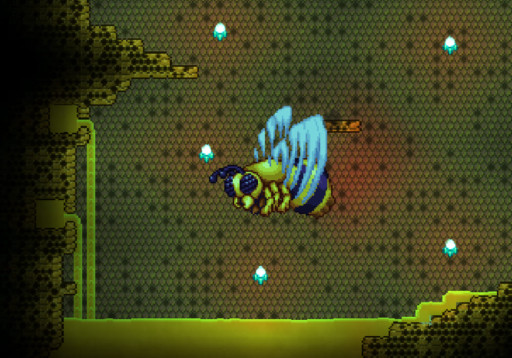
Location: The Queen Bee naturally spawns in the underground Jungle at any time of day after the player destroys a Larva, which can be found inside Bee Hives, a mini-biome in the Underground Jungle. The Queen Bee can also be summoned using an Abeemination, which can be crafted anywhere using five honey blocks, five hive blocks, a stinger, and a bottle of honey. The Queen Bee can only be summoned using the Abeemination within the Jungle or underground Jungle, but will not despawn if the player moves outside of the Jungle. Be warned, though: the Queen Bee will become enraged when outside of the Jungle, giving her a massive speed and damage boost.
How to Beat: The Queen Bee will spawn many small bees to attack the player, and, even though these bees don’t do much damage on their own, they can cause the player issues by knocking them out of a sprint and into a direct attack from the Queen. As such, the player will want some kind of weapon that can attack over a wide area to get rid of them as quickly as possible. They also have a chance of dropping consumable hearts upon death, which can also save the player in a pinch. Also, setting up a few platforms that can be jumped between during the Queen’s dash attacks can be incredibly helpful, though if fighting the Queen in a naturally-occuring bee hive, a proper arena set-up can be difficult.
» How To Beat Queen Bee Video Guide
Skeletron
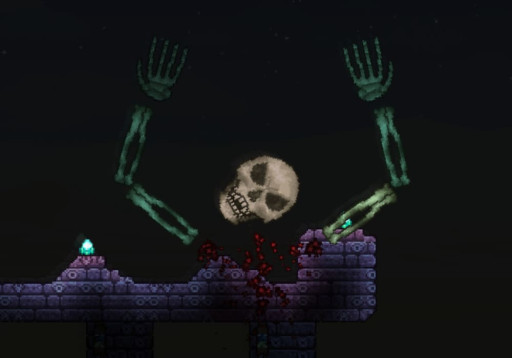
Location: Skeletron will naturally spawn at the entrance to the Dungeon, and will only do so at night after speaking to the Old Man NPC that hangs out in the same location. Later in the game, Skeletron can be re-summoned and fought additional times by killing the Clothier NPC at night using the Clothier Voodoo Doll. Keep in mind that Skeletron will despawn immediately at 4:30 AM (in-game), meaning that there is a time limit for him.
How To Beat: Skeletron should ideally be taken on as soon as possible as defeating him gives you access to the dungeon, which is filled with awesome loot that can be incredibly helpful for the remainder of pre-Hardmode and early on in Hardmode. While I’ve been successful at taking out Skeletron with a variety of character builds and strategies, the most important advice I can give is to think about your set up and the order that you take out his pieces. I would consider trying to level out and set up a multi-level arena directly outside of the Dungeon’s entrance to make sure you can easily run there as soon as Skeletron spawns as, depending on where the Old Man wants to stand, the player can easily get stuck inside a small space with the giant floating skull. Also, while fighting him, try to take out his hands as soon as possible since it will make his spinning attack easier to dodge and make his second phase easier to deal with even in Expert or Master mode.
» How To Beat Skeletron Video Guide
Deerclops

Location: The Deerclops will spawn in the Snow biome if the following conditions are met: there is a blizzard currently happening, it is currently midnight, and a player in the world has at least 9 defense OR 200 maximum health. It can also be summoned in the Snow biome at any time using the Deer Thing, which can be crafted at a Demon or Crimson Altar with three Flinx fur, a lens, and five Demonite or Crimtane ore.
How To Beat: The boss fight is intended to keep the player close; if the player moves more than 30 blocks away from the Deerclops while it is active, the Deerclops will become invulnerable to all damage until it gets closer again. As such, the player should try to fight close up and on the ground as much as possible since spending too much time in the air will bait out a special and hard-to-avoid attack. Notably, the Deerclops’ hitbox does not extend to his legs, meaning that the player can run back and forth through its legs to avoid attacks. One of the biggest things to watch out for is that the Deerclops is able to inflict the Frozen effect on the player, which can easily get the player killed, so bringing an item or potion to grant the player immunity to the effect can be the difference between life or death in the fight.
» How To Beat Deerclops Video Guide
Wall of Flesh
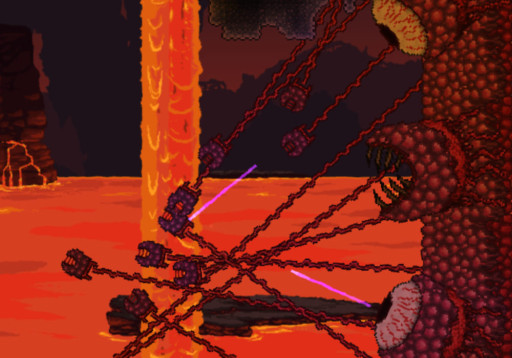
Location: The Wall of Flesh can only be fought in the Underworld, though it can be fought at any time of day. It will not spawn naturally and must be summoned by killing the Guide NPC using a Guide Voodoo Doll. This should ideally be done easily by throwing it into a conveniently-placed pool of lava in the Underworld. Keep in mind that killing a Voodoo Demon over a pool of lava can also spawn the Wall of Flesh if the dropped voodoo doll gets fried, so watch out when you’re trying to get your hands on the item. Also, this summoning method only works if the Guide NPC is currently alive in your world.
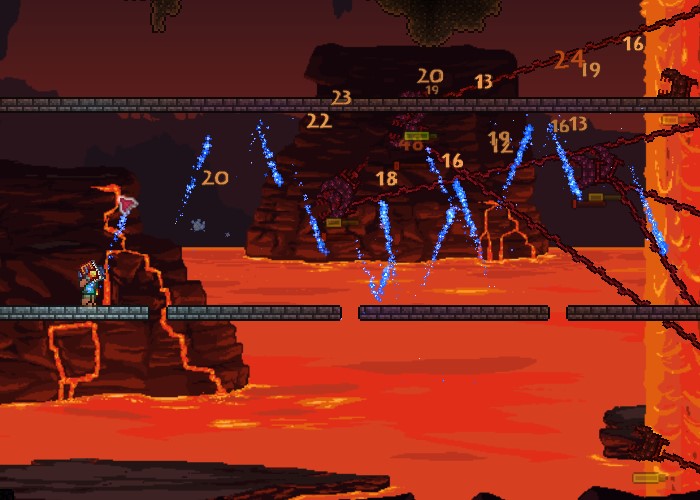
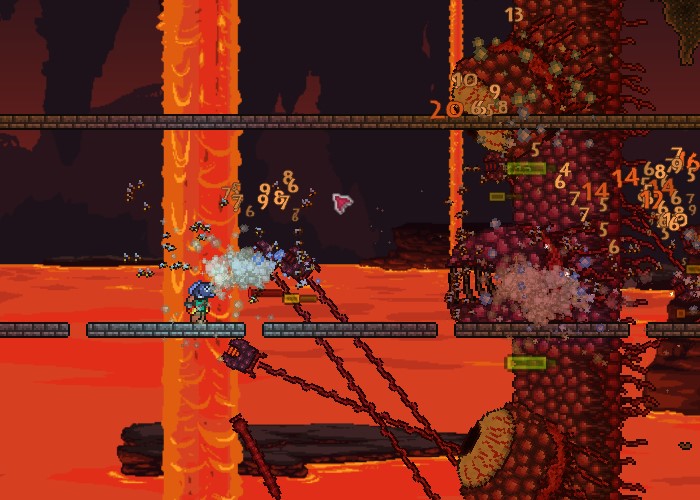
How To Beat: The most important thing to keep in mind is that, because the Wall of Flesh (WoF) is, well, a wall, the player will need to plan ahead in terms of terrain. The WoF will take up the entire height of the Underworld, meaning it cannot be jumped over or dodged under to be avoided, so the player should spend some time clearing out a relatively flat path across a wide stretch of the Underworld. The task is incredibly tedious and frustrating due to the obnoxious Underworld enemies that will harass you as you flatten Hell, but this is well worth it to save you from a panic during the fight; I have lost the fight many times due to underestimating how much space I would need and inevitably being sandwiched between the WoF and one of the obsidian brick buildings. It is also advisable to get yourself as close to one side of the world before summoning the WoF so that you won’t run out of world.
» How To Beat Wall of Flesh Video Guide
Hardmode
Queen Slime

Location: The Queen Slime will not spawn naturally and must be summoned in the Hallow biome using a Gelatin Crystal. The Gelatin Crystal can be found growing in the caves of the Underground Hallow and should stand out due to their unique appearance and color-changing effect. That is, as long as you are keeping an eye out for it!
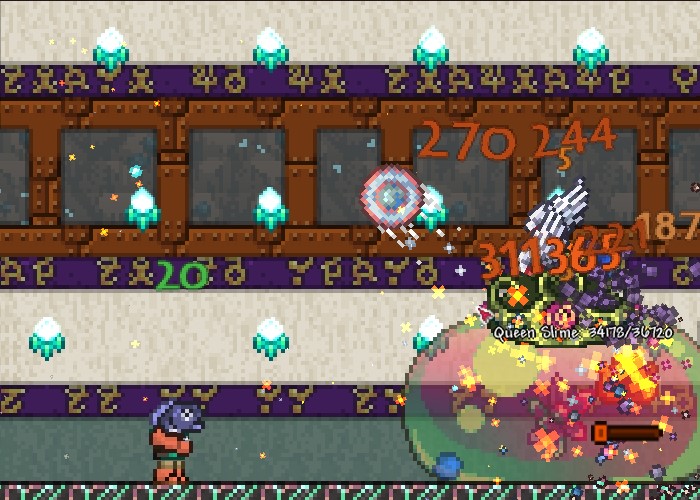
How To Beat: The Queen Slime has a lot of similar attacks to the King Slime but is faster, hits harder, and shoots projectiles at the player. I recommend having gear such as the Brain of Confusion that will give you a chance of a dodge, which will be helpful for pretty much every Hardmode boss going forward, honestly. These bosses hit hard, so any chance to completely nullify the damage of an attack is very helpful. Also, I recommend setting up your arena pretty high above the surface; the bouncing projectiles can be pretty annoying, but they will pass through platforms, so putting your solid ground as far below you as possible will give you one less thing to worry about while fighting her.
» How To Beat Queen Slime Video Guide
The Twins
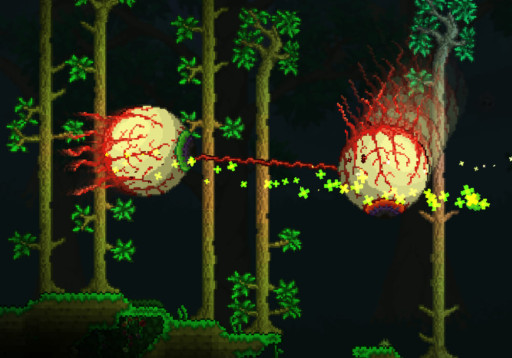
Location: If the player has broken at least one Demon or Crimson altar, The Twins have about a 10% chance of spawning naturally at night, assuming the player is on the surface and the Twins have not yet been defeated. The Twins can also be summoned manually at night in any biome with a Mechanical Eye, which has a 0.04% chance of dropping from any enemy during Hardmode. It can also be crafted at a Mythril or Orichalcum Anvil with three Lenses, six Souls of Light, and five Lead or Iron Bars.
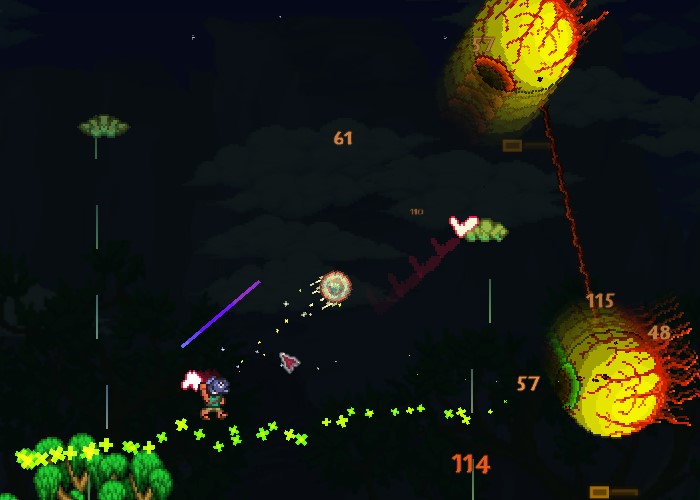
How To Beat: The Twins can be an especially difficult fight due to having to deal with two bosses at once. Being highly mobile and keeping your distance is very important for this boss fight; I find that getting a speedy mount can really improve your chances in this fight as you can actually outrun the projectiles from the bosses if you are fast enough. You could even choose to fight another one of the Mechanical Bosses first to get access to the Steampunker so you can build a long platform out of asphalt, which will massively improve your speed. Be warned, though, you can outrun these two to the point of them despawning, so don’t stray too far! Also, if you have to choose between getting bumped by any attack or getting hit by the cursed flame projectile, choose the other attack as the cursed flame debuff does an insane amount of tick damage that can easily cost you the fight.
» How To Beat The Twins Video Guide
The Destroyer
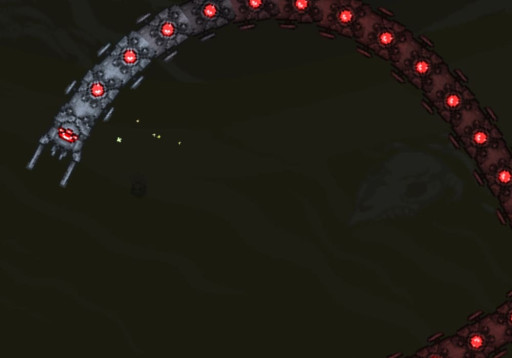
Location: If the player has broken at least one Demon or Crimson altar, The Destroyer has about a 10% chance of spawning naturally at night, assuming the player is on the surface and the Destroyer has not been defeated yet. The Destroyer can also be summoned manually at night in any biome with a Mechanical Worm, which has a 0.04% chance of dropping from any enemy during Hardmode. It can also be crafted at a Mythril or Orichalcum Anvil with six Vertebrae or Rotten Chunks, six Souls of Night, and five Lead or Iron Bars.
How To Beat: Because the Destroyer is a worm-type enemy, it can cause some issues since it can box you in with its body if you aren’t careful. As such, you’ll want to pay very close attention to where you are in relation to where the Destroyer is and is moving while fighting it and, ideally, stay off the ground as much as possible. In terms of gear, even if you aren’t a ranger, the Daedalus Bow is one of the best weapons you could use against the Destroyer, especially when paired with Holy Arrows. If you’re not in the mood to chase around Hallowed Mimics for the bow, however, pick up any weapon that can strike many points at once, such as weapons with a piercing effect, since they work great on its long, wormy body. Shooting it in the face with a piercing projectile as it dashes at you can do massive damage, but be careful of this high-risk strategy; the head of the Destroyer does way more damage than the rest of it and can one-hit a player with low enough defense!
» How To Beat The Destroyer Video Guide
Skeletron Prime

Location: If the player has broken at least one Demon or Crimson altar, Skeletron Prime has about a 10% chance of spawning naturally at night, assuming the player is on the surface and Skeletron Prime has not been defeated yet. Skeletron Prime can also be summoned manually at night in any biome with a Mechanical Skull, which has a 0.04% chance of dropping from any enemy during Hardmode. It can also be crafted at a Mythril or Orichalcum Anvil with 30 Bones, three Souls of Light, three Souls of Night, and five Lead or Iron Bars.
How To Beat: Like standard Skeletron, Skeletron Prime is made up of a giant floating skull and multiple floating arms, though Skeletron Prime has four rather than two. However, just like standard Skeletron, you’ll want to take out all four of those arms before putting all your focus on the skull since it’ll make it easier to deal with his spinning attacks without all the extra projectiles. Also, for this fight, having a set of wings and some gear that will give you a dodge chance is a must due to Skeletron Prime’s speed, attack patterns, and damage. Finally, make note of the fact that, unlike the other Mechanical Bosses that just despawn once morning hits, Skeletron Prime enrages and can easily one-shot the player with the sudden boost in speed and damage.
» How To Beat Skeletron Prime Video Guide
Mechdusa
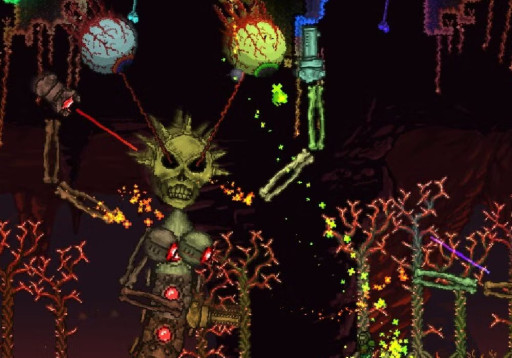
Location: This boss is exclusive to the Everything world seed, so it is impossible to spawn outside of this secret world type. However, if playing in the correct seed, this boss can be summoned using the Occam’s Razor item at any time. The Occam’s Razor must be crafted by combining the Mechanical Worm, Eye, and Skull at a Mythril or Orichalcum anvil. There is also a small chance of Mechdusa spawning naturally at dusk if the player has not yet defeated one of the mechanical bosses. Because the world seed has no sun, the player does not have to worry about summoning at a specific time or taking too long to fight the Mechdusa as it won’t despawn once it rolls over to “day”.
How To Beat: As one would expect from a secret boss from the incredibly challenging Everything world seed, Mechdusa is very difficult and should only be attempted by experienced and skilled players (though, hopefully, you aren’t trying to play in this world seed if you aren’t already in that category). Due to the high damage of the boss, keeping your distance from it at the start of the fight is definitely a good idea, so you might want to consider gearing up for ranged attacks and maximum maneuverability. Also, getting your hands on a Rod of Discord can be incredibly useful to prevent the player from getting trapped under the Destroyer. It is advisable to focus on the Destroyer first as the Destroyer will greatly limit the player’s movement if not careful, making it way harder to avoid attacks from Skeletron Prime and the Twins. Skeletron Prime should be defeated last as it is keeping all of them together, and it is easier to deal with them all in one place rather than broken apart.
» How To Beat Mechdusa Video Guide
Plantera
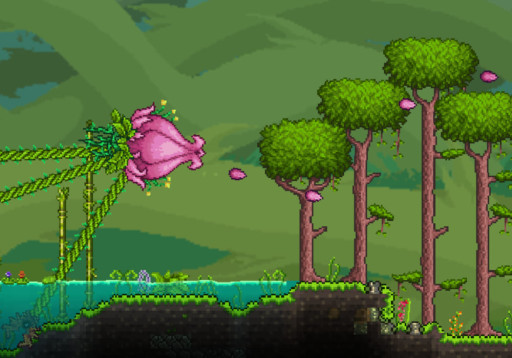
Location: Plantera must be summoned, which can only be done by breaking a Plantera’s Bulb, similar to how the Queen Bee can be summoned by destroying a Larvae. These bulbs spawn in the Underground Jungle once all three Mechanical Bosses (or Mechdusa) have been defeated. Plantera can move outside of the Jungle without despawning, but she will become enraged, making her much more difficult to fight.
How To Beat: Plantera can be a very difficult boss fight in the standard terrain of the Underground Jungle, but careful arena set up can really make the difference. There are many methods to set up, but you want to mainly account for two big things: bouncing spike-balls and walls. Plantera will shoot out bouncing projectiles that can be difficult to keep track of and dodge, especially during the more difficult second phase of the fight, so getting an arena set up that accounts for them will be massively helpful. This is a similar concept to the Queen Slime fight. Also, getting rid of most of the background walls in your arena will be very helpful as it will greatly limit Plantera’s movement, though the process of getting rid of said walls is quite time consuming and tedious.
» How To Beat Plantera Video Guide
Golem
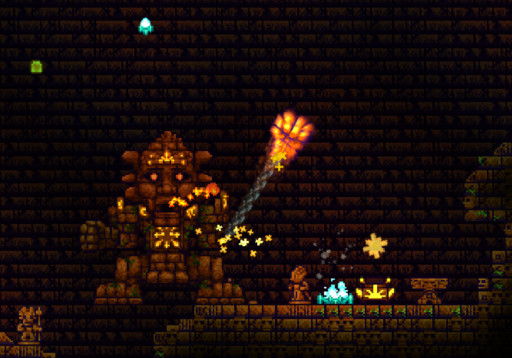
Location: The Golem can initially only be spawned by placing a Lihzahrd Power Cell on the Lihzahrd Altar at the end of the Jungle Temple. The player can access the Jungle Temple after defeating Plantera as she drops the key. After defeating the Golem and crafting the Picksaw, the Lihzahrd Altar can be picked up and placed anywhere, allowing the Golem to be fought in any location. Note that the Golem will technically enrage when outside of the Underground Jungle, but it’s enraged behavior is not typical; it does not gain increased damage and defense like other bosses and instead just gets a slight speed boost, so this may not effect your fight much.
How To Beat: The Golem is considered one of the easiest bosses in the entire game relative to how equipped the player would be when fighting it, though the latest major update to the game did make it considerably stronger. Still, the most difficult part of the initial Golem fight is the terrain as you will not be able to change the altar room (besides adding platforms and buff items) since Lihzahrd Bricks cannot be mined with any pickaxe available to the player before defeating the Golem. You really just have to get lucky with the shape and size of the room. Other than that, the best advice is that, like Skeletron and Skeletron Prime, you should focus on taking out the Golem’s hands as soon as possible as no longer having to deal with its punch attacks will make things a lot easier.
» How To Beat Golem Video Guide
Duke Fishron
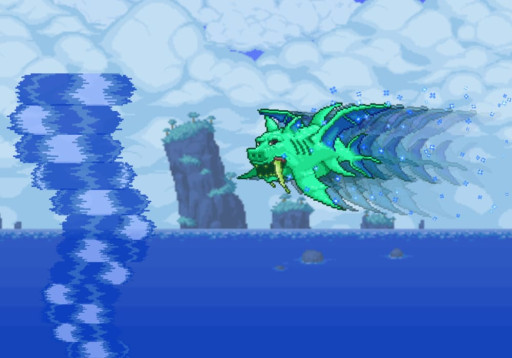
Location: Duke Fishron is summoned by fishing in the Ocean using a Truffle Worm as bait. Truffle Worms can be found rarely in underground Glowing Mushroom biomes. Duke Fishron can be fished up as soon as a player enters Hardmode, but due to its difficulty, it is advisable to wait until after defeating the Golem. Keep in mind that leaving the Ocean biome will cause the Duke to become enraged, so set up your arena by the Ocean.
How To Beat: Like the other Hardmode bosses, Duke Fishron is super fast and hits super hard, though the worst of his attacks comes in the form of a super speedy horizontal dash. When bosses dash to the side like that, moving quickly vertically or perpendicularly to them is the best way to dodge, so having a set of wings that can carry you up quickly can be helpful, and paired with a mount like the Slimy Saddle or Gelatinous Pillion that can fall super fast will also be a big help. If you time things correctly, of course. Other than that, my biggest piece of advice is to stay away from the water. While you do have to be near the water to summon the Duke and leaving the Ocean biome enrages him, staying as far above the surface of the ocean can save you the trouble of dealing with the Duke’s many sharknado summons.
» How To Beat Duke Fishron Video Guide
Empress of Light

Location: The Empress of Light is technically a Hallow boss and the critter that summons her, the Prismatic Lacewing, only spawns in the surface Hallow. However, the Lacewing can be caught and released anywhere, meaning that the Empress of Light can be fought anywhere if the player is fast enough in killing it; the Lacewing will despawn pretty fast if released outside of the Hallow biome. The Empress of Light will not be enraged when outside of the Hallow either. Time also does not affect your ability to spawn the Empress, though she becomes enraged during the day. In addition, if you spawn her during the day, please note that she will despawn once night hits in game.
How To Beat: The Empress of Light (EoL) is an extremely difficult fight, so careful preparation is a must, especially if you plan to take her on during the day to get your hands on her extra loot offerings. Having accessories and armor that offer a dodge chance is arguably more beneficial than worrying about total defense as she has quite a few moves that can one-shot the player regardless of armor. Also, aerial maneuverability is extremely important with this boss if you actually want to dodge all the crazy projectiles on the screen, so grabbing a speedy mount with infinite flight, such as the Cute Fishron mount, might be better than trying to deal with complex arena set-ups and wings. Opting for a mount rather than wings can also be better since you can replace any movement-based accessories you have with accessories that will improve your damage output or regen instead.
» How To Beat Empress of Light Video Guide
Lunatic Cultist

Location: The Lunatic Cultist will only ever spawn at the Dungeon entrance after the player kills the four cultists. These cultists will only spawn there after Golem has been defeated in the world. While the player can, therefore, fight this boss any time after defeating Golem, it is recommended to wait and really prepare due to the Lunatic Cultist’s fight being difficult and generally quite hectic.
How To Beat: The Lunatic Cultist is a very visually crazy fight with loads of projectiles, similar to the Empress of Light’s fight, though the Lunatic Cultist is a much smaller target than the Empress which makes him more difficult to hit. The solution, though, is not to get a weapon that strikes a large area willy-nilly; the Cultist will periodically spawn Mimic Cultists that will create even more crazy enemies when hit by the player, so precision is very important. There is a slight visual difference between the real Cultist and his mimics, so pay close attention to the details on the hood and the eye shape to the best of your ability. Also, this is another fight where having an infinite-flight mount is more helpful than using wings since you’ll be better off staying in the air the whole time anyway. My last piece of advice is to keep moving as sitting still opens you up to the Cultist’s many targeted projectile attacks.
» How To Beat Lunatic Cultist Video Guide
Moon Lord
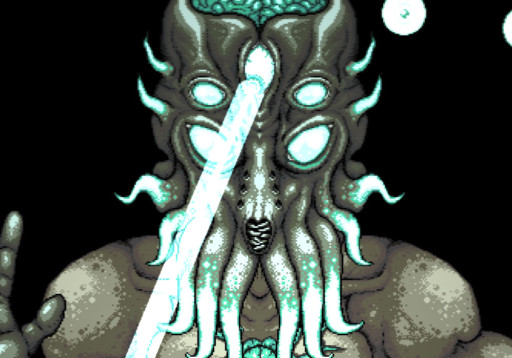
Location: The Moon Lord will spawn by the player one minute after defeating all of the pillars in the Lunar event, or 12 seconds after the player uses a Celestial Sigil. The Celestial Sigil can be crafted at an Ancient Manipulator using twelve fragments from each of the pillars from the Lunar events. The Moon Lord can be fought anywhere and will not despawn until defeated or all players in the world are dead.
How To Beat: Like the latest few bosses on this list, you are better off fighting this boss using a fast, infinite-flight capable mount since the Moon Lord is best fought entirely in the air. I personally recommend the Cute Fishron mount for the most recent versions of the game. If you use Cute Fishron, you should plan ahead to set up bubbles filled with water around where you plan to generally fight the Moon Lord or wait for it to rain so you can get some extra speed and damage from your mount. Also, focusing on taking out the Moon Lord’s hands before his head tends to be the best route, similar to how you would with Skeletron or Skeletron Prime, as his hands can add a lot of avoidable complexity to the battle.
» How To Beat Moon Lord Video Guide
Event Bosses
Dark Mage

Location: The Dark Mage only spawns during the fifth wave of the first tier of the Old One’s Army event and during the fourth and sixth wave of the third tier. Interestingly, it always spawns from the left portal.
How To Beat: While the Dark Mage can attack the player directly for some pretty hefty damage, the most dangerous thing about fighting it is having to deal with the other enemies from the event while fighting it. This will be a common theme with all the event bosses, but it is especially the case for the Dark Mage as it can heal the other enemies. The best strategy, which will really be the case for all of the Old One’s Army event bosses, is to focus all of your attention on the Dark Mage while it's active and let your sentries take care of defending the crystal.
» How To Beat Dark Mage Video Guide
Ogre
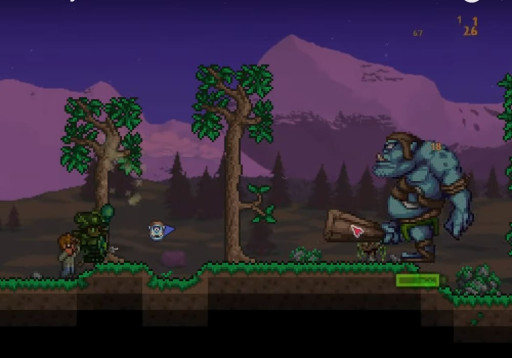
Location: The Ogre only spawns during the seventh wave of the second tier of the Old One’s Army event or during the fifth and sixth wave of the third tier.
How To Beat: Like the other of the mini-bosses from this event, you’ll want to forsake directly defending the Crystal here and focus entirely on taking out the Ogre since, if he reaches the Crystal, he will make short work of it. The Ogre has a variety of attacks that can really hinder the player, but most of them can be avoided by staying off the ground. His jump attack’s shockwave can be jumped above and his sticky spit attack only slows you down when you touch the ground, so flying mounts are a great counter to him. The biggest thing you’ll want to watch out for is his club as it does enough damage to one-shot the player in Master Mode, so keep your distance from this guy!
» How To Beat The Ogre Video Guide
Betsy

Location: Betsy only spawns during the seventh wave, that being the final wave, of the third tier of the Old One’s Army event. Betsy will fly in from the sky rather than spawning from the portal.
How To Beat: Betsy is a pretty hard boss due to her speed and attack damage, so the player will need to match her speed and damage with their gear loadout if they hope to take her down. However, the best advice I can give, regardless of weapon class or gear, is to fight her pretty far away from the Eternia Crystal. While this can feel a bit like abandoning the Crystal, as long as your sentry set up is good, this is really best practice as Betsy’s attacks can really chew up the crystal. This will not only lose you the fight with her but also force you to restart the entire event if you wish to try to fight her again. I find it best to create a large platform a ways above the arena for the event to exclusively fight Betsy on.
» How To Beat Betsy Video Guide
Flying Dutchman

Location: The Flying Dutchman will only spawn during the Pirate Invasion event and can appear any time, several times, after the event has reached at least 50% progress.
How To Beat: The Flying Dutchman can easily get stuck on solid blocks and has a hard time attacking the player if you aren’t below it, making it easy to create a trap and get above it. If unsuccessful in trapping it, it is still relatively easy to avoid the projectiles from it on a flying mount, and this also means you don’t have to worry about the pirates that will drop from the boss. However, weapon choice becomes much more important. Similar to the Destroyer, I would recommend grabbing the Daedalus Bow and pairing it up with Holy Arrows to maximize the amount of projectiles that will hit the pirate ship at once. This will make quick work of its cannons as they could all be hit at the same time.
» How To Beat Flying Dutchman Video Guide
Mourning Wood
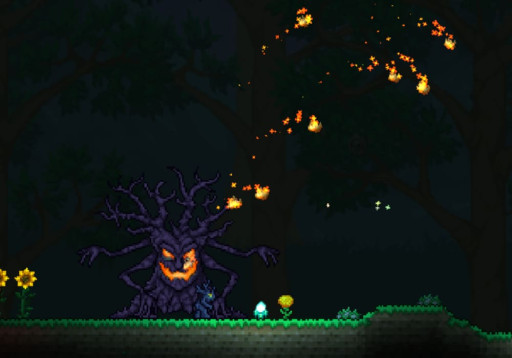
Location: The Mourning Wood will spawn as a part of the Pumpkin Moon event, starting at wave four. The Mourning Wood does not have to be defeated for another one to spawn and you may end up fighting multiple at once.
How To Beat: The Mourning Wood is a pretty troublesome boss, not only because you have to deal with the rest of the Pumpkin Moon enemies at the same time, but you may have to deal with multiple Mourning Wood bosses at the same time, too. I find that it’s easiest to fight the boss while on a fast flying mount as it makes it easier to dodge his fast-moving flying projectiles while also avoiding all the projectiles that stay closer to the ground. Keep in mind that those flying projectiles can move through solid blocks, so you can’t really take cover from them. The Mourning Wood will also get faster as its health gets lower, so don’t get caught off guard by it!
» How To Beat Mourning Wood Video Guide
Pumpking
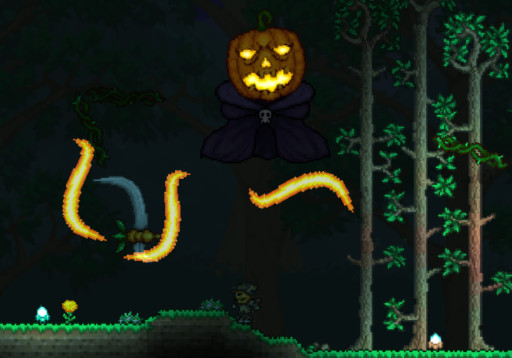
Location: The Pumpking will spawn as a part of the Pumpkin Moon event, starting at wave 10. The Pumpking can also spawn several times at once and can even show up in groups of seven in the final wave of the event.
How To Beat: The Pumpking is a pretty tough enemy due to its high damage and speed, but you can even the odds a bit by getting a speedy flying mount. I would recommend using the Witch’s Broom, which you can snag from the Mourning Wood earlier on in the event, as it is incredibly fast and can help you fly around the Pumpking. In general, I find flying in circles or some kind of variant loop around flying enemies that don’t have dashes can be a very simple method to avoid their attacks. Keeping your distance is best for this boss, even for melee builds, so hopefully you melee-users have your hands on a good weapons with a projectile such as the Terrablade, which can make relatively quick work of the Pumpking.
» How To Beat Pumpking Video Guide
Everscream

Location: The Everscream spawns as a part of the Frost Moon event starting at wave four. Multiple Everscream bosses can spawn at one time.
How To Beat: The Everscream has very similar attacks and behaviors to the Mourning Wood event boss from the Pumpkin Moon, so you can use similar strategies for dealing with that boss for this one, though is arguably easier to deal with due to its flying projectiles’ inability to pass through solid blocks. I find it easiest to take cover while this boss is active while letting arena traps and/or sentries deal with it, or otherwise using some weapon that will be able to hit him despite solid blocks being between us. This is mostly because the needle attack is far faster than the Mourning Wood’s flaming branch attack, meaning it is harder to dodge and can hit you quite a few more times which can kill your momentum and leave you open to attacks from other enemies.
» How To Beat Everscream Video Guide
Santa-NK1

Location: The Santa-NK1 boss spawns exclusively as a part of the Frost Moon event, starting at wave seven. Santa-NK1 does not have to spawn one at a time and multiple can be active at once.
How To Beat: The Santa-NK1, or Santank, has a lot of deadly projectiles that have a high accuracy, which means that you will be best suited with a pair of wings or a mount that can keep you light on your feet and moving around fast to avoid his projectiles. I find that best practice for avoiding him is by moving back and forth over his head repeatedly. Also, the Santank has a very high defense stat, exceeding pretty much every other boss in the game, meaning that the player will benefit greatly from using weapons that reduce the Santank’s defense like Ichor projectiles or the Golden Shower tome. These sorts of weapons will be a bit harder to acquire if not playing in a Crimson world since you will need to create an artificial Crimson biome to get the enemies that will drop Ichor, but it is certainly worth it.
» How To Beat Santa-NK1 Video Guide
Ice Queen
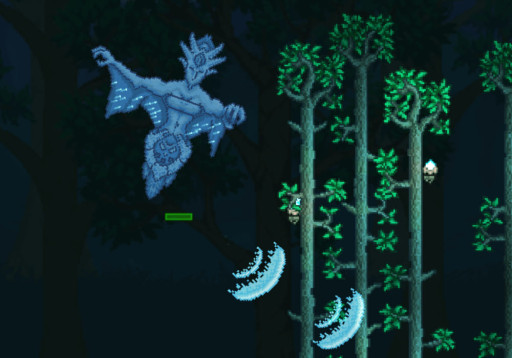
Location: The Ice Queen boss spawns exclusively as a part of the Frost Moon event, starting at wave 11. She does not have to spawn one at a time and multiple can be active at once.
How To Beat: The Ice Queen is the only flying boss in the Frost Moon event, and like the other flying bosses mentioned on this list so far, being able to fly around with her is incredibly helpful to fighting her. I recommend grabbing an effective flying mount to follow her into the sky. Her projectiles can be pretty troublesome, but if you are fast and careful enough, dodging should be easy. However, having an accessory that gives you a free dodge chance can’t hurt either! Also, regardless of strategy, it’s a good idea to have on gear or use a consumable that will grant you immunity to the Chilled and/or Frozen debuffs as the Queen can inflict these and ruin an otherwise clean fight.
» How To Beat Ice Queen Video Guide
Martian Saucer
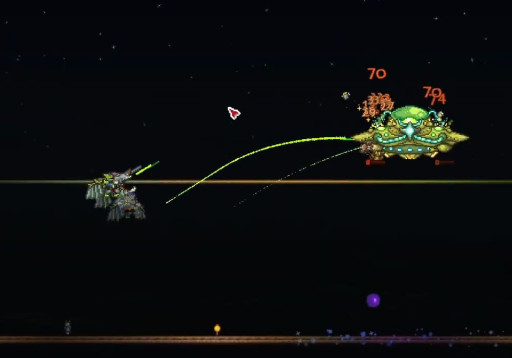
Location: The Martian Saucer spawns exclusively during the Martian Madness! event as long as the player has completed at least 30% of the event. It will despawn if the player is killed or if the event ends.
How To Beat: The Martian Saucer is kind of a pain to deal with, especially on harder difficulties due to its death ray attack; while the player will be able to destroy its other projectiles, which should be done as quickly as possible, the Martian Saucer will consistently attempt to fly over the player and shoot the death ray down, causing devastating damage. The easiest way to avoid it is by staying over it as, especially in its second phase, the Martian Saucer can whip around and change the direction it is firing in on a dime. Even if you manage to outpace the Martian Saucer one way, it can easily start to fire the other way and use your speed and momentum against you. Teleportation is one of the only ways to truly avoid the death ray as it will travel through blocks in the newest versions of the game, so I recommend bringing a Rod of Discord or the Hook of Dissonance to zip through the attack.
» How To Beat Martian Saucer Video Guide
Solar Pillar

Location: The Celestial Pillars spawn only immediately after the Lunatic Cultist has been defeated and will not despawn until defeated, even if the player leaves the world. The Solar Pillar will spawn on the surface in one of four locations across the map. Luckily, it will be visible on the minimap upon spawning.
How To Beat: The Solar Pillar is the melee focused boss among the Celestial Pillars, and as such, the enemies in this Lunar event are designed to keep you on the ground and up close to the mobs. If you try to fly up into the air, a special enemy will spawn and do high damage to you until you are back on the ground, limiting your ability to evade the swarm of ground enemies. In addition, some enemies will even reflect projectiles back at you similar to the hardmode biome mimics can. As such, it is generally advisable to cater to a melee build for this fight; use mounts that will keep you on the ground, preferably if they can do good ramming damage, to improve your maneuverability and put on some tanky accessories and armor. Use ranged weapons at your own risk!
» How To Beat The Solar Pillar Video Guide
Nebula Pillar
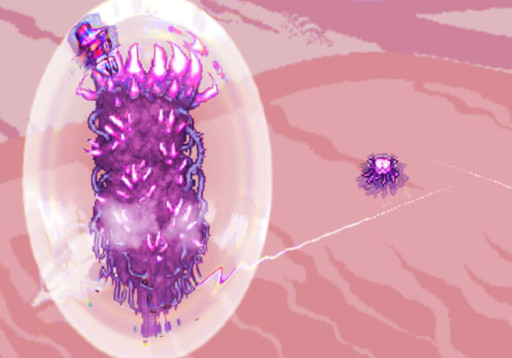
Location: The Celestial Pillars spawn only immediately after the Lunatic Cultist has been defeated and will not despawn until defeated, even if the player leaves the world. The Nebula Pillar will spawn on the surface in one of four locations across the map. Luckily, it will be visible on the minimap upon spawning.
How To Beat: The Nebula Pillar is the magic focused boss among the Celestial Pillars. It is the most annoying one, in my opinion, due to the ways that the enemies of this event tend to attack; many enemies can teleport around unpredictably in addition to shooting (or essentially becoming) tracking projectiles that will stick to the player and cause problems over time. There is genuinely a certain amount of RNG involved in whether or not the player will get hit by certain enemies or attacks or not. As such, you should be extremely vigilant and patient while challenging this particular pillar, and be prepared to heal a lot while weakening this pillar’s forcefield.
» How To Beat The Nebula Pillar Video Guide
Vortex Pillar
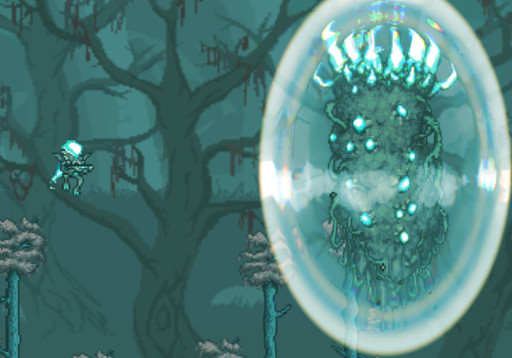
Location: The Celestial Pillars spawn only immediately after the Lunatic Cultist has been defeated and will not despawn until defeated, even if the player leaves the world. The Vortex Pillar will spawn on the surface in one of four locations across the map. Luckily, it will be visible on the minimap upon spawning.
How To Beat: The Vortex Pillar is the ranger Celestial Pillar, so players already playing with a ranged build luck out here. This pillar will throw a lot at you, but taking cover is a very effective strategy here as the projectiles from this pillar’s enemies cannot travel through blocks, allowing you to thin out the barrage of smaller enemies from a safety box until you weaken the forcefield around the pillar. The enemies here also tend to be a bit easier to pin down to their relatively slow speed, though it is easy to get swarmed. Watch out for the egg-laying Alien Queens as they can replicate many mobs in a short time span that can overwhelm a careless player.
» How To Beat The Vortex Pillar Video Guide
Stardust Pillar

Location: The Celestial Pillars spawn only immediately after the Lunatic Cultist has been defeated and will not despawn until defeated, even if the player leaves the world. The Stardust Pillar will spawn on the surface in one of four locations across the map. Luckily, it will be visible on the minimap upon spawning.
How To Beat: The Stardust Pillar is the summoner focused pillar. For this pillar, my biggest pieces of advice are to bring something that can do splash damage or damage a wide area with a single projectile or swing, specifically to counter the Star Cell enemies as they split into several cells that can easily overwhelm you if not careful. Also, this is another pillar where cover can be very helpful since some of the enemies’ projectiles have trouble homing in on the player, so having a weapon that can attack from behind cover can be helpful to you.

