[Top 10] Risk of Rain Returns Best Builds That Are Powerful
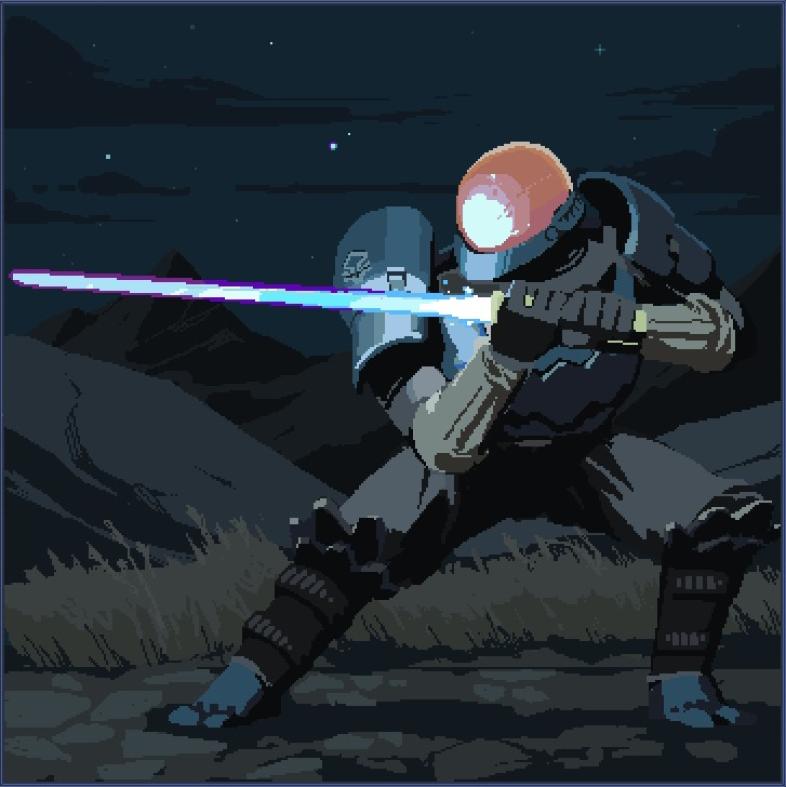
When playing Risk Of Rain it is essential to understand how to enrich your chosen character with items that boost their strengths and compensate for their weaknesses. With the release of Risk Of Rain Returns and its slew of new, and altered old items, along with the alternate survivor’s skills which have been equally revamped, the builds available to make are vastly different from the like of the original game or Risk Of Rain 2. Here will be a list of the most powerful builds, based on their difficulty to make and their effectiveness that will be sure to carry you from the Desolate Forest to the Temple Of Elders with ease.

“Let’s get ready to ruuuuuumble”
10. The ‘Hand-To-Hand’

“Sticky situation”
Characters: Loader
Items: Barbed Wire, Medkit, Crowbar, Tough Times, Frost Relic, Chargefield Generator, Concussion Grenade, Shattering Justice, Colossal Knurl
Equipment: Shattered Mirror / Prescriptions
Skills: Knuckleboom, Short Circuit, Hydraulic Gauntlet, S260 Conduit
A build specialised for Loader, a melee class.
The Barbed Wire, Frost Relic and Chargefield Generator (the latter two only activate after a kill) cause damage while enemies are nearby and will serve as additional damage dealt while Loader stuns with his Short Circuit paired with the Concussion Grenade.
This build utilises both damage infliction and damage reduction to ensure Loader achieves the best result when fighting up-close and personal. This build is capable of dealing heavy damage but forgoes mobility for that. The main downside to this build is that Loader is still constantly in harm’s way, so you need to be ready to evacuate with Hydraulic Gauntlet at a moment’s notice.
What ‘Hand-To-Hand’ excels in:
- Close-range combat.
- Damage reduction.
- Enemy stunning and grouping.
Try this build if:
- You can quickly switch attack patterns.
- Your play style is based on grouping enemies.
- You enjoy heavy-hitting characters.
9. The ‘Ghost’

“Where to now?”
Characters: Commando / Bandit
Items: Rusty Knife, Soldier’s Syringe, Paul’s Goat Hoof, Mocha, Hermit’s Scarf, Time Keeper’s Secret, Energy Cell, Panic Mines, Tesla Coil, Hardlight Afterburner
Equipment: Unstable Watch
Skills: [Commando] Double Tap, Combat Knife, Tactical Dive, Point Blank
[Bandit] Whip, Dynamite Toss, Smokebomb, Standoff
This tricky build is based around sustainability and mobility with a smaller focus on passive damage and contingencies, hence the items that are activated at low health.
The characters selected for this build to succeed are those that capitalise on I-frames; skills that use immunity in their utility skills. This allows them to weave between enemies inflicting close-up damage via Commando’s Combat Knife and Bandit’s Whip, causing tick damage and stun respectively and allowing the character to sit on the outskirts of groups of enemies and chip away at their defences. A build that requires versatility and doesn’t rely too heavily on extremely high damage, but instead on escaping difficult scenarios.
The capabilities of this build are still limited as the majority of items are meant for causing damage over time rather than dealing with more tank-like enemies efficiently. The benefits, though, are that this build allows the player to focus more on survival, to allow them to increase the collection of items that may benefit damage yield later in the game. This build is typically capped in the earlier stages of the game but definitely leads to greater chances to win.
What ‘Ghost’ excels in:
- Using both close and ranged combat.
- Weaving between large groups of enemies.
- Surviving at low health.
Try this build if:
- You’re prone to taking heavy damage.
- You prefer high DPS playstyles.
- You accurately use utility skills.
8. The ‘Full Counter’

“I don’t feel successful”
Characters: HAN-D / Enforcer
Items: Meat Nugget, Fire Shield, Barbed Wire, Medkit, Spikestrip, Will-O’-The-Wisp, Tough Times, Frost Relic, Chargefield Generator, Old Box, Repulsion Armor, Scorching Shell Piece
Equipment: Shield Generator
Skills: [HAN-D] HURT, DRONE-HEAL, OVERCLOCK, DISASSEMBLE
[Enforcer] Riot Shotgun, Shield Slam, Protect And Serve, Crowd Control
A bastion of defence, the ‘Full Counter’ is for the players who typically attempt to shrug off damage and keep fighting.
This thorny build allows incoming damage to serve your benefit. Much like the previous build - the ‘Ghost’ - it uses a myriad of items that activate when hit. But it also consists of items that cause damage when in close range, like the Barbed Wire, Frost Relic and Chargefield Generator, and when activating the Frost Relic and Chargefield Generator, there will be a chance to PROC the Will-O’-The-Wisp that explodes dispatched enemies after death - great for those stagnant hordes. The rest are those that benefit you when taking damage as they, as the name of this build alludes to, counter any imminent damage, mainly the Fire Shield to inflict the damage immediately, while the Repulsion Armor and Scorching Shell Piece will return fire when a set amount of damage is taken.
The amount of damage returned is reliant on the amount of stacks of said items. For the Fire Shield, a common item, it will be easier to return greater damage quickly because it is easier to encounter when exploring and returns 400% (+200% per stack) damage when hit. The other items are mainly uncommon and less efficient to stack, but nonetheless worth the effort. Start with Tough Times. This is because it will decrease all incoming damage by 14% (+14 armour per stack), allowing you to proceed without worry of an untimely end. Due to so many items needed being on the rarer side, this build is quite difficult to pull off, but yet very well exploited by the two characters that best soak up damage.
What ‘Full Counter’ excels in:
- Taking damage.
- Returning damage.
- Crowd control.
Try this build if:
- You enjoy playing as tanks.
- You spend the starting levels collecting commons.
- You usually sacrifice mobility for damage.
7. The ‘Demolitionist’

“Into the fray”
Characters: Miner
Items: Fire Shield, Mortar Tube, Backup Magazine, Sticky Bomb, Gasoline, Will-O’-The-Wisp, Concussion Grenade, Panic Mines, Brilliant Behemoth, Fireman’s Boots
Equipment: Dynamite Plunger
Skills: Crush, Drill Dash, Burnout, To The Stars
This explosive build is for those who appreciate the fast-paced, bulk damage builds that catch multiple enemies in an AOE.
The ‘Demolitionist’ is one of the classes that heavily relies on an individual character, namely, the Miner. Due to his self-damage caused by Drill Dash and Burnout, he can PROC both the Fire Shield and the Panic Mines, also capitalising on the Backup Magazines to constantly use Drill Dash, thus repeating this process. The rest of the items are purely offensive and are used to inflict as much damage to large masses of enemies all at once. As soon as one is beaten the on-kill effects have a chance to active, such as the Will-O’-The-Wisp and Gasoline, leading to a cascade effect that will more than likely clear any remaining enemies.
While focusing on quickly clearing bunched-up enemies, this build is great at inflicting AOE damage on multiple targets. However, the build doesn’t shine until one of the enemies has been killed, making it less effective when the average enemy is an elite or a boss type. And while the Mortar, Brilliant Behemoth and Fireman’s Boots are added to this build to increase passive damage it is not enough to keep up with the uptick in more difficult scenarios, paired with the strategy of self-harm to activate the on-hit effect makes this an extremely risky build to use.
What ‘Demolitionist’ excels in:
- Taking damage from enemies and surviving.
- Sudden burst damage.
- Defeating hordes of enemies.
Try this build if:
- You are prone to taking sudden damage.
- You take satisfaction from burst AOEs.
- You can properly use the strategy of self-inflicting damage.
6. The ‘Speed Freak’

“It can only go up from here”
Characters: Huntress
Items: Warbanner, Soldier’s Syringe, Paul’s Goat Hoof, Mocha, Voltaic Mitt, Arcane Blades, Rusty Jetpack, Prison Shackles, Hopoo Feather, Red Whip, Hunter’s Harpoon, Hardlight Afterburner, Burning Witness
Equipment: Carrera Marble
Skills: Strafe, Laser Cyclone, Blink, Cluster Bomb
A pure mobility-based build that focuses solely on utility, and all buffs that support movement speed.
A simple speed-boosting build with no damage increase is surprising at a high point in the list at number six. However, the Speed Freak is mainly a structure build, meaning it is made before building damage after it, like picking up Crowbars and Lens Maker’s Glasses - really anything that ups your base damage. This lack of sizable damage applied by these particular items is exactly why Huntress is the ideal survivor for this build. Huntress has great base damage and excels in kiting, which the Speed Freak compliments greatly. The Warbanner, Soldier’s Syringe and Voltaic Mitt are mainly for offensive purposes, as they provide much-needed damage output, the rest of the items increase manoeuvrability considerably. Hopoo Feathers paired with the Rusty Jetpack keeps Huntress out of danger by giving her the ability to simply jump out of reach, and the Hardlight Afterburner gives her 2 extra charges of her Blink ability to completely leave the enemy behind.
The Speed Freak boosts Huntresses speed from a starting 28 KM/H (with none of the above items) to a staggering 161 KM/H (with one of each item, with one kill to activate the Hunter’s Harpoon and Burning Witness), 210.5 KM/H during the teleporter event due to the Arcane Blades. All this greatly decreases any chances of getting hit by enemies. This build has its downsides, namely the lack of extra damage, but Huntress’ flat damage does encourage survivability even if the items add little to no benefits.
What ‘Speed Freak’ excels in:
- Movement speed.
- Avoiding damage.
- Dealing with regular enemies.
Try this build if:
- High speed and mobility are your preferred playstyles.
- You like kiting enemies with great efficiency.
- You prefer Huntress’ skill set.
5. The ‘One Shot’

“See you on the ground”
Characters: Sniper / Bandit
Items: Lens Maker’s Glasses, Crowbar, Boxing Gloves, Golden Gun, The Ol’ Lopper, Telescopic Sight
Equipment: Gigantic Amethyst
Skills: [Sniper] Snipe, Steady Aim, Heavy Recoil, Spotter: SCAN
[Bandit] Whip, Dynamite Toss, Smokebomb, Lights Out
As the name suggests. This item set is designed to decimate targets in one fell swoop.
With a stack of Crowbars to inflict initial bonus damage to high-health enemies, and conversely, The Ol’ Lopper for ones that might have taken damage elsewhere and not been killed. You will also be provided with other sources of bonus damage through the Boxing Glove, which inflicts an additional 100% damage and the Golden Gun, which increases damage based on how much gold has been collected per stage - this is just for good measure. However, if you can collect the rare Telescopic Sight item there is a 1% chance that you will be able to kill your target in one shot regardless of all of the aforementioned items. However, if these items fail and you don’t get an instant kill, you can reset your cooldowns with the Gigantic Amethyst equipment and try again.
Where this build grants the user incredible quick and significant base damage output in the form of Bandit’s 500% damage in Lights Out and Sniper’s 2000% damage through Steady Aim, the issue with this build is that it is highly chance-based and even though you can do good damage with the items collected, it does rely on the bulk damage meta.
What ‘One Shot’ excels in:
- Quick dispatching of enemies.
- Extremely high damage.
- Boss fights/ Teleporter events.
Try this build if:
- Low DPS and high damage are your preferred playstyles.
- You have unlocked ALL the necessary items and skills.
- You typically avoid incoming damage with just utility skills.
4. The ‘Gatling’

“David vs Colossus”
Characters: Commando / Pilot
Items: Lens Maker’s Glasses, Soldier’s Syringe, Backup Magazine, Mocha, Energy Cell, Predatory Instincts, Heaven Cracker, Wicked Ring, Hyper Threader
Equipment: Shattered Mirror
Skills: [Commando] Double Tap, Full Metal Jacket, Tactical Slide, Suppressive Fire
[Pilot] Rapid Fire, Target Acquired, Rapid Deployment, Aerial Support
An extremely high DPS-based build, purely designed to decimate waves of enemies as they approach.
The items gathered for this build are purely for increasing attack speed and require high stacks of each of them for ever-improving effectiveness. The Soldier’s Syringe, Mocha, Energy Cell and Predatory Instincts are all for increasing flat attack speed, except for Predatory Instincts requiring a critical hit to boost which the Lens Maker’s Glasses provide a higher chance. The Backup Mag is simply for the secondary skill and adds use for each one collected, the secondary skill that Pilot uses relies on multiple stacks for it to create a stream of projectiles.
The benefit to the Gatling build is that it is a continuous stream of bullets that cuts down enemies quickly - up to a total minimum of 60% and a maximum of 80% (x2 when activating the Shattered Mirror). The negative to it is that it doesn’t increase damage by much and will drop off as you progress into more difficult stages. Problems like this can be easily remedied by collecting other items that vastly increase damage, but Lens Maker’s Glasses mostly takes care of that.
What ‘Gatling’ excels in:
- Quickly defeating low-grade enemies.
- Extremely high DPS.
- PROC chance.
Try this build if:
- High DPS and low damage are your preferred playstyle.
- You use your primary ability above all others.
- You, without fail, survive without reliance on defensive items.
3. The ‘Infected’

“Here, piggy… and other piggy”
Characters: Acrid
Items: Sprouting Egg, Rusty Knife, Medkit, The Toxin, Infusion, Dead Man’s Foot, Toxic Centipede, Insecticide, Thallium, Alien Head
Equipment: Sawmerang
Skills: Festering Wounds, Neurotoxin, Caustic Sludge, Epidemic
An inventory of items that causes continuous and steady damage that weakens enemies to complete fragility.
This build focuses on The Toxin and that item’s weakening effect. As a melee class, Acrid activates it instantly when attacking, and then relies on the continuous damage caused by the Rusty Knife, Insecticide and Thallium to tick the target’s health down to minuscule levels, allowing Acrid to deal the final blow with his Epidemic that can spread to other enemies once the original target is dead. Making this a truly potent attack build.
The use of so many contact-based items, as in The Toxin, Dead Man’s Foot and the Toxic Centipede, makes this combination of items lack any defensive capabilities. Albeit strong, this build relies on close contact, which Acrid is capable of, and with skills at his disposal, like Caustic Sludge, can be beneficial. However, with this in mind, these items rely on passive damage, which is not the same as Commando's high DPS or Enforcer’s bulk damage. It requires time spent waiting for the damage to build up. The Toxin and Thallium outshine in this area as they pair amazingly The Toxin weakens enemy defence by 30% and Thallium slows the enemy to provide space to let the damage increase as the game progresses and you focus on surviving.
What ‘Infected’ excels in:
- Progressive damage.
- High PROC chances.
- Enemy weakening.
Try this build if:
- You can juggle large amounts of enemies as they build over time.
- You can filter through large groups of enemies.
- Acrid is your first choice of survivor.
2. The ‘Vampire’

“You gain nothing…”
Characters: Commando / Mercenary
Items: Meat Nugget, Lens Maker’s Glasses, Monster Tooth, Infusion, Leeching Seed, Harvester’s Scythe, Insecticide, Aegis
Equipment: Super Massive Leech
Skills: [Commando] Double Tap, Full Metal Jacket, Tactical Dive, Suppressive Fire
[Mercenary] Laser Sword, Whirlwind, Blinding Assault, Eviscerate
The Vampire syphons health from enemies by whatever means necessary, and in a game where you are constantly on the assault, that is a great ability to have.
This build will keep you alive. It is centred around DPS and health regen. It adds survivability to adequate damage infliction. The combination of the Lens Maker’s Glasses and the Harvester’s Scythe sums this build up perfectly, as the high damage per second PROCs the Lens Maker’s Glasses more often and the Harvester’s Scythe immediately heals the survivor. It’s an incredibly simple yet effective design that is balanced for both attack and defence.
The build requires a high DPS to function, hence the choice of both Commando and Mercenary as the most ideal characters for this build. Not only this, but the aegis adds a shield, much like the Topaz Brooch, that activates once you heal past your maximum health. Although to keep an effective balance of offence and defence, the player needs to consistently increase the amount of healing items to keep up with the ever-increasing health bar due to both levelling up and the Infusion item.
What ‘Vampire’ excels in:
- Health regeneration
- High damage
- Reliable survivability
Try this build if:
- You have more of a versatile playstyle
- You can quickly leave a difficult situation to regroup
- You play high DPS characters
1. The ‘One-Man-Army’

“You and… THAT army”
Characters: Engineer
Items: Fire Shield, Mysterious Vial, Monster Tooth, Soldier’s Syringe, Crowbar, Backup Magazine, Topaz Brooch, Hermit’s Scarf, Gasoline, AtG Missile MK1, Leeching Seed, Guardian’s Heart, Arms Race, Prophet’s Cape, AtG Missile MK2, Alien Head
Equipment: Jar Of Souls / Disposable Missile Launcher
Skills: Mortar Barrage, Bounding Mine, Thermal Harpoon, Auto Turret
With the most items out of any build, this lineup is designed purely to decimate anyone close enough to see.
The One-Man-Army uses not only items that heal, and protect but also items that act as an artillery barrage, such as the twin AtG Missiles as well as the Arms Race item that buffs all owned drones. This build does focus on an aggressive play style, and remember, that with the Engineer the items you collect aren’t just for you but for the Auto Turrets, in that respect all the aforementioned items are essentially tripled.
As the Auto Turrets also use the items that the Engineer uses, the on-hit effects activate three times as often as when they were used for the survivor only. This means that the PROC chance for the AtG Missile items activates much, much, more frequently. The turrets will also have all defensive items such as the Topaz Brooch and the Leeching Seed, and due to their high damage output and equally high DPS, they activate the on-hit and on-kill effects much quicker too. An all-round offensive and defensive build that is sure to keep you alive amongst the vast dangers of Petrichor V.
What ‘One-Man-Army’ excels in:
- Extreme damage return
- Zone defence
- Reliable survivability through aggression
Try this build if:
- You have more of a straightforward playstyle
- You can spend time waiting for skill cooldowns
- You prefer Engineer’s playstyle
If you enjoyed this article, you may also be interested in:
- [Top 15] Risk of Rain Returns Best Items In The Game (Ranked)
- Risk of Rain Returns Best Boss Drops (Ranked)
- [Top 10] Risk of Rains Return Best Characters
- Log in or register to post comments
 Home
Home PC Game Trailers
 News
News Menu
Menu







![[Top 10] Demon Slayer Best Characters We Love [Top 10] Demon Slayer Best Characters We Love](https://www.gamersdecide.com/sites/default/files/styles/308x185-scale-crop--more-top-stories/public/jacob-noble-img-1477-01.jpg)











![[Top 15] Nickelodeon Best Characters (Ranked) [Top 15] Nickelodeon Best Characters (Ranked)](https://www.gamersdecide.com/sites/default/files/styles/308x185-scale-crop--more-top-stories/public/nickelodeon_characters_main.jpg)
![[Top 15] Cartoon Network Best Characters [Top 15] Cartoon Network Best Characters](https://www.gamersdecide.com/sites/default/files/styles/308x185-scale-crop--more-top-stories/public/cartoon_network_characters_main.jpg)
