
1. Who is Dehya?
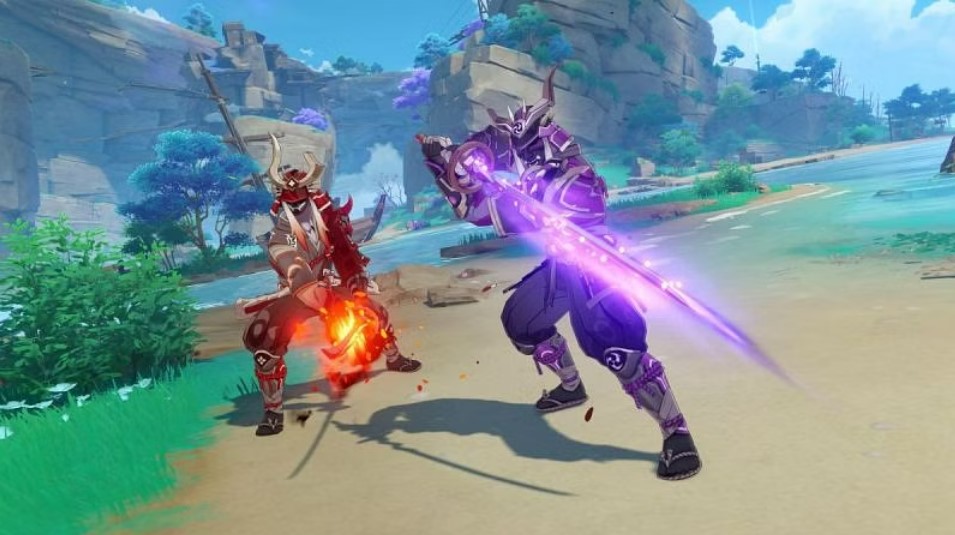
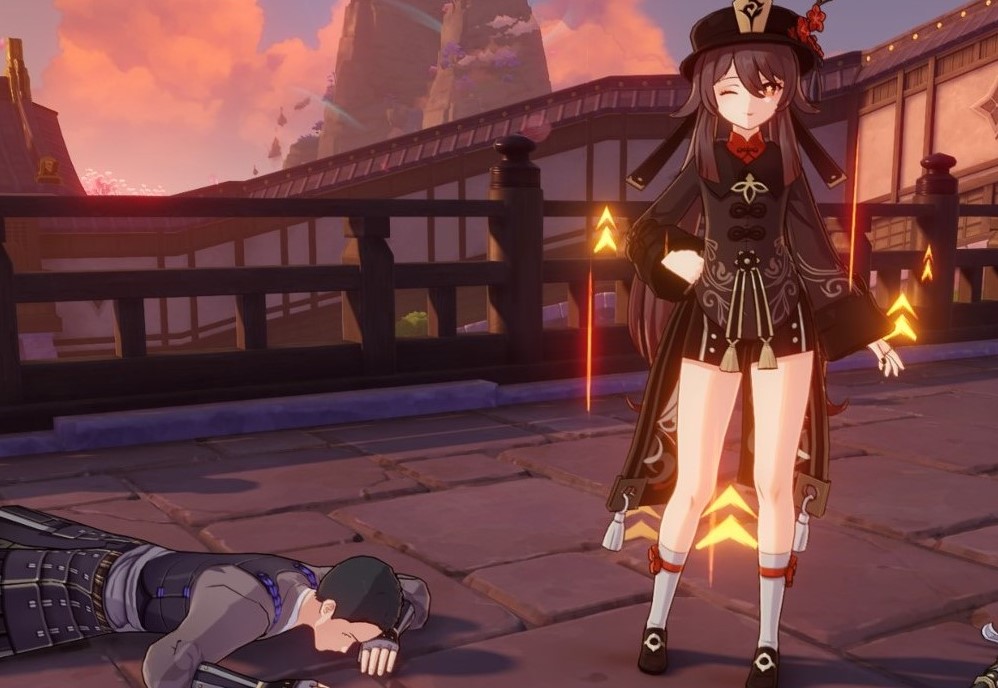
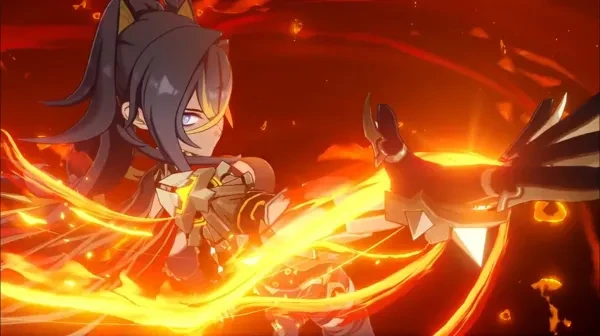
Dehya is the premier mercenary of the Eremites of Sumeru. While being well liked as a character, playing multiple critical roles within the Sumeru main story line, and often considered to be a well designed character looks-wise, her utility on the other hand has been a source of much ridicule within the Genshin community since her release, with many tier lists (both professional and amateur, and I have seen and been both), usually rank her anywhere from the mid to bottom tiers. Now, to be fair, part of the reason for this is that Dehya oftentimes gets used in incorrect roles, as many players play her as a DPS, when she is better as Sub DPS, and even better as Support. So, let’s take a look shall we.
2. Key Strengths of Dehya
- High Health: She has the highest base HP numbers of any character in the game. This means that she has a larger margin of error for things such as shielding and healing.
- Damage mitigation done in a unique way: She is very resistant to enemy interruptions, and her burst when triggered won’t be stopped through things such as enemy attacks. This gives her a rather unique form of damage mitigation compared to others.
- Off-field Pyro: Her elemental skill places an area in which attacks are infused with pyro. Furthermore, these can be repositioned easily, allowing a great deal of flexibility. You can place it down, and switch to other characters to keep up the fight. This also means that this grants players a lot of flexibility for whether to use her for on-field, off-field, or in hybrid roles.
- Great for exploration: Her passive adventuring skill is increased movement speed of party members by 10% during sunlight hours (6:00-18:00/6:00 p.m.), and her second passive talent is that should she fall beneath 40% of her health, she will recover 20% of her Max HP and will restore 6% of her Max HP every 2s for the next 10s, which can be triggered every 20 seconds. This makes her ideal for adventuring in areas where DMG might slowly be applied over time, particularly the Dragonspine subregion, where the cold deals slow DMG overtime unless near pyro.
- Self Sustaining: Like what was mentioned before, her second passive skill lets her naturally accrue health back. Between that skill, her high natural HP base, and her burst being interruption resistant, she has more wiggle room of activity, before she would need to be taken off the field. It should be noted that she is more self-sustaining, but not completely self sustaining. The longer a fight goes on, the more she would need a healer. That said, she does have a bit more wiggle room than most. (that said, a lot of these team builds, will have her run with a healer)
- Surprising amount of team flexibility: Due to both her self-sustain and her elemental skills and burst, this means that she has a surprising amount of team build options, especially for ones that involve elemental reactions in which constant application of pyro might be needed, like burn or overcharge builds. While she might not fit every single team, she can fit into a surprising amount of builds.
- Surprisingly easy to access (depending on player choice): She is available on the standard banner which is always available. Wishes for the standard banner are given both when leveling up characters, as well as coming for free with the battlepasses. So depending on how frequently players are willing to roll on the standard banner, this could mean the difference between building her up with more constellations or not. This could be a pro or con, but should be worth considering (hence the the whole “Depending on player choice” part)
- She looks cool: Subjective? Yes. But between her character design, her personality, and her burst, I personally think she looks cool. (It's the small things in life)
3. Melt-Build
What this team does:
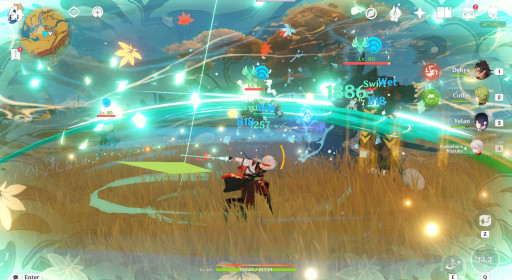
This team focuses on dealing damage through the usage of melting. Here, Dehya plays the dual roles of Sub DPS and support (depending on who the other characters are), with a cryo character such as Ayaka or Ganyu taking the mantle of DPS.
- Dehya takes the role of either Sub DPS or support, depending on how the rest of the team is built.
- A Cryo character will take the form of DPS.
- The ideal Cryo DPS characters are;
- Ayaka through her burst.
- Ganyu through both her burst and charged attacks.
- Should be noted that here, we are listing the ideal, if you don’t have Ayaka or Ganyu, don’t be afraid to use other Cryo characters that you do have.
- The ideal Cryo DPS characters are;
- Bennett takes on the role of a healer support, as well as buffing.
- The last slot has several options.
- Nahida as a Sub DPS.
- Though, theoretically, you could use any dendro character to help facilitate burning.
- Kazuha or other Anemo characters fill in the role of support.
- Nahida as a Sub DPS.
- Dehya uses her elemental skill, applying off-field pyro damage.
- If you choose to use a dendro character (see Nahida), apply Dendro as well. This will keep the burning status applied to enemies, as well as help the Pyro DMG deal more DMG.
- Likewise, if you instead choose an Anemo character, you could use their bursts and/or skills to help spread the burning status.
- Finally, the Cryo DPS will deal Cryo DMG to the burning enemies, maximizing the DMG by invoking melt.
Advantages of this build
This team is well designed to take out enemies, in particular, bosses, especially terrestrial bosses (please don’t try this with Stormterror). The electro hypostasis could be one that this would work well with.
- Maximizes Damage: this build is very good with maximizing damage. Between burning, melting, as well as potentially swirl, there will almost always be some form of elemental damage being dealt.
- Stagger resistant (especially important if you go the Ganyu route): Because of Dehya’s higher resistance to interruptions, this means fewer interruptions for other characters as well. This is especially important for Ganyu, as her charged attacks usually mean she has to focus down on enemies. If you decide to use a dendro archer like Collei or Tighnari, they would also probably appreciate the resistance as well.
- Flexible: This team, while largely considered to be best done with Ganyu (to the point where many guides will outright call it a Ganyu team) there is a shocking amount of flexibility. So long as Dehya is there, and some form of Cryo DPS, then you’re in the clear, with the main differentiation being either longer burns (via a Dendro Sub DPS) or a wider burn (via an Anemo support).
The Specifics of the build:
- Dehya (5 star claymore)
- Role: Sub DPS or Support (for this one, we will show the build of a support)
- Talent priority: Elemental Skill>Elemental Burst>Normal Attack
- Weapons: Portable Power Saw>Wolf's Gravestone>Favonius Greatsword
- Artifacts: Tenacity of the Millelith (4)
- Sands: HP%
- Goblet: HP% or Pyro Damage Bonus
- Circlet: HP% CRIT Rate/DMG
- Substats: Energy Recharge, HP%, CRIT Rate, CRIT DMG, Elemental Mastery, ATK%,
- Ideal Constellation: C0 is enough, but C4 isn’t a bad option either
- Ganyu (5 star bow)
- Role: DPS
- Talent priority: Normal Attack>Elemental Burst>Elemental Skill
- Weapons: Hunter’s Path> Aqua Simulacra>Prototype Crescent
- Artifacts: Shimenawa's Reminiscence (4)
- Sand: ATK%
- Goblet: Cryo DMG
- Circlet: CRIT RATE or CRIT DMG
- Substats: CRIT DMG/CRIT RATE, Elemental Mastery, ATK%
- Ideal Constellation: C1, at least for a melt build
- Ayaka (5 star sword)
- Role: DPS
- Talent Priority: Elemental Burst>Normal Attack>Elemental Skill
- Weapon: Mistsplitter reforged>Haran Geppaku Futsu>The Black Sword
- Artifacts: Blizzard Strayer (4)
- Sand: ATK%
- Goblet: Cryo DMG Bonus
- Circlet: CRIT DMG
- Substats: CRIT DMG, Energy Recharge, ATK%, CRIT Rate
- Ideal Constellation: C0 is good enough, but C4 doesn’t hurt either
- Nahida (5 star catalyst)
- Role: Sub DPS
- Talent Priority: Elemental Skill>Elemental Burst>Normal Attack
- Weapon: A Thousand Floating Dreams>Sacrificial Fragments>Magic Guide
- Artifacts: Deepwood Memories (4)
- Sands: Elemental Mastery
- Goblet: Elemental Mastery or Dendro Damage Bonus
- Circlet: Elemental Mastery or CRIT Rate/DMG
- Substats: Elemental Mastery, CRIT Rate, CRIT DMG, Energy Recharge
- Elemental Mastery should ideally be around 800 to 1000, but after 1000, start investing into CRIT
- Ideal Constellation: C2, as it allows Dendro reactions to crit, which is crucial for this build to maximize DPS
- Kazuha (5 star sword)
- Role: Support
- Talent priority: Elemental Burst> Elemental Skill>Normal Attack
- Weapons: Freedom sworn>Xiphos Moonlight>Iron sting
- Artifacts: Viridescent Venerer (4)
- Sand: Mastery
- Goblet: Mastery
- Circlet: Mastery
- Substats: Elemental Mastery, CRIT DMG, CRIT RATE, ATK%
- Ideal Constellation: C2
- Bennett (4 star sword)
- Role: Support/healer
- Talent priority:Elemental Burst>Elemental Skill>Normal Attack
- Weapon: Skyward blade>Favonius sword>Sapwood Blade
- Artifacts: Noblesse Oblige (4)
- Sand: HP%
- Goblet: HP%
- Circlet:HP%
- Substats: HP%,HP, Energy Recharge
- Ideal constellation: C1
4. Mono/Pure Pyro build
What this team does:
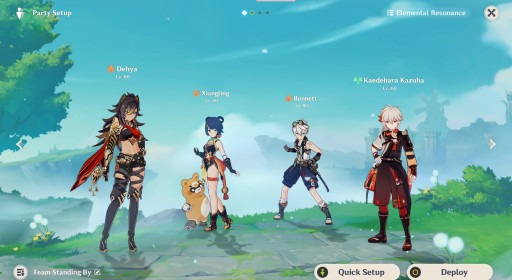
This is a team that almost exclusively relies on Pyro damage, and is distinct in that this team is one in which Dehya is the main DPS, and is unusually flexible, with multiple different iterations and versions, with even different names, of either a Mono Pyro team or as a Pure Pyro team, but the basic make up is the same. Dehya as DPS, Bennett as Support, and one Pyro and one Anemo character to fill in as a Sub DPS, or as a second support or Sub DPS.
- Dehya takes on the role of DPS.
- Bennett takes on the role of a healer support.
- A Pyro Sub DPS is up next, with multiple options, including but not limited to;
- Xiangling
- Yanfei
- Klee
- Hu Tao
- Yoimiya
- Klee, Hu Tao and Yoimiya can be chosen if you choose to have Dehya take on the role of a more off-field DPS.
- There is a version that exists in which you use Furina or Nahida as a Sub DPS for this team, but we will be focusing on Pyro characters, and more specifically, Xiangling.
- Some form of Anemo character will take the role of either a second Sub DPS, or more likely, as a support. Common options include;
- Kazuha
- Sucrose
- Venti
- For this build, we will look at Kazuha (the more recommended one) and Sucrose (the most common free to play option).
- Dehya damage via her burst is used, with both Bennett and your chosen Anemo character helping to buff and magnify the damage through their bursts.
- Xiangling helps provide Pyro Damage when Dehya is off-field, and can help act as a battery of sorts.
Advantages of this Build
This team is built around ensuring Dehya's fire power (both metaphorically and literally) gets so many buffs, that Bennett can conceivably go up a tax bracket with his overtime. This is really good if you are fighting enemies that will naturally have status on them that will react with Pyro. The Cryo Regisvine and Manguu Kenki come to mind.
- MORE DAKKA PYRO: This team is built around generating as many Pyro particles as possible, and with an Anemo character there to spread the burn around, enemies will quickly find themselves resembling the average Southern barbecue… smoked.
- Flexible: This build is extremely flexible, with multiple different versions and options. We can only focus on one version, but if you don’t have those characters, then you can easily find substitutes.
- Accessible/Free-to-play friendly: Again, aside from Dehya, you don’t really need a lot of 5 stars, although Kazuha is a highly recommended option. This means that this can be a really good option for those who want a cheap and easy build to create. Not to mention, many of the characters are comparatively easy to obtain (at least in comparison to say Arlechino).
The Specifics of the build:
- Dehya (5 star claymore)
- Role: DPS
- Talent priority: Elemental Skill>Elemental Burst>Normal Attack
- Weapons: Beacon of the Reed Sea>Wolf's Gravestone>Serpent Spine
- Artifacts: Vourukasha's Glow (4)
- Sands: ATK% or Elemental Mastery
- Goblet: Pyro Damage Bonus
- Circlet: CRIT Rate/DMG
- Substats: Energy Recharge, CRIT Rate, CRIT DMG, Elemental Mastery, ATK%, HP%
- Ideal Constellation: C0 is enough, but C4 isn’t a bad option either
- Bennett (4 star sword)
- Role: Support/healer
- Talent priority:Elemental Burst>Elemental Skill>Normal Attack
- Weapon: Skyward blade>Favonius sword>Sapwood Blade
- Artifacts: Noblesse Oblige (4)
- Sand: HP%
- Goblet: HP%
- Circlet:HP%
- Substats: HP%,HP, Energy Recharge
- Ideal constellation: C1
- Kazuha (5 star sword)
- Role: Support
- Talent priority: Elemental Burst> Elemental Skill>Normal Attack
- Weapons: Freedom sworn>Xiphos Moonlight>Iron sting
- Artifacts: Viridescent Venerer (4)
- Sand: Mastery
- Goblet: Mastery
- Circlet: Mastery
- Substats: Elemental Mastery, CRIT DMG, CRIT RATE, ATK%
- Ideal Constellation: C2
- Sucrose (4 star catalyst)
- Role: Support
- Talent Priority: Elemental Skill>Elemental Burst>Normal Attack
- Weapons: Thrilling Tales of Dragon Slayers>A Thousand Floating Dreams>Sacrificial Fragments
- Artifacts: Viridescent Venerer (4)
- Sand: Elemental Mastery
- Goblet: Elemental Mastery
- Circlet: Elemental Mastery
- Substats: Energy Recharge, Elemental Mastery, CRIT Rate, CRIT DMG
- Ideal Constellation: C1, which helps with energy recovery
- Xiangling (4 star polearm)
- Role: Sub DPS
- Talent Priority: Elemental Burst>Elemental Skill>Normal Attack
- Weapons: Staff of the Scarlet Sands>Staff of Homa>The Catch
- Artifacts: Emblem of Severed Fate (4)
- Sands: ATK%
- Goblet: Pyro DMG Bonus
- Circlet: CRIT Rate or CRIT DMG
- Substats: Energy Recharge, CRIT DMG, CRIT Rate, ATK%, Elemental Mastery
- Ideal Constellation: C4
5. Vaporize Builds (and their many variants)
What this team does:
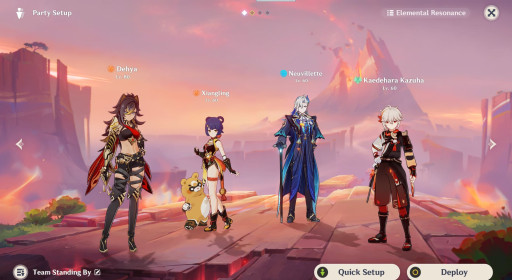
This team has multiple versions, but the idea is that Dehya acts as a support, where her skill will help apply the Pyro which when combined with Hydro, inflicts the vaporize status. Some versions will have a Hydro DPS, though some forms due have a Pyro DPS, with a Hydo Sub DPS and Support. Furthermore, some versions call for either an Anemo support, or a Dendro support. The crucial detail is that the main form of damage dealt is through vaporize.
- Dehya takes the role of support, though some forms will have her play Sub DPS
- A Hydro DPS is preferable.
- Neuvillette
- Mualani
- That said, some forms exist where a Pyro character, usually Hu Tao, takes DPS. However, for this build, we will look at Hydro DPS characters.
- For Sub DPS, multiple options are available.
- Dendro
- Emilie
- Pyro
- Xiangling
- Hydro
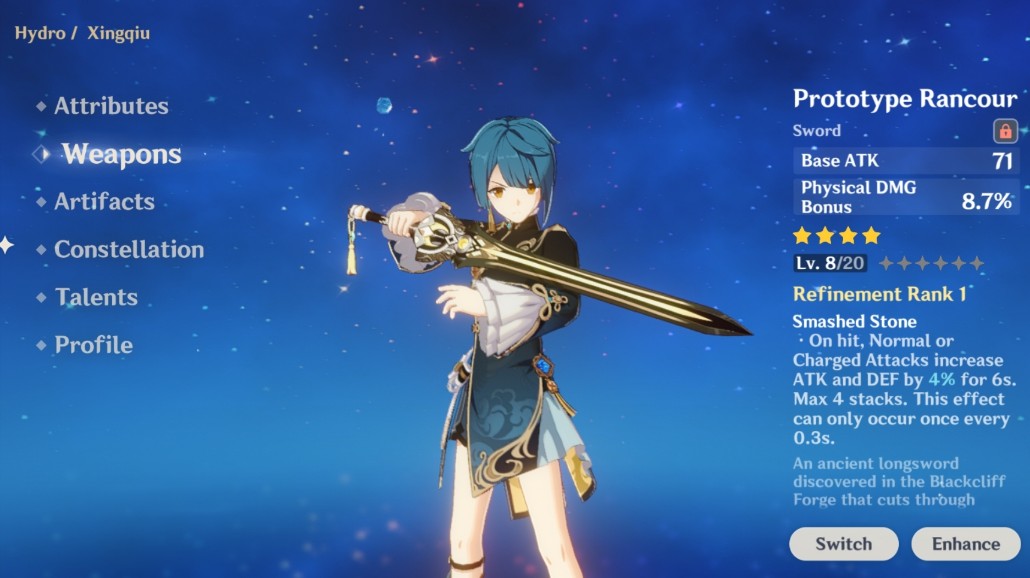
- Xingqiu
- Dendro
- Finally, for support, Anemo or Hydro are recommended.
- Yelan
- Kazuha
- Dehya uses her elemental skill, applying off-field pyro.
- Xiangling can also apply Pyro off-field.
- If Emilie is chosen, her elemental skill and burst can help sustain burn longer.
- Hydro DPS is chosen, then Hydro is applied to any burning foes, invoking vaporize.
- If a Pyro DPS is chosen, then Hydro Sub DPS or Supports apply the hydro for vaporize.
- If Kazuha is chosen, then his elemental burst and skill helps to spread both the Burn and Wet statuses, and increases the likelihood that vaporize occurs.
Advantages of this build
This team is again well suited for bosses, like the electro hypostasis, but could also be really good for fighting larger groups, such as in abyss runs.
- Flexible: As you can see by the fact that there are multiple versions of this build, this gives players a lot of leeway.
- Crowd control: While this does depend on which characters, if you choose to build with characters like Yelan, Neuvillette, or Kazuha, then you can easily take out broader groups of enemies. Not to mention, since Dehya is interruption resistant, this means that it can also be easier to get your enemies into position to get wiped out.
- Straight forward: Get a Dehya, get some sort of Hydro character, and some characters to help buff or spread the reactions, and then sic em on someone. The complexity comes from choice, but the actual mechanics are pretty simple once you put it all in a nutshell (albeit a nutshell that is the Genshin equivalent of a small tactical SWAT team).
The Specifics of the build:
- Dehya (5 star claymore)
- Role: Support
- Talent priority: Elemental Skill>Elemental Burst>Normal Attack
- Weapons: Portable Power Saw>Wolf's Gravestone>Favonius Greatsword
- Artifacts: Tenacity of the Millelith (4)
- Sands: HP%
- Goblet: HP% or Pyro Damage Bonus
- Circlet: HP% CRIT Rate/DMG
- Substats: Energy Recharge, HP%, CRIT Rate, CRIT DMG, Elemental Mastery, ATK%,
- Ideal Constellation: C0 is enough, but C4 doesn’t hurt either
- Neuvillette (5 star catalyst)
- Role: DPS
- Talent priority: Normal Attack>Elemental Skill>Elemental Burst
- Weapons: Tome of the Eternal Flow>Sacrificial Jade>Lost Prayer to the Sacred Winds
- Artifacts: Marechaussee Hunter (4) OR Wanderer's Troupe (4)
- Both are equally good, but Wanderer’s Troupe is often the recommended one if you wish to have Neuvillette’s damage be mostly dealt via reactions, and thus the one we will be looking at.
- Sands: HP%
- Goblet: Hydro DMG Bonus or HP%
- Circlet: CRIT Rate/DMG
- Substats: HP%, CRIT Rate, CRIT DMG, Energy Recharge, Elemental Mastery
- Ideal Constellation: C1
- Mualani (5 star catalyst)
- Role: DPS
- Talent priority: Elemental Skill>Elemental Burst>Normal Attack
- Weapons: Surf’s Up>Sacrificial Jade>Ring of Yaxche
- Artifacts: Obsidian Codex (4) OR Heart of Depth (4)
- Sands: HP% or Elemental Mastery
- Goblet: Hydro DMG Bonus or HP%
- Circlet: CRIT DMG
- Substats: CRIT DMG, HP%, Elemental Mastery, CRIT Rate, Energy Recharge
- Ideal Constellation: C2
- Xiangling (4 star polearm)
- Role: Sub DPS
- Talent Priority: Elemental Burst>Elemental Skill>Normal Attack
- Weapons: Staff of the Scarlet Sands>Staff of Homa>The Catch
- Artifacts: Emblem of Severed Fate (4)
- Sands: ATK%
- Goblet: Pyro DMG Bonus
- Circlet: CRIT Rate or CRIT DMG
- Substats: Energy Recharge, CRIT DMG, CRIT Rate, ATK%, Elemental Mastery
- Ideal Constellation: C4
- Xingqiu (4 star sword)
- Main Role: Sub DPS
- Talent priority: Elemental Burst> Elemental Skill>Normal Attack
- Weapons: Sacrificial sword>Primordial Jade cutter>Fleuve Cendre Ferryman
- Artifacts: Noblesse oblige (4)
- Sand: ATK%
- Goblet: Hydro DMG
- Circlet: CRIT DMG
- Substats: Elemental Mastery, CRIT DMG, CRIT RATE, ATK%
- Ideal Constellation: C6
- Emilie (5 star polearm)
- Role: Sub DPS
- Talent priority: Elemental Skill>Elemental Burst>Normal Attack
- Weapons: Lumidouce Elegy>Calamity Queller>Deathmatch
- Artifacts: Deepwood Memories (4)
- Sands: ATK%
- Goblet: Dendro DMG Bonus
- Circlet: CRIT Rate or CRIT DMG
- Substats: ATK%, CRIT Rate, CRIT DMG, Energy Recharge
- Ideal Constellation: C1, due to an outright 20% increase to DMG, but C2 wouldn’t hurt
- Kazuha (5 star sword)
- Role: Support
- Talent priority: Elemental Burst> Elemental Skill>Normal Attack
- Weapons: Freedom sworn>Xiphos Moonlight>Iron sting
- Artifacts: Viridescent Venerer (4)
- Sand: Mastery
- Goblet: Mastery
- Circlet: Mastery
- Substats: Elemental Mastery, CRIT DMG, CRIT RATE, ATK%
- Ideal Constellation: C2
- Yelan (5 star bow)
- Role: Support as energy generation (so she will be built like a DPS)
- Talent priority: Elemental Burst>Elemental Skill>Normal Attack
- Weapons: Aqua Simulacra>Elegy for the End>Favonius Warbow
- Artifacts: Emblem of Severed Fate (4)
- Sands: HP% or Energy Recharge
- Ideally around 170-200% Energy Recharge.
- Goblet: Hydro DMG Bonus
- Circlet: CRIT Rate or CRIT DMG
- Substats: Energy Recharge, HP%, CRIT Rate or CRIT DMG
- Sands: HP% or Energy Recharge
- Ideal Constellation: C1
6. (Hyper)Burgeon Builds
What this team does:
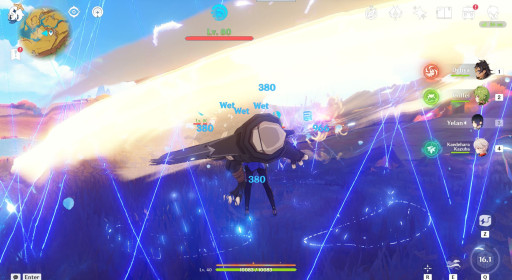
For those who are not aware, Burgeon is the reaction that occurs when bloom and burning meet. Or to put it as an equation; Hydro/Dendro + Dendro/Hydro + Pyro = Burgeon. These teams are built around Dehya being a support, applying off field Pyro, while a Dendro or Hydro DPS takes the center stage, supported by a second Sub DPS that is of either Dendro or Hydro. The final support is usually a Hydro character. Some versions will swap out the second Hydro to add in an Electro support to trigger Hyperbloom, which can multiply the damage of Burgeon.
- Dehya takes the role of support.
- Main DPS is usually taken by a Dendro character, though some versions may choose to use a Hydro character instead.
- Nahida (Dendro)
- Kinich (Dendro)
- Ayato (Hydro)
- Sub DPS can be taken by either a Hydro character or a Dendro character, and if you choose to go the Hyperburgeon route, then Electro would be in this slot.
- Xingqiu
- Nahida (again)
- Raiden Shogun
- Kuki Shinobu
- The final Support is almost always going to be Hydro.
- Kokomi
- Yelan
- Barbara
- Dendro or Hydro is applied to enemies, then the opposite is applied to create the Bloom reaction.
- This will trigger the production of Dendro cores.
- If you choose to go the Hyper route, apply Electro to trigger Hyperbloom.
- Finally, apply Dehya’s elemental skill, which will then apply Pyro to the Dendro cores, which explode, dealing DMG.
Advantages of this build
This build is a very solid all-rounder, and while there might be better options, this one is useful for both facing larger groups of enemies like in abyss runs, or against bosses such as Manguu Kenki.
- Flexible: As you may have noticed, there is a fair amount of flexibility available, and that's not including the fact that with the choice of adding Electro, you can supercharge your attacks.
- Powerful: Through the usage of the various elemental reactions, this team could punch well above the weight class of many foes.
- Surprisingly accessible: Again, due to the flexibility of this build, it also makes it somewhat accessible, with both 5 star and 4 star characters being able to be used. What is presented here is merely the ideals, but you could use a Dendro traveler if you don’t have any other Dendro characters.
The Specifics of the build:
- Dehya (5 star claymore)
- Role: Support
- Talent priority: Elemental Skill>Elemental Burst>Normal Attack
- Weapons: Portable Power Saw>Wolf's Gravestone>Favonius Greatsword
- Artifacts: Tenacity of the Millelith (4)
- Sands: HP%
- Goblet: HP% or Pyro Damage Bonus
- Circlet: HP% CRIT Rate/DMG
- Substats: Energy Recharge, HP%, CRIT Rate, CRIT DMG, Elemental Mastery, ATK%,
- Ideal Constellation: C0 is enough, but C4 doesn’t hurt either
- Nahida (5 star catalyst)
- Role: DPS or Sub DPS (we will be looking at her DPS build
- Talent priority: Normal Attack>Elemental Skill>Elemental Burst
- Weapon: A Thousand Floating Dreams>Kagura's Verity>Lost Prayer to the Sacred Winds
- Artifacts: Deepwood Memories (4)
- Sands: Elemental Mastery
- Goblet: Dendro Damage Bonus
- Circlet: CRIT Rate or CRIT DMG
- Substats: CRIT Rate, CRIT DMG, Elemental Mastery, Energy Recharge
- Ideal Constellation: C2, as it allows Dendro reactions to crit, which is crucial for this build to maximize DPS
- Kinich (5 star claymore)
- Role: DPS
- Talent priority: Elemental Skill>Elemental Burst>Normal Attack
- Weapon: Fang of the Mountain King>Beacon of the Reed Sea>Serpent Spine
- Artifacts: Obsidian Codex (4) OR Unfinished Reverie (4)
- Sands: ATK%
- Goblet: Dendro DMG Bonus
- Circlet: CRIT Rate or CRIT DMG
- Substats: CRIT DMG, CRIT Rate, ATK%, Energy Recharge, Elemental Mastery
- Ideal Constellation: C2
- Ayato (5 star sword)
- Role: DPS
- Talent priority: Elemental Skill>Elemental Burst>Normal Attack
- Weapons: Haran Geppaku Futsu>Mistsplitter Reforged>Primordial Jade Cutter
- Artifacts: Heart of Depth (4)
- Sands: ATK%
- Goblet: Hydro DMG Bonus
- Circlet: CRIT Rate or CRIT DMG
- Substats: Energy Recharge, CRIT Rate, CRIT DMG, ATK%, HP%
- Ideal constellation: C0, but C2 is fine as well
- Kuki Shinobu (4 star sword)
- Role: Sub DPS
- Talent priority: Elemental Skill>Elemental Burst>Normal Attack
- Weapons: Freedom-Sworn>Xiphos' Moonlight>Iron Sting
- Artifacts: Flower of Paradise Lost (4)
- Sands: Elemental Mastery
- Goblet: Elemental Mastery
- Circlet: Elemental Mastery
- Substats: Elemental Mastery, HP%, Energy Recharge
- Ideal constellation: C4
- Raiden Shogun (5 star polearm)
- Role: Sub DPS
- Talent priority: Elemental Skill>Elemental Burst>Normal Attack
- Weapons: Dragon's Bane>Kitain Cross Spear>Ballad of the Fjords
- Artifacts: Flower of Paradise Lost (4) OR Gilded Dreams (4)
- Sands: Elemental Mastery
- Goblet: Elemental Mastery
- Circlet: Elemental Mastery
- Substats: Elemental Mastery, Energy Recharge
- Ideal Constellation: C2
- Xingqiu (4 star sword)
- Main Role: Sub DPS
- Talent priority: Elemental Burst> Elemental Skill>Normal Attack
- Weapons: Sacrificial sword>Primordial Jade cutter>Fleuve Cendre Ferryman
- Artifacts: Noblesse oblige (4)
- Sand: ATK%
- Goblet: Hydro DMG
- Circlet: CRIT DMG
- Substats: Elemental Mastery, CRIT DMG, CRIT RATE, ATK%
- Ideal Constellation: C6
- Yelan (5 star bow)
- Role: Support as energy generation (so she will be built like a DPS)
- Talent priority: Elemental Burst>Elemental Skill>Normal Attack
- Weapons: Aqua Simulacra>Elegy for the End>Favonius Warbow
- Artifacts: Emblem of Severed Fate (4)
- Sands: HP% or Energy Recharge
- Ideally around 170-200% Energy Recharge.
- Goblet: Hydro DMG Bonus
- Circlet: CRIT Rate or CRIT DMG
- Substats: Energy Recharge, HP%, CRIT Rate or CRIT DMG
- Sands: HP% or Energy Recharge
- Ideal Constellation: C1
- Kokomi (5 star catalyst)
- Role: Support/healer
- Talent priority: Elemental Skill>Elemental Burst>Normal Attack
- Weapons: Thrilling Tales of Dragon Slayers>Everlasting Moonglow>Prototype Amber
- Artifacts: Tenacity of the Millelith (4)
- Sands: HP% or Energy Recharge
- Goblet: HP%
- Circlet: Healing Bonus
- Substats: HP%, Energy Recharge, Elemental Mastery
- Ideal Constellation: C1 is enough, C4 doesn’t hurt either
- Barbara (4 star catalyst)
- Role: Support/healer
- Talent priority: Elemental Skill>Elemental Burst>Normal Attack
- Weapons: Thrilling Tales of Dragon Slayers>Everlasting Moonglow>Prototype Amber
- Artifacts: Ocean-Hued Clam (4) OR Maiden Beloved (4)
- Sands: HP%
- Goblet: HP%
- Circlet: HP% or Healing Bonus
- Substats: HP%
- Ideal constellation: C6
7. Burn Build
What this team does:
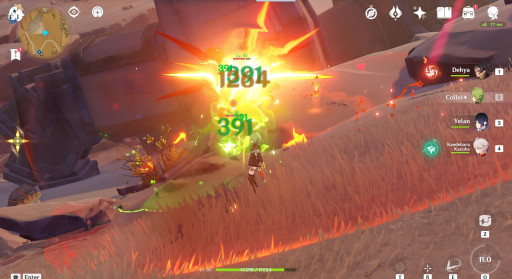
While burn builds have existed since the addition of Dendro characters, the addition of Emilie to the game has made a Dehya-based Burn build competitive and viable. In essence, Dehya takes the role of DPS, while a Dendro character (more likely than not Nahida or Emilie) takes the role of Sub DPS. Bennett, takes the role of the ever reliant support, with the final slot open to many choices for a secondary Sub DPS. Options may include an Anemo character, a Pyro character, or another Dendro character. Some versions of this team will have three Dendro characters, with Dehya being the sole exception. This team is reliant on applying Dendro DMG, and then creating the burn reaction through Dehya’s skill and burst.
- Dehya takes a DPS role, as it’s her Pyro DMG via her burst and skill that will provide most of the reaction for burn.
- Your first Sub DPS should be some form of Dendro character.
- Emilie is the ideal, especially because she is particularly well geared towards Burn builds.
- Nahida is a solid alternative choice.
- Kinich also is a strong choice as well.
- Bennett fills a support role.
- The final slot should go to either a second Sub DPS, or a second Support.
- Options include:
- Xiangling (Sub DPS)
- Kazuha (Sub DPS/Support)
- Baizhu (Support/healer)
- Collei (Sub DPS) if you are on a budget
- Options include:
- Apply Dendro to enemies, then slap down Dehya’s elemental skill, and watch the fireworks.
- An Anemo support will help clump up enemies, as well as induce swirl, helping to spread the damage.
Advantages of the Build:
This build is well suited and ideal for boss fights such as the Electro Regisvine. This build is also really well suited for abyss runs, in fact I would recommend this build for Abyss runs.
- Straight forward (read; easy): Apply Dendro, apply any relevant buffs, apply Dehya’s skill, done. This is shockingly smooth to run, even if you don’t have all the ideal characters aside from Dehya.
- Flexible and accessible: Again, like what was already said, this is pretty straight forward, and if you have Dendro characters with AoE bursts, they can easily do well. That said, Emilie is the ideal, as she is essentially a Dendro version of Dehya.
- Hits like a bus fueled with rocket propellant: Due to the burn reaction, plus any buffs added will deal massive damage. Add in properly built characters, then your team can hit well above its weight class.
The Specifics of the build:
- Dehya (5 star claymore)
- Role: DPS
- Talent priority: Elemental Skill>Elemental Burst>Normal Attack
- Weapons: Beacon of the Reed Sea>Wolf's Gravestone>Serpent Spine
- Artifacts: Vourukasha's Glow (4)
- Sands: ATK% or Elemental Mastery
- Goblet: Pyro Damage Bonus
- Circlet: CRIT Rate/DMG
- Substats: Energy Recharge, CRIT Rate, CRIT DMG, Elemental Mastery, ATK%, HP%
- Ideal Constellation: C0 is enough, but C4 isn’t a bad option either
- Emilie (5 star polearm)
- Role: Sub DPS
- Talent priority: Elemental Skill>Elemental Burst>Normal Attack
- Weapons: Lumidouce Elegy>Calamity Queller>Deathmatch
- Artifacts: Deepwood Memories (4)
- Sands: ATK%
- Goblet: Dendro DMG Bonus
- Circlet: CRIT Rate or CRIT DMG
- Substats: ATK%, CRIT Rate, CRIT DMG, Energy Recharge
- Ideal Constellation: C1, due to an outright 20% increase to DMG, but C2 wouldn’t hurt
- Nahida (5 star catalyst)
- Role: Sub DPS
- Talent Priority: Elemental Skill>Elemental Burst>Normal Attack
- Weapon: A Thousand Floating Dreams>Sacrificial Fragments>Magic Guide
- Artifacts: Deepwood Memories (4)
- Sands: Elemental Mastery
- Goblet: Elemental Mastery or Dendro Damage Bonus
- Circlet: Elemental Mastery or CRIT Rate/DMG
- Substats: Elemental Mastery, CRIT Rate, CRIT DMG, Energy Recharge
- Elemental Mastery should ideally be around 800 to 1000, but after 1000, start investing into CRIT
- Ideal Constellation: C2, as it allows Dendro reactions to crit, which can and will be appreciated
- Kinich (5 star claymore)
- Role: Sub DPS
- Talent priority: Elemental Skill>Elemental Burst>Normal Attack
- Weapon: Fang of the Mountain King>Beacon of the Reed Sea>Serpent Spine
- Artifacts: Obsidian Codex (4) OR Unfinished Reverie (4)
- Sands: ATK%
- Goblet: Dendro DMG Bonus
- Circlet: CRIT Rate or CRIT DMG
- Substats: CRIT DMG, CRIT Rate, ATK%, Energy Recharge, Elemental Mastery
- Ideal Constellation: C2
- Bennett (4 star sword)
- Role: Support/healer
- Talent priority:Elemental Burst>Elemental Skill>Normal Attack
- Weapon: Skyward blade>Favonius sword>Sapwood Blade
- Artifacts: Noblesse Oblige (4)
- Sand: HP%
- Goblet: HP%
- Circlet:HP%
- Substats: HP%,HP, Energy Recharge
- Ideal constellation: C1
- Xiangling (4 star polearm)
- Role: Sub DPS
- Talent Priority: Elemental Burst>Elemental Skill>Normal Attack
- Weapons: Staff of the Scarlet Sands>Staff of Homa>The Catch
- Artifacts: Emblem of Severed Fate (4)
- Sands: ATK%
- Goblet: Pyro DMG Bonus
- Circlet: CRIT Rate or CRIT DMG
- Substats: Energy Recharge, CRIT DMG, CRIT Rate, ATK%, Elemental Mastery
- Ideal Constellation: C4
- Kazuha (5 star sword)
- Role: Support
- Talent priority: Elemental Burst> Elemental Skill>Normal Attack
- Weapons: Freedom sworn>Xiphos Moonlight>Iron sting
- Artifacts: Viridescent Venerer (4)
- Sand: Mastery
- Goblet: Mastery
- Circlet: Mastery
- Substats: Elemental Mastery, CRIT DMG, CRIT RATE, ATK%
- Ideal Constellation: C2
- Baizhu (5 star catalyst)
- Role: Support/Healer
- Talent priority: Elemental Skill=Elemental Burst>Normal Attack
- Weapons: Jadefall's Splendor>Prototype Amber>Favonius Codex
- Artifacts: Deepwood Memories (4)
- Sands: HP% or Energy Recharge
- Goblet: HP%
- Circlet: HP%
- Substats: Energy Recharge, HP%, HP
- Ideal Constellation: C0 is good, C2 is better, C6 is best though
- Collei (4 star bow)
- Role: Sub DPS
- Talent priority: Elemental Burst> Elemental Skill>Normal Attack
- Weapons: Polar Star>Aqua Simulacra>Elegy for the End
- Artifacts: Deepwood Memories (4)
- Sands: Energy Recharge, ATK%, or Elemental Mastery
- Elemental Mastery should only be used if she can reliably trigger her own Dendro reactions
- Goblet: Dendro DMG Bonus
- Circlet: CRIT Rate or CRIT DMG
- Substats: Energy Recharge, CRIT Rate, CRIT DMG, ATK%, Elemental Mastery
- Sands: Energy Recharge, ATK%, or Elemental Mastery
- Ideal Constellation: C2
