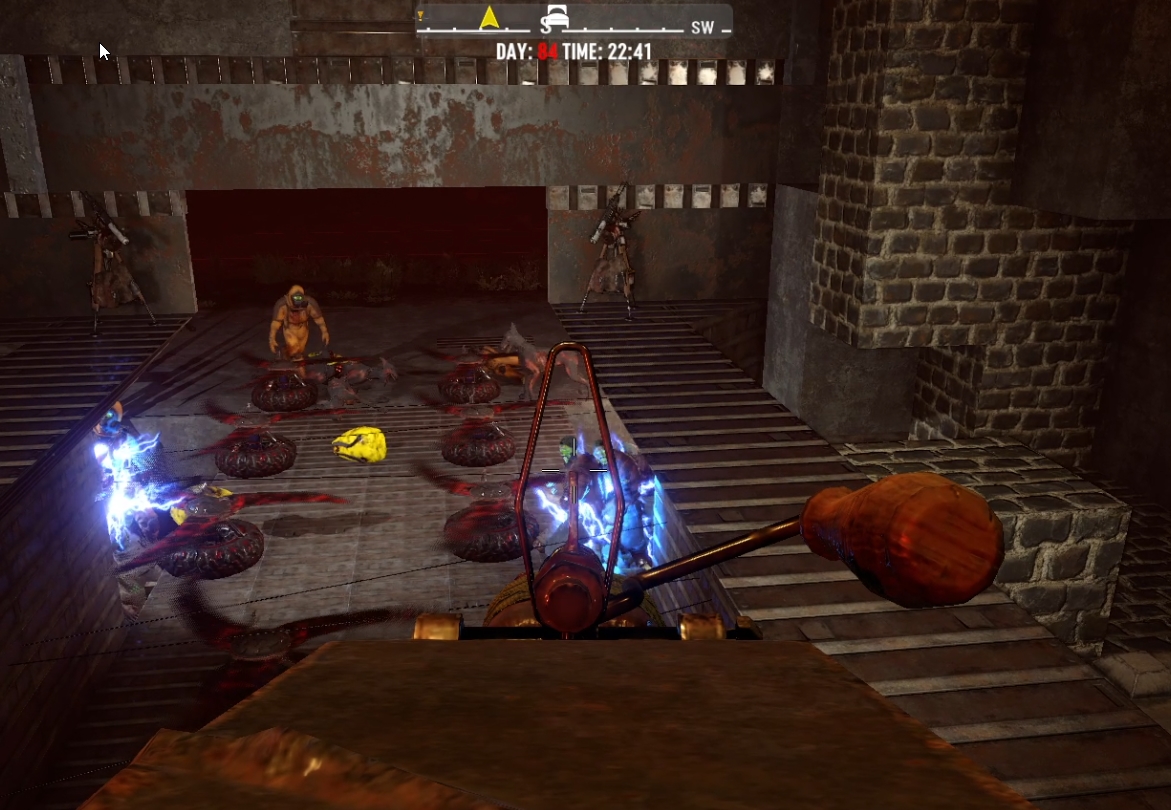
1. Tutorial (Beginner)
When you first enter your game, whether it is Navezgane or a Random generated world, you will begin with no weapon, no armor, clothing. There will be a tutorial to show you the very basics of crafting a bedroll, and a basic weapon among other items. Make sure you complete the tutorial right away to earn 4 perk points, even if you have played the game many times before. These perk points will help get you started with the game and eventually your skill tree.
If you want to start in a specific city, and you know which city you wish to start in, you can wait to complete the final part of the tutorial quest. Finishing this quest at any point calculates the nearest trader based on your current location.
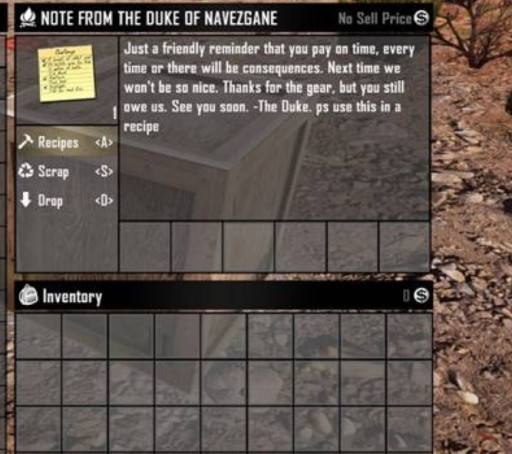
There are 2 items in your starting inventory that are taking up much needed space. The note from the Duke of Navezgane can be dropped after you read it to free up a spot for crafting the items from the tutorial and picking up materials as you explore the area you find yourself in. You can also drop the claim block from your inventory to free up one more inventory spot. The Land Claim Block can be easily crafted later.
Tips:
- Complete Tutorial right away for 4 perk points.
- Complete final tutorial quest where you want to reside.
- Drop the Land Claim Block and Note from Duke of Navezgane for extra starting game inventory space.
2. Location, Location, Location (Beginner)

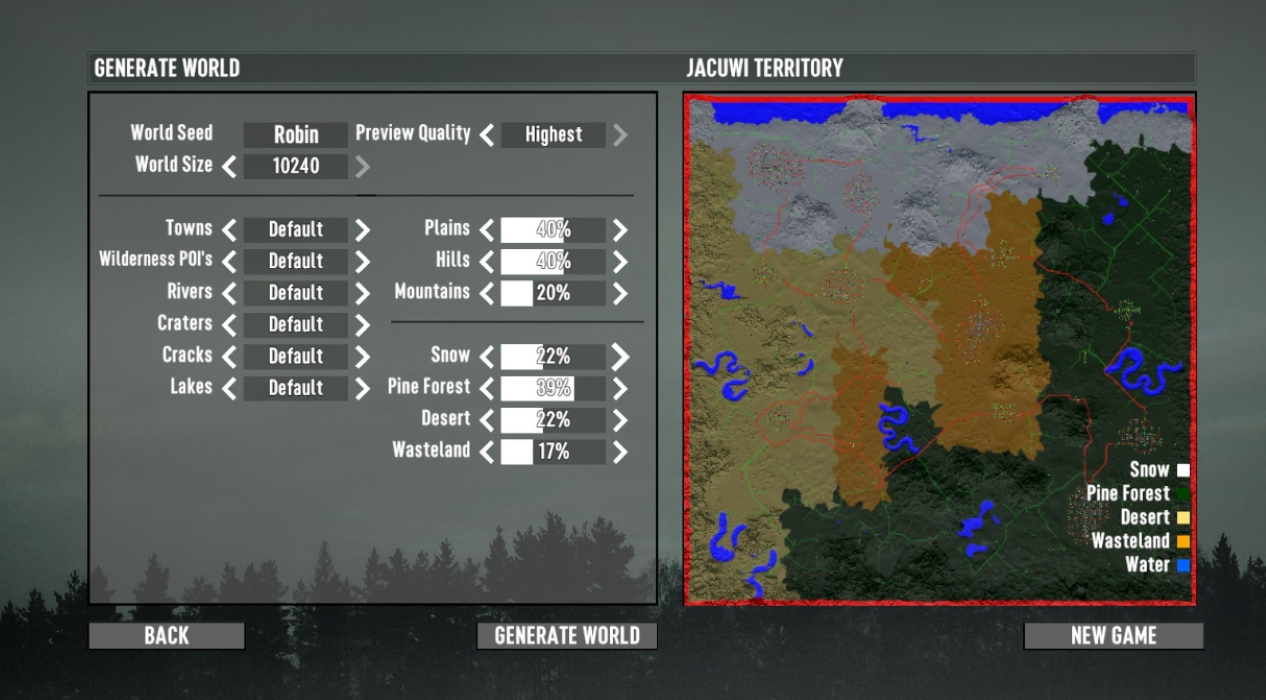
There are many different Biomes in 7 Days to Die to explore, loot and eventually set up a base camp. There’s the Forest Biome, the Burnt Forest - which contains the Desert and Wasteland Biomes, and the Snow Biome. Each biome offers different loot and enemies. You may see some of the enemies from another biome on Horde Nights, but they are more frequently encountered in their own biome.
Tips:
- 4 Different Biomes
- Each Biome has Loot available in scaled rewards.
- Each Biome has different enemies available and are increased in difficulty.
- Forest Biome = easiest enemies, lowest loot-quality.
- Desert/Wasteland Biomes = scale up in difficult and types of enemies including zombies (Such as Zombie Bears and Mutated Zombies, as well as adding heat multipliers which attract zombies to you.
- Snow Biome = scales up the difficulty and adds Lumberjack Zombies, Zombie Bears and Mountain Lions. The loot in this area scales up as well.
- Each Biome has its own Points of Interest (POIs), you can see the difficulty level of the POIs in the User Interface to determine if you are ready to visit a particular POI. The difficulty level will show in the top right corner of your screen as set of skulls.
3. Skill Tree (Beginner)
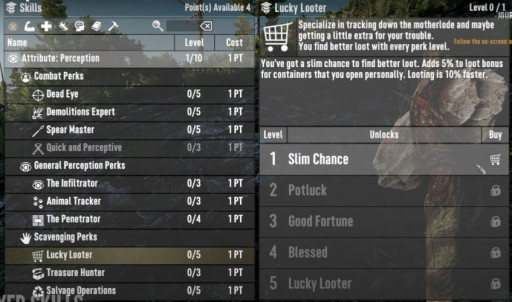
There are 5 governing Attributes: Perception, Strength, Fortitude, Agility, and Intellect. Each with their own list of perks, most of which can be ranked up multiple times. What is not clearly stated is that the attributes themselves can be ranked up as well. The skill perks beyond the first point will often require higher ranks in those governing attributes.
Tips:
- Best to choose no more than 2 attributes to start leveling.
- Try to align the attributes you choose with a play style.
- Some perks are not tied to weapon types or playstyles and are universal.
- Daring Adventurer Perk – 10pts plus level - gain access to better trader items, end game items later and get 20% more Dukes. Take this early for best results.
4. Traders (Beginner)
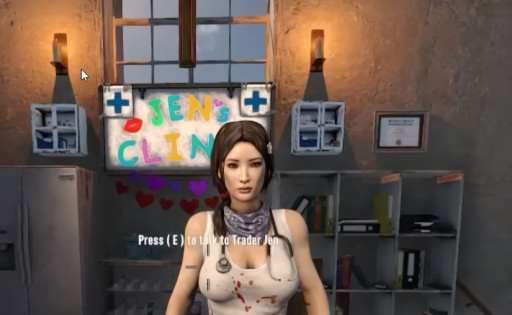
While there are many different Trader sites in 7 Days to Die, each Trader of the same name is linked. If you quest through Tier III with Trader Joel in one area, all Trader Joel’s will be set on Tier III Quests for you. You will only need to level the other Traders. So, who are the other traders and is it worth it to visit the others?
Trader Joel is one of the first you will meet; he is found in the Forest Biome. Trader Hugh can be in the Forest Biome or in the wilderness of other biomes. There is also a Trader Jen, Trader Bob, and Trader Rekt. They each have their own specialty.
Note: Repair items before selling to traders to get the most money from the item. They are worth more repaired than heavily damaged.
Tips:
- Trader Joel – specializes in Armor.
- Trader Hugh - specializes in Weapons and Armor
- Trader Jen - specializes in Medical.
- Trader Bob - specializes in Tools.
- Trader Rekt - specializes in Food and Seeds
5. Horde Night (Beginner)
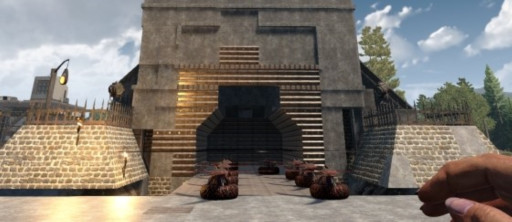
At the end of the 7th day and every 7 that follow (Day 14, Day 21, etc. – unless you change the blood moon setting to something other than every 7 days) you will encounter a Blood Moon – where the game spawn’s hordes of zombies in waves near you that will seek you out relentlessly.
Early on it is a good idea to find an existing POI or structure that is more easily defended. Craft and place down a claim block (only 1 active per character) to claim a location as your own. It will be immune to respawning if it is a POI and even if it’s not, zombies won’t spawn within a radius of the location.
This does not stop the location from being attacked in and out of blood moons.
Tips:
- Find an existing structure or POI that is easily defended.
- Lay a Land Claim Block to stop zombie respawning.
- Zombies can still attack you in your home base or horde base, blood moon or not.
- Don’t try to run from hordes in a vehicle; zombies will spawn in such as vultures, that will attack you and your vehicle.
- Your first 2-3 Horde Nights should only last until 2am. After that, all hordes will remain in effect until morning, at 4am.
6. Map (Beginner)
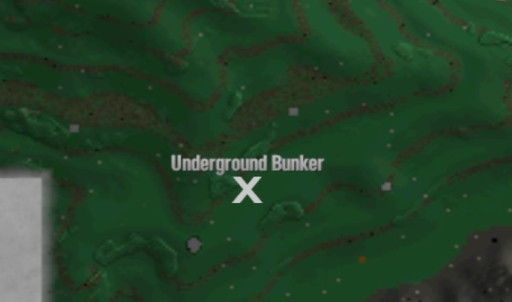
Looking at your map closely, you can see colorful Pixels or freckles all over it. These represent the materials you can find around the area. Each color represents a different material that can be mined or harvested.
If you create a large mine, might I suggest placing a flag or something noticeable, so you do not walk or drive into a large hole in the ground without meaning to.
Tips:
- Black Pixel represents coal.
- Grey/Blue Pixel represents lead.
- White Pixel represents nitrate.
- Beige Pixel represents oil shale.
7. Books and Magazines (Beginner)
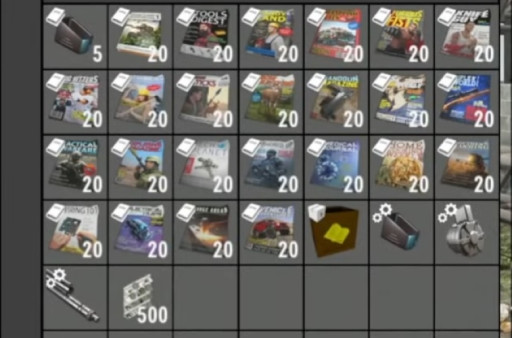
Books and magazines are valuable commodities that increase your capabilities or allow you to craft higher tiers of items. Their drop chances are heavily tied to the types of places you would find them; cooking magazines in cupboards, tool magazines in workshops/garages, etc. What is not clearly stated is that a large increase in the odds of finding the one that matches your build is based upon the perks you have. The more spread out your perks, the more diluted your loot pool will be for these.
Speaking of books and magazines, some containers have a very high chance of spawning them. Mailboxes outside of homes, newspaper racks in towns/cities, bookshelves in homes, even piles of books/papers in offices and homes are steady sources of books and magazines of which you need many. These will respawn over time, so check up on them later.
Note: Wearing Lucky Goggles in early game to gain better loot without extra XP gain.
Tips:
- Books and Magazines are a necessity for crafting new items and item tiers.
- Books and Magazine odds are based on your perk build.
- Check your mailboxes!
- You know you have read a book or magazine when you look at it in your inventory and the symbol on the top left. Closed book vs open book means read vs not read.
8. Inventory (Beginner)
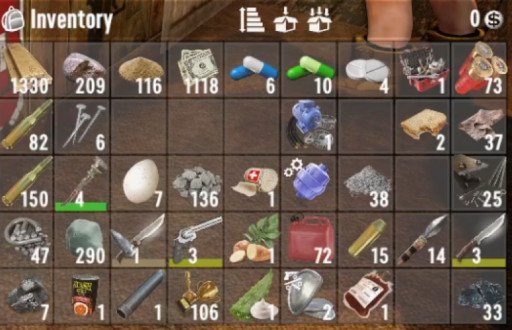
In the beginning, your inventory only has so much storage. Once you accumulate too many items, you become encumbered and take penalties to movement. There are items that should take up a spot in your inventory in the early game and items that should not. How do you manage your inventory?
As stated above, dropping the Land Claim Block and Note from Duke of Navezgane will give you extra starting game inventory space. A bone knife is worth crafting and keeping in your inventory or an active slot. You will find an abundance of bone in the game and a bone knife will allow you to harvest more resources (leather, animal fat, meat, bone, etc.) from animals and carcasses. Using a stone axe (or fireman’s axe) will only wield you 70% of the resources the bone knife can get you.
You can scrap items down to their base material to save inventory space. Materials like brass sell well and you can scrap brass radiators to brass material to sell. Brass will be needed later, but in the first 7 levels, gaining Dukes through selling items, materials and questing is a better option.
Tips:
- Drop the Land Claim Block and Note from Duke of Navezgane for extra starting game inventory space.
- Craft and keep a bone knife.
- Scrap items to their bass material.
- Sell what you do not immediately need.
- Craft clothing pocket mods (using 2 leather, 1 duct tape, 100 cloth, and 1 sewing kit) for 1 extra inventory space. Hint: Break down Cotton plants into cloth.
9. Parkour, Parkour! (Intermediate)
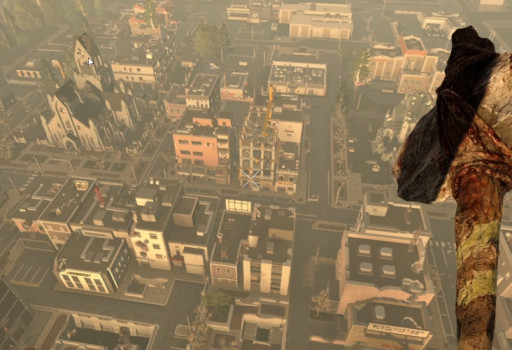
Parkour is a perk you can take under the attribute Agility. By adding perk points to Parkour, you allow your character to jump higher and jump farther without using as much stamina. After 3 perk points in Parkour, you can fall from higher heights without breaking your leg.
You should always have the Impact Bracing Mod equipped to your boots/shoes. This mod reduces fall damage and extends the safe fall distance before you sprain or break your leg. This does stack with the Parkour perks.
Tips:
- 1 Point in Parkour = 10% less stamina use for jumping; Safe fall distance increases by 1 meter.
- 2 Points in Parkour = 20% less stamina use for jumping and jump 1 meter higher; Safe fall distance increases by 2 meters.
- 3 Points in Parkour = 30% less stamina use for jumping and jump 1 meter higher; Safe fall distance increases by 4 meters and never break a leg.
- 4 Points in Parkour = 40% less stamina use for jumping and jump 2 meters higher; Safe fall distance increases by 5 meters and never get a sprained or broken leg.
- Add Impact Bracing Mod = adds another roughly 2 meters to safe fall distance
10. Weapons/Tools (Intermediate)
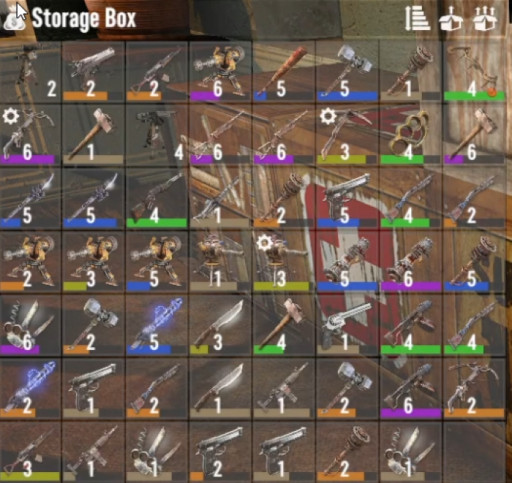
Alpha 21 has made many changes, including to weapons. Starting from A21, spears are quite effective! They have useful bonuses, such as the ability to attack enemies from a distance, and their books can still be found in mailboxes, making it easy to collect the full set bonus quickly. The set now fully recovers your stamina after each kill.
Trader Hugh is your go to Trader for weapons.
Be aware of what each weapon needs for repairing when they break. In the beginning game, items like a bone knife are easily repaired with bone, or pipe weapons are repaired with pipe. As you progress in the game, weapons cost more to repair/maintain. You will need to craft repair kits for more advanced weapons.
Tips:
- Spears are effective and easy to fully level.
- Knives are easy to fully level.
- Remember to place your perk points to the attribute and perks for your weapon of choice.
- Be aware of the repair needs of your weapon. Repair kits are harder to find and make in early game.
- You can mod weapons to give them specific boosts.
11. Armor (Intermediate)
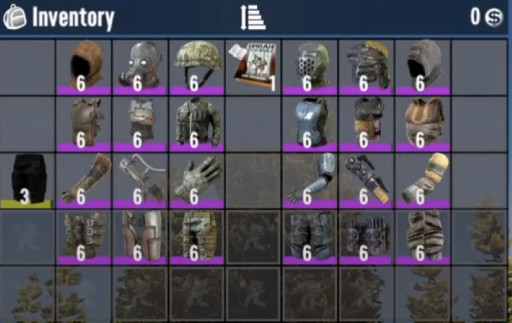
It can be difficult to keep your character defended in early game with armor items. Good armor is expensive to buy and hard to find. Your best bet is to craft or loot clothing and then craft padded armor (from duct tape and cloth) for affordable early game armor. There are no penalties to padded armor, only benefits. Later, when you upgrade to heavy armor or higher tiers of light armor there are upsides and downsides you must consider.
Find and/or craft armor in every slot as soon as you can. It drastically reduces the injuries and impediments you sustain, which can be very debilitating on their own and lead to your death.
Note: Wearing Nerdy Glasses is a great way to gain XP quicker, which raises your character level and game stage through processes of crafting, reading magazines, questing, etc.
Tips:
- Craft and loot clothing.
- Craft padded armor for all slots.
- Only benefits to Padded Armor, no detriments.
- Eventually, upgrade to heavy armor or higher tiers of light armor.
- Wear Nerdy Glasses for an XP boost of 10%.
12. Questing (Intermediate)
Following Horde base repair and improvements, focus on trader quests. Prioritize the nearest objectives for efficiency. As you complete missions for traders, you will reach new tiers. You will know you have accomplished this when you are given double rewards when turning in a quest and one of those rewards will be significantly improved. Tiers are tied to those skulls on POI’s.
After progressing to a tier, you will also be given a new type of mission – to find another trader along with their location. This can be beneficial as trader hopping is a great way to get materials, ammo, and other items not easily found in your environment.
Fret, not though, if you do not have the time or inclination to travel the distance to another trader – this quest is entirely optional. You can continue to progress the original trader through normal missions.
Note: Walking out of a quests range after starting it will cause the quest to fail.
Tips:
- Prioritize nearest objectives.
- Trader hopping can be beneficial, as each has their own specialty.
- Traveling to other trader as part of a quest is optional.
- Quest Tiers are 1-6 written as roman numerals.
- Stay inside quest area once started.
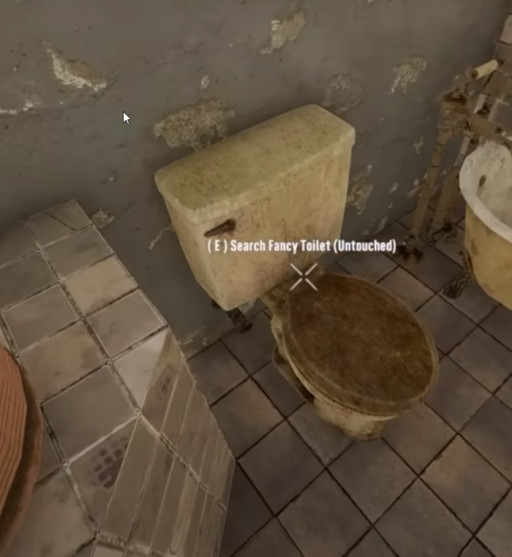
- Check your toilets! You can find murky water and hunting knives here!
- If you do not like a specific quest and want it to stop showing up, place a Land Claim Block.
13. Exploration (Intermediate)
Each biome offers new or higher concentrations of certain materials. Digging in the ground in the snow biome will give you snowballs which can be used for making Yucca Juice Smoothies or can be thrown, just as rocks can, to distract zombies.
Snowball fight!
The wasteland biome allows you to get the same amount of wood from trees you chop, as you would in the forest biome, but you also gain coal from those trees since everything is in this area is burnt.
While traveling, keep an eye out for tree stumps. If you chop them down with your axe, you have a 20% chance to obtain honey, which can be used as food or to cure an infected character.
Tips:
- Find new materials in other biomes.
- Snowballs in Snow Biome make one of the best drinks in game.
- Chop down trees in the Wasteland to earn wood and coal at the same time.
- Tree stumps can be chopped down for a 20% chance to find honey.
- Lockpick safes or police cars
- You can wrench police cars, but doing so will trigger the alarm and spawn several feral zombies.
14. Looting (Intermediate)
Players have a little control over respawning of loot. Locations show difficulty ratings identified by skulls. These are referred to as POIs or Points of Interest. Trader missions are a way to respawn a POI. When you arrive at a POI you have a mission for, there will be a floating exclamation mark. Starting the quest will instantly respawn all loot containers and enemies inside the POI.
You may want to double loot a location you have not visited yet. Accomplish this by ignoring the exclamation mark, exploring the POI, hopefully surviving with lots of goodies and when finished, go back outside to interact with the exclamation mark and do it all over again. You can only double loot a POI once, then it is cleared until you get a new quest for it.
Places like smaller crack-a-books are worth double looting. Maybe a quick run through hardware stores and gas stations if you need tools or an engine. If you are hurting for gas, break down cars in the parking lot before starting a quest. Otherwise, it may be more worthwhile to complete 2 quests and hope to get a magazine bundle, than to double loot one area. One more pro for double looting though, is more zombies to kill and more loot all equals more XP.
Make sure you have the storage area in your inventory or extra storage such as vehicles, otherwise be choosy about what you keep and what to discard.
Tips:
- Loot for books, magazines, crafting materials, and XP.
- Grab trader mission to get quest rewards after looting a POI.
- Double loot POIs for extra materials, XP, and earn Dukes from the items you sell.
- Determine if an area is worth double looting or if you can do 2 separate quests for better rewards (maybe doing one more trader mission will level your quest tiers).
- Keep an eye out for construction site boxes that contain additional loot. They can be easy to miss as there is no writing on them. They need to be hit to get to the items inside like the Shamway crates, but they look more like the writable boxes you can craft yourself (without the writing).
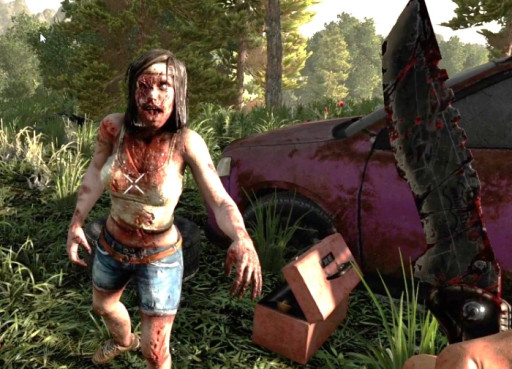
There are more ways to defend yourself than just finding an existing POI and hiding behind it’s walls or fortifying it for Horde night. I am talking about, defending yourself in combat.
An easy one for early game but can be used for strategy at any point in the game is to build a frame pillar just 2 blocks high from wood, fortify them. The zombie will try to hit you or the top wood frame. You can continuously repair the top pillar cube while also attacking the zombie from just enough distance using a spear or other ranged weapon. The more noise you make, the more zombies that will flock to you.
Instead of using frames to block doorways, use hatches. Wood hatches have 750 HP and can easily be opened and closed to block doorways. This is useful in the wild, in Tier 6 infested clear POIs and Horde bases. Zombies seem to have a tougher time attacking the hatch itself, perhaps because it is at waste level and below, as opposed to building blocks or doors. Zombies can be seen running in place against a hatch instead of hitting it. You can also craft a hatch out of iron.
Note: Just like a door, a hatch must be created in the material you want it in, it cannot be upgraded after you craft it.
Tips:
- Combat Zombies by using elevation.
- Combat Zombies by using space to keep their reach at bay.
- Craft 2 block high pillars, fortify them and continuously repair the top one for an easy elevated combat zone against 1-2 zombies in the wild.
- Craft a wood hatch or iron hatch (uses forged iron) to give distance between you and zombies while still being able to reach them.
- Use multiple hatches in a line to fall back against in Horde bases or high tier POIs.
16. So… You’re Infected (Intermediate)
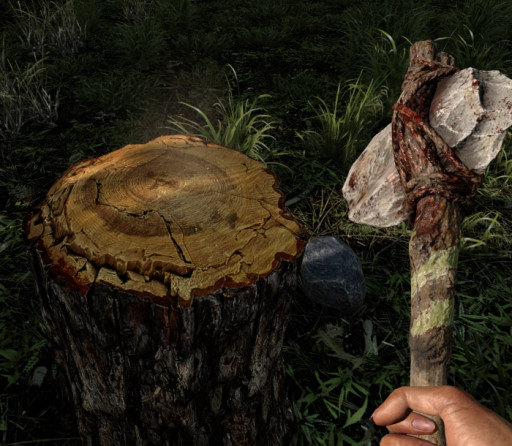
Until you can create antibiotics, vitamins, herbal antibiotics or find them while looting – Honey is your best option for staying human throughout the game.
Once “bit” (attacked) you can find yourself infected. An infection symbol will show up on your UI. It takes 7 (real life) hours for the infection to reach 100% and kill you, which aligns with the 7 Days to Die cycle at the default 1 hour day.
These tree stumps are found throughout the forests in 7 Days to Die. There is a 20% chance that a tree stump will drop honey if you chop it down. Honey will cure your infection if it is at 5% or less. Reading the book Wasteland Treasures 1 will give you a 5% chance to also find honey from trees.
Tips:
- Keep any antibiotics, vitamins, or honey you find.
- Infection will reach 100% and kill you in 7 real life hours (based on default 1 hour day).
- Tree stumps have 20% chance to drop honey when chopped down.
- Read Wasteland Treasures vol. 1 for a 5% chance to also find honey from trees.
17. Crafting (Intermediate)
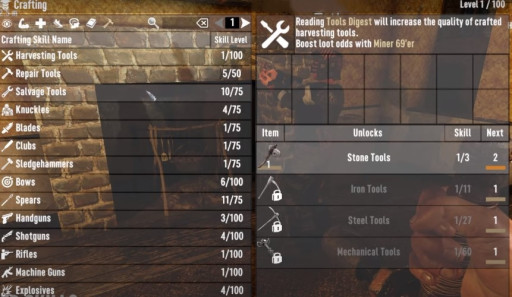
Craft clothing and padded armor in the beginning of the game to give you some protection. Cotton plants can be harvested and turned into cloth; curtains can be looted in POIs for cloth. Crafting a bone knife will help you harvest more from animals and carcasses. (You can find Nitrate from carcasses.)
When scrapping items, like brass trophies in your inventory, you only receive 75% of the materials compared to if you place them into the forge.
Craft dew collectors using water filters bought from traders or earned from quest rewards. These will give you 3 water every 24 hours. Craft farm plots and place them where there is sunlight to grow your own food from seeds. You can place farm plots and dew collectors indoor, but you need an opening to let the sun in. Using bars to plug an opening will provide some defense but still allow sunlight to penetrate. Light will spread 5 blocks from the opening.
Forges, Workbenches, Campfires, Dew Collectors, Farm Plots, etc., - will all generate heat, causing zombies to come towards the heat sources. Remember to turn them off when not in use.
Tips:
- Craft wood logs, they burn longer.
- Craft bone knife to harvest 30% more meat, animal fat, bone, and nitrate than if you used an axe.
- You can now pin and track recipes.
- Craft dew collectors to keep water supply up.
- Craft farm plots to grow your own food.
18. Mods - Clothes, Weapons, Armor, Vehicle (Intermediate)
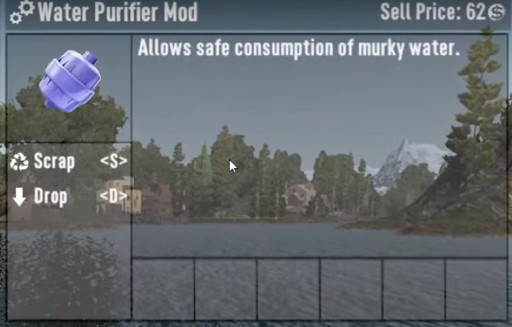
Mods for clothes, weapons, armor, and vehicles are a necessity. Do not neglect them, in fact, if you have a top tier weapon, armor piece, or clothing, the mod slots should be full.
All weapon and tool mods increase both weapon/tool damage and block damage. An iron breaker mod on a wrench is exceptionally effective.
Don’t hesitate to attach wood splitters to your club or a full auto mod to your pistol.
The best way to never be thirsty is to find a helmet modification called “Water Purifier Mod” which allows you to drink any questionable beverage or source without getting sick. To drink from a water source (puddle, lake, river) empty one of your action slots so that when you switch to it only your hands appear. Aim your reticle at the water (sometimes crouching is necessary) and the prompt to drink should appear.
Tips:
- Go to the piece of armor/clothing/weapon and click modify. Anything in your inventory that can be attached to that piece will glow green.
- Attach Water Purifier Mod to helmet.
- Attach Clothing Pocket mods to all clothing pieces for added inventory space.
- Attach armor pocket mods to armor for added inventory space.
- Add weapon mods to all weapon modifier slots.
- Cosmetic modifier slot is for items like dye, for changing the color of your item, including vehicles.
- Vehicles can have seat modifiers, so you can have a truck go from holding one person to holding 4.
19. Medical (Advanced)
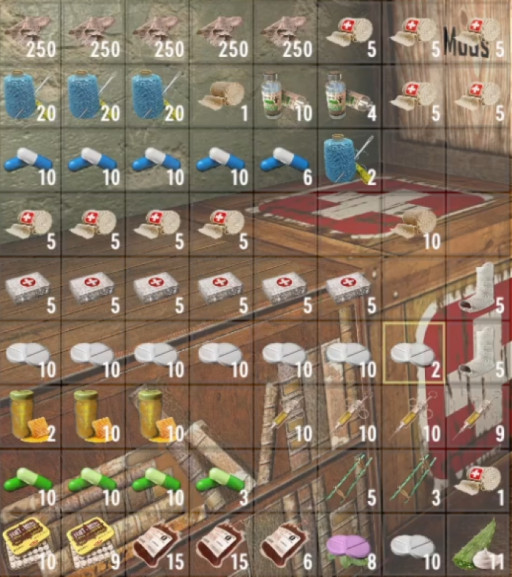
Injuries and impediments can be annoying. Many can be cured or drastically mitigated with the use of consumables. Maybe one of the zombies got your arm and you are bleeding: better staunch that wound with some bandages.
Note: Created medicated bandages using aloe cream and regular bandages for better healing.
Jumping off the roof of a 2-story building and broke your leg? A splint or cast will reduce the time you are injured. Combine that with steroids and you will move normally while waiting to heal without making it worse.
The chance of impediments worsens the lower your health is, when you take damage combined with how little armor you are wearing.
Tips:
- Use cloth to create bandages.
- Use aloe cream to create medicated bandages for better healing.
- Cast or a splint will reduce heal time for broken legs.
- Use pain killers to get rid of the fuzzy world from a concussion.
20. Rewards (Advanced)
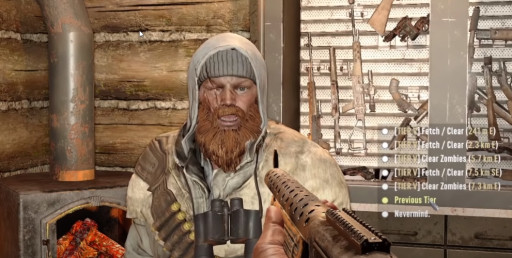
Some quests give better rewards than others do. If you are looking to get quests done quickly, you may want to just complete whatever is closest. No matter which tiers you are on, the lowest loot you will receive from the quest and the trader will be the Buried Supply Quests. The highest loot value will be the Infested Clear Quests which are new to Alpha 21. Infested Clears provide an additional infested chest as a bonus reward.
Don’t ignore quests, as they offer progressively better rewards as you level through the tiers.
You do not have to exclusively focus on your current tier. Instead of completing seven tier 5 quests, you could finish 9 tier 4 quests and still receive the tier 5 reward. This approach is faster as tier 5 quests are harder and POIs are more difficult to navigate, thus making tier 5 quests more tedious.
Tips:
- Don’t ignore quests.
- You can stay on your current tier or choose previous tier when speaking with the trader.
- Buried Supply Quests offer the lowest rewards.
- Infested Clear Quests offer the highest rewards plus a bonus chest.
21. Game Stages (Advanced)
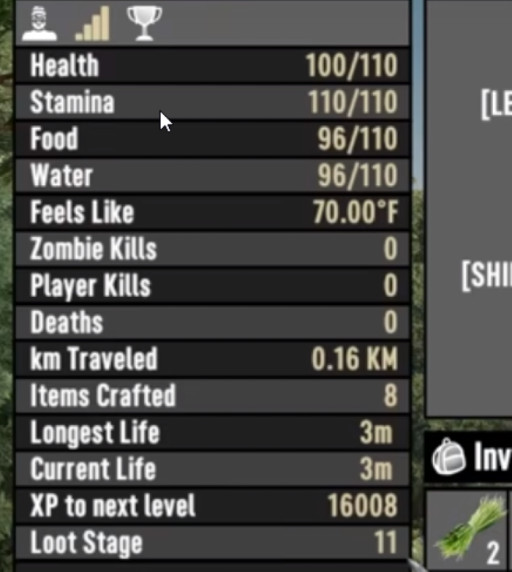
Just how in depth is this game!? There are 3 different stages to pay attention to in 7 Days to Die.
First is the Game Stage, which is a calculated value based on your survival skill and game progression and is used to adjust various game mechanics. Game stage is calculated differently for a single player than a player with a party.
Second is the Loot Stage, for a single player, is calculated by character level + perks (lucky looter perk) + apparel (lucky goggles). This stage is calculated differently for a single player than a player with a party. You can find loot stage by hitting tab on the keyboard, clicking on the face icon, as shown on the top left of the photo above, and clicking on the bar graph to see your stats.
Last is the Trader Stage replaces the Trader’s Secret Stash Perk. This affects what items are available to you at each Trader and prevents you from seeing end game items at the Traders in early game. The formula may change since A21 is still going through its various stages of experimental builds. But its currently Player Level x1 + Quest Tier + Daring Adventure x10.
Tips:
- Read Lucky Looter Books.
- Use Lucky Goggles when looting after horde night at least.
- Use Cigar when speaking with Trader for an extra 10 discount.
- Take the Daring Adventure Perk (in early game – listed in #3) to help with your Trader Stage.
22. Vehicles (Advanced)
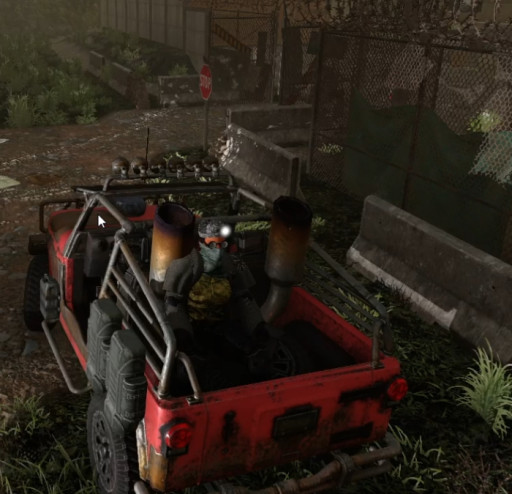
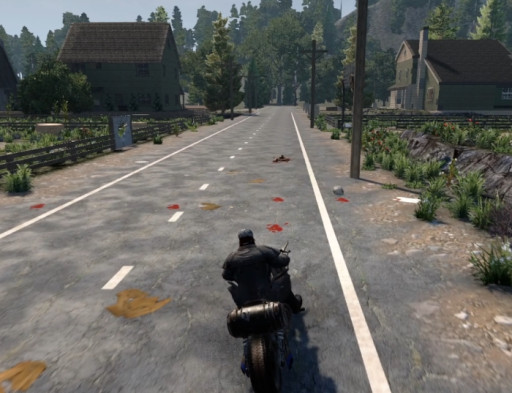
Vehicles are so helpful to have. Earning the bicycle after tier 1 missions to get around faster gives you the freedom to get more quests done in a day. Getting a motorcycle, minibike, or even that Gyrocopter finally allows you to traverse the map in just a few short minutes (or in game hours).
Be careful though, the larger the vehicle the more gas it needs. Since A21 came out, the amount of damage a vehicle takes from running into anything has drastically gone up.
If you run from zombies on horde night in a vehicle, vultures will be summoned to you and damage your vehicle. If your vehicle blows up, you will lose everything stored inside it.
If you are having trouble seeing at night while driving, there is a headlight mod that essentially gives you high beams.
Tips:
- Complete Tier 1 mission quickly to get bicycle.
- Do missions or learn to craft the minibike and motorcycle so you can travel further.
- Keep up on the gas consumption and repair kit needs.
- Add the high beam lights mod to all vehicles to avoid iron veins.
- Vehicles take significant amounts of damage in A21.
23. Buffs and Resets (Advanced)
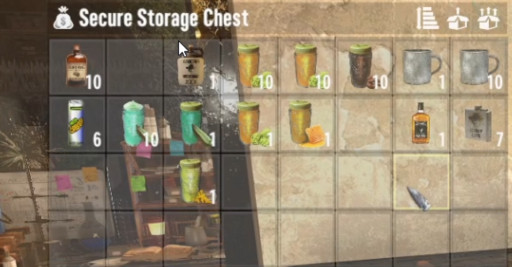
Some consumables give your character buffs that are worth taking when needed, and sometimes on a regular basis. An example of an as needed buff is taking steroids when you have a sprained or broken limb to prevent taking more damage and reduce the speed penalty from the injury.
One consumable to use on a regular basis is Grandpa’s Learning Elixir. Use this just before horde night begins for an additional experience boost. It is regularly sold in vending machines.
Nerdy Glasses provide a +1 intellect and a 10% experience bonus.
Many buffs will stack, for example:
Buying and equipping a cigar from the trader gives you additional strength and a bartering bonus. Use this with the Better Barter Perk, Grandpa’s Awesome Sauce, Sugar Butts Candy, wield a .44 Magnum (after reading Magnum Enforcer 4) for 5% intimidation, and eat a pumpkin cheesecake. This is all the items that you can stack currently for buying and selling to traders.
Tips:
- Drink beer while riding your bike to travel for 2 minutes without worrying about stamina.
- Use Grandpa’s Learning Elixir for an experience boost on Horde Night
- Wear Nerdy Glasses on Horde night, the 10% XP bonus will stack with the learning elixir.
- Switch to the Lucky Goggles when looting after Horde Night to gain the loot bonus from each dropped bag.
- Stack the cigar with the Better Barter Perk, Grandpa’s Awesome Sauce, Sugar Butts Candy, wield a .44 Magnum (after reading Magnum Enforcer 4) for 5% intimidation, and eat a pumpkin cheesecake and the total will give you a 75% improvement to purchasing from the trader and 70% improvement for selling to a trader.
24. Stay on Track (Advanced)
It’s easy to keep track of horde night in the beginning of the game on a traditional 7-day cycle. Day 7, Day 14, Day 21… What happens when you reach day 119 and beyond. How do you keep track then? Do you just wait for the morning of for the date to turn red?
Other than just waiting, here is 2 ways to figure out when horde night is coming.
#1 - Using the number 119; Take the number in the ones place out (the 9). This leaves you with 11. Now double the number you removed 9+9= 18. Now subtract that number from the 11. 18-11 = 7. The number is 7 which means day 119 is a Horde Night.
#2 – Using the same number 119; is 119 divisible by 7. 119/7= 17. Yes, it is, therefore it is a horde night.
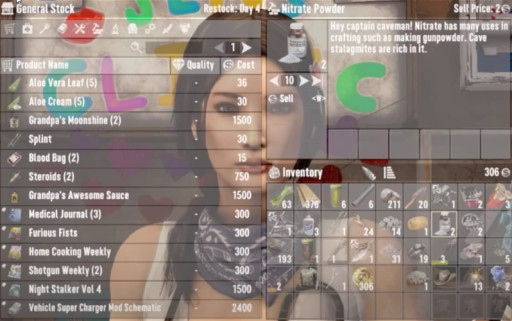
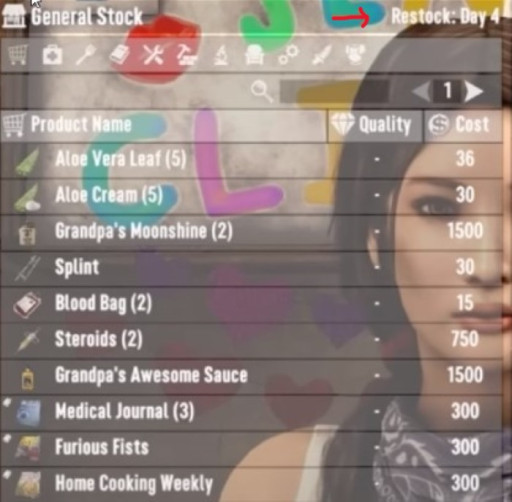
Did you know there is a Trader Restock Day? When you go to the trader and speak with them it shows their restock day on the top right of the product name section (as seen above). Day 1 is the first day you see them, and they restock every 3 days. In this case restock day is day 4.
Let’s say it is day 85, we could go look to see if it is restocking day or instead let us add our digits together. 8+5 = 13. Now subtract 1 from that: 13-1=12. Is 12 divisible by 3? Yes, it is, therefore it is a restock day.
Tips:
- Horde Night Formula 1: Choose Day or Date to use; Take out one’s column number and double it (x). Subtract x from left over numbers (y) to see if they equal 7. X – Y = 7 (Yes Horde Night) or X – Y ≠ 7 (Not Horde Night). (Yes, example for 119: {9+9} - 11=7)
- Horde Night Formula 2: Choose Day or Date to use and divide by 7; X/7 = whole number (Yes Horde Night) or X/7 ≠ whole number (Not Horde Night). (Yes, example: 119/7= 17)
- Trader Restock Day Formula: Choose Day or Date to use. Add the numbers for the day together, subtract 1 from the answer, then divide by 3. If the answer is a whole number, then it is a restock day. (Yes, example for 85: 8+5 = 13-1 = 12/3 = 4)
25. Game Mods (Advanced)

7 Days to Die has a huge modding community and is very accepting of mods. There are so many mods that can be added to this game for various reasons. Modding could be for changing game mechanics, changing game codes, or changing looks. Mods can make a game more glitchy so make sure you save your files often. Mods are currently only available on the PC version.
Tips:
- Game Mod that increases your Vehicles overall health – Vehicle Damage Reduction Mod.
- Game Mod that allows you to go fishing – Experimental Recipes Mod.
- Game Mod to increase difficulty of game – Darkness Falls Mod.
- Game Mod to lock inventory slots so you don’t accidentally move items you need from inventory to storage in your base – Lockable Inventory Mod.

