
Your eyes slowly open, letting the gentle light overhead adjust your eyes. A foul smell greeted you, and if your stomach had been full, it wouldn’t be anymore. . Your nose crinkled in disgust as you peered into the darkness, only to be met with a pair of eyes staring back at you.
“Another challenger…it has been ages.”
Today, we are talking about Inscryption. Inscryption gave us its debut back in October of 2021, three years ago. Disguised as just a plain table-top at first glance, Inscryption does a great job of keeping its cards close when it comes to the lore. Above all, Inscryption is an incredibly fun strategy game that I have put well over 100 hours in. But a common question amongst players is this: “What is the best card?”
Well, here we’re going to discuss just that. We are going to go through each Act and reveal the best cards in each one. So please join me as we go through Inscryption: Best Cards in The Game.
Act 1
1.Ouroboros
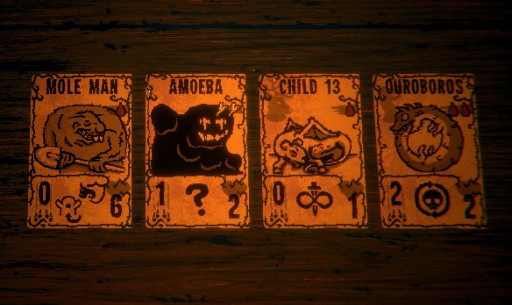
“The eternal serpent. Death strengthens it forever.”
The snake who always comes back. Bad for farmers, great for us. We start strong with the Ouroborus, a card strengthened by death.
That sounds great in theory, but what does that mean? Each time you sacrifice this card, its attack and health go up by one. With a good set-up card like the black goat with the Many Lives Sigil, you can get an easy 20 levels for the Ouroboros.
This is why it is ranked number 1. Just having a good set-up will transform this 1 attack 1 HP into a real beast if you find yourself in a pinch. This sort of set-up with the Ouroborus is also an excellent way to farm teeth if you need more cards.
Despite the reset you get when you die, the Ouroborus retains all levels it gets through your run. So if you can get your hands on this card, you’ll be set for the rest of the game. That is, if you play your cards right.
So what are the Ouroborus' strengths?
- Every time this card is sacrificed, it retains its levels. This can help you avoid the drawn out battle of the Angler by having your Ouroborus at a level 5 attack.
- The Ouroborus has the Unkillable Sigil. Every time this card is sacrificed, it will come back to your hand. This provides a perfect counter to the Trapper’s Strange Frogs.
- You can put the Fecundity sigil on them. As long as you have the resources, you can have a full team of Ouroborus. All of them grow stronger when you kill them.
- If you have the Mantis God or even just the Mantis, both of their sigils can be placed on the Ouroborus. This will give you double or even triple of an already high attack.
- The Ouroboros is a relatively low cost card with only two blood. So two squirrels, one black goat, or a really good totem will carry you.
2. Urayuli
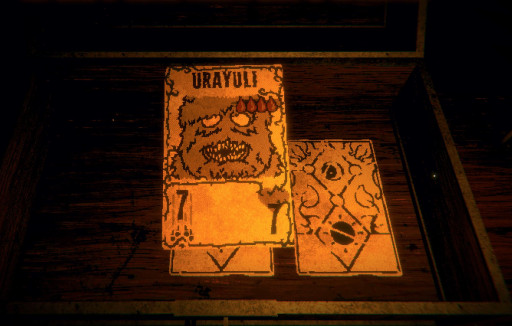
“This level of brutish strength needs no explanation.”
The Urayuli is a strong but costly wall to have in your arsenal. With its 7 health, the Urayuli will withstand several rounds of attack while dealing out his own. With its 7 attack, you are able to quickly end the battle as the scale only goes to 5 on each side. One of the best sigils to have on the Urayuli would be the Corpse Maggots.
Once you draw the Urayuli with this sigil on it, once any card on your side of the board perishes, it will play itself. This will negate the high cost of it, but you will have to worry about RNG.
If you do find yourself getting the “Too Fast, Too Soon” jumpscare, I highly recommend having one of these and a dagger in your back pocket. The quick deal of almost two digit damage is easy enough to knock over several kinds of creatures. The only exception, as with most of these, they can’t attack the ones who submerge themselves.
This is ranked number 2 just for the sheer brutish strength. The Urayuli is a high-cost, high-roller, great for those who like to take that gamble. He’s great for opening a way for you to clean it up. Though not as versatile as the Ouroborus, the Urayuli is still a fantastic card to have.
What are its strengths?
- Deals almost double-digit damage, which can be easily rectified with a visit to a campfire.
- The health of the Urayuli is one higher than the River Snapper, a cheaper but more common defense card to use.
- The Urayuli can have the bifurcated strike of the Mantis, meaning in one turn you can deal 14 damage.
- The Urayuli can also have the trifurcated strike of the Mantis God and allowing you to deal at least 21 damage in one turn.
- Pairing the Urayuli with the Ouroborus is one of the best ways to farm teeth for the Trapper/Trader.
3. Strange Larva
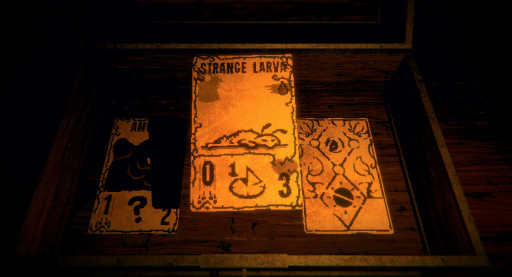
“A largely unimpressive specimen.”
The Strange Larva has an amazing ability, but you’ll need to wait 2 turns with it on the board. It’s a patience game. While it starts as just a Strange Larva, it will become the Strange Pupa, and eventually the Moth Man.
The Strange Larva keeps its 3 health throughout its Fledgling, but once it reaches Moth Man, it has 7 attack. Set at number 3, the Strange Larva is a card you wouldn’t expect to be such a powerhouse. However, this has quickly become one of my favorite cards to snag.
The 7 attack is just as good as the Urayuli with less cost. It’s 3 health is ultimately its downfall, as unless hidden, it can die fast.
Strange Larva Strengths:
- The card for its 3 forms only cost one blood, meaning you could have this powerhouse at your fingertips for only a Squirrel.
- Placing the Strange Larva in front of a rock, tree, or passive creature is the best way to preserve this creature. Its Moth Man form allows it to go Airborne.
- The Unkillable Sigil or totem here is the most useful, as it will bring the Strange Larva back to your hand.
- Putting the Fecundity sigil on the Strange Larva will give you two creatures that in total deal about 14 damage.
- Putting the Bifurcated or Trifurcated Strike on the Moth Man will allow you to farm for teeth like the Ouroborus.
4. Grizzly
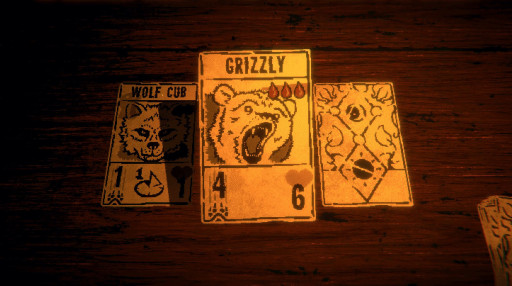
“The monstrous Grizzly. Its form speaks enough of its efficacy. ”
If you’ve come across the “Too Fast, Too Soon” jumpscare, then you know first-hand how rough these guys are. A wall of flesh and fur, the Grizzly is a must-have for defensive and offensive strategies. Only costing 3 blood, the Grizzly is one of the cheaper beast cards to have. You can put a variety of useful sigils on the Grizzly to turn it into Leshy’s worst nightmare.
You must be wondering why it’s number 4. The Grizzly is number 4 on our list because of its lower attack than the previous cards. His 4 damage almost completes the scale, but you will still need another card to finish Leshy off.
What are its strengths?
- You can put the Mighty Leap sigil on the Grizzly to swat those pesky birds out of the sky.
- The Trifurcated Strike is one of the best sigils to have on the Grizzly to maximize its bulldozing.
- You can put the Fecundity sigil on the Grizzly to replicate Leshy’s “Too Fast, Too Soon” Bear wall.
- Putting the Burrower sigil on the Grizzly makes great use of its high health.
5. Turkey Vulture
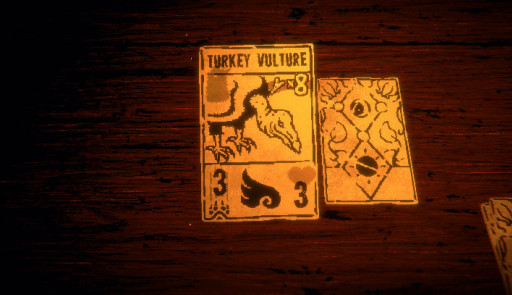
“The pernicious vulture. A tyrant of the skies.”
The Turkey Vulture is a great Airborne creature to have in your paltry deck. Though it doesn’t have as high a health as the Urayuli, it is one of the higher attacking fliers. It is more expensive than the Raven, though the latter does one less damage.
If you find you have a ton of bones, this will be good to get rid of the excess. This is number 5 on the list, due to its high cost and damage output. Second to the Moth Man, the Turkey Vulture is a good, secondary flier to have in your back pocket.
What are the Turkey Vulture’s strengths?
- The Turkey Vulture is pricey but deals a strong amount of damage. Putting Corpse Maggots on the Turkey Vulture is a way to get past its high cost. Then, you would just need to draw it.
- You can put the bifurcated strike on the Turkey Vulture to be able to deal double air damage to your opponent.
- You can put the Bone King sigil on the Turkey Vulture to get back half the cost of putting it on the board.
- An Airborne creature, you won’t have to worry about its attack being stopped short by Leshy’s creatures. Until the Turkey Vulture is blocked or killed, it will do a consistent 3 damage as long as it is on the board.
6. Alpha

“The venerable alpha. Its courage emboldens the creatures that stand beside it.”
A great, low-cost support card. The Alpha will raise the power level of the creatures beside it by 1. This not only means your stronger cards will get one level stronger, but other obstacles can now fight for you. The more low-cost compared to the others would argue that this card should be higher, but its poor attack stat says otherwise. Alpha’s ability to raise the attack stat by 1 is an incredibly useful thing. It’s a free booster. Just one that can’t hit as hard. Thankfully, the Alpha costs the same as a Cockroach. So if you can scrounge together 4 bones, you can play the Alpha and get its boost.
What are its strengths?
- The Leader sigil gives you the chance to do more overkill damage for extra teeth.
- If you find yourself in a pinch, you can throw the Alpha out to give your cards a boost to try and create an opening.
- You can put the Unkillable sigil on it so you can have it come back to your hand.
- You can put the Bone King sigil on the Alpha so that when it perishes, you are able to play it again.
7. Mantis God
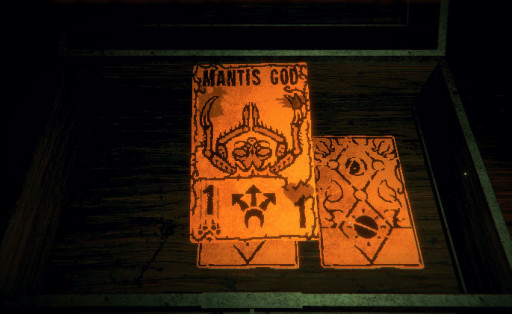
“The holy Mantis God. A perfect incarnation of terror.”
The Mantis God is a great but brittle creature to have in your deck. It is one of three cards that are able to strike multiple places at once. This is the only one that can strike three places at once. Once you throw this creature on the campfire and toast him a little, you can create a Teeth Farmer. The most terrifying kind of farmer. .
This is a fantastic way to quickly bring things back in your favor if you find yourself in a pinch. If you put enough damage into him, he can also be a great finisher too. However, with this great sigil, comes with it the number 7 ranking. Though it can inflict damage on multiple areas at once, it is incredibly brittle. You would need to spend extra time on that campfire for him to last a while.
What are its strengths?
- The Mantis God only costs one blood. An incredibly cheap, rare card that you can throw on the board with a single sacrifice.
- If you can upgrade the Mantis God at least to an attack of 2, you can throw him on the board at the start of the battle to end it. This can be a quick way for you to get to the bosses or to your next rest stop.
- Putting the Unkillable sigil on the Mantis God will ensure it comes back to your hand, giving you a powerhouse at the click of your fingers.
- Putting the Fecundity sign on the Mantis God will put a second one in your hand. So if you are lucky enough to get one, you can kill some field mice and slap that sigil on there. Ensuring a true wall of terror of praying mantis.
8. Magpie
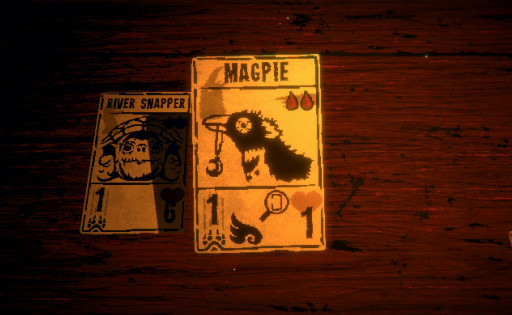
“The covetous Magpie. It can fetch any card in your deck.”
The Magpie will let you pull any card from your deck. This can range from any support cards, any defense cards, particular attack cards. Whatever is in your deck that you want to fish out, you now can. The Magpie costs the same as the Ouroborus, so you wouldn’t need to expend more resources than necessary in order to play it.
But why is it number 8? Well, the Magpie is as brittle as the Mantis God. The Magpie only does a singular point of damage, so he won’t be doing much damage on the board. Its Airborne sigil allows it to attack Leshy directly and to stand as a wall for your side of the board.
What are its strengths?
- This is the only card that allows you to search your deck and pull out any card. Making it incredibly useful if you have a certain strategy in mind.
- The medium cost. Compared to the others, this one is cheap enough. It costs the same as the Ouroborus, so all you would need to play it is just a Black Goat or 2 Squirrels..
- The Magpie has the Airborne sigil, which will give you at least a free point of damage directly if you need that lenience.
- You can put the Trinket Bearer sigil on the Magpie to help replenish your items mid-battle.
9. Adder
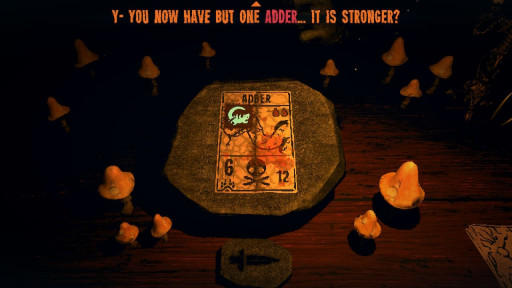
“The caustic Adder. Damage from its poison bite is always lethal.”
The Adder is brittle, but it makes up for it with its Touch of Death sigil. Any creature that faces it will fall. You would have to put some upgrades into its health if you would like to use it consistently in battle.
That is why it is number 9. Though the Touch of Death makes it a great strategic play, you won’t be able to rely on it long-term throughout the battle.
What are the Adder’s strengths?
- The Adder only costs two blood, giving you a third medium-cost card to choose from when it comes to opening a way.
- Giving the Adder the Unkillable sigil is a better and less riskier way to ensure you have the card whenever you want.
- If you give the Adder a ton of health, you can put the Bees Within sigil on it. You can farm bees to use as sacrifices for other cards.
10. Field Mice
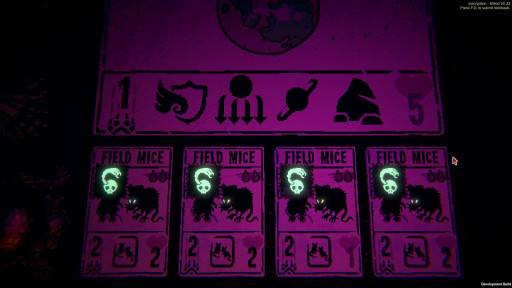
“Licentious field mice…Always breeding.”
The Field Mice have a special sigil called the Fecundity sigil. This means that every time that particular card was played, another copy of it would appear in your hand. A miniature army of rats.
I feel like this is how the plague started. No matter, though these field mice are great in reproducing, it's still ranked at number 10. This card is a great card to have sacrificed instead. You can only get the Fecundity sigil through the Field Mice or through special cards in trade.
What are its strengths?
- A medium-cost card. It’s great if you find RNG screwed you over with card distribution. This way, the Field Mice can fill out all four spaces and give you time to formulate a plan.
- They have two attack and 2 health, so they can turn the battle more in your favor. Or get you that little push you need to win.
- You can put the Corpse Eater sigil on the Field Mice, so when one dies, another will immediately take its place. This can help you push through difficult fights, or if you don’t have a lot of cards.
- You can sacrifice this card for its Fecundity sigil and place it on a higher tier card to get multiple high-damage cards immediately.
Act 2
1.Pharaoh’s Pets
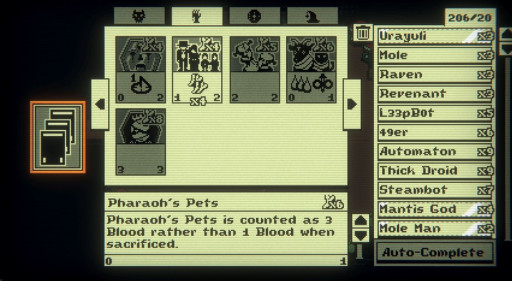
“Pharaoh’s Pets is counted as 3 blood rather than 1 Blood when sacrificed. Also: When Pharaoh’s Pets are sacrificed it does not perish.”
Do you remember the Black Goat and the Cat from Act 1? Yeah, this is like if those two cards visited the Mycologist. This combines the sigils of those two cards and gives you three blood you can sacrifice again and again.
Of course this card would be number one. The versatility of being able to get three blood without cluttering up the board is amazing. And it makes it so much easier to get out your Beast cards.
What are its strengths?
- You are able to sacrifice it multiple times without it perishing unless a creature attacks it.
- You’re able to garner 3 blood with each sacrifice, making it easier to get your Beast cards out faster.
- Unlike the Cat, after you sacrifice it nine times, there is no second form for it to take. This grants you plenty of use as long as it is on the board.
2. Sarcophagus
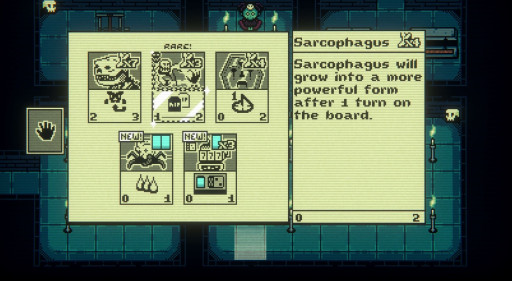
“Sarcophagus will grow into a more powerful form after 1 turn on the board.”
Sarcophagus is a much better counterpart than its evolution Mummy Lord. Though, you do have to wait one turn for it to change, it becomes a creature that has 3 attack and 3 health. Why is it number 2?
Well, despite the instant upgrade we get from Sarcophagus to Mummy Lord, you still have to wait for it to transform. If your RNG is good, then you could probably throw him out with the weaker creatures and survive long enough.
What are Sarcophagus’ strengths?
- It costs 4 bones, half of Mummy Lord’s 8 to play him. This makes Sarcophagus more useful because if you have a good bone economy, you’ll be able to get a powerhouse for only 4 bones.
- Sarcophagus transforms into a creature with 3 attack and 3 health, making him a monster to have in the early stages of Act 2.
- Sarcophagus is a common card, so you will be able to pick up multiple of these from either chests, the Trader, or even in some fights.
3. Mrs. Bomb
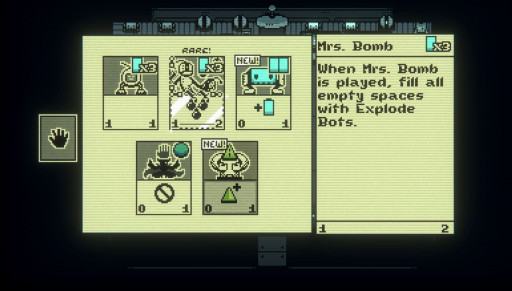
“When Mrs. Bomb is played, fill all empty spaces with Explode Bots.”
This game is not only the bomb, but it has bombs! How cool is that? A tactical wipe. A control of the field to restart when you please. Just don’t have your best cards out when you play this.
This is number 3 on our list for Act 2 because of the power this thing holds. There are numerous fights you will have to go through for Act 2. Several of them alone lead up to one boss. So there will be some tight situations here and there.
This is great for that, but it’s a one-use per fight thing. The only time it wouldn’t be is if you have several of the same card.
What are Mrs. Bomb’s strengths?
- It’s a redo button you can play if you find the board isn’t really in your favor.
- Mrs. Bomb is a cheap card that only costs 3 energy. If you can last 3 rounds and have good RNG, you can use this to bring it back.
- Having multiple of these gives you more of a safety blanket in case things go south. Multiple Mrs. Bomb also gives you the opportunity to try out different strategies, knowing you have a backup plan in your pocket.
4. Gamblobot
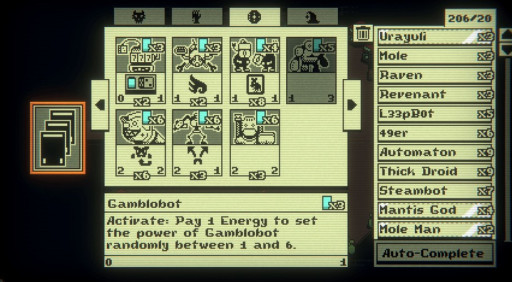
“Activate: Pay 1 Energy to set the power of Gamblobot randomly between 1 and 6.” (It’s the one that looks like a slot machine)
Have you ever wanted to gamble in a video game? Gamblobot accepts a single energy to roll the dice on your damage. It’s a cheap card of only 3 energy, though it only has one health.
This is number 4 on the list for those fellow reckless carders like me. Gamblobot can be a glass cannon. It can have an output of about 6 damage at most, but that 1 health point makes it incredibly easy to overpower.
What are Gamblobot’s strengths?
- Gamblobot is not very rare, so it is easy to get multiple. You can then use them to potentially farm foils if you can set it up.
- The energy cost of Gamblobot is only 3; you’ll be able to have at least 2 on the board for one turn. But unless you have the Energy Conduit, you’ll have to wait a round to pull the lever.
- The ability to do 6 damage immediately is great. The scale only goes up to 5, so if you can hit that open spot, you can get one foil at least.
- Even if you can’t do 6 damage right off the bat, Gamblobot goes from a range of 1 to 6 damage. You’ll be able to still at least get the scale halfway in your favor, even if your RNG is bad
5. M3atBot
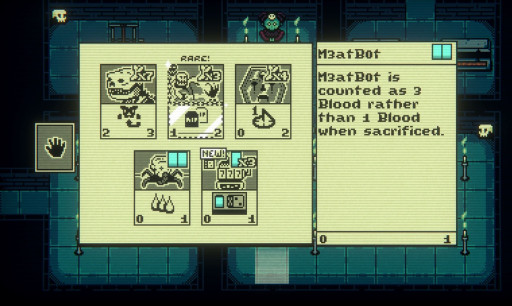
“M3atBot is counted as 3 Blood rather than 1 Blood when sacrificed.”
M3atBot is another common card that is like Pharaoh’s Pets. The difference is that this one doesn’t have Many Lives. M3atBot is a great substitute if you find yourself lacking on meaty sacrifices. It gives a generous three blood so you can have more ease getting your Beast cards out.
M3atBot isn’t as versatile a card as Pharaoh’s Pets. This is more of a one time use card, unless you have a few stashed away. This is why it is number 5. However, it does have the benefit of costing less than Pharaoh’s Pets. With its measly 2 energy cost, you can stock up on these and ride out until you get Pharaoh’s Pets.
What are M3atbot’s strengths?
- The 2 energy cost of M3atBot compared to the 6 bones of Pharaoh’s Pets makes it a lot easier to put on the board.
- M3atBot can be found in the Trader for a few foils and is a common card found around the map. Even if you go throughout the entire game not finding Pharaoh’s Pets, you can still have M3atBot.
- Being where you can sacrifice it without it staying on the board does clear up a space for you. Unlike with Pharaoh’s Pets where you have to hide it, you won’t have to worry about that with M3atBot.
6. Bone Heap
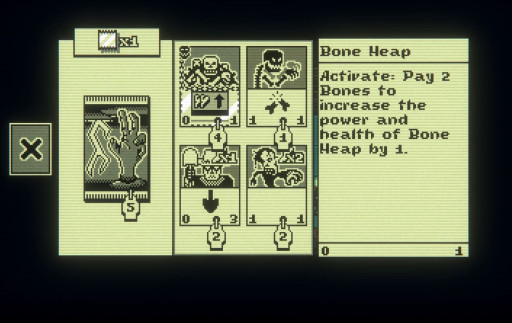
“Activate: Pay 2 Bones to increase the power and health of Bone Heap by 1.” (Located top left of the four given images)
This one was one of my favorites to play. Bone Heap does require some set up in order to effectively play, but it is a good card. Bone Heap increases its power and health with every two bones. Skeletons, Sporediggers, or two Gravediggers can get an economy started for you to farm levels for Bone Heap.
Bone Heap is at number 6 though. It’s not always easy to set up an effective bone economy. Especially when you have cards like the Mummy Lord, that costs 8 bones, and the Headless Horseman, that costs 13.
What are Bone Heap’s strengths?
- Bone Heap is a free card to play, so if you find you don’t have a bone economy, you can use it as a wall.
- Having a Sporedigger is probably the best way to farm bones for the Bone Heap. Since Sporedigger will dig up two bones instead of one bone during your turn, you’ll be able to constantly get bones for it.
- Using Sporediggers as a farm can turn your Bone Heap into a defensive wall, giving you time to create another strategy or to blast right through.
7. Plasma Jimmy
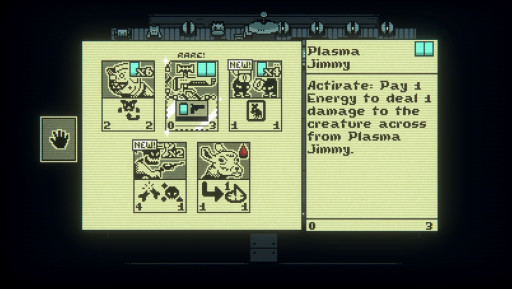
“Activate: Pay 1 Energy to deal 1 damage to the creature across from Plasma Jimmy.”
Plasma Jimmy is a low-cost rare card that allows you at least to put 1 point of damage on the board. The most you can do with 1 Plasma Jimmy is about 6 points of damage. The scale itself used in all three acts are from 1 to 10, 5 to you and your opponent. If you store up your energy, you can really pack a punch.
Plasma Jimmy, as fun as he is, is number 7 on our list. Though he is a low-cost card, you have to potentially draw out the battle to get that sweet 6 point damage. Plus, once you expend your energy, Plasma Jimmy only has 3 health to fall back on. Plasma Jimmy won’t attack open spaces, which just makes him an opposing creature only.
What are Plasma Jimmy’s strengths?
- Did I mention this card is low-cost? This is one of the big things about Plasma Jimmy. Since Energy naturally generates over the course of your battle, it’s the easiest to replenish.
- You can hook Plasma Jimmy up to the Energy Conduit to where you won’t have to worry about Energy depletion.
- If you have the Energy, Plasma Jimmy can do at least 1 point of damage to at most 6 points of damage. You’ll be able to put out 6 points of damage in one round if you play your cards right.
8. Necromancer

“When another creature you own dies, it is returned to life and dies again immediately.” (Located in the top middle of the 5 given images)
There is another way to farm bones, and you’re looking at him. Necromancer’s ability to bring things back to life…and kill them again…is fantastic for getting two bones every time one of your creatures die.
Necromancer is good for a bone economy for your Bone Heap. If you throw in your Ouroborus, you can get two levels for your Ouroborus too. Necromancer is a great card. However, in the grand scheme of things, he is ranked number 8.
He costs three bones, a moderate cost for this card. Necromancer only does 1 point of damage at a time, and as creatures get stronger, you’ll have to hide it. He only has 2 health, so just a Bolthound can take him out.
What are Necromancer’s strengths?
- Necromancer only costs 3 bones, which can be obtained by killing three things. It’s an easy card to get on the board to solidify your bone economy.
- Necromancer can at least defend itself with its 1 attack. Though it may or may not take it out, depending on the enemy, it can at least weaken it.
- These cards are not incredibly rare; you can find them from time to time in the Trader’s pockets.
- Pairing this with the Ouroborus is the fastest way to gain levels for your Ouroborus. The Ouroborus for Act 2 can be found with the Beasts.
- The double kill on the creatures when Necromancer is in place will generate enough bones to play higher cost cards like the Headless Horseman.
9. Dead Hand
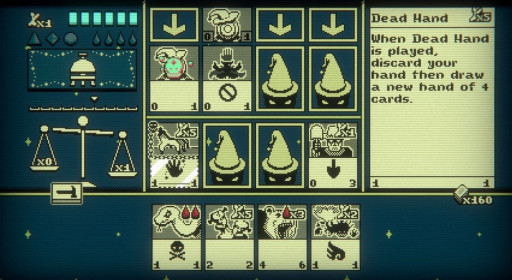
“When Dead Hand is played, discard your hand then draw a new hand of 4 cards.”
This is essentially another clover. However, instead of picking it from a patch, you’re picking it up from a patch of hands. The card distribution in this Act is not the best, so to get a card where you can shuffle your cards is amazing. This will give you 4 new card options, because let’s face it, the second shuffle of the clover sucks more than the first.
This is number 9 on our list. Everyone loves a shuffle. Though it’s no Magpie eye, this is handy if you need a potential out. It costs 5 bones to play, which reinforces the idea that you’ll need a bone economy just to do this hand once. It’s not a card you want in a pinch, especially if you’re relying on RNG.
What are Dead Hand’s strengths?
- Dead Hand is a card version of the clover you can pick by the water. This will give you a re-roll of your current hand to hopefully give you something better.
- Dead Hand can be found in Grimora’s Trader’s post, so after beating up Magnificus’ training dummy, swing by there to get a potential copy of it.
- If you have Skeletons or Gravediggers, you can farm bones in order to play Dead Hand. But you will need to rely on RNG to put it in your hand at times.
- It has at least one attack so it can defend for a turn if you need a meat shield.
10. Stim Mage
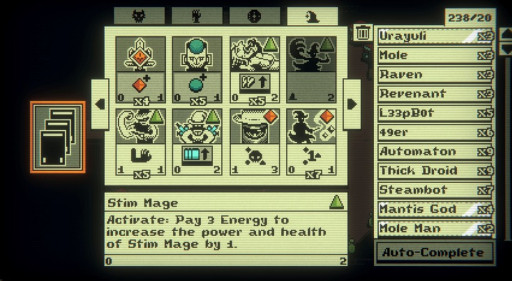
“Activate: Pay 3 Energy to increase the power and health of Stim Mage by 1.”
Stim Mage is last but certainly not least on our list. If you are looking for someone to farm foils with, this is definitely the card for you. It does cost a Emerald Mox in order to put it on the board. These can be easily obtained around the map or through the trader.
Stim Mage is number 10 on our closing Act, but due to the hoops you have to jump through to set him up. He takes an Emerald Mox to be able to place him on the board. It takes 3 energy each time you want to level him up. So you have to make sure you have a way to replenish your energy to get effective use out of him.
What are Stim Mage’s strengths?
- Thankfully, Stim Mage only costs the one Mox instead of multiple like Master Bleene. And the single Mox cards such as Emerald, Ruby, or Sapphire are easy to get through the Trader.
- If you use the Energy Conduit, paired with the Stim Mage, you can do an infinite upgrade to Stim Mage.
- If you use the Energy Conduit AND the Buff Conduit with Stim Mage, you will get energy that never depletes and an extra point of damage. This makes it a lot easier to farm for 50 foils at a time, if you can get the setup.
Act 3
1.Double Gunner
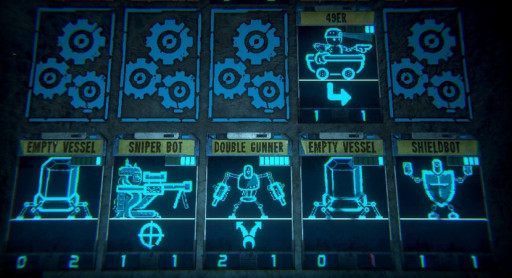
“Double Gunner will strike each opposing space to the left and right of the space across from it.”
This double-striker is a great card to pull in if you need a closer. Being able to deal 2 damage per spot will have you raking in the screws. Though it only has 1 health, making it quite brittle, it is a nice glass cannon.
Double Gunner is number one on our list for being able to deal massive points of damage in a short time. Though you would have to wait for the Energy bar to fill up, you can increase it with Battery Bearer cards.
What are Double Gunner’s strengths?
- Double Gunner is able to do four points of damage before being gemified or upgraded. It becomes a patience game to quickly close in on the prey.
- Its Bifurcated Strike sigil makes it easier to hide, as it attacks either side.
- When gemified, you can raise the attack by one of the Double Gunner. This can have your Double Gunner doing 6 points of damage instead.
- You can overclock the Double Gunner to make it more powerful, but if it dies, you lose it forever. That’s with any overclocked card.
- Putting the Unkillable Sigil on your Double Gunner will make it easier for it to come back to your hand. Your best way to pay the cost is to have some sort of energy economy going.
- You can put Sentry on your Double Gunner, so it will be able to do at least 1 point of damage to its opposer. This could potentially kill its opposer or at least weaken it for you to sweep it next play.
2. Swapbot
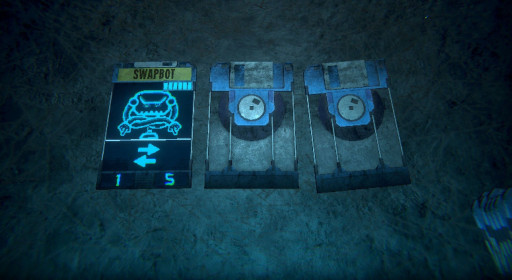
Swapbot once damaged will swap his attack and health, turning him from the defensive to the offensive. Though he won’t do the 5 damage unless you gemify or upgrade him, he still does four points of damage.
He is number 2, because he does the same amount of damage as the Double Gunner. The difference between them is that the Double Gunner can strike two places. Both cost full energy though. Swapbot is incredibly weak with his one health point; you would need to upgrade him with gems or with found upgrades so it can survive.
So what are Swapbot’s strengths?
- His ability to switch between defensive and offensive mode is great for when you’re in the heat of battle.
- Swapbot’s 4 attack is equal to the Double Gunner. So you can still get in a chunk of damage
- You can gemify Swapbot and increase its chance of survivability since it becomes a 2 attack and 7 health beast.
- You can upgrade Swapbot and give it Sharp Quills to have the opponent take damage when they strike you
- Putting Wolf Beast Mode on your Swapbot will give it 3 attack instead.
3. Gr1zz
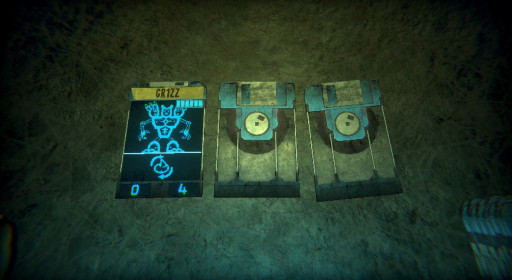
Grizz shares the same quality as Sarcophagus as it takes one turn to transform into a beast. However, when it does transform, its attack transforms as well and threatens 4 points of damage to your opponent. And if you’ve come across that fight with Gr1zz and Sonia, then you know what this card is capable of.
Gr1zz stands at a proud number 3 on our list, just for the powerhouse and wall he is. Though you do have to wait every other turn, this creature is sure to turn the battle around for you. Just be careful not to misplay like I have.
What are Gr1zz’s strengths?
- A defensive wall, Gr1zz is sure to last a few rounds to help you strengthen your strategy.
- Every other turn, Gr1zz transforms into a powerhouse that does more than half of your opponent’s scale.
- A gemified Gr1zz will have a lower cost than a non-gemified one. So as soon as you can, gemify your Gr1zz so it will only take 5 power to play instead of 6.
- Giving Gr1zz the Unkillable Sigil, paired with the Buff Conduit and Energy Conduit, gives you unlimited uses of its power. As long as neither of your Conduits die
4. Gembound Ripper

Gembound Ripper is a strong card to have, especially early in the game. Despite what it says in the image, the Gembound Ripper starts at 3 attack and 1 health. A 5 cost card, it is a little pricey. But it’s worth putting a hole in PO3’s defenses.
Gembound Ripper is number 4 on our list due to its higher attack stat. Though it only does 3 damage at first, it can still pack quite a punch. And that’s before gemifying it! Plus gemifying it can upgrade its health, allowing your reaper to do some ripping a lot more often.
What are Gembound Ripper’s strengths?
- It is a high-cost, high-damage card that can be excellent in clearing the way for your other cards.
- Its low health can be combated by gemifying the card.
- I have found that putting the Wolf Beast Mode on this to power up its attack is great for the glass cannon look.
- If you want your Gembound Ripper to be more lethal, you can put the Adder Beast Mode on it. This will ensure that every hit will knock ‘em dead.
- Gemifying it will lower the cost, so instead of paying 5 energy, you would only be paying 4.
5. Mycobot

Mycobot is a weird amalgam of creatures. This is a secret card you can get through defeating the Mycologist. You can’t kill it during the battle, because if you do, you don’t get it. It will fail you, and you’ll have to start over.
It also becomes an assault of creatures that get stronger. So make sure you have your strongest cards and some sort of strategy, because it took me a couple tries to get it. The battle to get Mycobot lasts 2 phases, in which the second phase is when your own cards will fuse.
This is number 5 on the list due to how out of the way you have to go for this one. To get this card, you’ll need to get a key from Act 2. And getting the key itself requires another step. While it is a strong card, it’s not worth entirely restarting to go back and get it. It’s definitely worth it if you remember while you’re in Act 2 though.
What are Mycobot’s strengths?
- You can manipulate how it fuses together. The costs and sigils will be taken from the center card on your side. Then everything muses with it.
- It isn’t just the costs and sigils. The power and health from that center card are taken too. Then, the other creatures’ attack and health gets fused into one.
- To start with a strong foundation for Mycobot, it’s best if you sacrifice one of your stronger cards. That card will gain the sigils, attack, and health of the others as the process goes on.
- The amalgamation of all the cards gives you a high damage card that has every ability under the sun.
6. Lonely Wizbot

Our wizard friend is back! Out from the darkness and into a card, he comes to fight for us. Lonely Wizbot only costs one energy, making it easy to put on the board the first turn. Unfortunately, the Lonely Wizbot only has one health point.
You’ll need to stimulate him with some upgrades if you want him to be a stronger wall. The other unfortunate thing about Lonely Wizbot, and why he’s number 6, is his Clingy sigil. Lonely Wizbot will go across the board to attach itself to the next card you lay down.
This makes it hard to strategize with him for certain parts because he doesn’t stay where you planned. However, the two attack is nice as it is a decent amount of damage to put on the scale.
What are Lonely Wizbot’s strengths?
- Before any upgrades or gemifying, Lonely Wizbot does 2 damage.
- You can give him a variety of upgrades, and one of them is the Hefty sigil. This can potentially shove Lonely Wizbot out of harm’s way.
- You can give Lonely Wizbot the Sniper sigil. This can turn Lonely Wizbot into more of a support card and still give him his stimulation.
- You are able to gemify Lonely Wizbot to where he has at least 3 health, rounding him out and making a fighter out of him.
- The best course of strategy is to lay down whatever card you want down first, and then lay down Lonely Wizbot. That helped me get around his Clingy ability.
7. Fishbot

The Fishbot offers so much to us. Fishbot has 3 health so it can tank a few hits for you and has the Gift Bearer. The Gift Bearer sigil makes it where Fishbot can give you one of three special cards: Good Fish, Bad Fish, and More Fish. Good Fish has quite a few sigils and is the only one to have that many without manually putting it on them.. It has the Sniper sigil which allows you to pick where you want to strike 2 damage to. Good Fish has the Sentry sigil, so whoever has the misfortune to walk in front of it, will be blasted.
Bad Fish is less exciting. It has the Brittle sigil, so after it attacks, it will die. There’s also the Annoying sigil that comes with it. The Annoying Sigil will boost your opponent’s attack by one, something nice when you’re getting buffed, but not when you’re getting attacked.
More fish contains the Gift Bearer sigil as well, so if you weren’t able to get Good Fish, you can use More Fish to reroll it. Once this card dies, you’ll get one of the three cards once more. So why is it number 7? Despite its versatility, Fishbot doesn’t do a lot of damage. He only does one point of damage until you buff him. There are two ‘bad’ options and a good option.
What are Fishbot’s strengths?
- Fishbot provides a wall with its 3 health.
- Once Fishbot perishes, you can get one of three cards from him.
- The elusive Good Fish has 2 attack and 2 health, along with a slew of other sigils to bring out the big guns.
- More Fish gives you a second chance to try and get Good Fish.
- You can give Fishbot the Wolf Beast Mode, and he will be upgraded with 3 attack and 4 health.
- Fishbot can also be gemified to have an increased health or attack. You can gemify for a lower cost, but Fishbot doesn’t cost a lot to begin with.
8. Sniper Bot
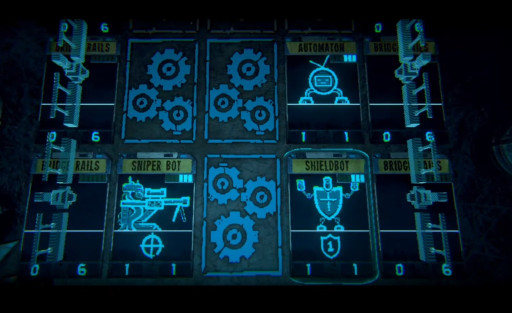
Sniper Bot is exactly what it says. You get to snipe things. You want to get rid of those Explode bots? Do it. Take your shot, and pop them from across the field. Until you gemify the Sniper Bot, it will continue to only do 1 attack.
This is number eight on our list for that. While its Sniper sigil makes it useful for clearing out potential danger, it only does it by one damage point at a time. It also only has one health, so it can be taken down quite quickly. In order to preserve Sniper Bot, you will need to keep it hidden or gemify it.
What is the Sniper Bot’s strength?
- You can take out Explode Bots without having to risk any of your good cards.
- It can be a temporary wall if you just need to throw something down.
- You can gemify it so it can cause more damage each hit. A gemified Sniper Bot yields 2 attack and 3 health
- The Adder and Wolf Beast Mode will change it every other turn to attack the spot opposing it. The Adder Beast Mode will give it the Touch of Death and keep its normal stats. The Wolf Beast Mode will give it 3 attack and keep its 1 health.
9. Shieldbot

Shieldbot starts with a shield as its name says. This makes it a great wall for those pesky Explode Bots. It only has 1 attack and 1 health, so once that shield goes down, it will probably follow suit.
Shieldbot is number 9 on our list because it is a decent wall. It can shield you from the Explode Bots, and keep a card on your side. It has a relatively low cost. But without gemify or upgrading it, it only does 1 damage.
So what are Shieldbot’s strengths?
- The Wolf Beast Mode is great if you’re looking for a great physical fighter. This will give it 3 attack but keep its 1 health.
- Giving Shieldbot the Adder Beast Mode gives it the Touch of Death. This could be great to use as a meat shield.
- Shieldbot has a shield as its name suggests. So despite its 1 point of health, it can actually withstand 2 attacks.
- With gemifying it, you can also increase its attack so you can balance it out. Gemified Shieldbot is 2 attack and 3 health.
10. Custom Cards

This is one of three custom cards you are permitted to make in this Act. In Act 1, you were able to construct your own cards through your death. You would then go through picking the cost, power/health, and sigils your death card would take.
In Act 2, this was taken away, and Inscryption took on a more table-top feel. Then in Act 3, we can unlock making our own cards without dying. This is a really cool concept, but it only happens towards the later part of Act 3. Hence why it is number 10.
In order to begin creating your own custom card, you’ll have to give up one of your own for SP. SP is what is needed in order to flush out your card with sigils, power, etc. You can gain more by increasing the cost or by sacrificing a card with a lot of sigils.
Now while this provides a plethora of options for us, it’s more towards the end of the game. Plus, depending on what you want to add onto it, it can make the card as expensive as a Double Gunner without having a decoy card for it.
What are the strengths of custom cards?
- You get the chance to customize your own card without having to lose all your progress, like in Act 2.
- Using SP, you can customize the card to your battle strategy. You could easily make a glass cannon or a defensive wall.
- The ability to give it whatever sigils you choose can lead to a lot of great combinations. One of the great combinations you can do is Mighty Leap and Unkillable. If you pump your card full of health, you can have a wall that keeps coming back to your hand.
- Being able to control how much the card costs gives you the chance to work with whatever energy economy you have, so it becomes a card to fit your situation.
If you liked this, you may also like:

