![[Top 15] Control Best Settings for a Great Experience](/sites/default/files/styles/responsive_image_600xauto/public/2021-09/settings_main.jpg.webp?itok=fChUpD5N)
Being appointed director of the Federal Bureau of Control like 15 minutes after entering their HQ for the first time in your life, it’s a lot to take in. Accepting that the Oldest House has an interior infinitely larger than its outer walls, it’s no easy task also. Juggling such psychological burdens is all the more difficult if you must avoid enemy’ gunfire while doing so.
That’s why this game is so aptly named – Control. And in this one, the task of assuming a firm grasp on the reins begins even before we press “new game”: we should take a good look at the list of options first. It’s the path every self-respecting director would take before anything else.
What follows is a list of the 15 best ways to tinker with the list of settings, thus providing yourself enough space to not lose comfort during those prolonged gameplay sessions.
Bulls-eye
15. Enable Tutorials On
Veterans familiar with previous work of developer Remedy may feel superior when they notice that Control seemingly doesn’t differ much from titles like Alan Wake or Quantum Break. Emphasis on “seemingly”, though…
Because, even if Control allows itself to be artistically similar to its older brethren (and to be more intimately connected to A. Wake), it also sprouts much wider wings than those games. The opening two to three hours alone introduces so many interesting concepts that they may become hard to follow.
That’s why it’s important to keep good track of each new concept - knowledge is power.
How Enabling Tutorials On, fixes the problem:
- It directs our attention to the most important aspects of the game, which we might’ve overlooked otherwise
- Allows us to keep pace with the rising difficulty of the game
- Helps us not to miss opportunities to gain new powers, before it’s too late
How to apply this setting: Options > Gameplay > Enable Tutorials by checking the box
14. Swap Left and Right Sticks On
Not many games incorporate this one, but it’s an option that’s always nice to find. Statistics show that a large percentage of all gamers aren’t right-handed, therefore, it’s encouraging that developers opt to implement this setting more and more nowadays.
With it, we can easily adjust the controller to our preference as easily as we would change the position of the mouse on PC.
How Swapping the Left and Right sticks, fixes the problem:
- Left-handed gamers who use a controller, might find directing the camera with the left stick and moving with the right, to be preferable and more comfortable for them
- How to apply this setting: Options > Gameplay > toggle on the option to Swap Left and Right Sticks
13. Subtitles Background On
It might seem unimportant, but given the myriad of otherworldly concepts speculated at length in this game, the relevance of this option soon becomes apparent. All the more so when conversations take place in totally white areas, and between subjects whom we can only understand through words.
The gameplay also ties to our understanding of the Oldest House, since many plot-important puzzles and particular monster encounters are explained during dialogue with various NPCs. Not to mention the many collectible items, which shed more detailed light on the subject at hand.
The frequency of those instances solidifies the need that the player follows this intricate plot, some of which is not communicated in audio at all.
How setting Subtitles Background On, fixes the problem:
- Makes it easier for us to understand various game mechanics
- If we pay a sufficient amount of attention, we won’t get lost (as often, at least…)
How to apply this setting: Options > Interface > set Subtitles Background On
12. Choose the right setting for Far Object Detail, depending on your gaming gear
Visually, Control is one of the most stunning and unique games released in recent memory. Speaking graphically-wise, it’s unarguably top shelf, no matter the platform (PC, PS, Xbox…)-this game is taxing to whichever machine we run it on.
Such quality comes with a drawback, though, namely in the form of frame drops and various stutters. Yet, there are many ways to circumvent this problem, with minimal compromises towards the game’s looks. One of the best and most unobtrusive ways to boost the performance is to lower the detail in which the game renders distant objects.
Even if we set this option to its lowest value, we won’t notice any particular change, since it’ll only affect really far away objects, almost at the edge of Jesse’s eyesight. Not something anyone would notice in a game as lively as Control.
How choosing the right setting for Far Object Detail, fixes the problem:
- It’s an elegant solution that will boost that FPS count higher, without sacrificing much in terms of visuals even when set on Low
- Owners of more powerful PCs can turn it all the way to High, and enjoy a much crisper appearance of all the things coming into view
How to apply this setting: Options > Display > set Far Object Detail to Low, Mid or High
11. Choose the right button for the “Change Side” feature
Control is first and foremost, a third-person shooter with an over-the-shoulder perspective. As such, players should know how to handle themselves in really tight situations, when precise shots must be landed consecutively in a split second.
Jesse cannot take cover behind walls, so she should stay in motion to avoid becoming an easy target. This constant movement hinders our ability to aim, especially when enemies attack from alternating sides. So, it is prudent that we’ve timely assigned the most comfortable button switching between shoulders.
Obviously, searching for this button in the heat of the moment won’t yield good results.
How choosing the right button for the “Change Side” feature, fixes the problem:
- Allows us to fully appreciate this game’ combat
- Helps us become better players and utilize all tools at our disposal as intended
How to apply this setting: Options > Controls > choose the desired button for this function
10. Turn Motion Blur Off
Many modern video games rely on this effect to create more intense gunfights. That doesn’t necessarily mean that motion blur is desired by gamers, by any stretch of the word.
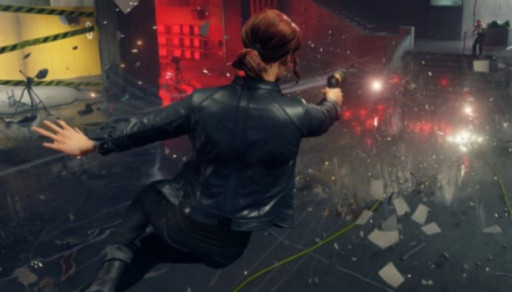
This game often features big explosions that leave a decent number of particles suspended mid-air, while enemies still shower you with bullets and explosives. It all takes place on elaborate arenas consisting of multiple levels, so we should be wary of the dangers originating not just from left and right, but from above and below as well.
Therefore, being able to quickly redirect Jesse’s focus without stuttering, is understandably helpful.
How turning Motion Blur Off, fixes the problem:
- Prevents us from feeling disoriented in the level’s geometry
- Smooths out some chaotic elements of Control’s explosive encounters
How to apply this setting: Options > Display > Turn Motion Blur Off
9. Turn Film Grain On
It’s not all “run and gun” in this game – more often than not, Jesse will engage in inspiring conversations with many interesting characters or stumble upon a particularly twisted new area. Those situations make room for the game’s strong art direction to shine, and to even be amplified by the inclusion of film grain.
It’s good that the developers peppered their game with just the right amount of this feature, and it never feels distracting to the player. It only contributes to the gravitas of a given scene, which is absolutely a good thing.
How turning Film Grain On, fixes the problem:
- This effect paints a “make-up” on the game when needed, assuring that those important cinematic moments deserve the player’ attention
- Many of the game’s enemies and bosses are introduced in a grandiose fashion, and the film grain plays a vital role there
How to apply this setting: Options > Display > Turn Film Grain On
Never a dull moment
8. Assist Mode Enabled (if you’re having serious troubles with the game)
There are no difficulty modes to choose from in Control: we all experience it just as the developers intended. This means that players who don’t revel in spikes in difficulty might be turned off at certain points of the story.
The absence of an easy mode also means that players with disabilities will always face overwhelming opposition from the game’s enemies, without being able to turn the odds in their favor. That is – only if they don’t enable the “assist mode”, which is incorporated in the game and lays hidden at the bottom of the options list.
Once enabling it, we can even choose some cool bonus modes (like immortality, one-shot kills always, damage reduction, etc.).
How Enabling Assist Mode, fixes the problem:
- Allows us to more closely tailor our experience with this game (though it might not be as the developers envisioned it for us)
- It’s the “cheat codes” section of the options list, so a lot of fun moments can be created with it
How to apply this setting: Options > Gameplay > Enable Assist Mode
7. Controller Aim Assist On (if you’re using a controller)
Gamers who feel more comfortable using a controller for all types of games might understandably run into some hardships when battling Control’s ensemble of baddies. Even more so when they group and position correctly, intelligently aligning themselves in dangerous formations.
Because of their combat readiness, Jesse should dispatch them swiftly so they can’t achieve their full potential. However, because of how far some game areas stretch, scoring headshots can prove a bit tricky, even if we aim with a mouse.
How turning Controller Aim Assist On, fixes the problem:
- Utilizing this option while using a controller, actually feels more intuitive
- Prevents frustration from building up
How to apply this setting: Options > Gameplay > Enable Controller Aim Assist
6. Adjust correctly the Aim Sensitivity
Throughout the course of Control, Jesse should remain at the top of her game when it comes to scoring precise shots, one after the other. Given that everything in her arsenal incorporates prolonged cool-down periods between bursts, it’s not hard to understand how important it is to make every shot count.
To achieve this more easily, we should set the aim sensitivity to a value that we prefer the most. Keep in mind that when playing on a modern screen with a 16:9 display ratio, the horizontal (X) and vertical (Y) axis of the screen are not equal. Their difference in length should be taken into account when tinkering with that portion of the settings list.
How correctly adjusting the Aim Sensitivity, fixes the problem:
- It’s a big part of any game that involves ranged weaponry, and even slight changes to the slider produce immediately noticeable results
- Setting it just right allows us to appreciate the combat even more
- Makes us be more immersed in the experience
How to apply this setting: Options > Gameplay > adjust the slider for both the vertical and horizontal aim mode sensitivities
5. Set Sprint Mode to Toggle On
Jesse Faden is given a lot of tools at her disposal – between the 5-6 different weapons and the four “powers” that require energy, she always has her hands full. And she does all that while practically never standing still because that is like asking to be shot in Control.
That’s why it’s a relief that sprinting shouldn’t be one of those things that demand constant attention. If we set it to “Toggle On”, we need to press the button only once and she will keep her momentum until we change to a different action. Those who’ve spent some quality time with the game, know how helpful this really is.
How setting the Sprint Mode to “Toggle On”, fixes the problem:
- Instead of having to sit on the button in order to remain mobile, this option frees up one of our fingers which then can be used for something else
- Given how often we should run in this game, this prevents a lot of player fatigue
How to apply this setting: Options > Gameplay > set Sprint Mode to Toggle On
4. Set Shield to Toggle On
Shield is definitely one of the most reliable abilities in Control, and more often than not, it proves to be a real life-saver. Most notably when we are on our last legs, and we raise this telekinetic barrier just so we can collect the healing elements dropped by our enemies. And we are able to do so safely – thanks to this skill.
But, even when this skill is in use, we should remain mobile. That means that having to keep the Shield button continuously pressed, can rob us of the ability to quickly perform other actions in the heat of battle. Thankfully, we can set this skill to Toggle On/Off.
How setting Shield to Toggle On, fixes the problem:
- Instead of having to sit on the button in order to remain protected, this option frees up one of our fingers which then can be used for something else
- This skill is usually combined with the dodge action so we can move into cover quickly, and doing both while keeping the button pressed can feel awkward
How to apply this setting: Options > Gameplay > set Shield to Toggle On
3. Set Launch to Toggle On
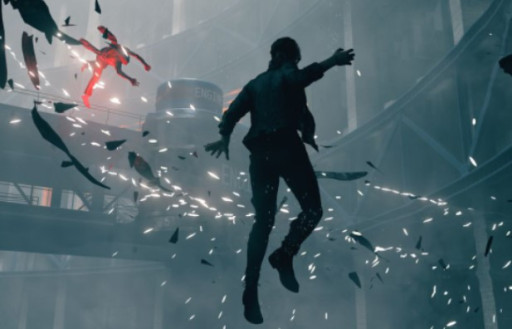
The most destructive of Jesse’s abilities, Launch allows us to effortlessly lift up large, often explosive objects with our mind, and hurl them towards unlucky targets. However, it takes some time to prime such projectiles, since their travel pattern isn’t momentary – we actually see the chosen object fly from a distance to our vicinity.
This period of time is short, but enough for a fast foe to hide behind a pillar or a staircase. Then, we should create space for the full effect of this attack, by repositioning or destroying something else first. Hence, launching an object can become a multi-part operation, which will demand quick usage of 3-4 different skills.
Needless to say, we’ll need all of our fingers to issue each subsequent command.
How setting Launch to Toggle On, fixes the problem:
- Instead of having to sit on the button to prepare a destructive projectile, this option frees up one of our fingers which then can be used for something else
- We should involve tactics when we choose the best target for a Launch since it eats up a respectable amount of energy. To achieve this, we should get in the correct position first, and doing that is a lot more comfortable if we need to press the Launch button a maximum of two times
How to apply this setting: Options > Gameplay > set Launch to Toggle On
2. Set Aim to Toggle Off
Unlike the usage of Jesse’s paranormal abilities, the Service Weapon allows for a snappier, almost trigger happy playstyle. The game loves to put us in the middle of mayhem, with enemies able to spawn all around us unpredictably. So, shooting will often come way before we can even think of choosing the right skill.
Because of this, we shouldn’t get locked in the aiming animation, which slows down Jesse’s speed considerably. Instead, we should spend as little time as possible between raising our gun and pulling the trigger. And most importantly – after taking a shot or two, we should immediately revert to running, or we may suffer potentially lethal damage.
Such speed is best achieved by tying the aiming process with the instances when we hold the finger pressed on the aim button. This fits best with the dynamic of Control.
How setting Aim to Toggle Off, fixes the problem:
- Speed, speed, speed – that’s the correct and most fun way to play this game. Not complying with this mantra will prove detrimental very quickly
How to apply this setting: Options > Gameplay > set Aim to Toggle Off
1. Choose the right setting for Shadow Resolution, depending on your gaming gear
The world of Control is aesthetically rich, and while not too overburdened with lush green areas or beautiful vistas, it is perfectly fitting for the game’s thematic. Most importantly, it’s at its best precisely when the fighting starts, as debris of all kinds fills the screen and bullet patterns riddle the ether. It is a symphony to behold.
Amidst all that, who really cares about the quality of the shadows each person or object cast? It’s meant to be a rhetorical question, but the fact remains that even those who do care for such details, simply won’t have time to look for things to complain about. Courtesy of the rapid pace Control presents itself with.
Because of that reality, lowering the resolution for all in-game shadows is one of the least painful ways to prevent the frame rate from dropping.
How choosing the right setting for Shadow Resolution, fixes the problem:
- While somewhat noticeable, it’s really easy to not focus on the shadows, even if we set this setting to Low
- In any case, if your PC can take it, go for it – set the shadow resolution to High, and notice how clearly they outline against the environment
How to apply this setting: Options > Display > set Shadow Resolution to Low, Mid or High
Did you find this list to be helpful and informative? Let us know in the comments section.

