Struggling to outsmart the Killer in Dead by Daylight? Come learn essential tips and tricks to increase your chances of survival. Don’t miss out on some in game secrets of Dead by Daylight that are hidden in this article!
Generators
1. It Takes Two

When repairing generators, it is important to remember that more is not always optimal. The most time efficient way to complete generators is no more than two Survivors per generator.
You may be wondering why? More teammates means more generator progress doesn’t it? In Dead by Daylight, you will receive a repair speed penalty the more Survivors that are on the generator. Two is the golden number. The exception to this rule is if specific perks are in use such as Prove Thyself, or if a specific situation is in play. For example, if only one generator remains and needs to be powered through.
2. 3 Gen.
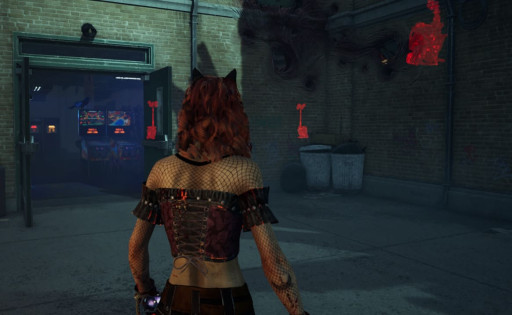
A common mistake general Dead by Daylight Survivors make is repairing all the “safe” generators first. This results in what we call a 3 gen. At the end of the game there are 3 generators left. Only one needs to be repaired, but they are in such close proximity to each other that it is difficult to achieve.
Preventing this will drastically increase your team’s chances of survival and escape. Build up your courage! Head towards a generator close to the center of the map. Rotate your repairs to alternating generators. You can also bring perks such as Deja Vu to assist you in preventing a 3 gen.
3. Follow The Lights
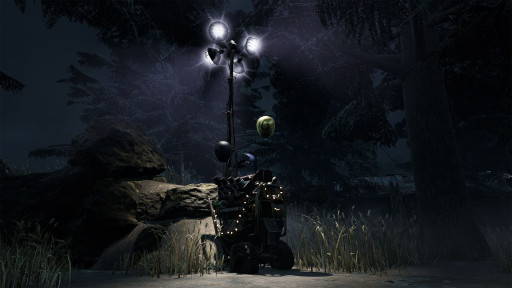
Now that you’ve learned an advanced generator technique, let’s talk about how to find a generator. There are a few distinct ways to track down a generator. On outside maps, look upwards and search for blinking lights. If the lights are solid, that means that specific generator is already repaired. Inside maps can be a bit trickier. For example:
- Lery’s Memorial Institute – Blinking lighted signs.
- Hawkins National Laboratory – Large pulsing doors.
- Gideon Meat Plant – Large metal doors.
It is important to be able to find generators quickly and efficiently. The faster you can locate a generator, the faster the Exit Gates will be powered. Use your newly discovered trick to lead your team to victory!
4. Tap and Go Tech.

When you are rotating through your generators, quickly tap a generator you don’t plan on repairing fully. This puts a small percentage of repair progress on that generator.
This provides a distraction for the Killer who may stop to kick the generator and search for a ghost that isn’t there. This technique can also be used to waste the use of a Killer’s perk such as Pain Resonance.
Taking a few seconds to provide a distraction and even waste the use of a Killer’s perk is a great way to assist your team. Always be on the lookout for new helpful tips and tricks!
5. Midwich’s Secret

It’s time for a Dead by Daylight Secret! Let’s travel to the infamous Midwich Elementary School. Inside these forsaken walls lurks a secret. To uncover this secret, you must evade the Killer patrolling the halls. Make your way to the Chemistry Lab which is indicated by the periodic elements table on the wall. Repairing the generator in this room will trigger the toll of the bell. Head to the Music Room, which is indicated by the piano inside the room. After repairing this generator, another bell will toll. Finally, finish repairing three additional generators to trigger the end game collapse. Head to the base of the Clock Tower. The wall will dissolve to reveal a secret room with a bonus chest. Collect your reward for surviving the horrors of Midwich!
Hooks
6. Basement Boss
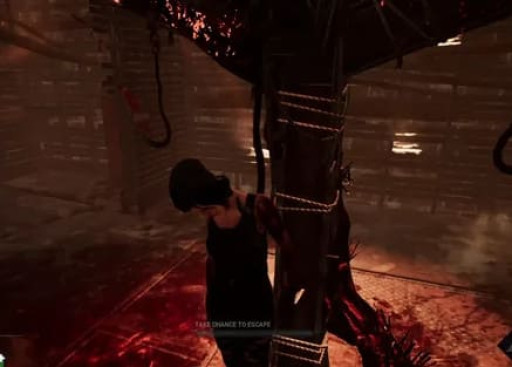
Basement is one of the most dangerous places on the map. Killers frequently return to snag another easy hook. When you rescue a Survivor in the basement, they should position themselves to take a hit from the Killer instead of you. The rescued Survivor will have the Endurance status. This will allow them to take a hit and will receive a deep wound instead of going into the dying state. The Killer will be locked in a weapon cleaning animation giving you time to rush by.
This tactic prevents you from becoming injured, and is the safest way for both Survivors to get away from Basement. You will also save time on healing which can be put towards generator repair.
7. Rescue Me
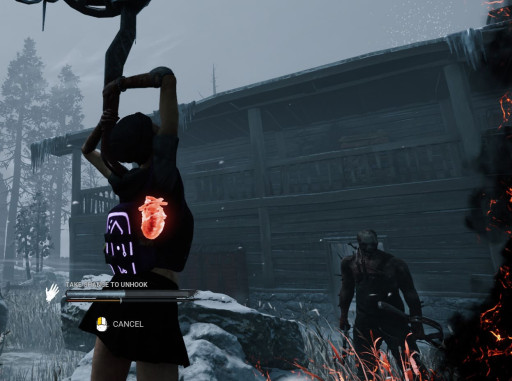
Many newer Survivors will get hooked and see the option to take their chances. DON’T! You have a 4% chance to unhook yourself naturally. Unless you are running a skill set specifically geared towards this playstyle, such as a Slipper Meat build with a Salty Lips offering, it is best to sit on hook and let a fellow Survivor rescue you.
The fastest way to lose as a Survivor is quick hook states. By extending the time between hook states, you are providing more time to complete generators. Staying alive is the key to success.
8. Save Yourself Anti-Camp Mechanic
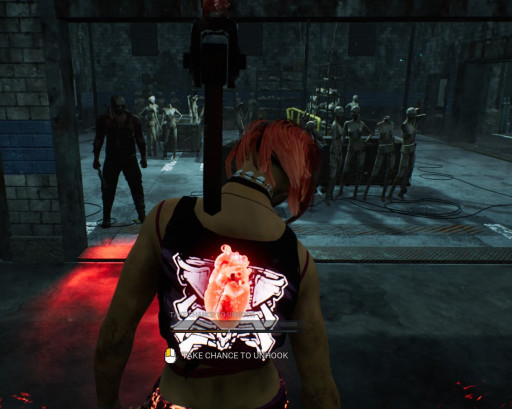
One of the only times you can break the Rescue Me rule is when a Killer is hook camping. Luckily the game has a built-in mechanic that will allow you to unhook yourself with 100% success rate. When the Killer camps your hook, your meter will slowly build. When the bar is completely full, it will light up and you can take your chance to free yourself.
While bad mannered Killers can’t be helped, it is nice the game has this in place. Always utilize this anti-camp mechanic. Keep in mind this meter will not build if a Survivor comes too close. Be sure to share this handy tip with your friends!
Healing
9. Healing On The Go
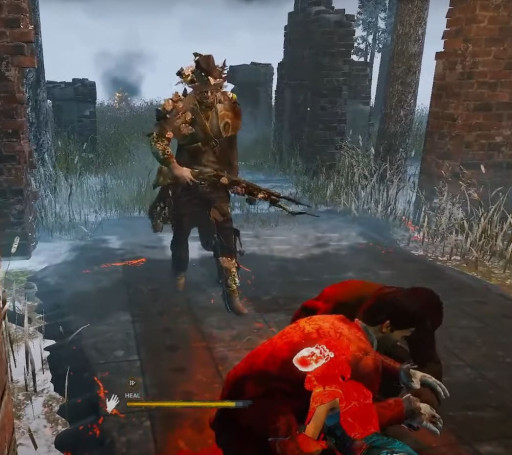
It’s a race to the finish line! The Killer is coming in fast, hot on your fellow Survivors heels. They manage to down the Survivor in the Exit Gate. Is all hope lost? Not yet. There is still time. Heal the downed Survivor. When the Killer swings to hit you, the downed Survivor should crawl towards freedom. Repeat as necessary.
Healing a downed Survivor prevents the Killer from being able to pick up that Survivor. Given just enough time, they may be able to crawl out of the Exit Gate to freedom. Try this trick out in your next game.
10. Spicy Heals

Knowing when you can heal underhook and when you can’t is an advanced Survivor technique. Most beginner Survivors will run away, wasting a lot of time. Try out this tactic to help your team become more time efficient. Here are a few examples of when to spicy heal underhook.
- If two or more Survivors are available to heal at hook.
- If a Survivor is running specific perks such as Resurgence or We’ll Make It.
- If you are both inside the range of a healing boon.
Underhook heals can provide fantastic time efficiency for your team and quick resets. Add this technique to your skill set in Dead by Daylight to become a more advanced Survivor.
11. I’ve Got Your Back
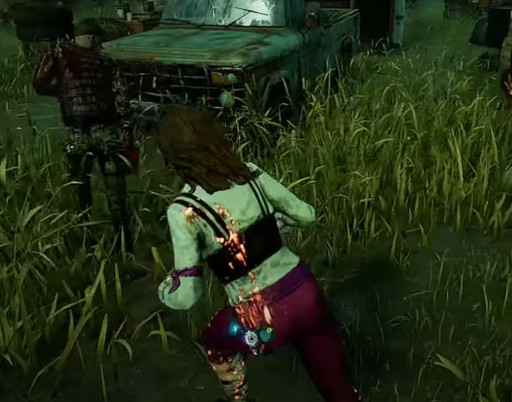
Teamwork is essential when using this tip in Dead by Daylight. There are two very important concepts you will need to remember to maximize your team’s success. Take protection hits for Survivors on death hook and spreading hook states between teammates.
These are both very important. 4v1 is a lot harder than 3v1 and 2v1. Maximizing the time all four Survivors remain alive greatly increases your team’s chances of success. More hook states, makes you an easy link to break. Use teamwork to protect each other.
Looping
12. Gold Toolbox Secret
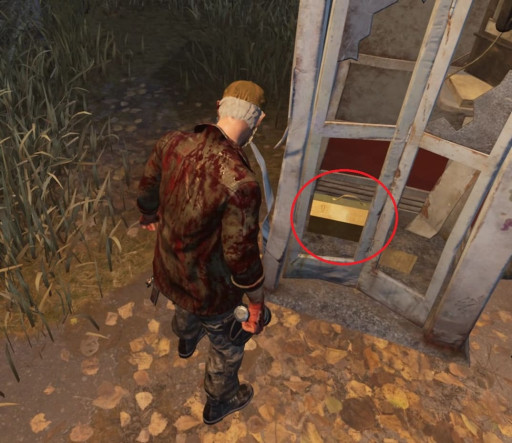
Who is ready for another secret of Dead by Daylight? All realms in the game have a hidden golden toolbox Survivors can find. While this toolbox is just for fun and cannot be interacted with in any way, it’s a unique treasure hunt you can keep your eyes open for. If you find one, share your discovery with your teammates and even the Killer! Most players will be appreciative of this little Dead by Daylight Easter Egg. Gear up and let’s get golden toolbox hunting!
13. I’ve Got My Eye On You
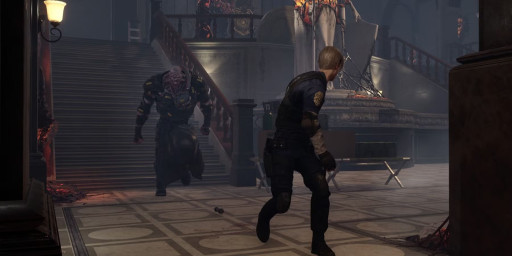
Most newer Survivors will run straight away from the Killer. Did you know you can enhance your looping abilities by simply looking back towards the Killer? This allows you to monitor their movements. You can easily predict where they are going next and counter it.
While this tactic will take some practice, your efforts are worth the reward. You will place yourself at an all-new tier of looping. Grow your skills with this fun tip to keep the Killer on their toes.
14. Precious Pallets

Keep pallets active as long as possible. These wonderful slabs of wood provide a great tactic against the Killer. This also plays into one of the most important rules of Dead by Daylight. Do not throw God Pallets at the beginning of the game. The most common God Pallets are located in the Killer Shack.
Pallets are extremely helpful for stunning and looping. Having a pallet can make or break a loop. The longer a pallet can remain in play, the longer you can loop the Killer. God Pallets should never be used before a minimum of two generators have been completed. You can also run the perk Any Means Necessary to reset any downed pallets. Use these essential tips to keep those pallets alive!
15. I Spy
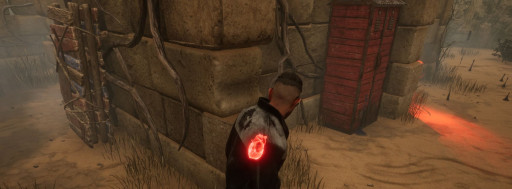
Loop Master incoming. Each loop area has safe check points you can use to pause and watch the Killer’s pathing. Make sure you know where they are coming from.
This little trick can enhance your looping skills and increase the amount of time you can successfully loop the Killer. This also gives your teammates more time to repair generators uninterrupted.
16. Window Tech.
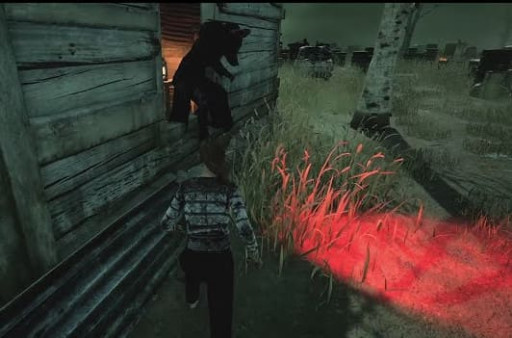
Here’s a fun little trick to try out against your next Killer. After going through a window, watch behind you to see if the Killer follows you. If they do, quickly return to the window hugging the wall tight. The Killer will be locked in an animation when they go through the window and shouldn’t have you in their field of vision. Use this opportunity to slip behind them and go in the opposite direction they saw you head.
When done successfully, this trick can confuse the Killer. You may even be able to lose the Killer completely. It’s like magic, poof where did the Survivor go?
17. Vault Master
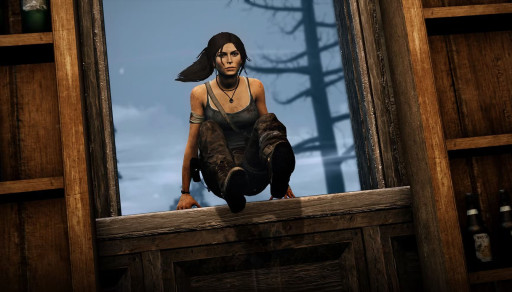
Dead by Daylight has 3 types of vaulting. Each vault type has its own pros and cons.
- Fast – Quickest version of vaulting, excluding vaulting perks such as Finesse. They require a specific distance and a head on approach to achieve.
- Medium – A slower vaulting speed when you do not achieve a head on approach and/or the distance requirements for a fast vault.
- Slow – The slowest vaulting speed which is achieved when you walk through a vault instead of running. This vault type does not create a noise alert, unlike a fast and medium vault.
Knowing the difference between the 3 vaulting types and when to utilize them is important. They can make or break your looping. If you are trying to be sneaky, you need to know how to slow vault. Practice makes perfect. Use this tip to enhance your Dead by Daylight gameplay.
Flashlights
18. Blinded By The Light

Newer Survivors may want to dabble in flashlights. With so many different shapes and sizes of Killer it can be difficult to know where to aim. As a general rule, shine your flashlight at the Killer’s neck and chest area during their pickup animation when they are hoisting the Survivor onto their shoulder. This tip will greatly improve your chances of a successful flashlight save.
There are a multitude of factors that go into being able to use a flashlight. Practice your timing, position and aiming your beam at the Killer’s chest and neck area. You will hear a noise cue, and your beam will narrow then expand if you successfully achieved a flashlight blind. Doing so will save the carried Survivor who will be dropped, and they can run away.
19. CJ tech.
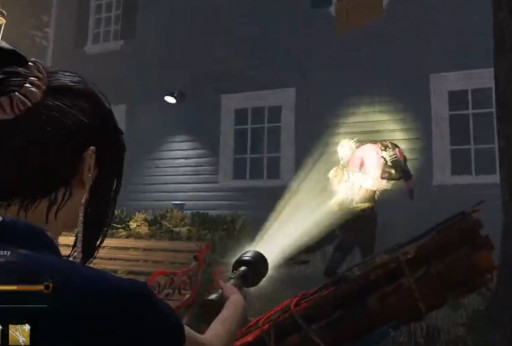
Once you have mastered how to flashlight save, you can add this other fun trick to your Survivor arsenal. To achieve a CJ tech. you must complete a few actions. After stunning the Killer with a pallet, pretend to go for a flashlight blind. Quickly vault over the pallet. The Killer will pick up the downed Survivor, while you vault back over to the safe side of the pallet. Flashlight the Killer during their pickup animation. Congratulations, you can now perform the CJ tech. and call yourself a Master Flashlighter.
Using this trick can be extremely useful for saving your fellow Survivors. Timing and precision are extremely important. Use your newfound skill to keep your teammates safely out of the Killer’s clutches.
General
20. Nostromo Wreckage Map Secrets
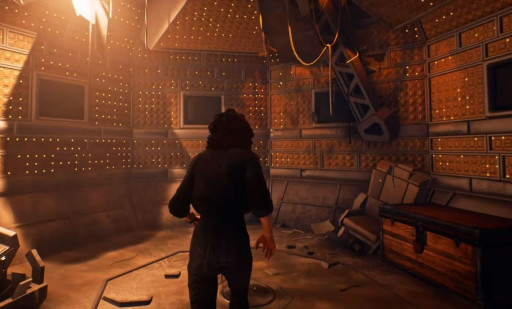
Secret Room Time! Let’s warp over to Nostromo Wreckage. The dead body of a cosmonaut will spawn at a random location with a special item. To retrieve this item, you need to crouch on top of the body and collect the Keycard. Travel to the crashed ship and locate the keypad. This can be found near the front ship generator and window vault. Insert the Keycard then, use the key binds Left, Down, Up, Right in that specific order. This will unlock the secret room and bonus chest. Don’t miss out on the other fun easter eggs of this map. Keep an eye out for the facehugger, ginger cat representing Jonesy and steampipe trap which you can actually use against the Killer.
21. Survivor Hud
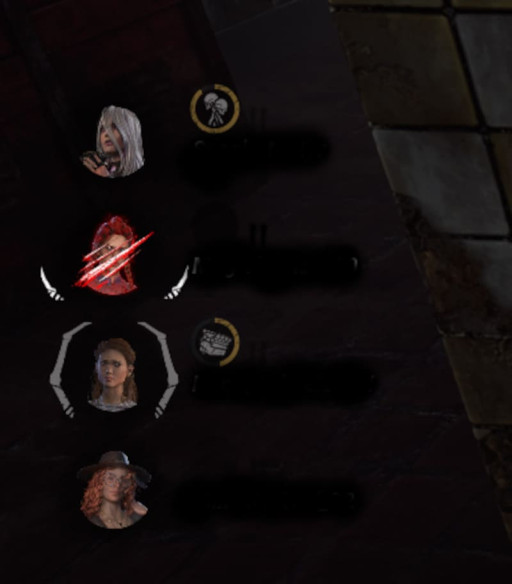
A useful tool was added to Dead by Daylight to help solo que Survivors. A Survivor Hud on the left side of your screen not only lists all your teammates, but can also show you what they are doing. Here is a list of what each icon means.
- Generator – Repairing a generator and the current progress on that generator.
- Chest – Unlocking a chest.
- Totem – Blessing or cleansing a totem.
- Plus – Healing themselves or another Survivor. This includes mending.
- Small moving entity claws – Survivor is in chase.
- Large entity claws – That specific Survivor is currently the Killer’s obsession. If the claws are moving, that Survivor is in chase.
- Hunched Survivor – The Killer has picked up that Survivor.
- Blood splatter behind a laying down Survivor – The Survivor is slugged on the ground.
- Hook – The Survivor is on hook.
- Oval – That Survivor is performing an Invocation.
- Skull Inside a pentagon – The Survivor is interacting with a Killer power. For example snapping out of Doctor’s madness or cleansing at Plague’s fountain.
- Exit Gate – The Survivor is opening an Exit Gate, and how far that specific gate is open.
Having the knowledge to know what your fellow teammates are doing, or what state they are in is extremely helpful. This information will help you decide your next move in the game. Should you go help a downed teammate recover? Is your time better spent repairing a generator? The possibilities are endless. Use your newly acquired knowledge to help your team towards success.
22. Killer Tricks

Each Killer has at least one unique trick you can use against their powers. Here are a few you can use in your next Dead by Daylight games.
- Pyramid Head – Crouch through his Torment Trails. You won’t scream or become tormented.
- Hag – Crouching through her traps. You won’t trigger the trap. While you are there, you can wipe them away.
- Nemesis – You can flashlight and pallet stun his zombies.
- Artist – Jumping into a locker will remove her crows from you.
- Shape – If you have a Tombstone Myers, jump into a locker to avoid instant death. They will be forced to hook you instead.
- Spirit – Crouch or backtrack your original path when she is phasing. Spirit is able to see scratch marks and hear you when she phases.
- Plague – Walking when you are not fully infected with puke will pause your infection timer. Also resist the urge to cleanse unless on death hook. This will limit her power.
- Legion – Spread as far apart from your teammates and only heal when you have at least two other teammates available or healing perks.
- Pig – Try to crouch and poke her snoot. While this isn’t a guaranteed trick, many Pig Killers will become passive if you boop their snoot.
Share these useful tips with your friends. They may have some other Killer tips to share with you!
23. I Just Want To Leave
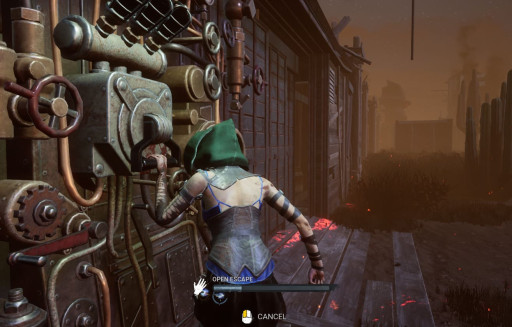
A lot of Killers have increasingly brought end game builds. These builds almost always include Blood Warden. This Killer perk will block your escape when a Survivor is hooked after the Exit Gates are open. To counter this, a good habit to get into is 99% the Exit Gate until all Survivors can safely make their escape. If you are the last Survivor and the Killer has closed the hatch, you need to use a slightly different tactic. Make sure the Killer is on their way to the opposite gate as you. Open the Exit Gate until the progress bar hits the C. Stop and hide. Wait for the Killer to return to your gate. None of the gate’s lights will be triggered, and the Killer may think no one is there. Once they leave, return to the gate and open it to make your escape.
These two tricks can save you a lot of grief at the end of the game. It will also allow as many Survivors as possible the opportunity for a safe escape. If you are the last one standing, using the C tactic is your greatest hope of escape. If the Killer catches you, it’s game over. This trick allows you to be sneaky and have a fair chance of surviving.
24. Extra Bloodpoints
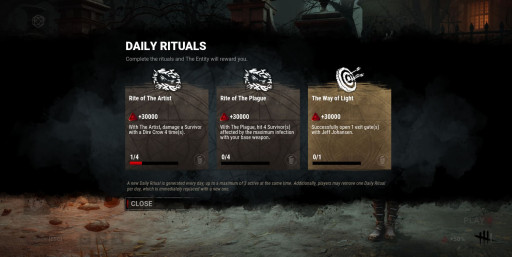
Don’t forget to look through your Daily Rituals. There will be a mix of Survivor and Killer options to choose from. If you run out of Survivor Rituals, try out a Killer one. You can also acquire extra Bloodpoints from completing your Tome Challenges. These will increase your progression in the Rift unlocking fun rewards and even more Bloodpoints.
Most of the tasks you will come across can easily be completed during a Dead by Daylight match. If a challenge or ritual is already something you do during normal game play, you might as well get the Bloodpoint reward for it. Also, by trying out Killer challenges you can gain knowledge of how their powers work, and how to counter them when you are playing Survivor. Keep up on all your dailies and challenges to provide yourself with plenty of Bloodpoints. Don’t forget to share this tip with your friends in case they may not know about it.
25. Shrine of Secrets
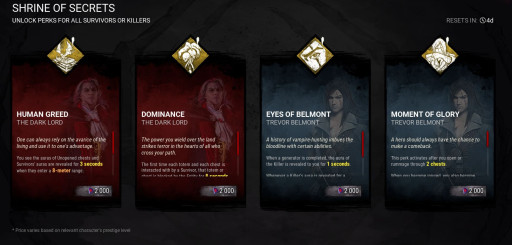
Have you ever wanted a specific perk, but didn’t want to spend currency to buy a character just to acquire one perk? Here’s a fun Dead by Daylight tip. Go to the Shrine of Secrets on your menu screen. This is where you can find specific perks. The Shrine of Secrets will reset every week. If the perk you desire isn’t currently in the Shrine, check back again next week.
The Shrine of Secrets is a nice way to save on unneeded purchases. It also provides access to perks regardless of if you own the character or not. Go take a peek and see what perks you can discover!
You may also be interested in:
All image and video credit goes to the creators

