There aren’t many ways to improve the gameplay of factorio, but there are some minor quality of life features to make a game a bit more comfortable.
1. Alt mode settings
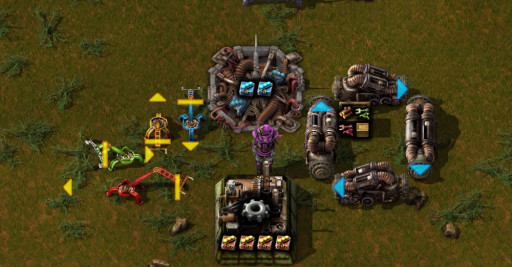
Structures showing what's inside them and inserters showing their item moving directions
Most likely you have already discovered the importance of the Alt key in factorio.
With these settings you can greatly improve coordinations in your factory and make it easier to fix possible issues!
- Go to Settings
- Interface
- Turn on everything under “Alt-mode”
2. Change hotkeys
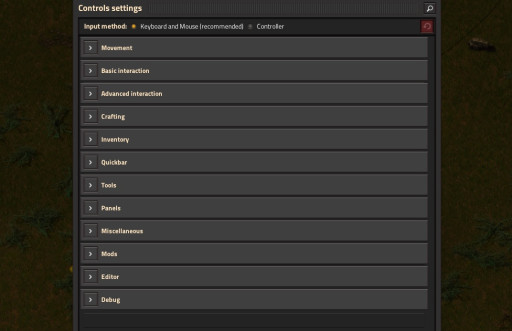
The menu of the hotkeys
Factorio has a huge amount of hotkeys and it can be a bit hard to learn and keep track of them.
In some cases it wouldn’t be too bad to change them, but even if you won’t change them, it’s still gonna be worth your while to check them out and look them through!
- Go to settings
- Controls
- Check them and set them
- (Especially the interactions)
3. Autosave
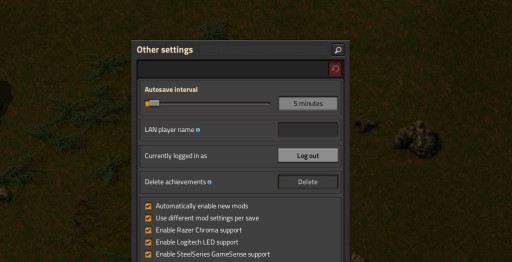
Picture of the autosave settings
Tho the game crashing by itself is fairly rare, but there are many things that can go wrong while playing!
Autosaving is always a good option, but sometimes it can be a bit annoying. Luckily, you can change the time interval of the autosave
- Go to settings
- Others
- First option
- (It is set to 5 by default, but usually I keep it on 15 mins)
4. Inventory sort
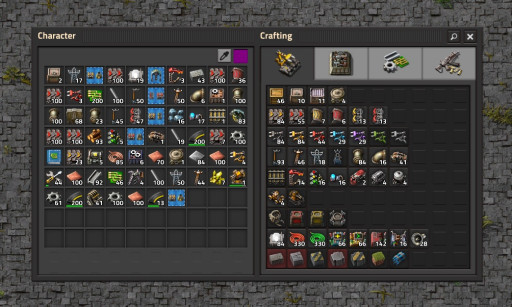
A not sorted inventory
Without sorting your inventory it can become a huge mess really quickly.
By turning this on, the game will automatically sort your inventory.
- Go to settings
- Interface
- Interactions
- Turn on “Always keep player’s main inventory sorted”
5. Locked belt
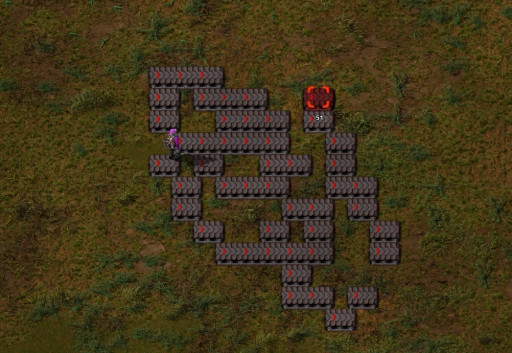
This is what happenes when the setting is turned off
How you like dragging your belt is a personal choice, but still a choice that you have to make!
When this option is turned on, you can keep dragging the same beltline and even if you hover away from it, it will not break and it will keep making the same line. On the other hand, when you’re trying to build several lines of belts next to each other, you can do it more efficiently when turned off!
- Go to settings
- Interface
- Interactions
- Turn on “Lock belt building to straight line”
6. Smart belts
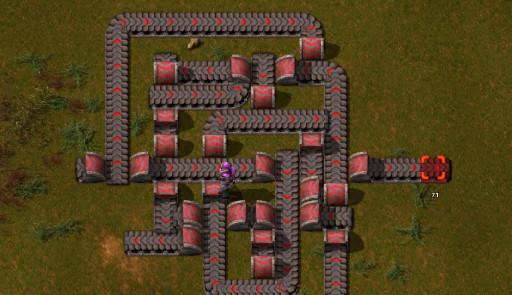
Smart belt dragging enabled
After turning on locked belt dragging, you can also turn on smart belt dragging.
This setting will make it easier for you to build singular belt lines! When turned on, it will automatically place underground belts if something is in the way. Upon pressing “R”, it will also rotate the belts and you can keep dragging the line!
- Go to settings
- Interface
- Interactions
- Turn on “Smart belt dragging”
7. Presetting your inventory slots
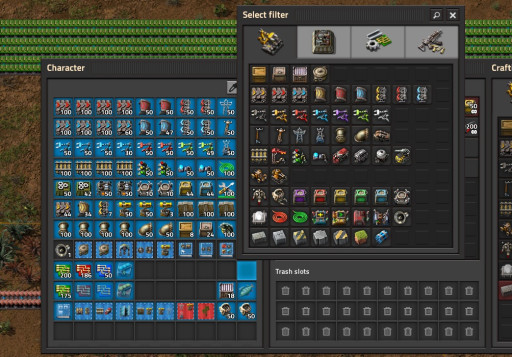
Presetting menu
Tho Autosort is a good option early on, but usually it’s not enough for the later parts of the game.
Luckily, you can use your middle mouse button while hovering over an inventory slot and then you can simply select an item and it will always be auto assigned there.
- Open inventory
- Hover over a slot and press middle mouse button
- Select an item
- Repeat with a big partition of your inventory
- leave some space for other items tho
8. Show all items
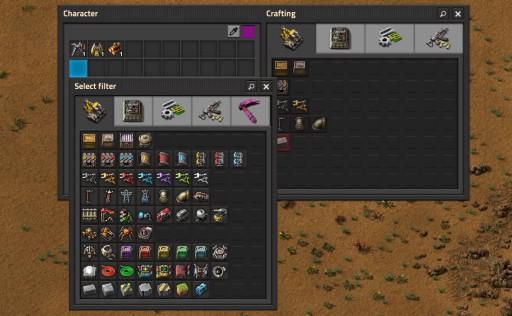
Preset menu showing items that you haven't even researched yet
To enhance the previous point, you can turn on a setting to be able to select items that you haven’t even researched yet.
With this you can even plan ahead your inventory from the start of the game!
- Go to settings
- Interface
- Interactions
- Turn on “Show all items in selection list”
9. Ghost item pickup
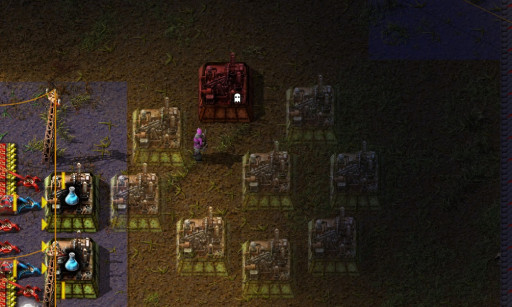
Placing ghost items
When you quickly want to put down an item, but you don’t have any of it is really frustrating.
After you get the bots and you have an item, you can just hold shift and place ghosts of it and your bots will build them for you. With this setting turned on, you can hover over something, press “Q” and you will instantly have a ghost in your hand even if you don’t have any of the item itself.
- Go to settings
- Interface
- Interactions
- Turn on “Pick ghost item if no items are available”
10. Visualization
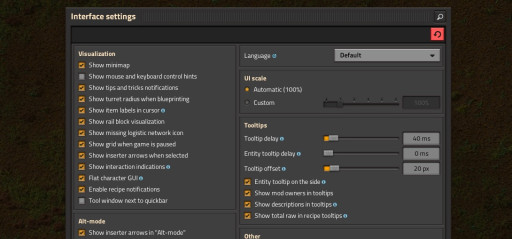
Visualization settings
These settings are mostly personal preferences.
There are many things you can set here, for example where the game shows your tool window, showing turret radiuses, showing blueprint names when held.
- Go to settings
- Interface
- Visualization
- Turn on the things that you think would make the game better for you
World generation settings:
Generating a good world is just as important as other settings when it comes to improving gameplay!
- When creating a new world, you should make sure that
- You have all 4 (Iron, Copper, Store and Coal) ores at your disposal close to each other, but not overlapping
- You have a water supply near you
- You have at least a few patches of oil in an acceptable distance from you
- Have some trees in your starter area
- Your next ore patches are relatively close to your starter area
- There aren’t too many biters spawning right on top of your expansions
11. World type
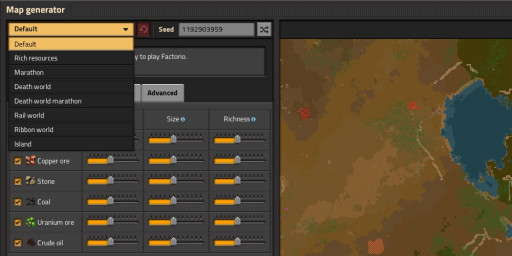
World types
There are several different preset world types in the game.
It is important to pick the one that will suit your playstyle and goals the best.
- “Default” is pretty self explanatory
- With “Rich Resources”, nothing else will change besides the quantity of ores that each resource field has
- “Marathon” will only affect how expensive recipes and technologies are
- In “Death World” biters are more dangerous and evolve faster, by a lot
- “Death World Marathon” is just the combination of the two
- In “Rail World” the biters won’t expand and the size of the resource fields are much larger, but on the other hand they are a lot further from each other
- “Ribbon World” will limit the height of the world
- “Island” will split the map into smaller or bigger islands separated by water
12. Resources
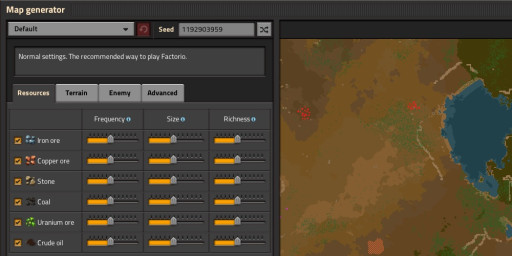
Rescources menu
In this tab you can change various properties of the way the ores spawn
- You can turn them on and off (not really recommended tho)
- The “Frequency” change the distance between the ores
- “Size” changes how much a ore patch is spread out
- “Richness” changed only the amount of the ore that is in the ore patch
13. Terrain
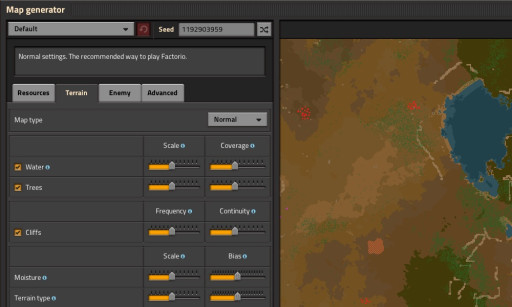
Terrain menu
Here you can modify the environment.
- With “Scale” you can the overall scale of features and the space between them
- With “Coverage” you can set the overall amount
- Just turn off “Cliffs”, they are annoying and no-one likes them
- Changing “Moisture” changes the grass distribution, higher bias means more grass
- “Terrain Type” changes the sizes of deserts
14. Enemy
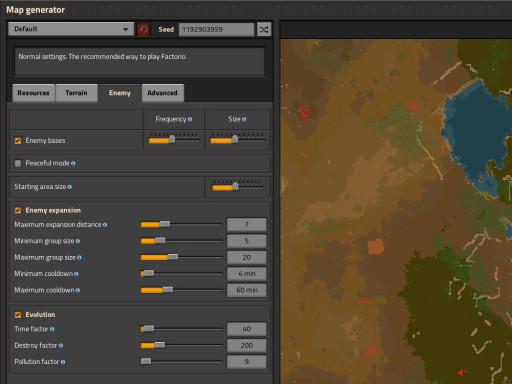
Enemy menu
Changing various features of enemies, their evolution and their bases.
Modifying too many of these options, will turn off some of the achievements in the game.
- With the “Enemy Expansion” settings you can raise or lower the time, size and distance of the new bases that the biters are building
- With the “Evolution” settings, you can change the speed they evolve and change how much their evolution is sped up by different factors
15. Advanced
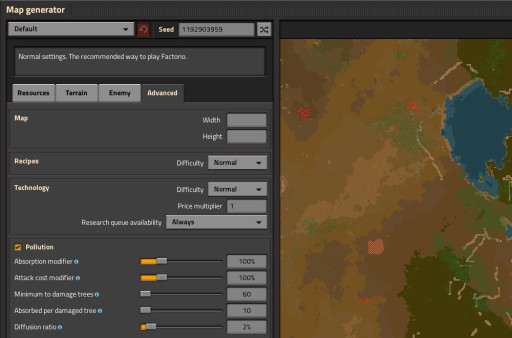
Advanced menu
Personally I do not recommend changing any of these settings as long as you don’t consider yourself an experienced player!
- In the “Map” section, you can set the height and width of the world
- In “Recipes” you can change the cost of the recipes to expensive
- In “Technology” you can change the cost of research to expensive and then even multiply that by an amount.
- In the “Pollution” section you can modify how much the pollution affects the environment


