1. Who is Bennett?
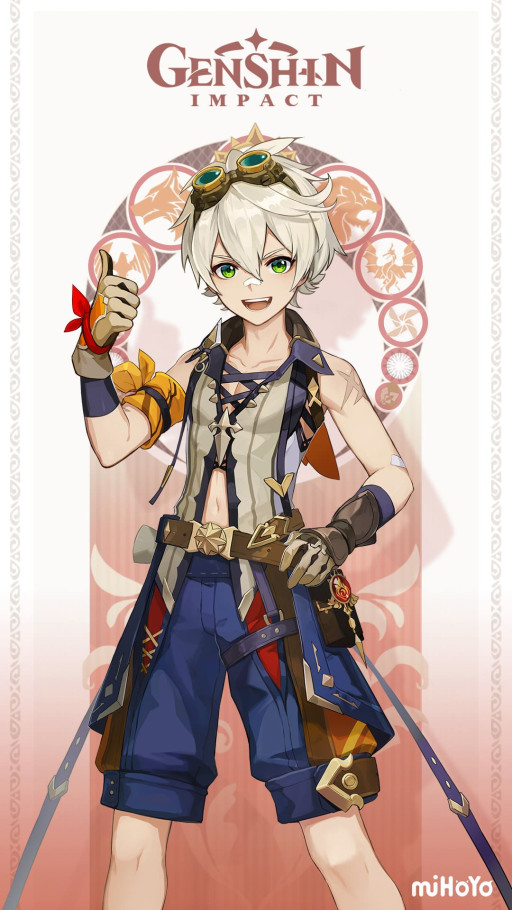
Bennett is an interesting character, as in the lore, Bennett is considered to be a particularly unlucky adventurer within Mondstadt. However, gameplay wise, Bennett is widely considered to be the premier, if not the ideal, form of support. Simply put, Bennett is what peak performance looks like for Support focused characters. With amazing versatility, and few noteworthy drawbacks, Bennett will always be seen as a welcomed sight. Case in point, if you ever read any of my other character build articles, you will quickly find Bennett appearing in every single one of them. So, let’s take a look shall we?
2. Key strengths of Bennett
- Attack buff goes Brrrrrrr: He has one of the best Attack buffs in the game, which means that any team that has him will benefit from being able to punch that much harder.
- “I need healing” “Consider it done.”: He can also heal via his Elemental Burst, which helps provide powerful amounts of healing. While the healing might not be constant with each hit like say Barbara and Jean, it is a massive amount over a short amount of time, very good for emergency heals.
- Is a portable battery: His abilities have low energy costs, and his Elemental skill yields large amounts of Energy. This means that he can trigger his Elemental bursts frequently, which helps with both buffing and healing.
- Cheap and easy to build: If I were to compare the support characters of Genshin with firearms, I would compare Bennett to an AK. He is easy to obtain, cheap to build, and easy to build. He is also reliable, and contrary to how he might view himself, he won’t let you down.
- Versatile: He is useful in most team builds, and doesn’t rely on any specific stats. His Pyro abilities help to set up for many elemental reactions, as well as the fact that at C6, many weapons will automatically get infused with Pyro when his Burst has been deployed. His healing and buffs meanwhile ensures that the team will last longer in fights, and also deal more damage. In all honesty, this article will touch on some of these builds, but not every single one, or else it would be long enough to qualify as a small novel.
- NOTE: Many people will point out that C6 infuses swords, claymores, and polearms with Pyro, which might interfere with characters that rely on their own elemental infusions (like Ayaka) or those who are distinctly Physical DPS (like Eula), however I would argue that the infusion is still for the most part beneficial as these characters tend to be the minority. That said, the trade off is real, and should be acknowledged, and factored into planning.
3. Vaporize Team
What this team does:
The concept behind this team build is quite simple; trigger the vaporize reaction. The reaction requires the application of both Hydro and Pyro, and is often strengthened by the inclusion of an Anemo character as Sub DPS. This reaction makes the build remarkably flexible, with many versions and team builds based around it. Bennett as support however will always be a mainstay for many of these builds.
- Bennett will take the role of Support, and oftentimes double as a healer as well.
- DPS will be either a Hydro or a Pyro character.
- Common choices includes, but are not limited to;
- Tartaglia
- Yoimiya
- Klee
- Hu Tao
- Yanfei
- Ayato
- Common choices includes, but are not limited to;
- For Sub DPS, choose the opposite element from your DPS.
- If you chose a Hydro DPS, Xiangling is the usual choice.
- If you chose a Pyro DPS, Xingqiu is the ideal.
- Finally, for a second support or Sub DPS, run an Anemo character.
- Sucrose
- Kazuha
- Hydro applies the wet status, followed by Pyro appling the fire to make the vaporize reaction.
- Anemo characters can help spread the statuses, as well as helping out in other ways.
- Sucrose oftentimes will help reduce enemy RES.
- Kazuha can buff allies as well.
Advantages of this build:
This team is a strong jack-of-all trade team. Whether it is exploring the world, fighting in the Abyss Spiral, or handling specific bosses such as Childe, this team will be a reliable option.
- Flexible: This team is super easy to build. So long as you have Bennett, and someone who can apply Pyro, Hydro, and Anemo, then the team can be built.
- Powerful synergy: Bennett buffs and heals, Pyro and Hydro characters apply elemental reactions, and Anemo helps to spread it all around as well as do crowd control. This synergy gets stronger with certain characters, namely;
- Xiangling gains extra energy from Bennett’s abilities, which helps fuel her abilities.
- Sucrose’s abilities help reduce enemies’ RES, allowing more damage to be dealt.
- Easy for players at all levels: Due to it being easy to make, any player at any level can create it easily enough, meaning this build is accessible for players at any experience rate.
The specifics of this build:
- Bennett (4 star sword)
- Role: Support/healer
- Talent priority: Elemental Burst>Elemental Skill>Normal Attack
- Weapons: Skyward blade>Favonius sword>Sapwood Blade
- Artifacts: Noblesse Oblige (4)
- Sand: HP%
- Goblet: HP%
- Circlet:HP%
- Substats: HP%,HP, Energy Recharge
- Ideal constellation: C1
- Ayato (5 star sword)
- Role: DPS
- Talent priority: Elemental Skill>Elemental Burst>Normal Attack
- Weapons: Haran Geppaku Futsu>Mistsplitter Reforged>Primordial Jade Cutter
- Artifacts: Heart of Depth (4)
- Sands: ATK%
- Goblet: Hydro DMG Bonus
- Circlet: CRIT Rate or CRIT DMG
- Substats: Energy Recharge, CRIT Rate, CRIT DMG, ATK%, HP%
- Ideal constellation: C0, but C2 is fine as well
- Hu Tao (5 star polearm)
- Main Role: DPS
- Talent priority: Normal Attack = Elemental Skill>Elemental Burst
- Weapons: Staff of Homa>Staff of the Scarlet Sands>Ballad of the Fjords
- Artifacts: Marechaussee Hunter (4)
- Sands: HP%
- Goblet: Pyro DMG Bonus
- Circlet: CRIT Rate or CRIT DMG
- Substats: CRIT DMG, CRIT Rate, HP%, Elemental Mastery
- Ideal Constellation: C1
- Tartaglia/Childe (5 star bow)
- Main Role: DPS
- Talent priority: Elemental Skill>Elemental Burst>Normal Attack
- Weapons: Polar Star>Thundering Pulse>The Viridescent Hunt
- Artifacts: Nymph's Dream (4)
- Sands: ATK%
- Goblet: Hydro DMG Bonus
- Circlet: CRIT Rate or CRIT DMG
- Substats: ATK%, CRIT Rate, CRIT DMG, Elemental Mastery
- Ideal Constellation: C0 is fine, but either C1 or C6 would help
- Yoimiya (5 star bow)
- Role: DPS
- Talent priority: Normal Attack>Elemental Burst>Elemental Skill
- Weapon: Thundering Pulse>Polar Star>Rust
- Artifacts: Crimson Witch of Flames (4)
- Sands: ATK%
- Goblet: Pyro DMG Bonus
- Circlet: CRIT Rate or CRIT DMG
- Substats: Energy Recharge, CRIT DMG, CRIT Rate, ATK%, Elemental Mastery
- Ideal Constellation: C2
- Klee (5 star catalyst)
- Role: DPS
- Talent priority: Normal attack>Elemental Skill>Elemental Burst
- Weapons: Lost Prayer to the Sacred Winds>Skyward Atlas>The Widsith
- Artifacts: Crimson Witch of Flames (4)
- Sands: ATK%
- Goblet: Pyro DMG Bonus
- Circlet: CRIT Rate or CRIT DMG
- Substats: CRIT DMG, CRIT Rate, ATK%, Elemental Mastery
- Ideal Constellation: C2
- Yanfei (4 star catalyst)
- Role: DPS
- Talent priority: Normal Attack>Elemental Burst>Elemental Skill
- Weapons: Lost Prayer to the Sacred Winds>Skyward Atlas>Flowing Purity
- Artifacts: Crimson Witch of Flames (4)
- Sands: ATK%
- Goblet: Pyro DMG Bonus
- Circlet: CRIT Rate or CRIT DMG
- Substats: ATK%, CRIT DMG, CRIT Rate
- Ideal constellation: C1 helps with attack, C4 helps with shielding, and C6 helps overall DPS
- Xiangling (4 star polearm)
- Role: Sub DPS
- Talent priority: Elemental Burst>Elemental Skill>Normal Attack
- Weapons: Staff of the Scarlet Sands>Staff of Homa>The Catch
- Artifacts: Emblem of Severed Fate (4)
- Sands: ATK%
- Goblet: Pyro DMG Bonus
- Circlet: CRIT Rate or CRIT DMG
- Substats: Energy Recharge, CRIT DMG, CRIT Rate, ATK%, Elemental Mastery
- Ideal Constellation: C4
- Xingqiu (4 star sword)
- Main Role: Sub DPS
- Talent priority: Elemental Burst> Elemental Skill>Normal Attack
- Weapons: Sacrificial sword>Primordial Jade cutter>Fleuve Cendre Ferryman
- Artifacts: Noblesse oblige (4)
- Sand: ATK%
- Goblet: Hydro DMG
- Circlet: CRIT DMG
- Substats: Elemental Mastery, CRIT DMG, CRIT RATE, ATK%
- Ideal Constellation: C6
- Kazuha (5 star sword)
- Role: Support
- Talent priority: Elemental Burst> Elemental Skill>Normal Attack
- Weapons: Freedom sworn>Xiphos Moonlight>Iron sting
- Artifacts: Viridescent Venerer (4)
- Sand: Mastery
- Goblet: Mastery
- Circlet: Mastery
- Substats: Elemental Mastery, CRIT DMG, CRIT RATE, ATK%
- Ideal Constellation: C2
- Sucrose (4 star catalyst)
- Role: Support
- Talent priority: Elemental Skill>Elemental Burst>Normal Attack
- Weapons: Thrilling Tales of Dragon Slayers>A Thousand Floating Dreams>Sacrificial Fragments
- Artifacts: Viridescent Venerer (4)
- Sands: Elemental Mastery
- Goblet: Elemental Mastery
- Circlet: Elemental Mastery
- Substats: Energy Recharge, Elemental Mastery, CRIT Rate, CRIT DMG
- Ideal Constellation: C1
4. Thunder Team
What this team does:
This team is fairly straightforward. Bennett is support, get an Electro DPS, more than likely Raiden Shogun, take an Electro Sub DPS or Support, likely Kujou Sara or Kuki Shinobu, and finally, another Anemo support, probably Kazuha, though Sucrose can be used in a pinch.
- Bennett plays dual roles as support and healing, where his Elemental Burst provides both healing and buffs to ATK.
- An Electro character plays the main role of DPS.
- Raiden Shogun is the ideal choice for this role.
- A second Electro character plays either the role of a Sub DPS or a Support.
- Kujou Sara (at C6) is a strong option.
- Kuki Shinobu is another strong choice.
- Finally, an Anemo character plays as another support.
- Kazuha
- Sucrose
- This team is focused on buffing and improving Electro damage.
- Bennett buffs the team, and provides healing.
- Raiden allows consistent Electro DMG.
- The Electro support both provides Elemental resonance, as well as other buffs depending on who you choose.
- Kujou Sara provides further ATK buffs, and at C6 Sara’s Elemental Burst can boost the CRIT DMG of Electro DMG.
- Alternatively, Shinobu provides additional healing, as well as helping to provide Electro damage off-field.
- Anemo characters meanwhile help with crowd control, as well as dealing swirl damage, as well as other advantages depending on who you choose to use on your team.
- Sucrose’s abilities reduce enemy RES, making the Electro hurt even more.
- Kazuha for his part also helps to buff the team’s Elemental Mastery.
Advantages of this build:
This team build is a strong all-rounder, but is perhaps particularly good for bosses such as Childe.
- Powerful: This team focuses on overpowering enemies with Electro DMG, and with the buffs that are provided by the potentially three different Support characters, this build will leave enemies thoroughly shocked, both metaphorically and literally.
- Secure (potentially): This team can be very secure, depending on choices. Run this team with Shinobu and you will find a lot of potential for healing.
- Straight forward: Many teams depend on a mixture of different skills and synergies, as well as rotations to maximize those benefits. This team in comparison, is more akin to a sledgehammer. Apply Bennett’s burst, apply Electro, and swirl every now and then to cluster enemies together.
The Specifics of this build
- Bennett (4 star sword)
- Role: Support/healer
- Talent priority: Elemental Burst>Elemental Skill>Normal Attack
- Weapons: Skyward blade>Favonius sword>Sapwood Blade
- Artifacts: Noblesse Oblige (4)
- Sand: HP%
- Goblet: HP%
- Circlet:HP%
- Substats: HP%,HP, Energy Recharge
- Ideal constellation: C1
- Raiden Shogun (5 star polearm)
- Role: DPS
- Talent priority: Elemental Burst>Elemental Skill>Normal Attack
- Weapons: Engulfing Lightning>Staff of Homa>Wavebreaker's Fin
- Artifacts: Emblem of Severed Fate (4)
- Sands: Energy Recharge% or ATK
- Goblet: ATK% or Electro DMG Bonus
- Circlet: CRIT Rate or CRIT DMG
- Substats: CRIT DMG, CRIT Rate, ATK%, Energy Recharge, Elemental Mastery
- Ideal Constellation: C2
- Kuki Shinobu (4 star sword)
- Role: Sub DPS or Support, but here we will present her as a Sub DPS option
- Talent priority: Elemental Skill>Elemental Burst>Normal Attack
- Weapons: Freedom-Sworn>Xiphos' Moonlight>Iron Sting
- Artifacts: Flower of Paradise Lost (4)
- Sands: Elemental Mastery
- Goblet: Elemental Mastery
- Circlet: Elemental Mastery
- Substats: Elemental Mastery, HP%, Energy Recharge
- Ideal constellation: C4
- Kujou Sara (4 star bow)
- Role: Sub DPS or Support, but here, we will present her as a Support
- Talent priority: Elemental Skill>Elemental Burst>Normal Attack
- Weapon: Elegy for the End>Skyward Harp>Mouun's Moon
- Artifacts: Noblesse Oblige (4)
- Sands: Energy Recharge or ATK%
- Goblet: Electro DMG Bonus
- Circlet: CRIT Rate or CRIT DMG
- Substats: Energy Recharge, CRIT Rate, CRIT DMG, ATK%
- Ideal Constellation: For this build, C6 is a must
- Kazuha (5 star sword)
- Role: Support
- Talent priority: Elemental Burst> Elemental Skill>Normal Attack
- Weapons: Freedom sworn>Xiphos Moonlight>Iron sting
- Artifacts: Viridescent Venerer (4)
- Sand: Mastery
- Goblet: Mastery
- Circlet: Mastery
- Substats: Elemental Mastery, CRIT DMG, CRIT RATE, ATK%
- Ideal Constellation: C2
- Sucrose (4 star catalyst)
- Role: Support
- Talent priority: Elemental Skill>Elemental Burst>Normal Attack
- Weapons: Thrilling Tales of Dragon Slayers>A Thousand Floating Dreams>Sacrificial Fragments
- Artifacts: Viridescent Venerer (4)
- Sands: Elemental Mastery
- Goblet: Elemental Mastery
- Circlet: Elemental Mastery
- Substats: Energy Recharge, Elemental Mastery, CRIT Rate, CRIT DMG
- Ideal Constellation: C1
5. Pure Pyro Team
What this team does:
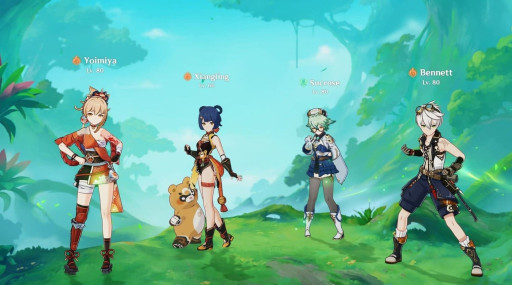
This team functions in a similar way to the Thunder team build, only instead of electrifying foes, this one turns the heat up by applying grotesque amounts of Pyro damage instead. Bennett returns in the noble role of a healer-support. Kazuha also returns as another support character, though he could also fill in as a Sub DPS. Sucrose, like always, is a cheap alternative for Kazuha. Xiangling also reprises as a Sub DPS. Main DPS however does have some competition, with the main choices being either Klee or Lyney, though Yoimiya is a strong alternative, and theoretically any Pyro DPS character can be used. (I might be a gremlin, and try to run this team with Dehya. It’ll be stupid, but I’ll do it, for science.)
- Bennett takes on the role of Support, providing both healing and buffing.
- An Anemo character takes on the role of either a second Support or as a Sub DPS.
- Kazuha is the ideal choice.
- If you are newer to the game, aren’t a whale, or just unlucky with the Gacha, then Sucrose is a cheap, strong (and cute) alternative.
- Xiangling is quite reasonably, the main Sub DPS for this team build.
- Finally, for DPS, any reasonably strong Pyro DPS character should be considered. Strong options for this role includes;
- Klee
- Lyney
- Yoimiya
- Apply Buffs, apply Pyro, and then apply Anemo, rinse, repeat, it is rather straightforward.
Advantages of this build:
This team is another strong all rounder, great to use for a wide range of situations. Exploration, domains, spiral runs, and many boss fights such as the Cryo regisvine are all situations where this team can prove to be useful. If it burns, it is probably a good time to use it.
- Simple and straightforward: It’s pretty straightforward to build and use. Apply a lot of Pyro to enemies, and swirl them every now and then to reduce their RES and spread the flames.
- Cheap and easy to build: Compared to a lot of other teams, this team build is pretty easy to create, as Bennett and Xiangling are both easy to obtain 4 stars. Kazuha might be harder, but not impossible, and Sucrose is a strong 4 star alternative. As for the main DPS, while the ideal are limited banner 5 stars like Klee or Lyney, theoretically any Pyro DPS character can fill the role. If you are desperate enough, you could theoretically use Amber (just saying, Amber might appreciate the attention).
- Strong synergies: So one thing that I mentioned earlier, but haven’t really shown examples of, is that Bennett-Xiangling duo teams are a very strong friendship, as they synergize well between Bennett’s buffs and healing, and Xiangling’s fast off-field Pyro application and the combined two’s fast energy reclamation. Add in Kazuha or Sucrose, and even before you have a DPS, this team has incredibly strong synergy.
The specifics of this build:
- Bennett (4 star sword)
- Role: Support/healer
- Talent priority: Elemental Burst>Elemental Skill>Normal Attack
- Weapons: Skyward blade>Favonius sword>Sapwood Blade
- Artifacts: Noblesse Oblige (4)
- Sand: HP%
- Goblet: HP%
- Circlet:HP%
- Substats: HP%,HP, Energy Recharge
- Ideal constellation: C1
- Klee (5 star catalyst)
- Role: DPS
- Talent priority: Normal attack>Elemental Skill>Elemental Burst
- Weapons: Lost Prayer to the Sacred Winds>Skyward Atlas>The Widsith
- Artifacts: Crimson Witch of Flames (4)
- Sands: ATK%
- Goblet: Pyro DMG Bonus
- Circlet: CRIT Rate or CRIT DMG
- Substats: CRIT DMG, CRIT Rate, ATK%, Elemental Mastery
- Ideal Constellation: C2
- Yoimiya (5 star bow)
- Role: DPS
- Talent priority: Normal Attack>Elemental Burst>Elemental Skill
- Weapon: Thundering Pulse>Polar Star>Rust
- Artifacts: Crimson Witch of Flames (4)
- Sands: ATK%
- Goblet: Pyro DMG Bonus
- Circlet: CRIT Rate or CRIT DMG
- Substats: Energy Recharge, CRIT DMG, CRIT Rate, ATK%, Elemental Mastery
- Ideal Constellation: C2
- Lyney (5 star bow)
- Role: DPS
- Talent Priority: Normal Attack>Elemental Skill>Elemental Burst
- Weapon: The First Great Magic>Aqua Simulacra>Thundering Pulse
- Artifacts: Marechaussee Hunter (4)
- Sands: ATK
- Goblet: Pyro DMG Bonus
- Circlet: CRIT DMG
- Substats: CRIT DMG, Energy Recharge, CRIT Rate, ATK%
- Note: The recommended amount of Energy Recharge to aim for is 130%
- Ideal Constellation: C0 is fine, but C2 is probably the best to aim for for this build
- Xiangling (4 star polearm)
- Role: Sub DPS
- Talent priority: Elemental Burst>Elemental Skill>Normal Attack
- Weapons: Staff of the Scarlet Sands>Staff of Homa>The Catch
- Artifacts: Emblem of Severed Fate (4)
- Sands: ATK%
- Goblet: Pyro DMG Bonus
- Circlet: CRIT Rate or CRIT DMG
- Substats: Energy Recharge, CRIT DMG, CRIT Rate, ATK%, Elemental Mastery
- Ideal Constellation: C4
- Kazuha (5 star sword)
- Role: Support
- Talent priority: Elemental Burst> Elemental Skill>Normal Attack
- Weapons: Freedom sworn>Xiphos Moonlight>Iron sting
- Artifacts: Viridescent Venerer (4)
- Sand: Mastery
- Goblet: Mastery
- Circlet: Mastery
- Substats: Elemental Mastery, CRIT DMG, CRIT RATE, ATK%
- Ideal Constellation: C2
- Sucrose (4 star catalyst)
- Role: Support
- Talent priority: Elemental Skill>Elemental Burst>Normal Attack
- Weapons: Thrilling Tales of Dragon Slayers>A Thousand Floating Dreams>Sacrificial Fragments
- Artifacts: Viridescent Venerer (4)
- Sands: Elemental Mastery
- Goblet: Elemental Mastery
- Circlet: Elemental Mastery
- Substats: Energy Recharge, Elemental Mastery, CRIT Rate, CRIT DMG
- Ideal Constellation: C1

6. Superconduct Team
What this team does:
Returning to reaction-based teams, one surprisingly good team build for Bennett is that of Superconduct. Superconduct is what happens when Cryo and Electro meet together, resulting in Cryo DMG being applied and enemies’ Physical RES being lowered by 40%. The build is rather straightforward. Bennett plays Support/healer, while an Electro character plays Sub DPS, a Cryo character DPS and finally a second Cryo character that plays Support. The usual choices for the Electro Sub DPS is Fischl, though Raiden is a very strong alternative. For Cryo DPS, Eula is the emblematic one, though Freminet could be a decent free-to-play alternative. Finally, for a Cryo Support, we have two strong options of either Diona or Mika.
- Bennett takes on the role of Support/healer, providing ATK buffs and healing.
- A Cryo character takes on the mantle of DPS.
- Eula is the premier choice for any Superconduct team, who is both a strong Cryo character and is one of the few characters that can work well as a Physical DPS.
- Freminet is a strong free-to-play alternative, and while he lacks the Physical DPS capabilities, he makes up for it by being well geared towards the Superconduct reaction.
- An Electro character meanwhile takes the role of Sub DPS.
- Fischl is the ideal choice for Superconduct teams.
- Raiden Shogun is a strong option as well.
- Finally, a second Cryo takes the role of a second Support character, oftentimes fulfilling the role of a second healer.
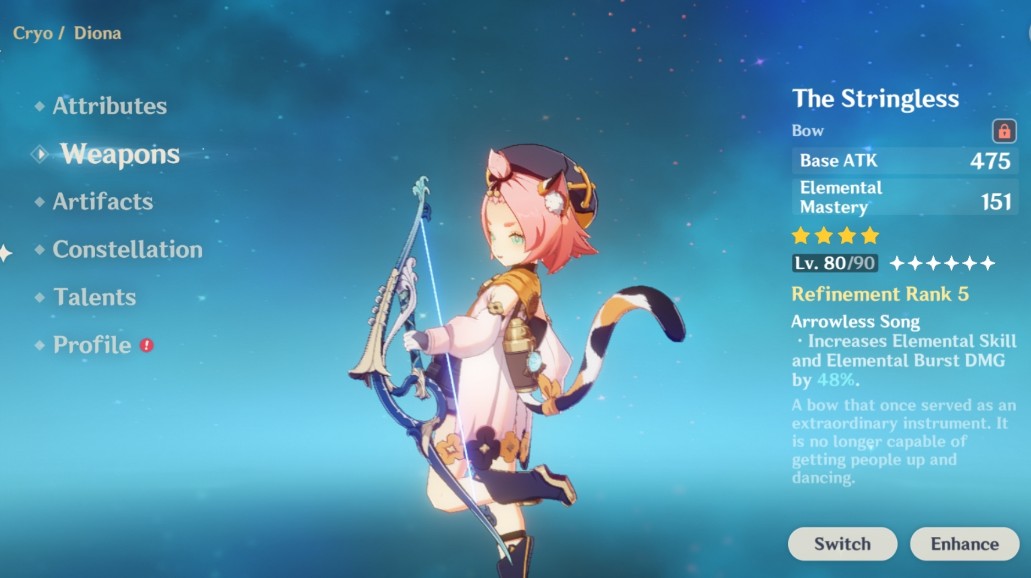
- Diona provides shielding, healing, and can act as a battery for the main Cryo DPS character.
- Mika (a character most players rarely think about) shines, providing healing, buffs Physical DMG and buffs ATK speed.
- Apply Cryo or Electro, then apply the other, with Bennet occasionally slapping down his burst to buff characters.
Advantages of this build:
Again, this build is a strong all-rounder, but I might consider this build particularly good for fights in which you know that you will be facing foes that might already be Hydro infused, such as exploration in Fontaine, or fighting the Oceanid boss fight.
- Surprisingly Flexible: This team can be surprisingly flexible build-wise. Both 5-star and 4-star options are viable choices for this build, giving great flexibility to both free-to-play and whales.
- Easy to learn: Honestly, the hardest part might be learning what Superconduct actually does, but once you know how it works, then everything after that becomes easy to do. Apply Electro or Cryo, apply the opposite, rinse and repeat.
- Great for Dueling bosses: Again, this build might not be as strong against large amounts of foes compared to other reaction-based builds, but in exchange, it becomes very good for fighting a single foe over a prolonged period. This makes it a very strong choice for boss fights.
- Spotlight’s lesser used characters: This team is unique for me, because it is a team that can be used with characters you don’t tend to see as frequently within the community zeitgeist. Freminet and Mika are both characters that you would be hard pressed to find roaring crowds for, but both are viable choices.
The specifics of the build:
- Bennett (4 star sword)
- Role: Support/healer
- Talent priority: Elemental Burst>Elemental Skill>Normal Attack
- Weapons: Skyward blade>Favonius sword>Sapwood Blade
- Artifacts: Noblesse Oblige (4)
- Sand: HP%
- Goblet: HP%
- Circlet:HP%
- Substats: HP%,HP, Energy Recharge
- Ideal constellation: C1
- Eula (5 star claymore)
- Role: DPS
- Talent priority: Elemental Burst>Normal Attack>Elemental Skill
- Weapons: Song of Broken Pines>Beacon of the Reed Sea>Wolf's Gravestone
- Artifacts: Pale Flame (4) OR Pale Flame (2), Bloodstained Chivalry (2)
- Sands: ATK%
- Goblet: Physical DMG Bonus
- Circlet: CRIT Rate or CRIT DMG
- Substats: Energy Recharge, CRIT DMG, CRIT Rate, ATK%
- Ideal Constellation: C1is the ideal, though C3 is also fine
- Freminet (4 star claymore)
- Role: DPS
- Talent priority: Elemental Skill>Normal Attack>Elemental Burst
- Weapons: Beacon of the Reed Sea>Song of Broken Pines>Prototype Archaic
- Artifacts: Blizzard Strayer (2) and Pale Flame (2)
- Sands: ATK%
- Goblet: Physical DMG Bonus or Cryo DMG Bonus
- Circlet: CRIT Rate/DMG
- Substats: ATK, CRIT Rate, CRIT DMG, ATK%, Elemental Mastery
- Ideal Constellation: C6
- Raiden Shogun (5 star polearm)
- Role: Sub DPS
- Talent Priority: Elemental Skill>Elemental Burst>Normal Attack
- Weapons: Engulfing Lightning>Staff of Homa>Wavebreaker's Fin
- Artifacts: Emblem of Severed Fate (4)
- Sands: Energy Recharge% or ATK
- Goblet: ATK% or Electro DMG Bonus
- Circlet: CRIT Rate or CRIT DMG
- Substats: CRIT DMG, CRIT Rate, ATK%, Energy Recharge, Elemental Mastery
- Ideal Constellation: C2
- Fischl (4 star bow)
- Role: Sub DPS
- Talent priority: Elemental Skill>Elemental Burst>Normal Attack
- Weapons: Polar Star>Aqua Simulacra>Stringless
- Artifacts: Thundering fury (2), Gladiator’s Finale (2)
- Sands: ATK%
- Goblet: Electro DMG Bonus
- Circlet: CRIT Rate or CRIT DMG
- Substats: CRIT Rate, CRIT DMG, ATK
- Ideal Constellation: C6 is the best for a Sub DPS role
- Diona (4 star bow)
- Role: Healer/Support
- Talent priority: Elemental Burst>Elemental Skill>Normal Attack
- Weapons: Elegy of the End>Sacrificial Bow>Favonius Warbow
- Artifacts: Maiden Beloved (4)
- Sand: Energy recharge%
- Goblet: HP%
- Circlet: HP%
- Substats: HP%, HP, Energy Recharge
- Ideal Constellation: C1 is enough, C2 is decent, C6 will be the most bang for your buck
- Mika (4 star polearm)
- Role: Healer/Support
- Talent priority: Elemental Skill>Elemental Burst>Normal Attack
- Weapons: Favonius Lance>Dialogues of the Desert Sages>Rightful Reward
- Artifacts: Noblesse Oblige (4) OR Ocean-Hued Clam (2) and Tenacity of the Millelith (2)
- Sands: Energy Recharge% or HP%
- Goblet: HP%
- Circlet: HP% or Healing Bonus
- Substats: Energy Recharge, HP%
- Notes: The ideal Energy Recharge percentage should be around 200%
- Ideal Constellation: C6, especially for the massive Physical DMG buff.
7. Burn-Melt Team
What this team does:
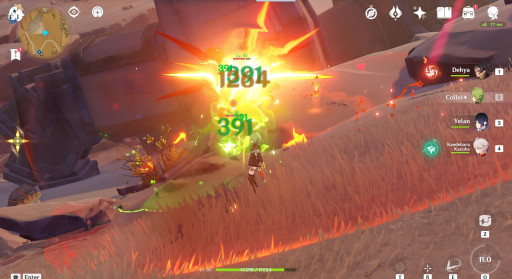
This team relies not just on one reaction, but on two reactions: Melt and Burn. Melt is when Cryo and Pyro react to each other. Burn meanwhile is when Dendro and Pyro meet. So a Burn-Melt team is when you bring both reactions in the same team. Bennett, as you can probably guess, is the Support, but choices may vary for the rest. Basically, it calls for a Cryo Main DPS, a Dendro Sub DPS, and either a Pyro or Anemo Sub DPS. Dendro is applied, followed by Pyro, and then that is followed by Cryo.
- Bennett takes the role of a Healer/Support
- A Cryo character takes the mantle of Main DPS.
- Wriothesley
- Ganyu
- A Dendro character takes the role of Sub DPS.
- Nahida
- Emilie
- The last slot goes to a Sub DPS that can be either Anemo or Pyro.
- Kazuha
- Sucrose is a good free-to-play alternative.
- Xiangling
- Thoma is a good choice that can also double as Support.
- Dehya can be a surprisingly good option as well.
- Apply Dendro, then apply Pyro, to cause Burn. Apply Cryo afterwards to cause Melt.
Advantages of this build:
This build, like many mentioned in this article, is a good jack-of-all trades option. That said, it might be particularly strong for boss fights, such as the Cryo regisvine or Childe.
- Flexible: This build does have a certain amount of leeway in how to build it, which can be helpful to know, especially if not all your characters are available to you.
- Double Reaction, Double Damage: This build uses two reactions, both of which require Pyro to trigger. Burning applies Pyro DMG applied over time, while Melt amplifies the damage of whichever element was applied first. Two reactions that require the same element (Pyro) would need multiple Pyro characters, which in turn means that Elemental resonance will be applied. Taken all together a lot of damage is dealt both immediately, and over time throughout the fight.
- Strong for sustained fights: I believe that this build is good for boss fights specifically because of its viability both in the immediate beginning of the fight, and throughout. Melt is very much a reaction that deals damage immediately, while Burn is a longer game. Combine the two together, and damage will almost always be dealt. Add in the fact that both Emilie and Dehya have skills that constantly apply Dendro and Pyro respectively, and you can let your Cryo character go hog-wild.
The specifics of the build:
- Bennett (4 star sword)
- Role: Support/healer
- Talent priority: Elemental Burst>Elemental Skill>Normal Attack
- Weapons: Skyward blade>Favonius sword>Sapwood Blade
- Artifacts: Noblesse Oblige (4)
- Sand: HP%
- Goblet: HP%
- Circlet:HP%
- Substats: HP%,HP, Energy Recharge
- Ideal constellation: C1
- Wriothesley (5 star catalyst)
- Role: Main DPS
- Talent priority: Normal Attack>Elemental Skill>Elemental Burst
- Weapons: Cashflow Supervision>Tulaytullah's Remembrance>The Widsith
- Artifacts: Marechaussee Hunter (4)
- Sands: ATK%
- Goblet: Cryo DMG Bonus
- Circlet: CRIT DMG
- Substats: CRIT DMG, ATK%, Elemental Mastery, CRIT Rate, Energy Recharge
- Ideal Constellation: C1 or C6
- Ganyu (5 star bow)
- Role: DPS
- Talent priority: Normal Attack>Elemental Burst>Elemental Skill
- Weapons: Hunter's Path>Aqua Simulacra>Amos' Bow
- Artifacts: Shimenawa's Reminiscence (4)
- Sands: ATK%
- Goblet: Cryo DMG Bonus
- Circlet: CRIT DMG or CRIT Rate
- Substats: CRIT DMG, CRIT Rate, Elemental Mastery, ATK%
- Ideal Constellation: C1
- Nahida (5 star catalyst)
- Role: Sub DPS
- Talent priority: Elemental Skill>Elemental Burst>Normal Attack
- Weapons: A Thousand Floating Dreams>Sacrificial Fragments>Magic Guide
- Artifacts: Deepwood Memories (4)
- Sands: Elemental Mastery
- Goblet: Elemental Mastery or Dendro Damage Bonus
- Circlet: Elemental Mastery or CRIT Rate/DMG
- Substats: Elemental Mastery, CRIT Rate, CRIT DMG, Energy Recharge
- Ideal Constellation: C2
- Emilie (5 star polearm)
- Role: Sub DPS
- Talent priority: Elemental Skill>Elemental Burst>Normal Attack
- Weapons: Lumidouce Elegy>Calamity Queller>Deathmatch
- Artifacts: Deepwood Memories (4)
- Sands: ATK%
- Goblet: Dendro DMG Bonus
- Circlet: CRIT Rate or CRIT DMG
- Substats: ATK%, CRIT Rate, CRIT DMG, Energy Recharge
- Ideal Constellation: C1, due to an outright 20% increase to DMG, but C2 wouldn’t hurt
- Kazuha (5 star sword)
- Role: Sub DPS
- Talent priority: Elemental Burst> Elemental Skill>Normal Attack
- Weapons: Mistsplitter Reforged>Freedom-Sworn>Primordial Jade Cutter
- Artifacts: Viridescent Venerer (4)
- Sands: ATK% or Elemental Mastery
- Goblet: Anemo DMG Bonus
- Circlet: CRIT Rate or CRIT DMG
- Substats: CRIT Rate, CRIT DMG, Elemental Mastery, ATK%, Energy Recharge
- Ideal Constellation: C2
- Sucrose (4 star catalyst)
- Role: Sub DPS
- Talent priority: Elemental Skill>Normal Attack>Elemental Burst
- Weapons: Sacrificial Fragments>A Thousand Floating Dreams>Wandering Evenstar
- Artifacts: Viridescent Venerer (4)
- Sands: Elemental Mastery
- Goblet: Elemental Mastery
- Circlet: Elemental Mastery
- Substats: Energy Recharge, Elemental Mastery, CRIT Rate, CRIT DMG
- Ideal Constellation: C1
- Xiangling (4 star polearm)
- Role: Sub DPS
- Talent priority: Elemental Burst>Elemental Skill>Normal Attack
- Weapons: Staff of the Scarlet Sands>Staff of Homa>The Catch
- Artifacts: Emblem of Severed Fate (4)
- Sands: ATK%
- Goblet: Pyro DMG Bonus
- Circlet: CRIT Rate or CRIT DMG
- Substats: Energy Recharge, CRIT DMG, CRIT Rate, ATK%, Elemental Mastery
- Ideal Constellation: C4
- Thoma (4 star polearm)
- Role: Sub DPS or Support, but we will show him as a shielder/support
- Talent priority: Elemental Skill>Elemental Burst>Normal Attack
- Weapons: Favonius Lance>Rightful Reward>Black Tassel
- Artifacts: Emblem of Severed Fate (4) OR Tenacity of the Millelith (4)
- Sands: HP% or Energy Recharge
- Goblet: HP%
- Circlet: HP%
- Substats: Energy Recharge, HP%
- Ideal Constellation: C6
- Dehya (5 star claymore)
- Role: Sub DPS
- Talent priority: Elemental Skill>Elemental Burst>Normal Attack
- Weapons: Mailed Flower>Makhaira Aquamarine>Rainslasher
- Artifacts: Flower of Paradise Lost (4)
- Sands: Elemental Mastery
- Goblet: Elemental Mastery
- Circlet: Elemental Mastery
- Substats: Elemental Mastery, Energy Recharge
- Ideal Constellation: C0 is enough, but C4 isn’t a bad option either
You may also be interested in:
[Top 10] Genshin Impact Best Elemental Reactions 5.1
