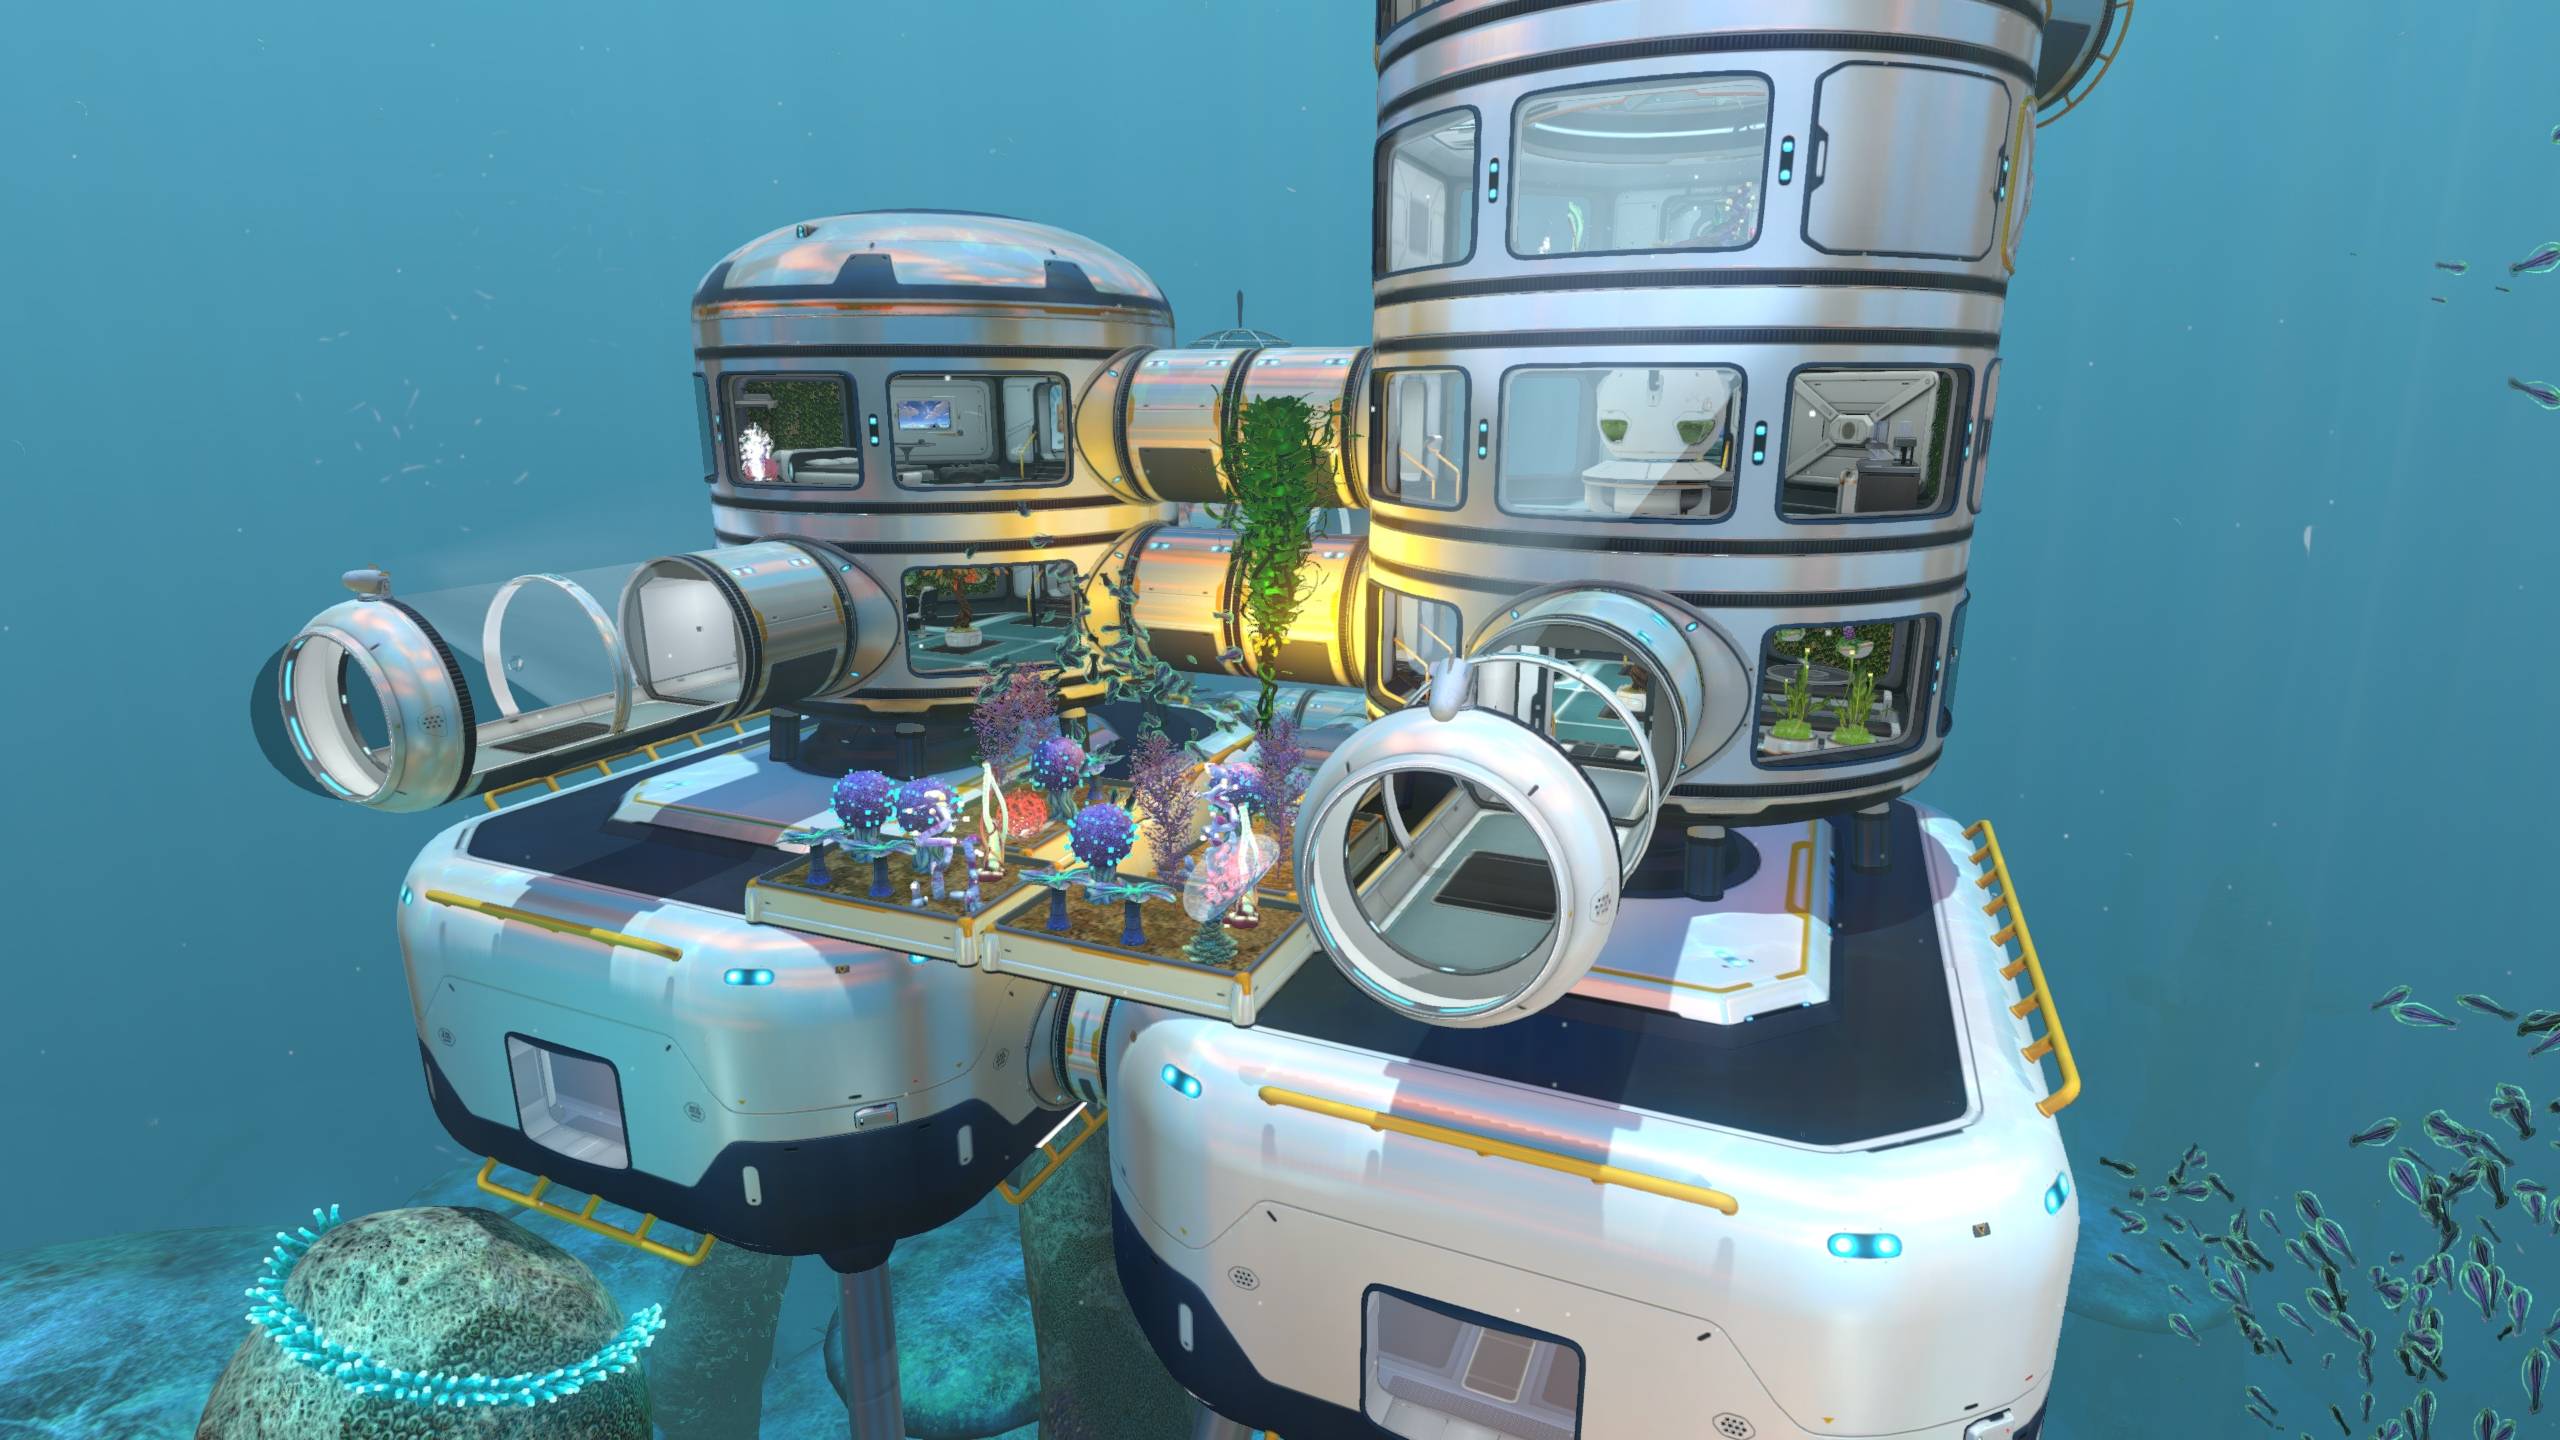
If you’re a new Subnautica player, a long-time veteran returning to the game, or the sort of player who’s into “Creative Mode,” then you might be thinking deeply about where to set up your next base.
You’ve got tons of great options at your disposal, but a lot of vectors to consider as well, and the huge amount of options can be daunting.
This Listicle narrows your choices down to what is arguably the ten best places for a base. We’ll go through each viable area, give it a rating, talk about why it's great, and give you some guidance on how to get there, plus some ideas on how to effectively set up shop.
SPOILER WARNING: Subnautica is a game all about exploration, so having someone detail to you all the best places to go find involves spoiling multiple areas. If you want to enjoy the experience of discovering these amazing places on your own, you should save this list for when you’re planning your next playthrough.
That said, this list will avoid spoiling anything about the game’s storyline and will withhold any info about these biomes that aren’t relevant to base-building but is still worth discovering, so rest assured that reading this list will not reveal everything there is to find.
Also important to note: Subnautica’s map doesn’t appear in-game, so all maps of the world are fan-made. The one I’m using is from Subnautica Interactive Map, a fan website that does a great job conveying everything in a way that’s visually clear and easy to read. Most maps orient themselves the same way, but if you’re following my directions to get where you’re going, I recommend checking this website out.
So then, which places are the best for bases? Let's discuss:
10. Safe Shallows
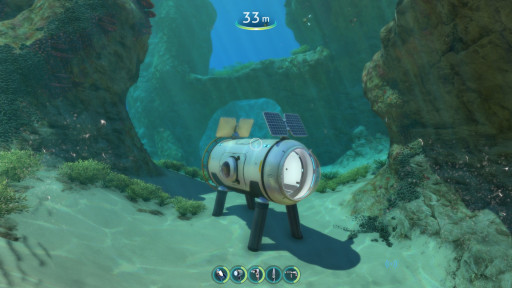
You have to start somewhere.
The safe shallows will undoubtedly be your first base location, but hopefully not your last. While the Safe Shallows does offer a space abundant with early game materials, tons of sunlight for solar power, and basically no predators, it runs up against a few issues as you progress through the game.
For one thing, being as shallow as it is, there isn’t much space to comfortably build, and this becomes a bigger issue as you build vehicles since ones like the Cyclops need ample space to park, and the shallows can be tricky for her to navigate. Also, the Shallows are essentially the center point of the world map, so they’re very close to some critical mid-game areas but basically as far from every late-game area as they can possibly be at once.
This means you have a long commute between here and wherever you plan to explore next in the late game, and seeing that food and hydration are a constant timer ticking down, minimizing the amount of time spent between your goals and safe harbors is ideal. Finally, the game starts you in this area with an escape pod, which essentially functions as a free base to start with, so of all the biomes, this one already has a head start on being colonized.
So with that said, why bother adding it to the list at all? Well, when you start the game, you’ll quickly find that you need a base sooner than later. The Escape Pod has a crafter, radio, med kit fabricator, and some small storage space, but that’s it. There’s nowhere to charge batteries, no space for growing food of any kind, and you’ll quickly fill up the storage compartment inside your pod. Since building base parts isn’t allowed inside the escape pod, this space barely functions as a living quarter, offering subpar storage and giving you no way to farm food or charge gear reliably.
In the early game, your first order of business is gathering a boatload of stuff, all while working with a small number of tools, so any base of any size for this leg of the adventure is potentially a welcome upgrade from your Escape Pod. From the moment you build a Habitat Builder, you’ll benefit right away from just having somewhere to offload all your extra titanium and copper, as well as somewhere to stockpile food and purified water.
You’ll outgrow this base soon after, but this place serves as a good location for your intrepid first steps, especially if this is your first playthrough. It's also a very cheery, colorful space, serving as the game’s most inviting and whimsical biome, so you might find it nostalgic after a while and choose to make it your primary base after all. If not, don’t worry; you’ll find more open and inviting places for a base soon enough, but for now, just get your roots down and start working on finding that mobile vehicle bay.
BUILDING TIPS
Don’t overthink this base. Just keep it simple and cheap. A habitat here only needs the bare essentials: A fabricator, storage space, and a battery charging station if you have it. If you find a bed small enough to fit, try throwing it in to give yourself a way to advance time.
If you decide you really like it here and want to stay, my advice is to scout the edges of the biome to find where it transitions into other zones since those will offer you sudden elevation drops that make it very easy to build a more extensive, more functional base that can serve as your primary residence. You’ll likely use this technique in a few other biomes as well, but it's most necessary here.
HOW TO GET HERE:
Start the game. You’ll be flung from the Aurora into a random corner of this area.
9. Tree Cove
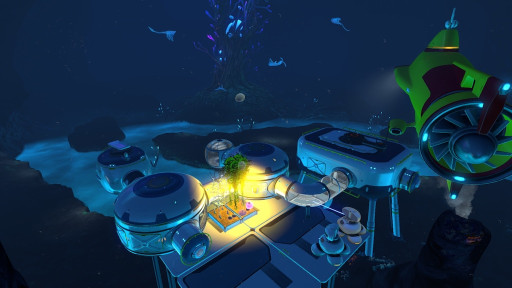
A haunting view, if ever there was. (Posted by Bijschrift on Subnautica’s Steam Community)
A stunningly beautiful cave between two of the world's most remote and unsafe locations. The Tree Cove is a well-hidden area you’ll find while pursuing the game’s storyline, serving as a reward for braving the treacherous road to get there. If you find the place particularly welcoming, you can always set up a base here.
Despite being so far underground, this location is relatively open and spacious. It also has lots of late-game resources hidden around thermal vents or in the acidic brine pools along the cavern floor.
The space is home to a majestic flock of ghost rays, a type of passive fauna that won’t give you any trouble and lend the place a haunting sense of serenity. At a depth like this, Tree Cove is probably as peaceful as it's ever going to get.
Building a primary residence here is not much of an option since the space is so remote and hard to get to, but it can work well as a forward operating base when scouting out the neighboring zones for their store locations or for late-game resources you’ll need to finish your adventure. A base here needs only the essentials for comfy living, a garage for vehicles, and a scanner room for hunting down all those helpful resources.
BUILDING TIPS:
Setting up grav traps near the area’s entrance can help with catching errant Spine Fish and the occasional Bladder fish for water, but your best bet for subsisting down here is probably growing food in or around your base as the environment often has meager pickings.
Indoor grow beds in a multipurpose room or one of the recently added Big Rooms will help you cultivate marble melons and lantern fruit or Chinese potato plants, which can help give you your daily fix of food and water. Try and find the water filtration machine before coming down here since it really helps with stockpiling water.
The area also has a few thermal vents near the entrance for cheap power, but by this point in the story, you’re likely to have unlocked Nuclear Reactors, which trivializes the issue of keeping a base running. Still, always nice to have a backup power line.
Just pack lots of early game resources before you make your way over because there's no fast and easy way back to the surface from here, and nothing stings more than realizing you need to backtrack all the way home for the resources necessary to finish a base here. A solid technique to assure you have enough before venturing down is to build the base you’re imagining in the Tree Cove somewhere close to the surface, then disassemble it and place all the resources into the inventory of your Cyclops.
For suggestions on what to build, a moonpool for recharging the PRAWN suit and a Power Cell Charger for recharging the Cyclops are two big worthwhile investments, considering you’re going to need them for what comes next.
Building in the Tree Cove is far from easy, but it pays off by giving you a perfect resting spot to charge your Cyclops or PRAWN suit before venturing into the world’s most treacherous areas.
HOW TO GET HERE:
This spot is at the tail end of the Lost River. You'll find it by following the main storyline to its completion. The most foolproof method for gaining entrance might be finding the Sea Treaders as they migrate towards an entrance hidden in one of the world’s spookier biomes.
8. Floating Island
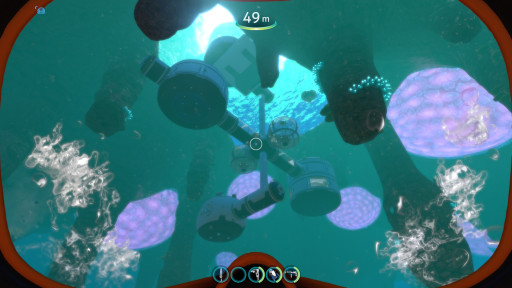
Quite the hang-out, ey?
While playing Subnautica, the concept of walking around on a planet’s surface can begin to feel like a distant memory, what with the overwhelming amount of ocean all around you. So it might be a bit of a shock when you finally find dry land, and even more shocking to find it floating on the ocean surface on the backs of giant buoyant parasitic organisms.
Floating Island is a picturesque location to build in, where unique food sources like Lantern Fruit, Hydromelons, and Chinese Potato Plants grow here -and only here- in abundance. Once you harvest a few of their seeds, you're free to grow them in any of your bases across the map, but the local environment makes it easy to farm them in mass amounts by planting them in exterior grow beds placed on the island’s surface.
No natural predators exist on the islands, save for one, the Cave Crawlers, which are pests at best that can be warded off with a knife or propulsion cannon. They’ll give you about as much trouble as a summertime mosquito.
Floating Island is unique to most other biomes in that it’s entirely cut off from the sea floor, hanging directly above a very resource-rich biome with a fair amount of distance between you and the sea floor. This place is called the Grand Reef, and it isn’t a bad spot for a sea base either, I’d say, but it does have many cave systems scattered around that are full of some really nasty predators, so make doubly sure you aren’t trying to set up shop near a warper, or they’ll be stalking you at every turn.
Just note that if you try bringing your PRAWN Suit to the island, you’re going to have a hard time getting it on dry land, and if you fall to the reef below, you won’t have a way back up. This won’t be an issue for you once the Cyclops is in your fleet, but it is another limitation to building here that holds the place back.
If you can forgive the poor parking options for PRAWN Suits, or the total lack of natural resources for crafting, this is the perfect base for a pacifist or vegan run. Or, if you don’t feel like you’re in a rush to leave 4546B, it’s the perfect real estate for your own personal hotel resort.
BUILDING TIPS:
The 2.0 update for Subnautica added some tweaks to the building system made for Subnautica: Below Zero that make building on land much more seamless, like hatches generating above sea level with convenient ramps attached to them. You can build anywhere on the island with sufficient space, but most likely, your best options are going to be building on the island’s beaches and the hidden cove at its center.
Platforms can’t be built in open water without being close to the sea floor, but they can be built if they’re pushed up against walls, so placing one or two along one of the island’s hanging stalactites will give you a good starting point to build. From there, expand upward or downward all you want, and add reinforced hulls for additional structural support as needed.
HOW TO GET HERE:
To get here, you need to start in the safe shallows and face south. Look closely, and you'll likely notice clouds gathering in one spot on the horizon, almost forming a fog that seems to occult something. Drive straight towards it, and you'll find the island. Alternatively, you could find Mountain Island’s alien archway and figure out a method for powering it up. Doing so will take you straight there.
7. Inactive Lava Zone
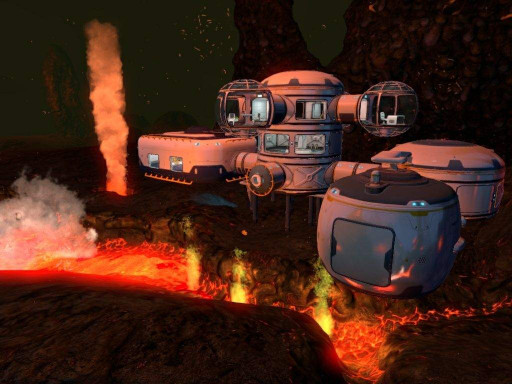
A hot spot location, to say the least. (Base by sundump post, uploaded on amino)
This massive cauldron of heat is the precursor to your last significant hurdle in Subnautica. Unlike areas before and after, this area is highly expansive, taking up many biome’s worths of space! The place could be large enough to house an entire player-made city if it weren’t for the lava enthusiast lurking in every corner or, y’know, frame rate limitations.
Building here might sound like a nightmare to you, and it is. But hear me out: The Inactive Lava zone has something rare inside that you definitely want: Kyanite crystals. They help you craft upgrades for vehicles and are a needed resource to get off this world by the game’s end, so it's best not to leave here without a few. And if that’s the case, while you’re down here grinding up those blue crystals, why not make things a bit comfier around here?
The Lava Zone is home to the game’s apex predator-type Leviathan, so that might discourage the average person from building here, but keep in mind that this space is massive. If you pick the far side of the area to build on, you’ll never end up rubbing shoulders with him, so the most significant hurdles will likely be the various Lava Lizards and depth pressure.
But hey, free thermal power all around, am I right?
BUILDING TIPS:
There isn’t much point to a full-sized primary residence down here, but a forward operating base for recharging and growing food has plenty of space to grow in size, and a scanner never hurt anyone trying to find valuables. Like with the Tree Cove base, build the base you want to make up above in the safer spaces of the game and then disassemble it. Place everything you used to make it into your Cyclops to ensure you won’t need to do any additional resource collecting once you get down here.
A moonpool would be welcome down here but only bother with one. The Seamoth -sea empress love her- can’t handle these depths even when fully upgraded, so you’ll only need the moonpool to recharge a PRAWN suit, which is going to be super necessary for these parts.
A charging station for power cells would help anyone at this point in the journey since your Cyclops has had a long voyage to get here, and she’s probably getting drained of her energy by horrible little leeches right now.
HOW TO GET HERE:
You’ll need to search the hidden river below the world for an entrance to this place. There are multiples across the map, waiting for you to discover them. I’m remiss to spoil how to find everything, but if you’re desperate for a hint, the entrances to the deep underground are always in the outer reaches of the map, typically in biomes that are pretty deep, reasonably dark, and Leviathan territory. When in doubt, follow the Sea Treaders.
6. Mountain Island
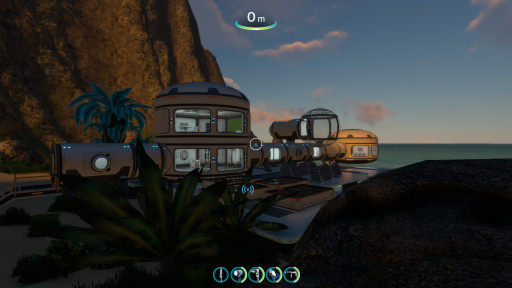
You might be a castaway, but that doesn't mean you have to live like one.
What if you could have the benefits of the Floating Island but without the drawbacks of living in a highly remote location far from the seafloor with zero natural resources?
Well, we don’t have to operate on “what if’s” here. The place exists, and it's called Mountain Island. This is a key biome in the game’s narrative, housing a very important couple of locations, including an Alien Archway that takes you straight to the Floating Island. This makes the place an easy commute over to the lush island paradise, which means you can easily take advantage of that location’s food supply.
Unlike the Floating Island, this place is connected properly to the ground, so building a vehicle bay for your PRAWN Suit is considerably easier, and the location has a series of caves beneath it that contain some highly valuable mid-game items like Lithium and Diamond. It’s also close to both early-game areas AND some late-game areas, so sourcing metals and resources, as well as launching expeditions, is pretty easy around here.
It's a much less visually exciting location, with a very major drawback of having a resident Warper and Reaper Leviathan for neighbors, but the Warper is easy to give a wide breadth, and the Reaper Leviathan stays on the island’s east side, so building on the western beach is a safe bet. Since the space around the island’s west side is so open, you’ll have enough space and nearby materials to build a proper Mega Base, so this isn’t a bad spot to make your primary residence.
BUILDING TIPS:
As previously stated, avoid the east side altogether. The Warper is your main stumbling block when building, and he’s mostly confined to patrolling along the southern rim of the island, where it’s tough to build anyway. Try utilizing the beach as much as you can to support your Foundations and create entrances onto dry land. Remember that Solar Panels are most effective when close to the sun, so using the island to build above sea level is most efficient.
HOW TO GET HERE:
Start in the safe shallows and head north. You'll eventually find a kelp forest and some underwater islands surrounded by bone sharks. The mountain island is east of said underwater islands.
5. Mushroom Forest
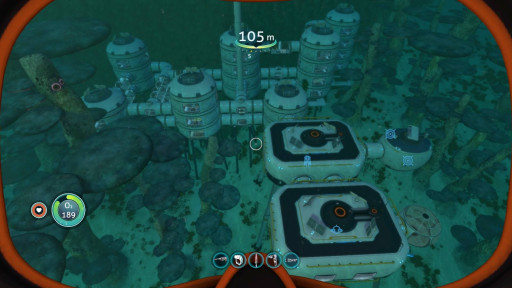
No, you can't eat the mushrooms.Yes, I tried. (Post by ZeBugHug on r/subnautica)
So by now, you’ve heard some of the decent early base locations, some late-game base locations, and some more exotic or unconventional ones to boot, but what are the best “mid-game” places to build? Everything from here on should be considered not just good for a base but great for a base.
Being a beautiful local not far from the game's start but very close to its much more dangerous areas, the mushroom forest has plenty of fish to eat, resources to collect, and blueprints to discover. It's deep enough to park vehicles and flat enough to walk around with a prawn suit. Tons of mushrooms help you source some cheap and easy power for your base when using bioreactors, and you can augment it with some solar panels by installing them on the tree branches closer to the surface. While there is an ever-present threat from predators, they are made easier to sidestep thanks to the natural mushroom formations giving you plentiful opportunities for cover.
Also of significant import, this place has some of the best blueprints available to find and tons of valuable mid-game resources. While the mushroom trees can limit your space to build, there are lots of open plots all over that give you the breathing room to make a megabase that can serve as your primary residence. Namely, some spots are available near the ridges leading down to the Bulb Zone in the Northeastern Forest and areas surrounding the great mushroom tree in the Northwestern.
The biggest thing holding this place back has got to be the local predators. Bone Sharks aren’t much of a force to reckon with, but they aren’t very helpful for feeling at home. Reaper Leviathans can be a particular issue since they often lurk at the outer edges of these areas.
Although they can be sidestepped by simply building away from them in most cases, they sometimes range into here by accident, which makes them less predictable than in most locations, and that unpredictability seriously demotes the Mushroom Forest. The mushroom trees might work well as a barrier to hold them back and get away, but generally, the best way to deal with leviathans is to simply not be near them.
BUILDING TIPS:
Find the centermost part of these locations where they border with more shallow spaces, since those tend to be the places where Leviathans show up least frequently. Avoid the corners of the biome that rub up against the Mountain Island or Crash Zone, and stay FAR away from the Dunes.
The distance to the surface here is a significant stumbling block for power generation, so get a bioreactor to work as your main source of power, then augment it with solar and replace it later on with nuclear if you plan to grow larger here. A pair of Moonpools works great here since you have the depth and flat terrain to dock both a Seamoth and a PRAWN suit in this area. Just make sure your Moonpool isn’t too close to the ocean floor, as the Seamoth will slam into the ground when deploying.
The area has lots of great sources of food, but you’ll likely want to get some gardens going indoors for reliable fuel through lantern fruit. Also, remember that Oculus fish are the most efficient source of farmable power. You can easily make a space big enough to house an alien containment unit around here.
This is one of the more forgiving spaces to build in, so feel free to customize to your heart's content and experiment with things.
HOW TO GET HERE:
There are two Mushroom Forests, one to the Northwest and one to the North East. Go towards the front tip of the Aurora if you want to find the Northeastern one, and head to the centermost point of the Safe Shallows. Go due north until you hit the Underwater Islands, then turn west and sail until you see the big mushroom trees.
4. Sparse Reef
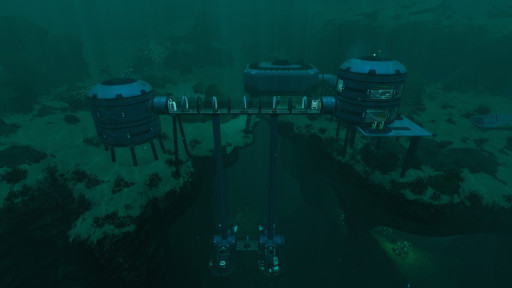
What base is complete without an up-close view of the terrifying depths? (Sparse Reef Ravine Base by SafetyReaper07 on r/subnautica)
Subnautica has a lot of amazing biomes you’ll want to get lost in, as well as quite a few biomes you’ll be desperately trying to escape the moment you’re too deep inside them. The Dunes, Mountain Ranges, and Blood Kelp Zones all come to mind here. Many of these places aren’t exactly ideal to live in, but due to how dangerous or intimidating they can be, it helps to come down here with a clear lay of the land.
Enter the Scanner Room, a base part that lets you remotely chart areas using a holographic map and a pair of remote-controlled cameras. This room is ideal for minimizing your interaction with biomes you’ve decided you hate for whatever reason, so building it and upgrading it at locations on the edge of these forbidden zones is often worthwhile in many corners of the map.
And so we come to the Sparse Reef, a perfectly located little corner of the world that rests between the deep dark zones of the Dunes, Blood Kelp Trench, and Grand Reef. These areas range on the ‘Danger Scale’ from risky to absolutely not, so having a pair of remote eyes braving these zones ahead of you can seriously help you search these nastier zones for everything worth finding. Or just, y’know, deciding they aren’t worth it and agreeing with yourself to never go there.
The Sparse Reef is also, frankly, a very worthy place for a sizable base. It may not be very inviting, but the area contains some caves full of high-value materials, some sources of scrap for titanium collecting, and a very generous amount of space for building. You’ll be deep enough in the water to easily find parking space for all your vehicles, and the terrain is friendly enough to PRAWN Suits.
Frankly, I would have gone so far as to say this place belongs in one of the top three choices if it weren’t for the overwhelming dead and desolate landscape. Or the constant shadowy hue of the sea that totally obscures the horizon, giving off the terrible sinking feeling that Cthulhu itself is moments away from reaching out past those grand spires and snatching you away into the depths.
So yea. It gets a number four spot for those reasons.
BUILDING TIPS:
The area is primarily sheer cliffs that you can hang a base off the side of, but your best bet is to go deeper and find the vast empty plains below for perfect building real estate. Here you can set up a multipurpose room or two, which will house your main source of power. Down here, power isn’t easy to come by, so you’ll have two main options: Bioreactor, or Nuclear Power.
In my opinion, your best pick is probably the former since a Nuclear Reactor down here would be overkill unless you pick this spot as your primary residence. To power a Bioreactor, you’ll need one multipurpose room at minimum to house the machine and, ideally, another multipurpose room for keeping an alien containment unit to farm fish. Bioreactors can run on a lot of things for power, but the most efficient choices are Oculus, Reginald, and Spadefish.
Alternatively, you can plant a Lantern Fruit tree indoors to grow fuel that’s 100% cruelty-free! Trees actually need less than a single base compartment’s worth of space to grow, but they produce a lot of lantern fruit pretty fast and with no need for upkeep. This option will let you keep your base contained to one multipurpose room and one scanner room if you’re looking for a more economical alternative.
Once you have a solid bio farm and bioreactor set up, you’ll have the option to expand the base any way you like.
HOW TO GET HERE:
Starting in the Safe Shallows at the map’s center, go due west until you hit a Grassy Plateau. Then turn left and look for a sudden drop into the deep sea with tall spires pointing up to the surface. This is the Sparse Reef.
3. Sea Treader Path
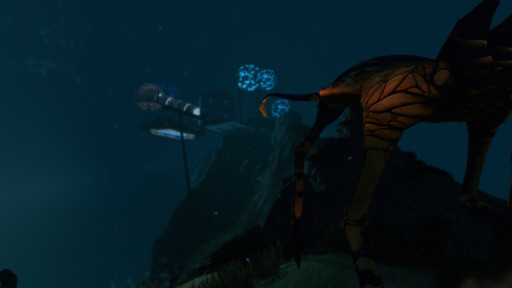
Get a front-row seat to the migrating heards.
The Grand Reef is one of Subnautica’s biggest and most iconic zones, and you’re probably going to spend a lot of time exploring it. The place is spacious, dense with valuables, and dangerous, so having to stop to eat and recharge can be disruptive to the process of exploring.
Having somewhere to stop and recharge around here is highly valuable when you're so far from the surface, but choosing to build in the Grand Reef is complicated by the very dangerous wildlife that lurks around the place.
The Sea Treaders Path is a relatively safe area of the grand reef, so building here can give you needed reprieve from all the hostile Warpers and Crab Squids. You need to have high-quality gear and building materials to shack up around this side of the sea, but the payoff is considerable since the grand reef is so rich with great loot and is possibly one of Subnautica’s prettiest locations!
The area is admittedly very remote, which has held back many other biomes on this list, but unlike the others, this area is not nearly as hard to get to, and what's more important, it has so much to explore and discover. A base on the far side of the Koosh Zone, for example, is equally as remote, but you'll have far less to discover that way, while the Grand Reef offers a significant amount of PRAWN mining nodes, discoverable wrecks, and expansive cave systems, while also being a significant location for the game's story.
The Sea Treader's Path gets its title from a Leviathan class lifeform of the same name, which migrates across the area in massive herds. The sight is remarkable and is a lovely thing to have just outside your window, as you can imagine.
The Grand Reef was a prime location for primary player bases in earlier parts of the game’s beta, but it waned in popularity with the addition of more hostile fauna. So having a corner of the place that’s decently safe and extra unique feels like an open invitation to move in. You also have plenty of space to work with, so expands to your heart's content down here. Just bring some lithium if you do, or you might have a few holes to patch in the walls.
BUILDING TIPS:
Nuclear power is tempting to use in this environment since it's so far down into the ocean that using solar is out. Thermal vents are a solid alternative choice, but relying on them limits where you can choose to build. This is far enough along in the game that you’ll likely have nuclear power at your disposal, and this is as good a time to use it as any, but if you want to avoid this in exchange for something more eco-conscious, combine a few thermal plants huddled around a deep sea vent with a bioreactor. The sea treaders marching around are known for their sizable leavings, which are a source of low-effort power generation. Leveraging that will make your stay down here just a bit easier.
Warpers sometimes lurk around the edges of the Sea Treader’s Path, but they’re easy to hear from a distance, and few and far between, so you won’t be harassed by them as badly as you are when building near some of the Grand Reef’s many caves. Just do a thorough scouting session before deciding on a base location so as not to have any rude surprises.
Down here, food is neither totally scarce nor super plentiful, so it's good to show up here after creating a renewable source of food and water for yourself. If you haven’t found the water filtration system, try some of the deeper, pinker caves around the shallow areas or the Bulb Zone wrecks. Those spaces should help you unlock the alien containment blueprint and water filtration blueprint, which combined can help you easily farm fish and generate purified water passively with a powered base.
HOW TO GET HERE:The Sea Treader’s path is found most easily by locating… you guessed it, the Sea Treaders. They’re impossible to mistake, and once you find them, you know you’re here. Just worry about getting to the Grand Reef. It’s the location under the Floating Island, so just locate the cluster of clouds on the southern horizon and follow it until you’re sailing over staggeringly deep water.
2. Kelp Forest
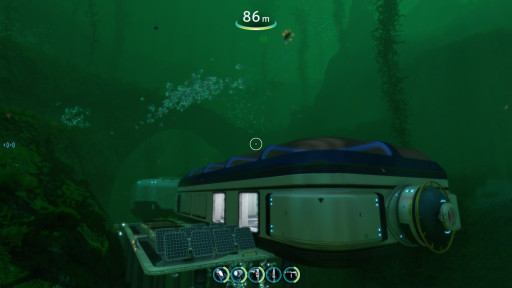
Sorry for all the terrible puns. I couldn't kelp myself. (Base by jasperjade817, posted on r/subnautica)
The Kelp Forest is likely your first step into danger when first venturing out of the Safe Shallows, so they’ll feel like a big risk at first, but with better gear and a few successful tangos with Stalkers, they’ll start feeling less like a daring venture into the unknown and more like free real estate.
Kelp Zones are a primarily safe and resource-rich early-game set of areas that neighbor a lot of mid-game areas and are great for building mid to large-sized bases that can work as an early-game primary residence. If you pick a location well, it might even become your permanent home base.
You have a lot of stalkers nearby who can be lousy neighbors, but dealing with them isn't too hard, and they're the only major predator, which is quite the relief compared to other areas. You’ll always live in abundance when it comes to food, and there are tons of caves with valuable resources. The spot is a short distance to the surface, and to top things off, it's a very beautiful environment that makes for a chill base location.
But since it's an early-game area, its main drawbacks are inherited partially from the Safe Shallows. The space is also pretty shallow, which means it can feel crowded thanks to multiple rock formations and lots of kelp that obscures your view. Also, the seabed is too uneven for the prawn suit to walk around at maximum comfort, but thankfully there aren’t any significant drops in elevation that you won’t be able to climb back out of. Just like with the Safe Shallows, try building on the edges between here and deeper biomes, as it'll give you more room to park your vehicles and far fewer stalkers to worry about.
BUILDING TIPS:
Picking the right spot is most important here for the sake of having space to build outward and minimizing Stalker bites. The Kelp Forests are typically found up against Grassy Plateaus and Mushroom Forests, with a few neighboring more dangerous spaces like Crash Zone, Underwater Islands, and the Grand Reef.
You’ll want to aim for the edges of these spaces mostly. The rim between here and Mushroom Forests can be incredibly chill so long as you’ve thoroughly checked for unwelcome neighbors since Mushroom Forests can, on rare occasions, have some pretty nasty Leviathan-Class threats lurking around. The safest bet would be parking between here and Grassy Plateaus, as those spaces tend not to have anything worse than a Sand Shark here and there.
As for building tips, this is a very easy space to build in since you’re close to the surface, so once you’ve picked a good spot, just build to your heart's content. Solar is highly viable here, you can easily expand out with Big Rooms or Multipurpose Rooms, and Platforms will likely be all you need for maintaining base integrity. The stakes of building here are pretty low, so once you have all the necessities, like a crafting station and food sources, just experiment around.
HOW TO GET HERE:
While in the Safe Shallows, look around for sudden drops in elevation that lead to tall stalks of kelp. There are many of these surrounding the starting areas, so if you’re inside the safe shallows, finding them is as easy as looking for green.
1. Grassy Plateau
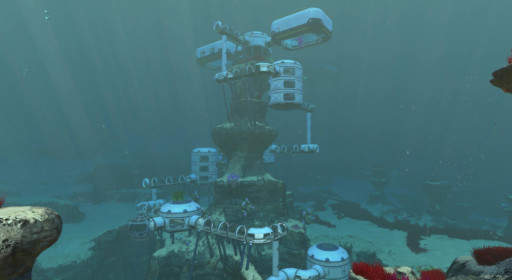
Behold, the seat of your personal Atlantis. (Tower Base by Demon_Princess_Rose)
If I were told at the start of a new Subnautica playthrough that I was allowed to build only one base in any one of the zones in Subnautica, I wouldn’t hesitate to choose. Why? Because of all the many options available, there is one choice that is, from a strategic standpoint, ideal in about every way.
The Grassy Plateaus.Why? Because ultimately, the Plateaus are seated in the ultimate sweet spot when picking a location to build a primary residence. They’re wide open spaces with water that’s deep and space that’s open, but the water isn’t so deep as to make surfacing for air an issue.
The location is rich with Filterfish for accessible water and Spadefish for efficient bioreactor fuel sources and substantial meals. The space has all the early-game resources you need and typically a few wrecks that can offer you some easy titanium and some necessary blueprints, but they’re typically also a stone's throw away from harder mid-game and endgame biomes, so shoving off to find the stuff you need is never tedious. Because the water depth is in that sweet spot, you have lots of room to expand but also not much water pressure to battle against, so you don’t need Lithium just to build a few compartments.
The sun is close enough to the sea floor here that Solar Power works perfectly well, and in fact, you likely won’t notice any dip in performance from transitioning out of the Safe Shallows. Your local terrain is nice and flat for the Prawn, open enough for the Cyclops, and doesn’t present any significant predators beyond the semi-frequent Sand Sharks, all of whom are easy to get rid of with a repulsion cannon and even easier to outrun with a Sea Glider.
On top of that, they tend to stick to pretty limited patrol routes, so you can easily build in their blindspots and proceed to forget they exist. Other than that, you’re going to get harried by occasional biters, who will deal a few points of damage to you and then clear off. They’re not any more worrisome than a cave crawler, so don’t sweat them.
Essentially, this is a zone that has early-game danger levels, but with enough space for expansion to take you all the way to the end-game.
The South Western Plateau can sometimes rub up against Leviathan Waters, but the comparatively shallow water means their movement patterns around here are more restricted than usual, so it's not hard to see one coming, and they won’t range into your side of the fence. It’s the one and only example of a Leviathan predator anywhere remotely close to these grassy fields, and once you know where it is, it takes little effort to evade him entirely.
Look. There are no ‘wrong answers’ when picking somewhere to build in Subnautica, but it isn’t a coincidence that basically everyone ends up building a base or two in these regions.
BUILDING TIPS:
For the safest experience, the Northern Plateaus are better than the Southern ones since they’re both a sizable distance from any Reaper Leviathans. The South Western Plateau is highly open and offers a few good wrecks, but it has one particular Reaper lurking near its westernmost edge. If you simply stay put in the red grass fields, he’s never going to give you any trouble, but it's best to keep him in mind.
The South Eastern Plateau is very small and very close to the Crash Zone, a highly Reaper-infested region, so I wouldn’t bother with that one. That said, it is relatively shark-free compared to the others, so if you don’t mind hearing a few distant ominous roars here and there, it’s no worse to build here than any others.
Your bases in this location don’t have much water pressure to worry about, so platforms should be enough to combat loss of integrity as you expand. A small collection of Solar Power will easily get you by in the early game, and you can transition to any of the other power sources as you progress since the plateaus can facilitate them all except for Thermal.
As for plants to grow, the biters around here make potting some Tiger Plants not a bad idea once you have the reinforced dive suit. Wearing it will make you impervious to Tiger Plant attacks, but said flora would also take shots at hostile fish ranging towards your base, so they’re great for dispatching biters or giving a curious sand shark something to think about.
Otherwise, just do whatever you want. This is the most foolproof area to build in.
HOW TO GET HERE:
Just like the Kelp Forest, you should be able to see the Grassy Plateaus from the safe shallows at the start of your game. Just poke around after you land and look for the areas with vast flat plains made out of crimson-red grass.

