In any video game, settings can be extremely important to optimize before you set foot into a match because everyone has different hardware and preferences. Luckily Counter Strike 2 has plenty of optimization support, meaning you can synchronize the game to your hardware very easily.
Here are the top 15 BEST settings to modify in Counter Strike 2 that will help your game run way better, even if you are still playing on your faithful 1080ti thats begging for mercy.
15. NVIDIA Control Panel - Refresh Rate (NVIDIA users)
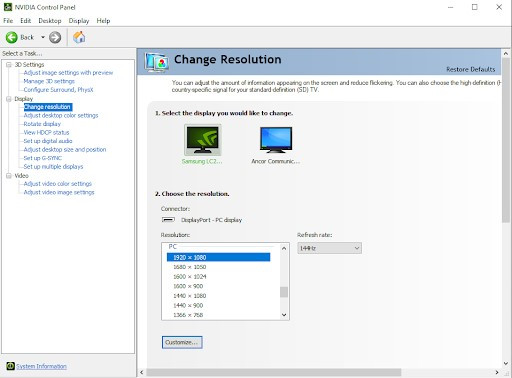
The NVIDA Control Panel
In order to capitalize on an NVIDIA graphics card, it is necessary to take a look at your NVIDIA control panel to make sure it is synchronized with your monitor. You may experience frame drops and screen tearing if your monitor refresh rate is higher than your GPU’s capability or vice versa, because they will be competing against each other. Your monitor should always be set to the highest refresh rate possible so that your GPU has a limit that it can either reach or come close to.
- Right click on your desktop and select “NVIDIA control panel”
- Under “Display” select “Change Resolution”
- For the best settings, scroll and select a resolution that best fits your hardware
- (I generally select “1920x1080” under the “PC” section)
- Then, ensure that your refresh rate (on the right side) is the highest your monitor is capable of
- (For me, this is 144hz, though some monitors will be capped at 75hz and others may go higher to 165hz or 240hz)
Now your monitor is set to maximize your GPU!
14. NVIDIA Control Panel - Texture Filtering
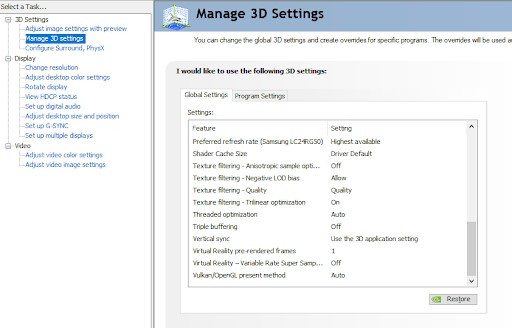
Texture Filtering settings
Continuing on in the NVIDIA control panel, before you start up your game to modify your personal CS2 game settings, we need to take a look at Texture Filtering. If you are looking to boost your frames per second in CS2, then modifying this setting will allow you to reach high frames with less effort from your computer.
- In order to modify this setting, head back into your NVIDIA control panel and select “Manage 3D Settings” on the left side.
- In the 3D settings section, scroll down to the bottom of the list under “Global Settings”
- Select “Texture Filtering - Quality” and use the drop down menu to select “High Performance” if you are chasing higher frames
- If you are already satisfied, then leave the setting at “Quality”
Rasing your texture filtering to high performance will improve the overall quality between your GPU and monitor, which will then improve your graphics quality and frames in-game.
13. Disable V-SYNC


Where to get rid of V-Sync
V-SYNC synchronizes the frame rate of your computer's graphic card with the refresh rate of your monitor in order to attempt to prevent screen tearing. Although this seems like a useful setting to have on, it can diminish the performance of your GPU or monitor by conforming one to the other.
Your monitor will always set the limit for how many frames per second you can get, so letting your GPU naturally hit that limiter is better than trying to push over. By disabling V-SYNC you will immediately notice higher frames per second because it will relieve your CPU and GPU from becoming overwhelmed by being forced to conform.
Higher frames will improve your overall quality of gameplay and reduce screen tearing, while further combating against input delays.
- In order to disable V-SYNC, head to settings in the main menu in CS2
- In the “Video” section, click on “Advanced Video”
- Set “Wait for Vertical Sync” to “Disabled”
12. Screen Resolution (In Game)

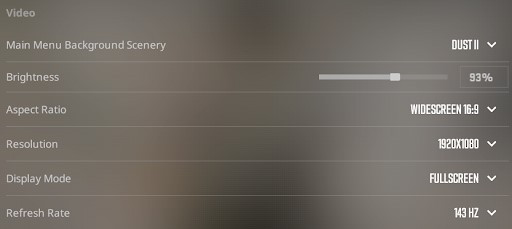
Standard resolution settings
Now that your NVIDIA settings are proper and your V-SYNC is disabled, it is time to decide what your CS2 screen resolution will be. In general it is recommended for new players to ignore this setting, and to ensure that all resolution settings are set to “Native”.
- For a standard 1920 x 1080 monitor, “Native” resolution will usually be at an aspect ratio of 16:9
If you wish to put less strain on your GPU and improve your frames per second marginally, you can play on a smaller resolution. By having less pixels on the screen, you will be able to reduce the load on your hardware and increase the allocation of power to your smaller visual field.
However, this may cause difficulty in game because your view distance will be lowered and will likely have to physically move your mouse more in order to look around.
To change your resolution in the standard settings menu:
- Click “Video” settings
- Select resolution and change to the desired resolution
- Test different resolutions to see which is the best for you
11. Stretched Resolution

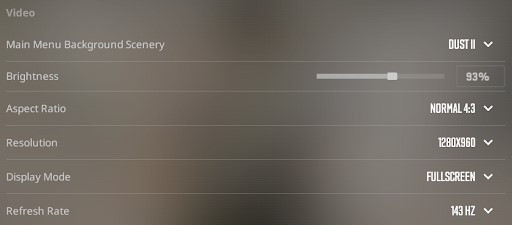
Funky stretched resolution settings for the true gamers
If you are not chasing after higher frames per second and simply want more advantages in competitive modes, you should try out using stretched resolution. Many professional Counter Strike players use stretched resolution because they are comfortable with it, and because it makes in-game objects seem bigger.
Playing with stretched resolution may be beneficial to improving your aim, because targets will be easier to hit and easier to see. This setting will not impact your frames by too much, so it is worth a try if you are feeling skeptical.
In order to play with stretched resolution, follow these steps:
- Within Counter Strike 2, open the settings menu and select “Video”
- In Video settings, change your aspect ratio to 4:3
- Then, change your resolution to 1280 x 960
- If 1280 x 960 is not available, select the closest numbers possible
If you want to get serious about Counter Strike and are willing to use any means to improve, stretched res will definitely make spotting enemy character models much easier.
10. Disable Power Saving Mode (Laptops)
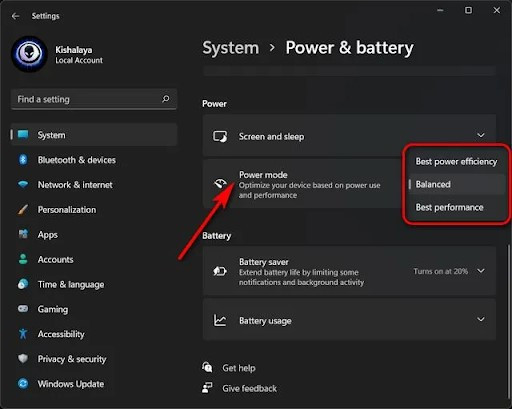
The battery settings menu: currently unavailable for desktops
If you are gaming on a laptop, you may be losing a few frames here and there due to your power saving mode which can detract allocation from your game. Enabling this setting will allow your game to work on a lower frame rate in order to save battery charge, so it is crucial to disable it if you are pushing for high frames.
Laptop users will not have a hard time keeping up with desktops, because they can run CS2 on lowered graphic settings and still get tons of kills from the comfort of a McDonalds parking lot.
If you have a laptop PC, go to your power settings in order to change this preference.
- Go to your Control Panel, then Hardware and Sound, then Power Options
- In Power Options, select “High Performance”
Don't worry, we get it. A laptop is convenient and you can take it anywhere! Don't let desktop users tell you otherwise, they wish they could play Counter Strike on their local Starbucks’s wifi. Make sure you bring your charger to keep your laptop set to the best power settings for performance.
9. Advanced Graphics: Anti Aliasing


*Settings shown not reccommended for Chromebook users
Graphics settings cause a large debate within every gaming community because players are torn between the game looking the best it can, and the game running the highest frames possible. Counter Strike 2 players can ride the middle ground of this argument because the game is so simplistic, it does not need better graphics for it to be enjoyable.
If you are playing Counter Strike because of its amazing graphics and visuals, then you are definitely playing for the wrong reasons.
Anti Aliasing is a graphics setting that makes objects look smoother by using your GPU to blend jagged edges in order for them to appear round. Your hardware will determine how high or low you should set your Anti Aliasing to, so it's a good idea to try out each option from the bottom up.
(I use an NVIDIA RTX 3060, and I would recommend anyone with a similar or better GPU to set their Anti Aliasing setting to at least *4X MSAA and above)
In order to change your Anti Aliasing settings, follow these instructions:
- In settings, select “Video” and then “Advanced Video”
- Near the top of the list, identify your current Multisampling Anti Aliasing mode
- Change the mode to *4X MSAA or a lower setting (depending on your GPU)
8. Volume Settings


If you prefer high volume just remember: you can't hear footsteps if you're deaf
In a tactical shooter like Counter Strike it is extremely important to have good audio settings to ensure you hear gunshots, footsteps, and bombs. Depending on your computer’s volume settings, you may want to set your in-game volume setting to 100% or even 75% if your audio device is high quality.
- Test out different volume levels to see if you can hear game events properly without hurting your ears, as having this setting too high can be uncomfortable.
The most important volume settings that can give you a competitive advantage as a newer player are the “Music” settings. These will affect the noise level that the bomb or hostages make when you are near them, as well as when you are running out of time. Be careful, if you did not purchase a diffuse kit then you will not be able to defuse the bomb in time if the “Ten Second Warning” music activates before you begin diffusing.

You will never say "I didn't know the bomb was planted"
To edit your audio settings, follow these steps:
- Enter the settings menu, then click “Audio”
- Set your master volume to your preferred volume
- Set your EQ profile to Natural, or Smooth if you have a high quality audio device
- Set Enable Voice to “Press to use Mic”
- Scroll down to the “Music” section
- Set “Bomb/Hostage” volume to at least 25%
- Set “Ten Second Warning” volume to at least 30%
7. Detail

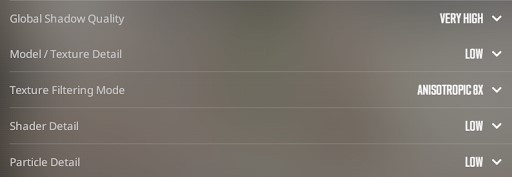
Set low Particles to see through the edge of smoke
Below your shadow settings, you will notice that there are multiple ways to change the details of your game including “Model/Texture”, “Shader”, and “Particle”. All of these settings are related to the graphic quality of objects, landscapes, and phenomena within the game. By lowering the first two settings you will see improvements in frames per second as well as enemy visibility, and neither of these settings will affect your graphic quality in a large way.
Particle Detail is the most important setting to look at here as lowering it can provide a certain competitive advantage. In CS2 smoke grenades and incendiary grenades are much stronger, as both provide a high magnitude of visual clutter. By lowering your particle detail, certain parts of smoke from objects on the maps and around the edges of a smoke grenade will become more see-through.
Remember, this is Counter Strike 2. In Counter Strike we don't care about graphics, we care about winning by any means necessary.
To check your Detail settings, follow these steps:
- Start in settings, then go from Video to Advanced Video settings
- Set Model/Texture detail to low for higher FPS
- Set Shader detail to low for higher FPS
- Set Particle detail to low
- Notice the change to the smoke on the graphic demonstration on the left side of the menu
6. Detach Silencer

Dont be like this guy, just use a P2000
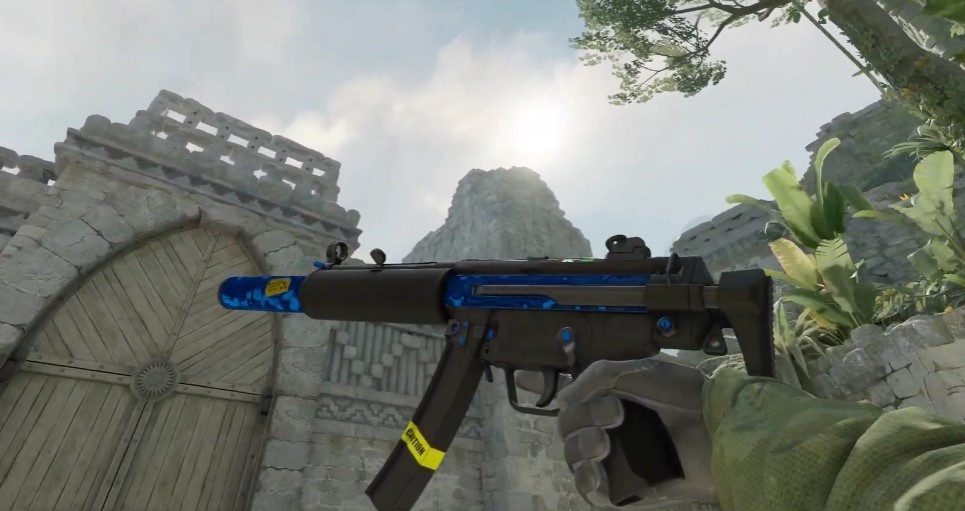
Despite being a feature in Counter Strike for many years, the “Detach Silencer” function is hardly ever used in both casual and professional play. It is likely that there are more people that have purple eyes than people that have actually unscrewed their silencer at the beginning of the round.
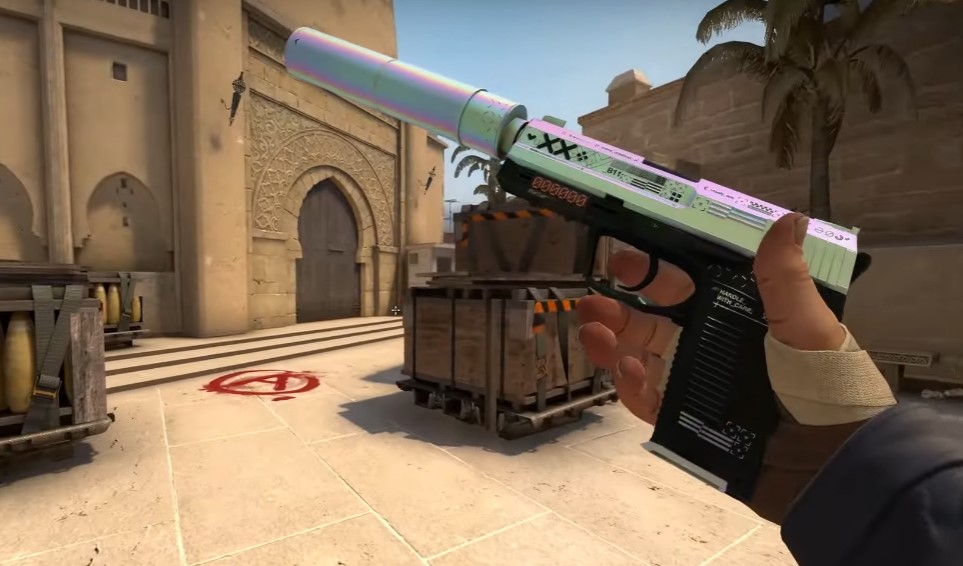
The M4A1-S and the USP-S are the only silenced weapons in the game, which makes them extremely useful for playing with smoke grenades and maintaining stealth. Taking the silencer off of either of these weapons will give a slight boost in damage, but overall it is essentially a useless feature.
Disabling this setting will prevent you from accidentally starting the “take off silencer” animation, which is done by clicking the right mouse button. Accidently activating this feature in game can be extremely costly, because you are vulnerable for multiple seconds without any way to fight back.
Newer players may find themselves caught with their pants down after attempting to aim down sight, only to start twisting the suppressor off of their gun.


In order to disable “Detach Silencer”, follow this guide:
- In settings, click on the submenu “Game”
- Scroll down to the “Item” section
- Set “Detach Silencer on M4A1-S and USP-S” to “Disabled”
5. Heads Up Display
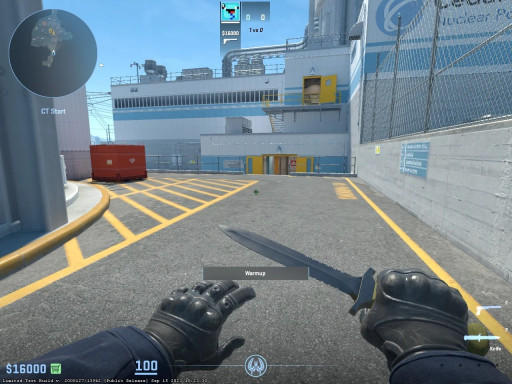
A light blue HUD is neutral and immersive
Your heads up display, or HUD, is the information displayed around the edges of your screen such as your health, ammo capacity, teammates, and round timer. The HUD is an essential part of Counter Strike because it gives you extremely important information for making crucial decisions.
Although the default HUD is usable, many players eventually start to modify its size and color to better suit their needs. If a certain size is too small you may not be able to read properly, but if it is too large you may not be able to see something in the corner of your screen.
I would recommend making the HUD slightly smaller if you are able, and changing the color to something that is visible to you but not overbearing.


To modify your HUD, follow these steps:
- Enter the settings menu and select “Game”, then select “HUD”
- Lower or raise your HUD scale to personal preference
- Change your HUD color to personal preference
4. Mouse Settings (DPI/Sensitivity)
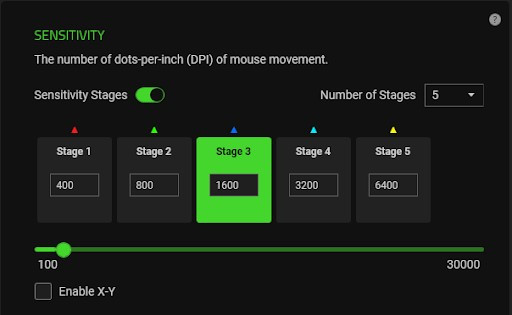
I dare you to set it to 30,000
Your mouse sensitivity will determine how accurate you can be while reacting quickly to danger, and practicing with a higher sensitivity may give you a competitive advantage. Let's talk about your mouse settings starting with the DPI, or Dots Per Inch, which is the metric that tells how quickly your mouse cursor moves in conjunction with how far you move the mouse on your desk.
Most players will set their mouse on either 400, 800, 1200, or 1600 DPI depending on what kind of mouse they have and how much room they have to move it around. I personally set my mouse to 1600 DPI so that I can use a lower sensitivity in-game. Many professional Counter Strike players set their mouse to 400 DPI and play on higher sensitivity so that their mouse reacts quicker to less movement.
Experiment with your own mouse by changing its DPI (this will be a different process or application for each mouse). Personally, I use a Razer Deathadder V3 set to 1600 DPI, with my in-game sensitivity set to 0.80.


Follow these steps in order to change your in-game sensitivity, (after you have set your preferred DPI):
- Go to settings in the main menus
- Select the “Keyboard/Mouse” submenu on the right side
- Change your mouse sensitivity based on your DPI (you will need to experiment)
- Leave Zoom Sensitivity Multiplier at 1.00
3. Global Shadow Quality
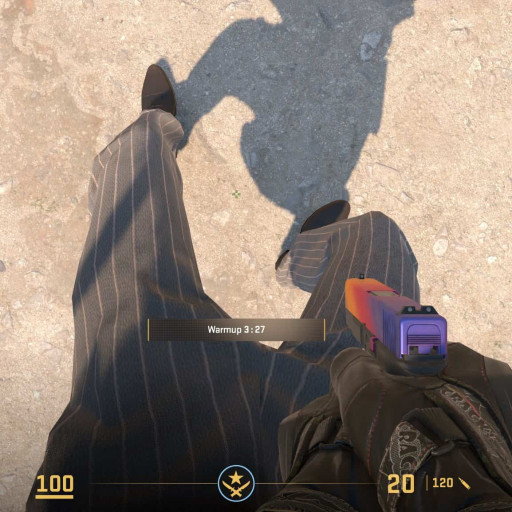
Check out that insane shadow quality!
In any other video game I would immediately recommend lowering any and all settings that have to do with shadows or sun detail. Shadows can take a toll on your frames, and in most games they are not useful unless you are aiming for the highest graphic quality.
However in CS2 shadows are absolutely essential to having a competitive advantage in the game due to the legitimate purpose they now serve as information providers.
Shadows are visible to both teammates and enemies, and in some situations you may see a shadow before you see its attached player. In a high risk and stealthy game such as Counter Strike it is necessary to have as much information on the enemy as possible, even if it means possibly losing a couple of frames.


In order to edit your Shadow Quality:
- Head back to settings, then “Video”, then “Advanced Settings”
- Under “Global Shadow Quality”, set the marker to “High” or “Very High”
The new shadow mechanics in CS2 provide essential intel on your enemies location, and that is why I recommend to set your Global Shadow Quality to at least “High”.
2. Crosshair

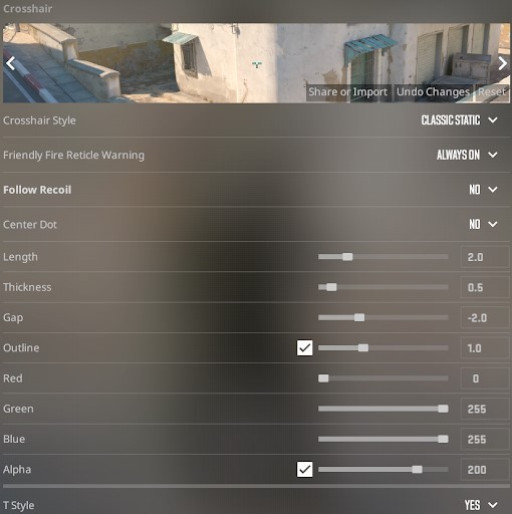
Use this menu or a crosshair generator in the Steam workshop
In order to perform your best in CS2 it is necessary to change your crosshair from the default settings either with your own design or a professional one. Every professional Counter Strike player uses a unique and individualized crosshair to suit their own needs because it will impact every second of the game.
Some players prefer crosshairs to be extremely small and compact, others prefer them to be extremely large and wide. There are different benefits to each type of crosshair, so it is important to experiment with many to learn which one you personally prefer.
(Check out our article on the top 15 crosshairs used by the best players in the world to see what the pros use!)
In order to change your crosshair, you can either:
- Go into settings, then click “Game”, then click “Crosshair”
- From here, you can edit each individual setting to modify your crosshair
- After editing each setting, take a look at the preview at the top
If you would rather directly copy a professional's crosshair…
- Select “Share or Import” at the top
- Copy and paste the crosshair code from your favorite pro player
Whether your taking a professional crosshair or making your own, changing it from default is extremely important for having success in CS2.
1. Keyboard Settings

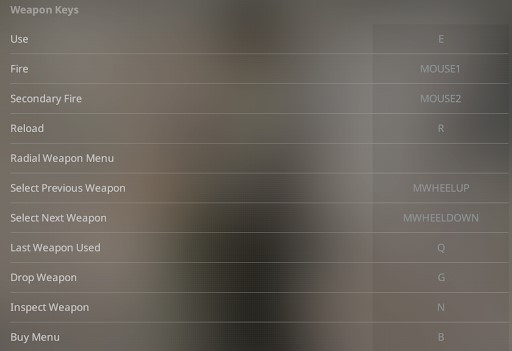
Everyones binds are different, test out what works for you!
Keyboard bindings can give you a competitive advantage by allowing you to execute certain actions quicker and easier, such as pulling out your knife or selecting a certain grenade. For example, I have my “pull out knife” function bound to the number 3 key, and my “pull out primary weapon” to one of my mouse thumb-buttons.
By having these actions bound this way, I am able to hit the “3” key easily with my left hand to move quicker with my knife out, and I can pull out my primary weapon at ease with my other hand. This is also effective when using sniper rifles such as the AWP, because I can quickly un-scope by pulling out my knife with my opposite hand.
In order to modify your keyboard bindings to your liking, follow these steps:
- Head to the settings menu and select “Keyboard/Mouse”
- Then, go to each submenu in order to reassign your keybinds
By modifying your settings in Counter Strike 2 you will gain a competitive advantage over those that neglect this strategy. Being comfortable with your video, audio, and mouse/keyboard settings is vital to cultivating your skill in a competitive environment.
If you try out editing these settings, you will immediately see an increase in your game quality as well as an improvement in your competitive edge.
You may also be interested in:
-
Top 15 CS2 Best Crosshairs (Used By The Best Players In The World)
-
Top 10 CS2 Best Audio Settings and Tips That Give You an Advantage


