
Your first steps into the brutal world of Escape From Tarkov can be daunting. A world where murderous AI Scavs roam free and real-life player PMCs are baying for your blood.
It’s a hard fought battle of hunger, thirst, injury and potential (almost certain) death as you make your way across a crowded map to ExFil, and to glory.
One of the hardest aspects of Escape From Tarkov is the lack of a mini-map. That’s right kids, you’ll have to find your own way around here.
But don’t fear! (Well… maybe fear a little bit). Because I’m here to help guide you through your first few adventures in this harsh, unforgiving game
There are an infinite number of ways to approach and play the game, but most newcomers tend to find the best way to get started is to pick a map, learn it inside out, then move on to another one and do the same.
That’s why we’re going to focus on which three maps in Escape From Tarkov you should commit to learning first to help get you looted and booted. We’ll talk about the prime areas of each map, some pro tips, and what keys you should bring with you to unlock the rarest loot Tarkov has to offer..
Quick Pro-Tip: When you’re starting out, it’s always a good idea to have the map layout up on either a second screen or your phone. Even seasoned pros sometimes need to have a quick glance to make sure they know where they are, and where their extracts are.
Let’s get stuck in.
3. Interchange
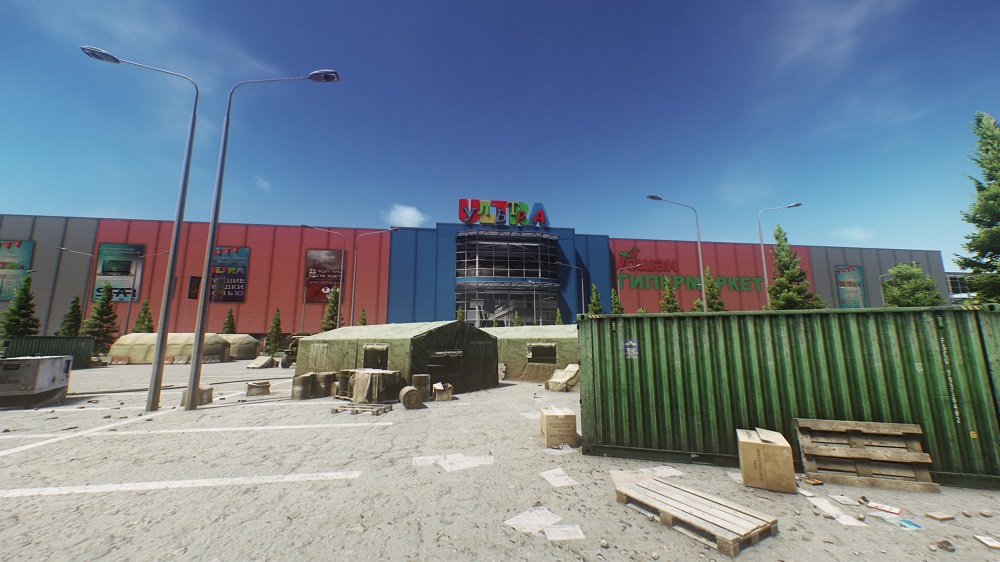 Interchange: The Mega Mall of death
Fans of Escape From Tarkov may be surprised to see Interchange listed as a good map for beginners, and I’ll admit it can be a tough map due to the sheer number of kitted-out PMCs that love to do an Interchange loot run. But with great risk, comes great reward as Interchange has some of the best, most accessible loot in the whole game.
One of the reasons that Interchange can be a great learning ground for new players is due to its simple set out and linear left to right, spawn-to-extract.
The map consists of the outside areas, such as a large parking lot, the Power Station, a few separate car parks, and then slap-bang in the middle of the map is the ULTRA Mall.
Ah, but this… this is no ordinary shopping mall.
Instead of happy shoppers and amazing discounts, this mall is packed with pain and suffering… oh and also a crate load of loot.
This mall itself is split into five parts:
-
Oli - a hardware store.
-
Idea - a furniture store (which is definitely not a certain Swedish chain).
-
Goshan - a grocery store.
-
The Shopping Mall - made up of two stories of a few different stores.
-
The parking garage - the underground floor.
If you’re being sensible, when you start off you’re going to want to stay away from the mall until later in the raid. That’s because as soon as the game starts, all the high-levelled players will stream there in their droves and fight it out for the chance to take home some high-tier goodies.
But as soon as you get a bit more comfortable with the map and the game in general, the ULTRA Mall is home to not only some of the best loot in the game, but also some of the most fun and challenging firefights.
Prime Areas
The Shopping Mall
The shopping mall is where the big boys go hunting.
Inside you’ll find the stores which are home to some of the most valuable loot in the game, including:
-
Techlight - a tech store that has lots of loose loot laying around. There’s a chance to grab some high-tier loot here, including the mega valuable GPU.
-
Emercom - a medical supply store where you can grab some (probably much needed) meds, and the chance to grab the ultra-rare LEDX.
-
Kiba - a gun shop that’s guarded by two locked doors. You can pick up some great guns here so if you want to make the most of it, you’ll most likely have to fight your way in - and out!
The Shopping Mall also has a chance to spawn the Scav Boss; Killa.
Killa is the only Scav Boss that doesn’t spawn with Bodyguards. Why, you ask?
Because Killa doesn’t need protecting.
This guy is kitted to the teeth with high-level armour, including his iconic three-stripe helmet, and enough guns and grenades to start a war.
Trust me here; if you’re new, stay well away from this guy.
Oli and Idea
Once you’re more comfortable with the map and the game, both Oli and Idea are good places to start. Both of them are chock full of loot and useful barter items and are relatively easy to get in and out of.
If you’re just doing a loot run and not looking to engage, then you won’t do much better than dashing straight to Oli or Idea, looting up, then dashing out again as fast as your little Russian legs can carry you.
Outside
Okay I know this sounds a bit silly, but with about 80% of the map going straight to the mall, that leaves you to take advantage of the rest of the map!
There are some great places to loot, such as the Power Station which has a fair few loot spawns and jackets to potentially find some high-value keys in.
You’re also most likely only going to be bumping into people who are also avoiding the mall meaning you’re more likely to have a fair match-up in terms of weapons and skill.
Remember an often forgotten fact; there’s more than one way to play this game.
Pro-Tips
Light the way!
When you think of shopping malls, you tend to think of them as bright as the sun.
This mall, in true dark and dingy Tarkov fashion, is the opposite. So make sure you bring along a flashlight if you want to see what you’re picking up, or if you want to blind your enemies as you pop them right between the eyes.
Cash, Money
There are dozens of cash registers on the map, so it’s a great chance to level up your Attention skill by opening them all up and grabbing the dollars, rubles, and euros stashed inside. Just make sure you bring along the cash register keys!
Bring some marshmallows and a sleeping bag for the Campers
This map is particularly bad for ex-fil campers. These people will sit at the ex-fil sites and wait for an unwitting, plump-with-loot PMC to come down to extract before filling them with bullets and nabbing their gear.
So watch out.
Key Keys
What’s great about Interchange is it can arguably be the most profitable map in the game where the loot isn’t mainly locked behind doors. But these are some extremely handy keys to get that extra loot.
-
As I said before, you’re going to need TWO keys to get access to Kiba so make sure you bring along; Key to Kiba Store Outlet, and Key to Kiba Outlet Grate Door.
-
Key to Emercom Medical Unit - you’ll want this for a chance to get some high-tier loot and all the meds you can carry.
-
Oli/Idea/Goshan Cash Register Keys - If you have the patience to unlock every single cash register, you can make a fair bit of money here.
2. Shoreline
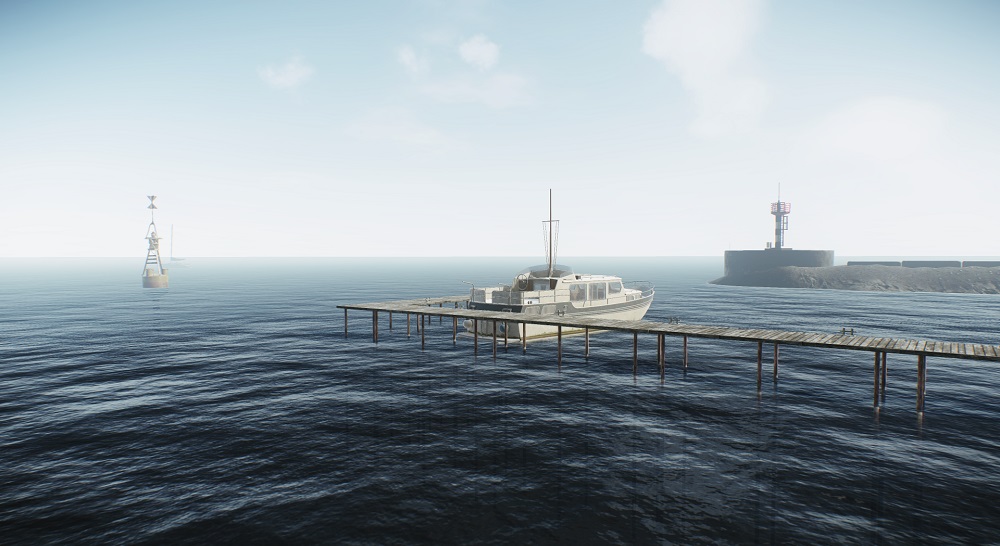
This is no ordinary trip to the seaside.
Pop on your water wings and grab your beach towel. We’re going to the seaside.
Shoreline is a great map for learning every aspect of the game. It’s a huge map that has open, hilly plains for practising your long-distance shooting and sniping, a few villages and buildings for some easy looting, and the dreaded Resort for close-quarters combat PvP fighting. It really has something for everyone.
If you were diving (not literally, you can’t swim in this game) into Shoreline with PvP in mind, then the general flow of the map would be to head straight to the Resort, fight, loot, then extract. But as a new player, there are a bunch of different ways to play.
Funnily enough, most of the action happens away from the actual Shoreline, so if you don’t want to head to the Resort then there are plenty of great loot spots dotted around the map which are relatively uncontested.
Prime Areas
As I said before, this is a big map with quite a few different locations. I’ll name a few of my favourites here but there’s plenty more to find and conquer.
Resort
This is the most obvious prime area on the map. It’s pretty much slap-bang in the middle and it’s where most players will head to when they spawn.
There is some incredible loot to be found in both the east and the west wing of the resort and a big chunk of the rooms have safes in them. So grab your bag and stuff it with all the cash you can.
Once you get comfortable with PvP, then the Resort can be home to some of the best battles in the game.
Power Plant
Just south of the resort is the Power Plant. It’s super easy to spot due to the three power lines that start there. It’s made up of the main building, a guardhouse and some sandbagged areas.
It’s a great place to fight some Scavs and grab some easy loot.
Scav Island
Also known as Loot Island, this little piece of paradise is where Scavs go to retire and enjoy their pension while sipping margaritas and basking in the sun.
Just kidding, it’s an island full of Scavs just waiting to be murdered.
Found just south of the gas station, Scav Island is another great place to practice your Scav fights. It’s also got a few loot crates and can sometimes spawn keys for some of the resort rooms.
Weather Station
This is a great location, partly because it’s where a couple of quests are, but also because it’s a great landmark to help grab your bearings as it’s easily recognisable by the huge weather tower that can be spotted from a mile away.
Fans of sniping can climb to the top of this to survey the area but be careful, you’re very exposed up there.
Village
On the western side of the map is an old abandoned village that has been taken over by Scavs.
It’s basically made up of a few houses separated by fences. It’s a great place to loot while also having plenty of cover, so you’ll be hard to spot!
Be careful though, it’s home to multiple PMC spawns and a Scav extract, so if you do spawn here be on high alert for other raiders.
Pro-Tips
Be wary of the Drug Lord!
Shoreline is home to the Scav Boss, Sanitar.
He’s a tough cookie that has two well-kitted, highly armoured bodyguards and will aggressively come after you and are very hard to kill.
If you either want to engage or have no other choice, try and make the fight as short as possible as both Sanitar and his bodyguards carry a tonne of meds with them, so will regularly break away to heal up. So you could be in for the long run with this one.
Loot, Loot, Loot!
There are a huge 37 hidden staches on Shoreline. If you can learn their locations you can map out a quick and simple loot run for when you’re running low on cash and want an easy buck.
Key Keys
The Resort is packed full of locked doors. I mean literally packed full. If you want to maximise the loot from Shoreline you’re going to need as many keys as you can carry.
-
There’s no simpler way to say this. Get all the keys for the Resort if you can. Here’s a photo of the recommended keys.
-
On the west side of the map, there’s a cottage that can be full of great loot. So make sure you grab the Cottage Key and the Cottage Safe Key.
1. Customs
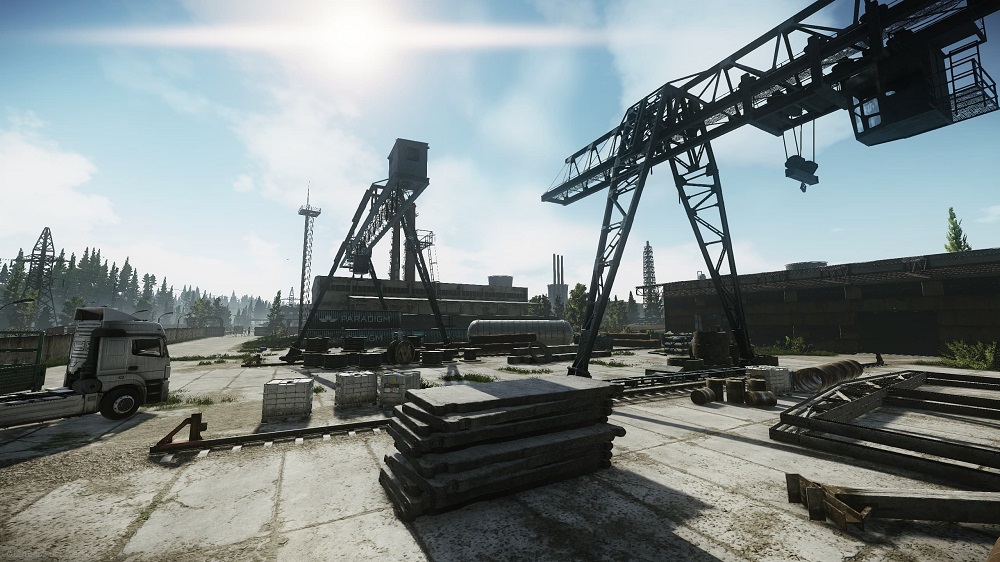 Customs: Where the goods are shipped in, and the bodies are shipped out
Customs. The ultimate beginner’s map.
Now don’t let the fact that this is top of the pile make you think you’ll have an easy time here. Customs can be a brutal map, filled with as much frustration and pain as it’s filled with loot and success.
What makes this a good map for beginners is its linear layout and rectangle shape. As a PMC you will spawn on either the east or the west side, and your extract will be on the opposite side with a few alternative extracts dotted through the middle. Nice and simple.
It’s also where a lot of the early tasks are based so you’ll be spending a lot of time on this map sprinting around desperately trying to pick up task items.
What makes this a great map in general, is the abundance of different ways to play it;
If you’re new you can creep around the sides, darting in to loot a box here or there.
If you’re a mid-level player you can keep more central and engage in a fight or two.
If you’re a beefed-up pro you can head straight to Dorms for some intense battles and high-tier loot.
The map has everything!
Prime Areas
Gas Station
The gas station on the east part of the map is a great place to farm Scavs. If you have the Gas Station Key then there’s also a safe which can spawn some high-value items. Plus, if you’re desperate for some cash, there are four tills you can loot.
It’s also one of the places where the Scav Boss Reshala and his bodyguards can spawn, so be careful!
Dorms
Dorms is where most of the high-levelled players will make a beeline towards. Its dark and dingy corridors are filled with Scavs, high-tier loot, and an abundance of PvP.
The Dorms are split into ‘Two-story Dorms’ and ‘Three-story Dorms’. Three-story Dorms has the infamous ‘Marked Room’ inside which, once unlocked, you can find some delicious loot worth millions of rubles.
If you want to explore it or need to do a quest here, I’d suggest waiting until near the end of the raid if you want to keep your head intact, or you could always grab a flashlight and do a night raid!
Customs Office
On the west side of the map, before you cross the bridge, you’ll see a huge red warehouse. This is where you’ll find the Customs Office.
Once you’ve unlocked it you’ll have the chance to loot a safe, a few computers, and a couple of jackets. There is also a few quest items found here so it’s a good place to become familiar with.
Sub Station
If you’re spawning on the east side of the map, it’s a great idea to head straight to the sub station. Here you’ll find a few weapons crates and some duffel bags, you’ll also be at the top of a hill with a great view over the Gas Station and the rest of the map. Perfect for you sniper experts out there.
Pro-Tips
Watch out for Sniper Scavs!
These bad boys can ping you from a mile off. If you see one, it’s always a good idea to line up a shot and take them out before they spot you.
Count the bodies!
If you do bump into Reshala and his boys and fancy taking them on, remember that he has four bodyguards. So if you haven't got five dead bodies at your feet, you know your jobs not done yet.
Learn the Loot!
There are a load of hidden loot stashes in Customs that often get forgotten. You can make a pretty penny by going from stash to stash and looting it all up.
Check out this loot guide of Customs by Pestily.
Key Keys
-
For three-story dorms, the most important keys are the Marked Key, Room 214, and Room 204. These keys will get you some of the best loot on the map.
-
For two-story dorms, the best keys are Room 105, Room 110, Room 114, and the Guard Desk Key. You’ll need a couple of these for quests too so they are super useful to have.
-
For other keys around the map, you’ll want the key to the gas station storage room, Cabinet Key, Customs Office Key, and the Military Base Checkpoint Key. Remember, most of the best loot in the game is hidden behind locked doors so keep those keys safe.
And there we have it! My Top 3 Escape From Tarkov Best Maps for Beginners.
Tarkov, like most games, is all about preference so if you feel I’ve missed the perfect beginners’ map, or just want to tell me which map is your favourite, then let me know in the comment section below.
To all you beginners out there. Good luck. This is going to hurt.


