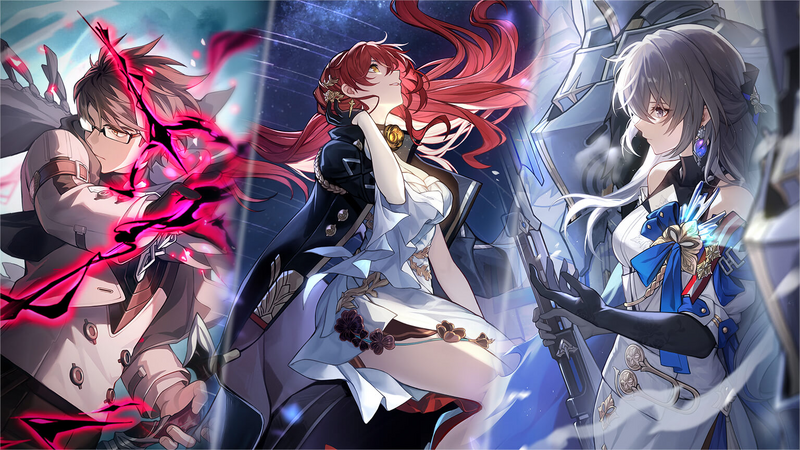
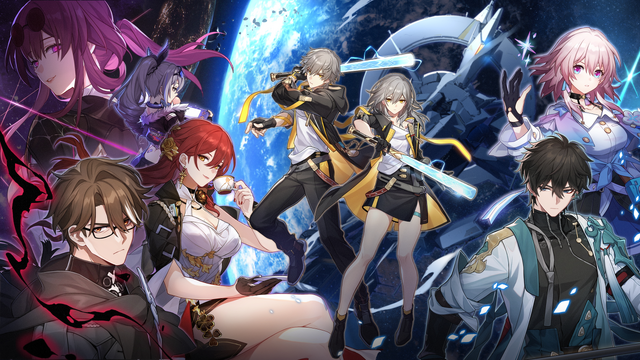
![[Honkai: Star Rail Guide] Top 25 Tips for Beginners official artwork for Honkai: Star Rail's second closed beta featuring the main cast](/sites/default/files/styles/responsive_image_600xauto/public/2023-10/baeball_bat.png.webp?itok=gMu3zfZy)
INTRODUCTION
Honkai: Star Rail—the latest installment in the Chinese media series Honkai—has taken the initiated ones by storm. With the player character “Trailblazer”, players explore the universe and come up with their own answers for why the Aeons—“gods”—do the things they do. Having only been launched in April of this year, the buzz around Honkai: Star Rail has yet to consume all and if you want to come join in the fun, now would be the best time to do it.
This guide will serve as your beginner’s handbook and will provide you with 25 tips and strategies essential for any Honkai: Star Rail beginner. Master them all and you can join the ranks of the endgame players (unless, of course, you burn out before that point)!
The Essentials
1) Bind your account
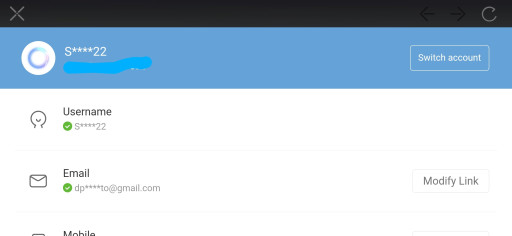
In-Game Account Screen
It may be a bit complicated—I would know as I’m still confused about Hoyoverse’s binding system—however, the first thing you should do is bind your game account to something else, such as your Twitter or email. This ensures that you do not lose your progress if you move to another device and do not wish to start anew. Have you ever spent a great amount of time on a game and lost all progress just because you failed to bind the account beforehand? Let’s not make the same mistake.
2) Take the time to read
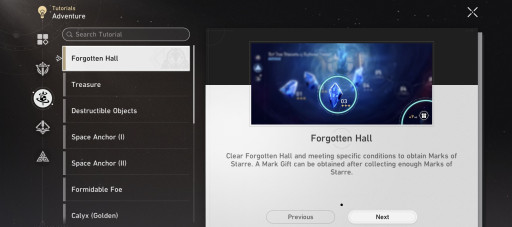
On average, it takes about four hours for a beginner to advance far enough in the story to unlock most of the story-locked content. This can increase to five or six hours if one gets sidetracked with other things aside from the main story and can decrease to around two and a half hours if one does not take the time to read.
Honkai: Star Rail does a very excellent job of walking a player through its core mechanics (such as how follow-up attacks of different characters work and how specific characters’ abilities work) and most of the time, player confusion can be solved by visiting the in-game tutorial tabs—an example is shown in the screenshot (Forgotten Hall is a gameplay mechanic that I will cover later). So, do take the time to read—it can save you.
3) Optimize Trailblaze Power Usage
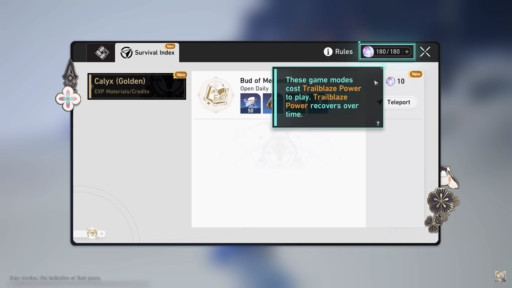
Trailblaze Power is a stamina gauge unlocked after advancing a certain amount in the main story. As a beginner, you start with 180 Trailblaze Power which you can use on Calyxes which are unlocked at the same time as your Trailblaze Power.
I would recommend you spend at least 30 of your Trailblaze Power on the Golden Calyxes to ensure you have enough character EXP materials to keep your characters up to speed. As you progress, other features that utilize Trailblaze Power will be unlocked, however, this will be further elaborated on in another tip.
4) Managing Trailblaze Level
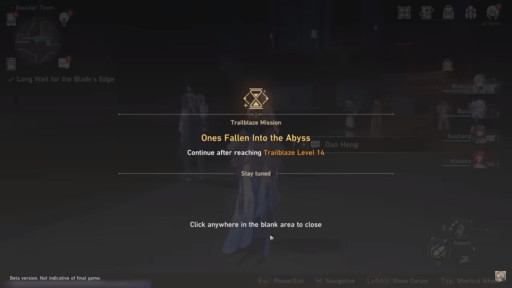
There comes a point in your early gameplay where you encounter the first level-gated main story quest. In order to advance further, your Trailblaze Level—that is, your player level separate from your character level—needs to be of a sufficient number.'
This can be done by completing the Daily Training (daily missions), using Trailblaze Power, exploring zones, and performing side quests. Remember that your Equilibrium Level is also tied to your Trailblaze Level; I will explain what this is later.
5) Operation Briefing
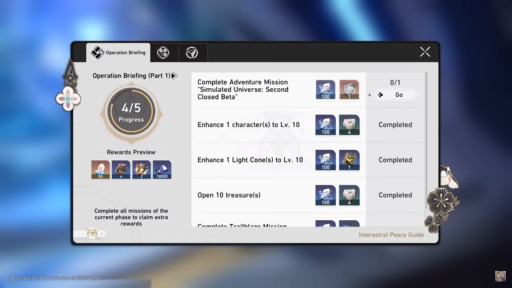
If any of you play Genshin Impact, this may flood you with nostalgia. Similar to beginners of Genshin Impact, Honkai: Star Rail also has an additional list of missions that you can complete to further increase your Trailblaze Level as well as obtain additional rewards.
Keep in mind that these missions are permanent and will remain until you have completed them all. They are a great source of early-game EXP and I recommend that you complete all missions as soon as possible (or at your own pace—I can’t tell you how you play).
6) First steps into Simulated Universe
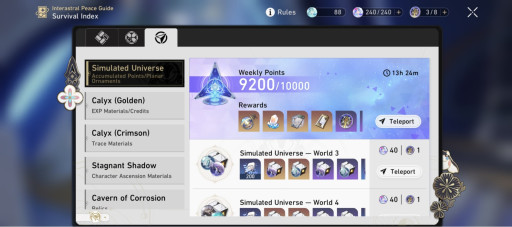
The provided screenshot is of my interface and as you can see, I’ve already (mostly) completed it. The Simulated Universe is essentially Honkai: Star Rail’s sandbox where you can experimentally clear trash mobs and bosses alike. Upon first unlocking it, you are guided through how to clear it and following this, you are expected to begin clearing it on your own.
Completing a world will grant you many rewards via filling out the weekly point quota and I highly recommend to meet this quota every week to ensure maximum profit.
7) Assignments
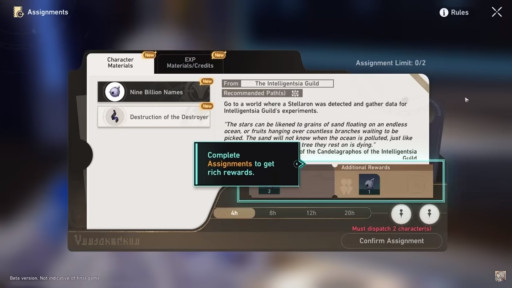
Similar to your homework assignments, these are missions that you can send your characters on to gain additional rewards, including character EXP and Light Cone EXP materials as well as character ascension materials and trace materials. Sending characters on assignments will constantly guarantee you free materials on the daily to further strengthen your characters; you just have to remember to check the progress as the game will not remind you when you have completed an assignment.
Time for the Fun Details
8) The Elements
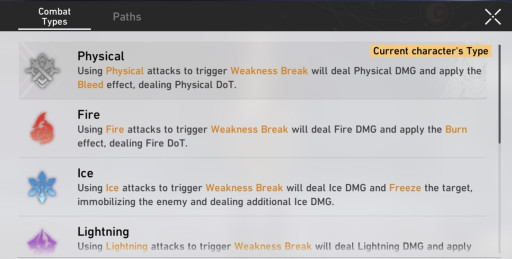
To first begin comprehending team compositions, you first need to understand the different elements in the game as well as their strengths and weaknesses. For example, the default element of the player character—Trailblazer—is “Physical” as indicated in the screenshot.
Each element triggers a different kind of effect after inflicting “Weakness Break” and provides a different sort of resulting effect. Understanding these effects will assist in your progress as you face harder and harder bosses.
9) The Paths
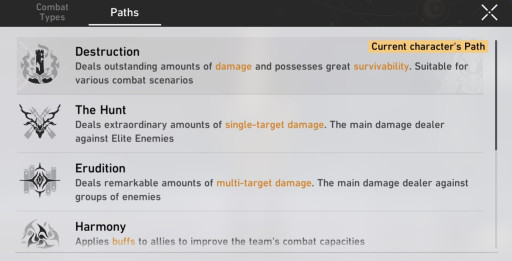
Paths can be likened to “classes” in your standard MMORPG’s. Each character follows a different “Path” and all have different roles in teams. For example, Destruction units are akin to bruisers who boast immense damage and great survivability, Hunt units are single-target nukers, Erudition units are AoE attackers, Harmony and Nihilty units buff your team and debuff the enemy respectively, while Abundance and Preservation units heals and shields your team, respectively. Understanding how all these paths synergize with each other will greatly help in team-building.
10) Team Order
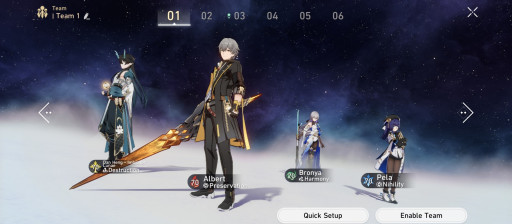
I only recently found this out myself as I was experimenting with team placements in my own game—did you know it matters where you put characters in your team setup? Take, for example, my team placement—in this arrangement, should Albert (the player name I chose for Trailblazer xd) be attacked by an area-of-effect attack, the damage will spread to the two units to his left and right.
This can be mitigated by placing Trailblazer (or any other unit that can either taunt the enemy or has a higher chance of being attacked) first or last (in this case, swapping the Trailblazer with either Dan Heng or Pela), thus limiting the damage done to your overall team.
11) Optimize Trailblaze Power: The Details

I’ve already covered this before but I’ll go over it again. You begin with 180 Trailblaze Power with six minutes needed to recover one (meaning, 18 hours to recover from zero). As a beginner, I recommend that you focus use of your Trailblaze Power on the Golden Calyxes (pictured); these are the ones that provide character EXP and Light Cone EXP (a card that you can put on a character and increase their base stats).
Your next focus should be on Crimson Calyxes where you get materials to upgrade Traces (stat upgrades that your character has by default), however, I do recommend not doing this too much as you can get these materials from in-game shops as well as Trailblaze Level rewards if you talk to Pom-Pom (the cutest mascot, fight me).
I highly recommend against early-game farming of Relics (a set of “weapons” you can place on your character for further stat bonuses) as you can get them quite easily from treasure chests and in-game shops and they are not yet a requirement (since they are mostly optimized for endgame content).
12) Perform the trials of Equilibrium as soon as you unlock them
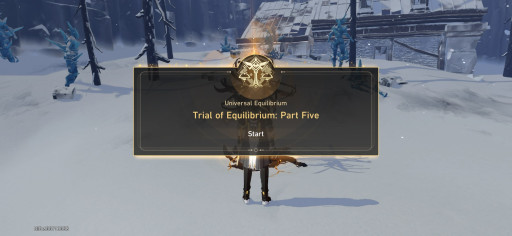
The Trials of Equilibrium is a special quest you unlock upon reaching certain Trailblaze Levels. Honkai: Star Rail’s system stops you from advancing if you do not also advance the Equilibrium Level—this system essentially makes all enemies stronger but also increases the quantity and quality of the rewards you get from defeating enemies. Your character’s level is also barred by Equilibrium level and cannot be increased if you do not complete the trials first.
As such, it is highly recommmended that you complete these trials as soon as you unlock them—it will give you higher character levels and greater rewards which will make higher-difficulty events much easier. (I was legit speedrunning getting to level 60 to unlock Equilibrium V but it was also to get this screenshot lmao)
13) Weekly Bosses (Echo of War)
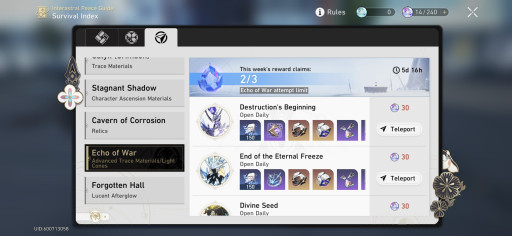
While most Trace materials can be sourced from the three world shops (as of this article’s writing—the one in Herta’s Space Station, the one in Boulder Town, and the one in Xianzhou) and Crimson Calyxes, certain Trace materials require you to defeat weekly bosses. These are much stronger than the usual bosses you encounter and often have two or three phases to the battle. Clearing them will grant you advanced trace materials as well as some Relics.
I do suggest, however, that you push off weekly bosses until the days prior to when the rewards reset so as to challenge it at the highest Equilibrium level possible (since as previously stated, a higher Equilibrium level equates to higher rewards).
14) Max out Simulated Universe point rewards
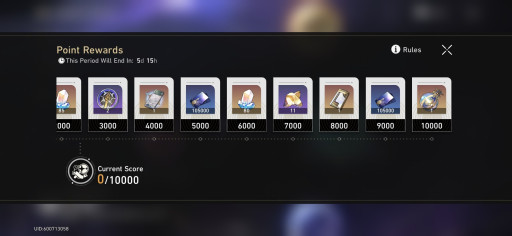
Like the weekly bosses, Simulated Universe has a string of rewards that resets weekly. It gives you a plethora of materials and credits. Most importantly, it gives you an advanced trace material that allows you to max out a character’s traces (this is a very limited material so it is imperative that you get it or you won’t be able to max out the traces!).
Ensure that you max out the point rewards every week for massive rewards (these rewards grow larger if you are of a higher equilibrium level—the provided screenshot is of the current point rewards I possess.
15) Ensure you prioritize these 5-star Light Cones
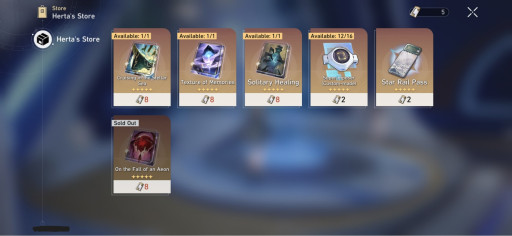
Simulated Universe gives you “Herta Bond” which is the currency you use in Miss Herta’s store—she offers you Star Rail Passes and 5-star Light Cones. Ensure that you prioritize the 5-star Light Cones—these are essentially free immensely high stat bonuses you could get just by regularly clearing Simulated Universe, no luck required.
As you can see, I’ve already bought out one and maxed it out (“Superimposer (Custom-made)” is the material you use instead of regular duplicates to max out these unique Light Cone’s effects). For my personal experience, I am currently saving for “Texture of Memories”, a Preservation-type Light Cone that will be very effective when placed on Fu Xuan.
16) Embers Exchange and Starlight Exchange
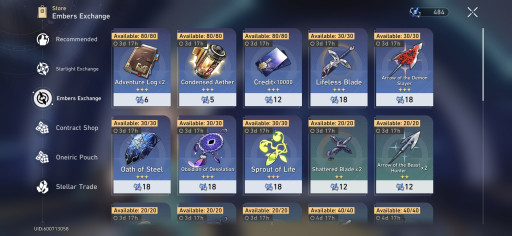
Undying Embers (the store is shown in the screenshot) and Undying Starlight are an extra currency you obtain from performing Warps (Honkai: Star Rail’s gacha system). Depending on how much you roll, they can be very easy or very difficult to acquire—Undying Starlight, especially, as that is only acquired by getting SSR’s (5-star characters or Light Cones).
This currency can be exchanged for Passes (which are the gacha tickets) and all sorts of other materials with Undying Starlight which can be used to exchange directly for 4-star characters and 5-star Light Cones (which are an incredible boon to your characters). If you do find yourself short of materials, ensure that you give these two shops a gander for they might have the wares thou art searching for.
17) The basics of team composition
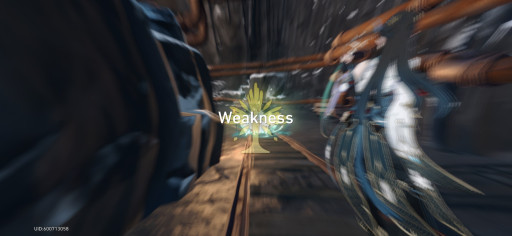
Upon first starting, Honkai: Star Rail introduces you to the “Weakness Break” system wherein if you field a team with the same elements as the enemy, your damage to the enemy is more effective. Choosing which characters to field for any one battle is also encouraged as some enemies require different approaches that some characters are better at compared to others.
Depending your team composition, you can stack any choice of Techniques (which are abilities you can use before the battle starts to buff your team or directly attack an opponent with an advantage) to make it easier to win.
18) Team compositions: advanced tips
YouTube video, detailing team compositions for beginners using the starter 5-stars.
For a more advanced strategy, take a look at the kits of the characters you have—take the time to understand their idiosyncracies and their synergies with other characters. If, for example, you focus on a DPS character, then you would ideally want a (hyper)carry character to buff that DPS character’s damage, either a healer or shielder character, and an off-DPS character that can fulfill other roles such as crowd control.
Of course, you can have both the healer and the shielder if you simply refuse to take damage. On the other side of the spectrum, some characters simply do not need any team building as they can outright solo most content due to how their kit works and I would say that’s part of the charm of Honkai: Star Rail.
19) Build Trailblazer
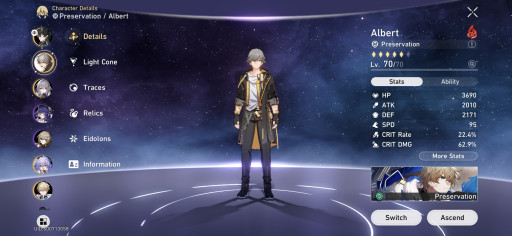
This is a very personal suggestion, however, I promise you that it is worth it. Unlike most other games where the MC is usually average and quickly powercrept by other characters, the Trailblazer is currently one of the best units in the game. As the only character to be able to switch Paths and Elements, he can be used in a variety of team compositions—physical Trailblazer is rather trash, however, fire Trailblazer is incredible. Before Fu Xuan released, fire Trailblazer was essentially the best tank the game had to offer and is still, in my opinion, incredibly viable.
20) Build Natasha
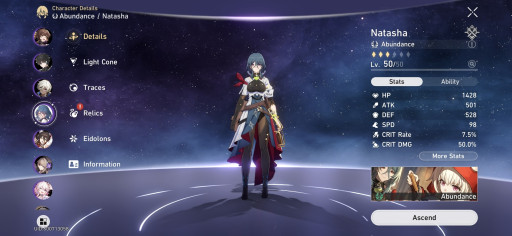
At the time of the writing of this article, there are four healers in Honkai: Star Rail and you are only guaranteed to acquire one of them, the 4-star Natasha, as a reward for clearing a certain milestone in the main story quest. If you have not been rolling or have been rolling but have had terrible luck, it is necessary that you build Natasha as she can greatly increase your team’s survivability, especially once you start challenging higher-difficulty quests. Of course, if you have any of the other three healers (Bailu, Luocha, or Fu Xuan), you can sideline Natasha, such as myself as I have Bailu and is focusing on building her.
Do NOT Do These
21) Do NOT farm relics early
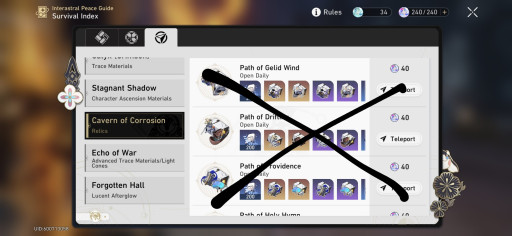
As I stated previously, ensure that you do not begin farming relics until you are at least Equilibrium Level 3 (that is, Trailblaze Level 40)—not only do you unlock the ability to craft Relics on your own, this is also when you actually hit the “wall” in the game wherein you need better relics to continue clearing content. Relics are items that you get pretty regularly just by playing the game normally—you can find them in chests and some quest rewards throughout the game, you can find them in the shops, and you can get some from the weekly bosses in Echo of War.
They are not necessary early game as getting the right stats on them is entirely dependent on your luck and it is much more recommended to spend your Trailblaze Power on things that you are guaranteed to obtain that will reliably strengthen your character without relying on luck, such as EXP and Trace materials.
22) Do NOT purchase regular passes

With the exception of the Undying Embers exchange where you can purchase discounted passes, I highly recommend against purchasing the regular passes for use on the standard banner—this includes the Starlight Exchange and the Stellar Trade where you exchange Stellar Jades (your other in-game currency) for either regular or special passes. Unlike the featured banners with limited characters, the standard banner only has the starter 5-star characters who are all powercrept to some degree by the limited characters.
Focus on obtaining only the special passes to roll on these limited banners as even if you do, you will still get either standard 5-star characters or their Light Cones by losing the pity (on the bright side, losing the pity will guarantee you the limited character upon reaching the next hard pity threshold).
23) Do NOT purchase Trailblazer’s Eidolons (until later)
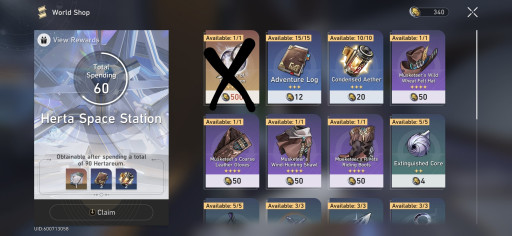
In Herta’s Space Station and in the Xianzhou, you are able to purchase Trailblazer’s Eidolons which will make Trailblazer stronger. I do not recommend you buy these as a beginner and instead acquire everything else in the shop. As I’ve said previously and as you can see in the screenshot provided, you can obtain character EXP, Light Cone EXP, a set of 4-star relics, and character ascension materials—all of which are imperative to have in bulk in the early game. Only after you feel like you’ve reached a good point in your experience do I recommend that you purchase the Trailblazer’s Eidolons.
24) Do NOT forget to clear Forgotten Hall
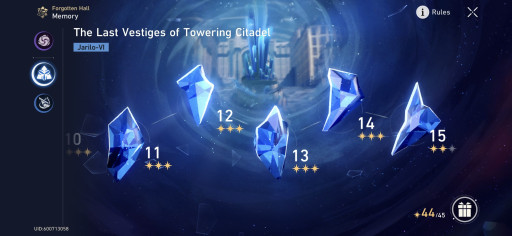
Upon first encountering level-gated main quests, you will have to scrounge up levels to unlock these quests, as previously stated. Forgotten Hall is a game mode you can unlock after completing the Adventure Mission Fleeting Lights (a side quest, essentially), clearing the provided stages rewards you with EXP materials, Credits, and Lucent Afterglow—a new currency that you can also obtain from Echo of War that you can use to purchase some 4-star Light Cones.
Additionally, clearing bonus conditions rewards you further with more Credits as well as a healthy amount of Stellar Jades. Higher stages provides more rewards in exchange for higher difficulty, however, it is completely worth it. As you can see, I’m still struggling with a bonus condition for the final stage…
25) Do NOT forget to check your achievements

As you play Honkai: Star Rail, you may notice some banners with sometimes witty, sometimes literal titles. These are your achievements for doing things in the game. Don’t forget to check them because they do award you with Stellar Jades. While the amount given is rather paltry (five for bronze, ten for silver, and twenty for gold), they will eventually pile up as you continue racking up achievements.
For an additional flair, some achivements are hidden and you don’t know ahead of time what to do to get them. So, go out, have fun, and commit to hunting those achievements down to the last one! After all, we all are a completionist on the inside, right?
CONCLUSION
For a game that has only been out for almost half a year, Honkai: Star Rail has proven itself to be a very fun game, especially among dedicated fans of the Honkai media franchise as a whole. Burnt-out Genshin Impact players find Honkai: Star Rail to be exceedingly fresh and I agree, as one burnt-out player myself. I’ve always never been that much of a fan of the “meta” in Genshin and that does not even take into the account the toxicity of the community. While there is some toxicity, it will not take away from the enjoyment of this game—Honkai: Star Rail is simply a relaxing turn-based strategy game with a pretty decent built-in idle (as it does have an auto mode for battles; of course, this auto mode can still be pretty dumb). I certainly would recommend this game to others.
