![[Top 11] Hyrule Warriors Best Weapons and How To Get Them Best Hyrule Warriors Weapons](/sites/default/files/styles/responsive_image_600xauto/public/2023-01/hwbw_0.jpg.webp?itok=f75BAzU2)
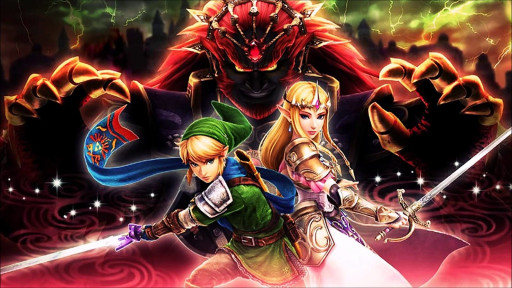
In any game, the weapons you use are the most important things to pay attention to. For most games, it is because the weapons are scarce, but in Hyrule Warriors, it is because the weapon you choose can make or break your run. The right weapons are hard to find, and we’re here to help you beeline directly for the top 11 best ones (in no particular order).
11. Power Gloves (Best for Link)

Link with the Power Gloves
The Power Gloves are one of Link's gauntlet options, as well as an electric element weapon set. It is the level 3 weapon, and in the Definitive Edition, it has an additional + level. It might be controversial of me to suggest anything below the master sword for Link, but you shouldn’t underestimate how well these things can mow down a crowd. It is not the most powerful thing he can possibly use, but it is on par with anything more powerful simply for how easily it clears the screen.
The Power Gloves are better used on stages where racking up KOs is the goal.
One of their best moves is Y-Y-Y-X-X-X, which swings the ball twice, spins the ball on the chain, then grabs one of the pillars from Ocarina of Time and uses it to sweep your vicinity.
The Electricity+ weapon skill is great for the Power Gloves as it keeps things from hitting the ground as fast, leaving them open for much more hits and much more lightning.
Using Y-Y-Y-B is an amazing way to wipe out crowds and run away before you get hit.
Hyrule Warriors absolutely demands that you are capable of clearing a battlefield, or else you might get overwhelmed by hundreds of enemy grunts. With the Power Gloves, you are constantly sweeping in large circles as you attack. And turning on your heel to swing behind you does not leave you too open for more attacks. The lightning that the gauntlets produce lands extra hits on your enemies as well, for a bit of additional damage. No matter what, you are dealing damage to everything around you.
The Power Gloves excel in:
- Applying electric damage. The swings are swift and consistent, making enemies stay off the ground for a long time and allowing the extra electric damage to affect them.
- Crowd Control. The attacks have a very wide area of damage. They make it easy to run across the stage, leaving nothing behind you.
- General Damage. The Power Gloves’ power is nothing to sneeze at. Their power dwarfs the Master Sword’s before all of its skills are unlocked. Which is most of the game.
- Quick Dodging. The Power Gloves’ attacks are quick and wide, making them a great weapon for hit-and-run. You make a few Y attacks and dodge afterwards to weave through the battlefield with little damage taken.
Power Gloves details: “A power-gauntlet-and-flail combo set, perfect for devastating attacks. Pressing the Strong Attack button allows you to pick up enemies.” - as stated in the game's description. The strength ranges from 280-420 for the base set and 500-750 for the Definitive Edition’s + level set.
How to get:
- In Adventure Mode, go to the Master Quest map. It is “normal” difficulty, so any character around level 40 should handle it just fine. When reading the map, we’ll have the y-axis lettered and the x-axis numbered.
- Fight around the map until you uncover the battlefield in A-11. When you get to the battlefield, you’ll see the reward is hidden.
- Find yourself a bomb item card. It is necessary for finding the reward. If you want, you can always buy one from the main map with the + button. They’re about 10,000 rupees. You’ll have to bomb the top left wall tile, just after the curve in that corner.
- It is a level 7 “Destroy enemies and traitors alike!” battle. It has a Master Quest rule that you cannot guard. You have to use Link, as the battle is limited to him. Which is good because you have to use the character shown in the reward if you want to get it anyway.
Once the battle is completed with an A rank, you get your Power Gloves!
10. Sol Shackle (Best for Midna)
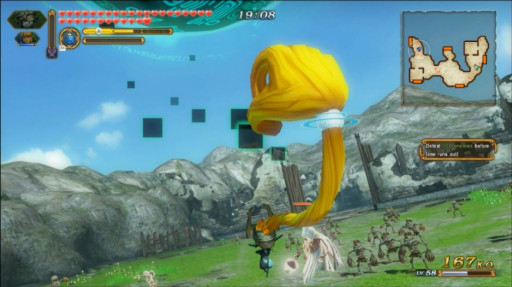
Midna fighting with her Sol Shackle
The Sol Shackle is a high-level option for Midna's shackle. It has the darkness element and, in the Definitive Edition, has a + level. Midna is one of many characters who only has one weapon, so it is sensible that the high-level one would be best for her. Midna's attacks are powerful, and she is well worth keeping in your character rotation.
The Sol Shackles, as well as Midna in general, are best used on stages where racing across the field for multiple fights is the goal.
A lot of her attacks can miss if you don’t face the right direction, so make sure you aim for the center of the horde. And that the horde is a little bit ahead of you.
Midna’s special attack can do heavy damage to boss monsters outside of their weakened state! Well, compared to any basic attack, it still pays to weaken them first.
One of my preferred moves with Midna is Y-Y-X-X-X, which brings out a pair of wolves to strike a crowd before she sends out the one under her for an extra punch. It multi-hits and travels a medium distance from her.
Midna’s skill set allows her to summon multiple wolves to use as projectiles. These wolves are great for small hordes of enemy grunts. Her special attack, in particular, has the potential to decimate the group in a single move. The Sol Shackle makes these moves hit as hard as they can since they are the highest-level weapons in her arsenal. They are even stronger in the Definitive Edition. The only downside is that Midna’s attacks take up all her time, making it hard for her to dodge attacks.
The Sol Shackle excels in:
- Overall Damage. They are the most powerful weapon Midna can obtain.
- Punching Armor. They aid Midna’s special attack in punching through the boss’ armor. At levels lower than Link, she can get a good percentage taken out of a boss monster.
- Combos. The Sol Shackle has a lot of very strong combos. The only issue is that they are hard to dodge and cancel out when you need to run. You better hope you hit faster than they can.
- Grappling Enemies. The Sol Shackle allows you to simply grab enemies and chuck them around. A couple combos rely on this as well, which helps when an enemy is wailing on you.
Sol Shackle details: “A cursed shackle, originating from the Twilight realm. Use the Strong Attack button to grab and hurl an enemy with your hair. You’ll also be temporarily imbued with Darkness.” -in game description. The strength ranges from 280-420. In Definitive Edition, the + form ranges from 500-750.
How to get:
- In Adventure Mode, go to the Master Quest map. It is “normal” difficulty, so any character around level 40 should handle it just fine. When reading the map, we’ll have the y-axis lettered and the x-axis numbered.
- Fight around the map until you uncover the battlefield in B-3. When you get to the battlefield, you’ll see the reward is hidden.
- Find yourself a bomb item card. It is necessary for finding the reward. If you want, you can always buy one from the main map with the + button. They’re about 10,000 rupees. You’ll have to bomb the top middle wall tile, just after the curve with the stairs.
- It is a “Fight the chosen ones!” battle without a level. It has a Master Quest rule that you cannot guard. You have to use Midna, as the battle is limited to her. Which is good because you have to use the character shown in the reward if you want to get it anyway.
Once the battle is completed with an A rank, you get your Sol Shackle!
9. Water Dragon Scale (Best for Ruto)
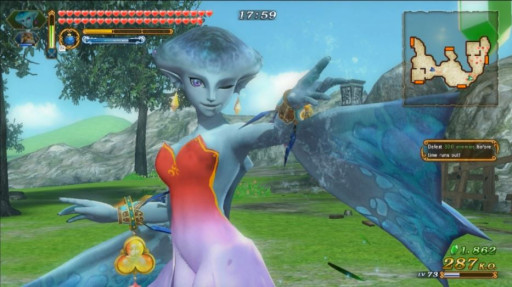
Ruto posing with the Water Dragon Scale
The Water Dragon Scale is the high-level version of Ruto’s Zora Scale weapon with the water element and a + form in the Definitive Edition. It is the most powerful weapon Ruto has since she is one of the warriors with only one weapon. This weapon gives Ruto’s moves a powerful kick, and all the water in her moves does lingering damage, making her a great warrior for sapping away at powerful enemies like other warriors!
The Water Dragon Scale benefits greatly from having the Water+ skill attached. This skill makes the bubbles last longer, which means more poison damage!
Make sure you are right in the middle of the fray with some of Ruto’s attacks. Some of them only affect the area immediately around her, like her giant water bubble attack.
Ruto has plenty of good moves, including Y-Y-Y-Y-X, which causes her to flip around into different pools of water, ending with a large burst that hits everything in the radius. This move counts as roughly two dodges, attacking without taking damage.
Ruto is a sort of “sorcerer” character because all of her moves are magic-based and have a wide area of attack. It makes her moves not too punchy. Because of this, though, all of her attacks have the Water attribute, which gives enemies lingering damage. It’s like using poison—the damage doesn’t require you to continue hitting them. What’s better is that many of Ruto’s attacks count as dodges, keeping you from taking damage while you’re clearing the horde.
The Water Dragon Scale excels in:
- Freeing Yourself. The several moves that count as dodges help you get out of a tight spot easier.
- Lingering Damage. Ruto’s attacks apply water damage with every combination of moves because of her water magic.
- Defeating the Enemy Warriors. The water damage whittles away at powerful enemies while you directly attack, eating at their health from two angles.
- Keeping Distance. With the water gauge that Ruto has, you constantly build up ammunition for long distance attacks. Keeping you far away from your enemies while you pulverize them!
Water Dragon Scale details: “An amulet of the Zora people, imbued with the power of water. Each Combo Attack fills a water gauge. Press the Strong Attack button to expend the water for a powerful distance attack!” -in game description. The strength ranges from 280-420. In Definitive Edition, the + form ranges from 500-750.
How to get:
- In Adventure Mode, go to the Master Quest map. It is “normal” difficulty, so any character around level 40 should handle it just fine. When reading the map, we’ll have the y-axis lettered and the x-axis numbered.
- Fight around the map until you uncover the battlefield in A-12. When you get to the battlefield, you’ll see the reward is hidden.
- Find yourself a water bomb item card. It is necessary for finding the reward. If you want, you can always buy one from the main map with the + button. They’re about 10,000 rupees. You’ll have to bomb the rock in the lake.
- It is a “Defeat the warriors of twilight!” battle without a level. It has a Master Quest rule that you cannot heal. You have to use Ruto, as the battle is limited to her. Which is good because you have to use the character shown in the reward if you want to get it anyway.
Once the battle is completed with an A rank, you get your Water Dragon Scale!
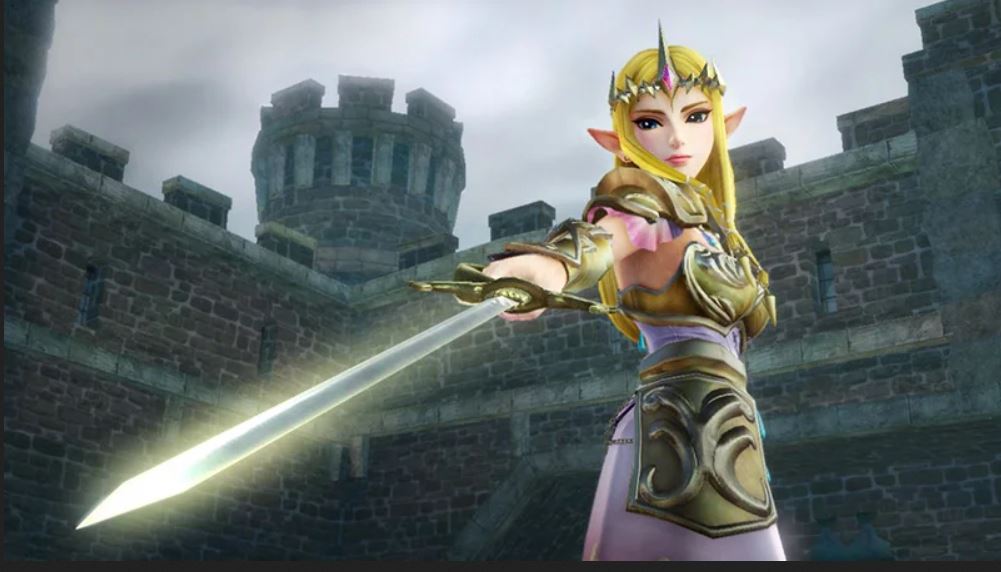
8. Royal Dominion Rod (Best for Zelda)
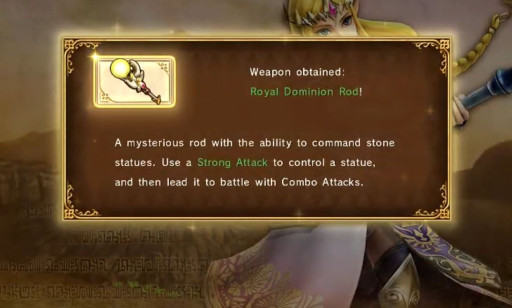
The new weapon screen for the Royal Dominion Rod
The Royal Dominion Rod is a high-level version of the Dominion Rod, one of the weapons Zelda can use that has the dark element and a + form in the Definitive Edition. It is one of the most powerful weapons Zelda can use. Unlike Link, Zelda does not have a holy grail weapon, so all of her level 3 weapons are around the same strength, and the rest comes down to personal preference.
When fighting with the Royal Dominion Rod, you are able to summon statues and use them to fight for you. The large one has a much bigger area of attack.
Once you summon a statue, you can attack in one direction while the statue attacks in the other. You form your own tag team!
You have to make sure you watch your combos if you want to summon the right statue. Do not use another combo if you want to keep your preferred statue with you.
Y-Y-Y-X-X-X is the best move to summon the large statue with. It smashes the horde with its giant hammer relentlessly, and you can stay back out of the fray. It’s a great way to dismantle the army while keeping your hands clean, so to speak.
The Royal Dominion Rod is my preferred weapon for Zelda because of her interesting fighting style when using it. It mixes all the ranges of attack when you fight: melee with the rod itself, midrange with the orb from the rod, and longrange with the statues. When you summon a statue, it mirrors your moves wherever you leave it, so you can bring in some help and then take on a different crowd altogether. A powerful two-for-one warrior!
The Royal Dominion Rod excels in:
- Crowd Control. The statue, in tandem with your ability to quickly spin and attack, makes it easy to clear the field.
- Beating Boss Monsters. With the statues, you can attack from two sides and quickly smash a boss monster’s weakness gauge.
- Taking Elemental Keeps. The Royal Dominion rod allows you to attack from afar, which is amazing for elemental keeps that you might have missed the fairy for. You summon a statue and beat at the keep while you stay safely outside.
Royal Dominion Rod details: “A mysterious rod with the ability to command stone statues. Use a Strong Attack to control a statue, and then lead it to battle with Combo Attacks.” -in game description. The strength ranges from 280-420. In Definitive Edition, the + form ranges from 500-750.
How to get:
- In Adventure Mode, go to the Master Quest map. It is “normal” difficulty, so any character around level 40 should handle it just fine. When reading the map, we’ll have the y-axis lettered and the x-axis numbered.
- Fight around the map until you uncover the battlefield in B-16. When you get to the battlefield, you’ll see the reward is hidden.
- Find yourself an ice arrow item card. It is necessary for finding the reward. If you want, you can always buy one from the main map with the + button. They’re about 10,000 rupees. You’ll have to use it on the ring of fire. To get everything done at once, you should also get a hookshot card, in the store for 10,000 rupees, and use it on the target.
- It is a “Defeat the warriors of time!” battle without a level. It has a Master Quest rule that you cannot get hit. You have to use Zelda, as the battle is limited to her. Which is good because you have to use the character shown in the reward if you want to get it anyway.
Once the battle is completed with an A rank, you get your Royal Dominion Rod!
7. Scimitars of Twilight (Best for Zant)
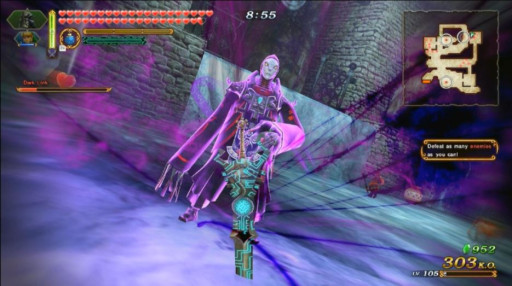
Zant using the Twilight Scimitars
The Scimitars of Twilight are a high-level set of swords made for Zant and imbued with the power of darkness. They’re the strongest weapons for him, and they are the only choice he has in terms of weapon types. They are definitely worth unlocking if you love Zant as a fighter with all of his quirky moves and varying ranges.
All of Zant’s combos fill up his twilight gauge, but if you try to overfill the gauge, he will mess up and be left open for attacks. Keep an eye on it while you're spamming your combo to avoid getting hurt.
The Scimitars of Twilight glow different colors when you attack or run, which is just a fun thing I noticed.
Many of Zant’s attacks involve him spinning in circles while moving forward. It hits the immediate area around him as he moves, which cuts through crowds and can be abused. Which I love to do.
The Scimitars of Twilight allow Zant to use twilight energy to enhance his attacks, whether it is used in its pure form to shoot enemies or used to make himself gigantic. He can do a lot of combos that are reminiscent of his battle in Twilight Princess, like summoning the spire from the fight with Ook or one of his giant hands that protected the Sols. His attacks are fun to watch as well as use. He is great for both boss monsters and enemy warriors since his moves allow him to duck around and avoid the line of fire.
The Scimitars of Twilight excels in:
- Crowd Control. Many of Zant’s attacks cover a wide area around him or make him cut through a crowd in a whirlwind. Especially his giant tantrum combo, which is Y-Y-Y-Y-Y-X.
- Beating Boss Monsters. Zant is made up of quick succession attacks, which are essential for quickly depleting a boss monster gauge.
- Beating Enemy Warriors. The whirlwind attack hits and travels fast, so you can circle an enemy warrior and escape their attacks.
- Combos. Every hit in his basic combo can be easily dodge-canceled. The twilight energy combos can be cancelled out as well, but some are harder to escape, like Ook’s pillar.
Scimitars of Twilight details: “Curved blades birthed from Twilight magic. A gauge fills up with each combo attack you connect. Use the Strong Attack button to expend the gauge and bombard your foes with energy.” -in game description. The strength ranges from 280-420. In Definitive Edition, the + form ranges from 500-750.
How to get:
- In Adventure Mode, go to the Master Quest map. It is “normal” difficulty, so any character around level 40 should handle it just fine. When reading the map, we’ll have the y-axis lettered and the x-axis numbered.
- Fight around the map until you uncover the battlefield in G-16. When you get to the battlefield, you’ll see the reward is hidden.
- Find yourself a bomb item and a ladder item card. It is necessary for finding the reward as well as revealing the enemies. If you want, you can always buy one of each from the main map with the + button. They’re both about 10,000 rupees each. You’ll have to bomb the top wall tile, just before the curve on the right side of the wall. Then you use the ladder on the wooden spaces in the water.
- It is a “Watch out for falling artillery fire!” battle without a level. It has a Master Quest rule that you must complete it within a time limit. You have to use Zant, as the battle is limited to him. Which is good because you have to use the character shown in the reward if you want to get it anyway.
Once the battle is completed with an A rank, you get your Scimitars of Twilight!
6. Swords of Demise (Best for Ganondorf)
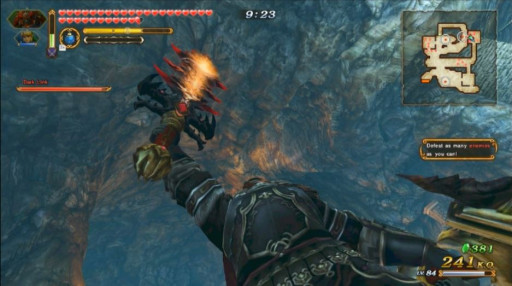
Ganondorf holding up one of his Swords of Demise
The Swords of Demise are Ganon’s weapons of darkness and one of two sets of weapons he can choose from. These swords are extremely powerful, and despite the stats displayed, it feels as if they have an extra 100 strength on them.They’re fast, strong, and they look very deadly, which is a perfect mix for our resident villain.
The attacks from the Swords of Demise are very quick, which allows you to duck and weave through the fight. Amazing for all sorts of battles, but especially those “don’t get hit” stages.
Before you use your darkness energy gauge, get right into the middle of the fight. It maximizes your kill count.
A lot of the Swords of Demise’s moves explode at the end of the combo, which disperses crowds with ease. One of these moves is Y-Y-Y-Y-X; make good use of it!
Ganondorf is a powerhouse. His skillset with the Swords of Demise is so powerful and punchy that he is able to take on three boss monsters at once! Unlike the other characters with an energy gauge, Ganondorf’s gauge with the Swords of Demise only has one attack. The intensity is determined by how full the gauge is.
The Swords of Demise excels in:
- Racking Kills. With their speed and power, the Swords of Demise wipe out elite enemies with the same ease they handle grunts. This is best for “beat X enemies” and “rack up kills” battles.
- Beating Boss Monsters. Like I mentioned, the Swords of Demise took out three boss monsters at once with a mixture of Focus Gauge attacks and Special attacks.
- Freeing Yourself. Expending the darkness gauge when you’re in a bind wipes out the crowd around you in one move and allows you to escape.
Swords of Demise details: “A set of great swords brimming with dark power. Hold Y at the end of a Combo Attack to fill your gauge. Press Y to unleash the collected energy in a powerful attack.” -in game description. The strength ranges from 280-420. In Definitive Edition, the + form ranges from 500-750.
How to get:
- In Adventure Mode, go to the Master Quest map. It is “normal” difficulty, so any character around level 40 should handle it just fine. When reading the map, we’ll have the y-axis lettered and the x-axis numbered.
- Fight around the map until you uncover the battlefield in B-4. When you get to the battlefield, you’ll see the reward is hidden.
- Find yourself a bomb item card. It is necessary for finding the reward. If you want, you can always buy one from the main map with the + button. They’re about 10,000 rupees. You’ll have to bomb the top left wall tile, just before the wall slopes inward.
- It is a level 7 “Destroy the army with boosted morale!” battle. It has a Master Quest rule that you have to complete it within the time limit. You have to use Ganon, as the battle is limited to him. Which is good because you have to use the character shown in the reward if you want to get it anyway.
Once the battle is completed with an A rank, you get your Swords of Demise!
5. Legend’s Crossbows (Best for Linkle)
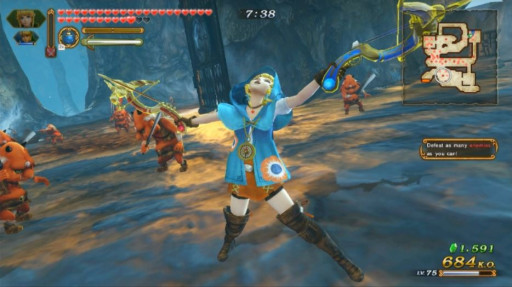
Linkle in a funny pose using the Legend's Crossbows
The Legend’s Crossbows are the high-level option of one of Linkle’s weapons. They have the element of fire and are exclusively long ranged. While Linkle isn’t one of my favorite characters in Hyrule Warriors, I would be lying if I said this weapon wasn’t a really good one.
The Legend’s Crossbows fire in front of you and in random directions, so make sure you are facing the crowd you mean to hit. Anything else is collateral.
Building up her fire gauge is essential if you want to make direct and consistent attacks. You can use it to continuously fire forward.
There are several explosive attacks you can make with Linkle, but your gauges have to be full to use them, which leaves her unable to really clear out crowds. Attaching the Fire+ skill to the Legend’s Crossbows is recommended.
Linkle’s crossbows are fast, alright, but they aren’t very strong or wide. You are able to run in and take out individuals, maybe even lines of individuals, but you can’t clear out the field as fast as the other characters or weapons. Still, this is Linkle’s best weapon, which says a lot about her other options. She’s great against enemy warriors since her attacks are fast, allowing her to hit and run.
The Legend’s Crossbows excels in:
- Dodging. Linkle is fast on her feet, and her attacks don’t lock her into specific combos.
- Applying Fire Damage. Most, if not all, of Linkle’s attacks are imbued with fire, which explodes when enemies hit the ground. Linkle can hit a lot of guys, even if they don’t die immediately.
- Freeing Yourself. With the fire gauge full, you can send out bomb arrows and quickly flee from a tight spot.
Legend’s Crossbows details: “Two crossbows normally used to protect Cuccos from Wolfos. Use the Strong Attack to fire continuously, or hold down X after a Combo Attack to fire bomb arrows!” -in game description. The strength ranges from 280-420. In Definitive Edition, the + form ranges from 500-750.
How to get:
- In Adventure Mode, go to the Master Quest map. It is “normal” difficulty, so any character around level 40 should handle it just fine. When reading the map, we’ll have the y-axis lettered and the x-axis numbered.
- Fight around the map until you uncover the battlefield in B-5. When you get to the battlefield, you’ll see the reward is hidden.
- Find yourself a bomb item card. It is necessary for finding the reward. If you want, you can always buy one from the main map with the + button. They’re about 10,000 rupees. You’ll have to bomb the top wall tile, 3 tiles away from the slope on the top left of the screen.
- It is a “Prevent reinforcements from coming!” battle without a level. It has a Master Quest rule that you cannot heal. You have to use Linkle, as the battle is limited to her. Which is good because you have to use the character shown in the reward if you want to get it anyway.
Once the battle is completed with an A rank, you get your Legend’s Crossbows!
4. Flesh-Render Fang (Best for Volga)

Volga ready to kill with the Flesh-Render Fang
The Flesh-Render Fang is the high-level option for Volga’s Dragon Spear. It is a fire elemental weapon, and it is very powerful in Volga’s hands. The weapon, combined with many of Volga’s abilities to breathe fire and become a full dragon, makes him a force to be reckoned with.
If you need a quick, long-range attack, Y-Y-X-X is his giant dragon claw, and it has a great range with three splitting slices.
There are many wide attacks that Volga can use that are easy to cancel out. This allows you to sweep a group and get away.
Volga’s Y-Y-Y-Y-X turns him into a dragon to dive-bomb and explode. It is very powerful, but you can’t cancel it out, so be careful once he lands!
Volga’s abilities are so powerful, he smashes through armor on command, and he can transform into a whole dragon! His fire breath clears crowds, and his dragon claw keeps you at a distance while flinging enemies aside. I never expected Volga to be so powerful when we met him in the story mode. I thought it was all talk, but he definitely has a bite!
The Flesh-Render Fang excels in:
- Crowd Control. The Flesh-Render Fang excels at wide attacks. There are multiple, and you can sweep crowds aside with each of them.
- Beating Enemy Warriors. Volga can beat a lot of things in general, but with his extra guard-breaking ability, he is the best option for enemy warriors. Those guys love to guard.
- Clearing Elemental Keeps. With the dragon claw attack and the fire breath, you can attack enemies from the outside of elemental keeps without stepping foot inside.
Flesh-Render Fang details: “An exquisite spear, carved from the bones of a dragon, it channels a fraction of the great beast’s might. Use a Strong Attack or a Combo Attack after evading to break the enemy’s guard.” -in game description. The strength ranges from 280-420. In Definitive Edition, the + form ranges from 500-750.
How to get:
- In Adventure Mode, go to the Master Quest map. It is “normal” difficulty, so any character around level 40 should handle it just fine. When reading the map, we’ll have the y-axis lettered and the x-axis numbered.
- Fight around the map until you uncover the battlefield in G-13. When you get to the battlefield, you’ll see the reward is hidden.
- Find yourself a candle item card and a harp item card. It is necessary for finding the reward and the army. If you want, you can always buy them from the main map with the + button. The candle is about 10,000 rupees, and the harp is 15,000 rupees. You must burn the bush third from the top of the screen in the wall of bushes that cuts through the center of the screen. Then you use the harp on the butterflies.
- It is a “Defeat the forest dragon!” battle without a level. It has a Master Quest rule that you cannot guard. You have to use Volga, as the battle is limited to him. Which is good because you have to use the character shown in the reward if you want to get it anyway.
Once the battle is completed with an A rank, you get your Flesh-Render Fang!
3. Biggoron’s Sword (Best for Impa)
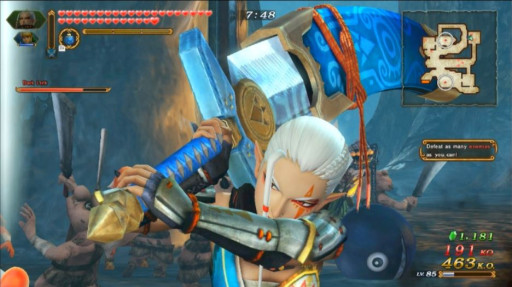
Impa wielding Biggoron's Sword
Impa has a fire weapon and a water weapon; the water weapon is the Biggoron's Sword, which also has a high-level version. There are lots of cool moves that Impa is capable of, from making miniature swords entirely of water to cracking the earth to release a torrent. While Impa doesn’t make the best use of the lingering water damage, she is a great melee fighter.
Impa is able to dash into enemies and deliver a wide slash, which allows you to escape and then make a few kills. The slash only works at the end of the dash, though.
The water kunai, “Y-Y-Y-Y-X”, is the best move for dispersing a crowd and dodging at the same time. You leap into the air and unleash the kunais on all enemies beneath you.
Dashing around will get you fewer kills, but it will keep you moving. It all depends on what you need.
Impa is not a speed demon, but she is a dodge-attack demon. Her Strong Attack is a dodge attack, and many of her combos are dodge attacks. You are able to get out of most battles unscathed when you use her. I love using Impa’s combos that give her the faux water weapons since they attack consecutively and sometimes apply lingering water damage. The Biggoron’s Sword allows you to hit hard and fast, the best combo for Warriors type games.
The Biggoron’s Sword excels in:
- Freeing Yourself. The dash attack is your key to getting out of a bind.
- Crowd Control. The water kunais and the basic combo are great for dispersing crowds. You have a lot of control over Impa’s direction in the basic combo, making it perfect for crowds.
- Beating Boss Monsters. Impa’s Y-Y-Y-Y-Y-X attack summons severalof water Biggoron’s Swords that strike in the same place, which is perfect for boss monsters since it is consecutive and strong.
Biggoron’s Sword details: “A sword created by the finest Goron smithy who ever lived. It slices deep but it requires immense strength to wield. Press the Strong Attack button to quickly dash into enemies!” -in game description. The strength ranges from 280-420. In Definitive Edition, the + form ranges from 500-750.
How to get:
- In Adventure Mode, go to the Master Quest map. It is “normal” difficulty, so any character around level 40 should handle it just fine. When reading the map, we’ll have the y-axis lettered and the x-axis numbered.
- Fight around the map until you uncover the battlefield in G-6. When you get to the battlefield, you’ll see the reward is hidden.
- Find yourself a water bomb item card and a harp item card. It is necessary for finding the reward and the army. If you want, you can always buy them from the main map with the + button. The water bombs are about 10,000 rupees, and the harp is 15,000 rupees. You’ll have to bomb the rock in the water and then use the harp on the butterflies.
- It is a level 9 “Destroy enemies and traitors alike!” battle. It has a Master Quest rule that you cannot heal. You have to use Impa, as the battle is limited to her. Which is good because you have to use the character shown in the reward if you want to get it anyway.
Once the battle is completed with an A rank, you get your Biggoron’s Sword!
2. True Goddess Blade (Best for Fi)
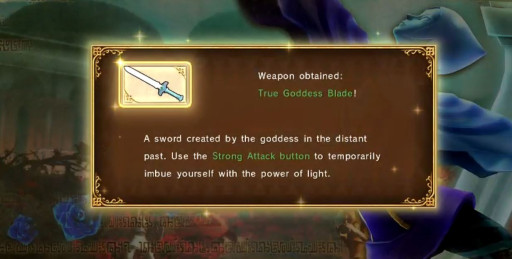
The new weapon screen for the True Goddess Blade
The True Goddess Blade is the high-level option for Fi’s weapon. It has the ability to imbue her with light directly instead of building up to using it maybe once, like other gauges. The light element is perfect for Fi because she is able to hit many people in a row with her wide, spinning combos, and the ability to imbue yourself with it on command is key.
Always imbue yourself with light before you go into a combo to maximize your damage. Fi is fine without the power up, but it brings out more in her.
Fi dances around the stage when you attack, which is a little hard to control, so make sure you don’t need to turn on a dime.
Plenty of Fi’s attacks are wide, but a few of her combos only attack the direct vicinity, so make sure you aim for the right areas and get right in the middle of the fray before you use your Special Attack.
The True Goddess Blade increases the power of Fi's attacks as you hit more people. Though Fi might not kill too many enemies right off the bat, the more enemies you hit in a row, the more powerful she gets. I would suggest using her on “attacks are devastating” stages because you don’t need to build the power and she can quickly glide through the enemies.
The True Goddess Blade excels in:
- Applying Light Damage. You have the ability to imbue yourself with power on command and attack multiple times in a row.
- Freeing Yourself. Fi has many combos that attack as she dashes, but she is also good at simply pushing past the crowd.
- Traversing the Battlefield. Fi glides fast, and she has a couple attacks that make her move a little faster without getting hindered.
True Goddess Blade details: “A sword created by the goddess in the distant past. Use the Strong Attack button to temporarily imbue yourself with the power of light.” -in game description. The strength ranges from 280-420. In Definitive Edition, the + form ranges from 500-750.
How to get:
- In Adventure Mode, go to the Master Quest map. It is “normal” difficulty, so any character around level 40 should handle it just fine. When reading the map, we’ll have the y-axis lettered and the x-axis numbered.
- Fight around the map until you uncover the battlefield in G-15. When you get to the battlefield, you’ll see the reward is hidden.
- Find yourself a power bracelet item card and a flute item card. It is necessary for finding the reward and the army. If you want, you can always buy them from the main map with the + button. The power bracelet is about 10,000 rupees, and the flute is 15,000 rupees. There is a rock out of place with all the bushes; push it. Then use the flute.
- It is a level 4 “Defeat the enemy forces!” battle. It has a Master Quest rule that you cannot guard. You have to use Fi, as the battle is limited to her. Which is good because you have to use the character shown in the reward if you want to get it anyway.
Once the battle is completed with an A rank, you get your True Goddess Blade!
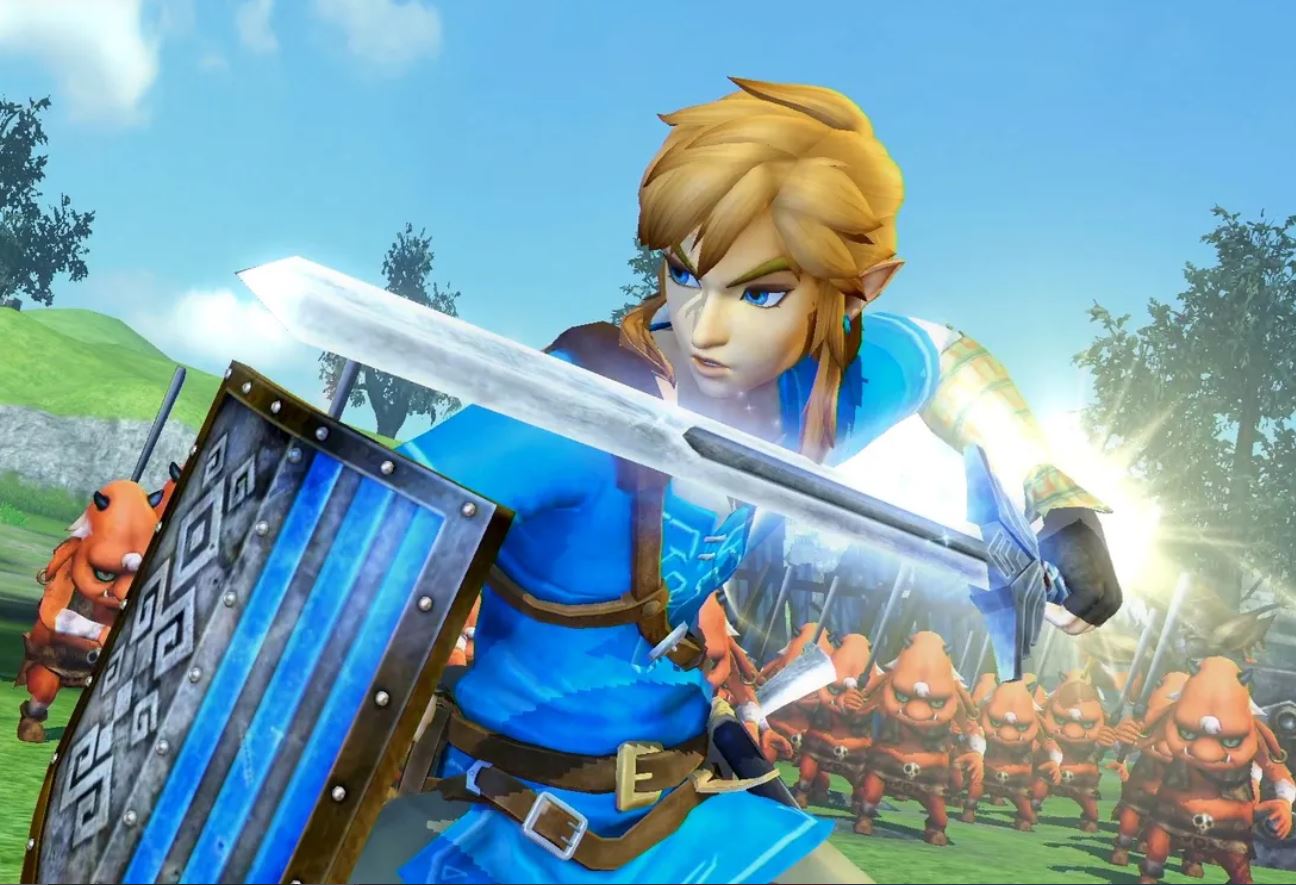
1. The Master Sword (Best for Link)
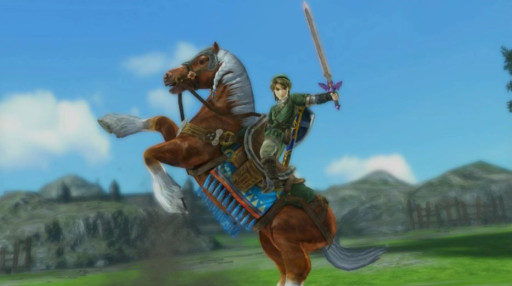
Link posing with Epona and the Master Sword
Yes, of course the Master Sword is here! I would have to be playing a whole different game not to see this thing’s pure power. But it is a mid-tier weapon unless it is fully unlocked, which gives it 600 extra strength and the ability to make ranged attacks.Top-tier stuff.
The Master Sword only makes ranged light attacks when you are at full health, so you have to make sure you dodge after almost every attack. Luckily, Link is good at dodging!
The light element is good on this weapon since Link strikes very quickly, but it is not the prime feature of this weapon. Not compared to the sheer strength.
The Master Sword can punch through boss monster armor, so I often use Link on boss monsters that are more difficult for me to defeat since he doesn’t have to weaken it too often. Though, obviously, that makes things so much faster.
The Master Sword is Link’s signature weapon for many reasons. It clears fights in the least amount of time and is perfect for battles that need you to complete them within a specific time limit. Link has insane range! He can clear the field with his held X spin attacks without anything touching him, and then use Y-Y-Y-X-X-X for a stronger and wider version.
The Master Sword excels in:
- Crowd Control. The held X spin attack can be used over and over again to clear the screen, including elite enemies.
- Taking Elemental Keeps. With the full health light beam attack, you don’t even have to enter the keep to take them.
- Overall Damage. This thing has 900 damage. Add that to the base strength of Link, and you can beat anything.
- Applying Light Damage. Link can attack a lot, so his light elemental damage adds insult to the many, many injuries.
Master Sword details: “The legendary blade of evil’s bane. Only the chosen hero can wield this sword. When attacking with full health, your strikes gain a little extra oomph!” -in game description. The strength of the base Master Sword is 300. Once it is fully realized, the power leaps to a whopping 900!
How to get:
- This one is a little different. Instead of the adventure map, you find the Master Sword in the story mode.
- Fight your way through the story mode until you reach the "The Sacred Sword" scenario. This gets you the sword itself.
- Keep fighting through the story mode until you get to the “A War of Spirit” scenario. This unlocks the light beams.
- In order to fully unlock the Master Sword’s power, you have to collect every last one of the other Warriors’ weapons. That brings you through every single fight in the adventure modes across several different maps.
Once all of that is completed, you get your full power Master Sword!

