
Star Wars Jedi Survivor has a unique perk system that allows you to fine-tune Cal’s attributes to match your playstyle. If you’re having a hard time getting your bearings in Jedi Survivor, having the right combination of perks could be all you need to start slicing through storm troopers and taking down Dark Jedi with ease.
There are 25 different perks in the game, each of which can take up between 1-4 perk slots. You begin the game with 3 perk slots, but you can unlock a maximum of 10 as you progress, by purchasing them from the droid Zee or completing Jedi Chambers. With so many perks and so little capacity to hold them, it can be tricky to decide which perks will be best for you.
This article will guide you through e the Top 10 Best Perks in Jedi Survivor and where to find them, so you can enhance your Jedi experience with a powerful perk setup that matches your playstyle in the early and late game.
10) Shatter Perk (Late Game)

Found at the end of the finding missing prospects Rumour after defeating the Rancor (Koboh).
"Attacks are more effective at breaking enemies’ guard."
Cost – 2 Perk Slots
The Shatter Perk comes in handy because it allows you to break enemies’ guards more easily, leaving them vulnerable to high damage attacks. This perk is useful against any enemy, particularly highly defensive ones like Magna guards who will keep their guard up most of the time. It also pairs nicely with the Crossguard stance to make light-work of the strongest enemy defence.
This perk is great if:
- You are an offensive player.
- The Crossguard stance is your main stance.
- You struggle against enemies who keep their guards up.
9) Gambler Perk (Late Game)

Reward after beating the Sutaban Alpha in the Crypt of Uhrma (Jedha).
"Increase to Experience gained, but you may no longer Restore after death."
Cost - 4 Perk Slots
As you might expect from its name, the Gambler Perk offers high rewards for high risk. With this perk equipped you gain more XP from each enemy you slay, but this comes with a catch that - if you die you lose all the XP you have gained since your last skill point. You don’t want to be using this perk all the time. As it takes up a lot of perk slots it is best equipped when farming lesser enemies to earn Skill points, and then replaced with something more useful before boss battles.
This perk is great if:
- You want to earn Skill points quickly.
- You are a risk taker.
- You are an experienced player who doesn’t die frequently.
8) Centered Perk (Late Game)

Reward after beating Rayvis at the end of Shattered Moon Part 2 (Shattered Moon).
"Enemies in a small area are staggered when Cal is healing. Cal can take one hit and not be interrupted."
Cost – 2 Perk Slots
The Centered Perk is a helpful addition to all perk setups because it’ll give you valuable time to restore your health even in the most intense battles. By staggering enemies and allowing you to take a hit while healing, this perk makes you substantially more resilient. This means you can take a more gung-ho approach to combat; launch yourself into legions of stormtroopers with confidence, and time your stim heals to perfection to stagger surrounding enemies and launch a devastating counter-attack.
This perk is great if:
- You like to take a slightly reckless approach to combat and dive in headfirst.
- You want an advanced but effective way to surprise enemies with counter attacks when you are seemingly at your most vulnerable.
- You often find yourself in sticky situations where you are low on health and surrounded on all fronts, so some breathing room while healing would make life a little easier for you.
7) Resilience Perk (Early Game)
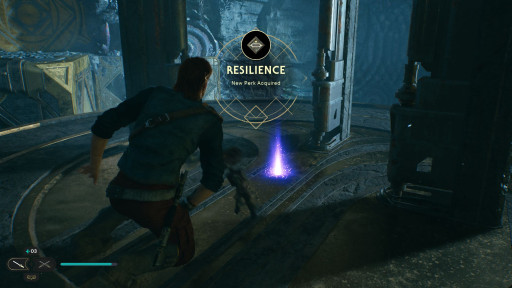
Rewarded after completing Chamber of Duality (Koboh).
"Increase your block meter."
Cost – 1 Perk Slot
The Resilience perk is simple but effective; it provides you with extra stamina so you can block more enemy attacks. This perk is great because you can pick it up early on in the game, when blocking will likely be your primary method of evading enemy attacks.Resilience is essential if you like to use the Crossguard stance because with this slow-swinging lightsaber stance requires you to block a lot whilst waiting for your opportunity to counterattack.
This perk is great if:
- You have recently started playing Jedi Survivor and could use a buff which will help with defending enemy attacks.
- You like to use the Crossguard stance.
- You have a spare perk slot, since the Resilience perk only costs 1.
6) Wisdom Perk (Early Game)

Bought from Zee for 5 Datadiscs on the 2nd floor of Pyloon’s Saloon (Koboh).
"Gain more experience from defeating enemies."
Cost - 3 Perk Slots
Like the Gambler perk, the Wisdom perk will increase the amount of XP you gain for each enemy you take out. You earn a little less XP than the Gambler Perk, but you also take on none of the risk. This is a great early game perk when you are trying to earn as many Skill points as possible to unlock more of the exciting abilities available on the Skill Tree. Like the Gambler perk, you are better off unequipping this perk for something more useful before taking on any bosses.
This perk is great if:
- You are early on in the game.
- You want to earn skill points quickly.
- You are comfortable running a perk which you may need to quickly swap out if you get ambushed by a strong opponent.
5) Dexterity Perk (Early Game)

The Dexterity Perk can be picked up after completing up the Chamber of Reason.
"Lightsaber throw deals more damage."
Cost – 2 Perk Slots
The Dexterity perk is excellent if you like to throw your lightsabers and do damage from range. This perk can be unlocked early in the game, which makes it very helpful because during these early stages it is easy to get overwhelmed by enemies.
The Dexterity perk will help you to quickly and efficiently clear out hordes of stormtroopers, especially if you are using the Double-Bladed stance which has a variety of lightsaber throwing abilities unlocked via the Skill tree, such as Controlled Throw or Double Orbit.
This perk is great if:
- Lightsaber throwing is one of your preferred methods of attack.
- The Double-Bladed lightsaber is your preferred stance.
- You are early on in the game and want a method to quickly clear out groups of enemies without taking any damage
4) Versatility Perk (Late Game)

Bought from Zee for 5 Datadiscs on the 2nd floor of Pyloon’s Saloon (Koboh).
"Deal extra damage temporarily after switching lightsaber stances."
Cost - 3 Perk Slots
Another great addition to any build, the Versatility Perk allows you to inflict extra damage when swapping between lightsaber stances. In Jedi Survivor you can pick two stances to swap between at any moment. Many builds suggest picking two stances like the Double-Bladed and the Crossguard that complement each other because they have opposite strengths and weaknesses.
When running a stance combination such as this, you will find yourself frequently swapping between stances in the middle of a fight depending on what the situation calls for. Therefore, being able to deal a little extra damage when swapping stances can be very handy, especially if you are new to the game and find swapping stances to be a little disorientating.
This perk is great if:
- You find yourself frequently swapping lightsaber stances in the heat of battle
- You are a new player wanting a buff to make swapping stances a little easier.
- You like to use two stances with different strengths – e.g. Blaster/Dual Wield, Double-Bladed/Crossguard.
3) Ambidexterity Perk (Late Game

Rewarded for completing the Final Jedi Chamber in the Devastated Settlement (Koboh).
"Shooting targets temporarily increase lightsaber damage."
Cost – 3 Perk Slots
This perk is essential for anyone running the Blaster Stance. With a blaster in one hand and a lightsaber in the other, the Blaster Stance offers a vicious two-pronged attack,made even more lethal with the addition of the Ambidexterity Perk.
The Blaster Stance is great against your average enemies like Stormtroopers and Bedlam raiders, but it struggles against bosses because it has the lowest damage output of any of the stances. The Ambidexterity perk helps to bridge that gap because it allows you to power up your lightsaber by shooting targets, so you can then swoop in to deal heavy melee damage and clear out any stragglers.
This perk is great if:
- You are trying to maximize your damage output with the Blaster Stance.
- Your main stance is the Blaster Stance
- You are skilled enough to comfortably use your blaster and lightsaber interchangeably.
2) Fortification Perk (Early Game)
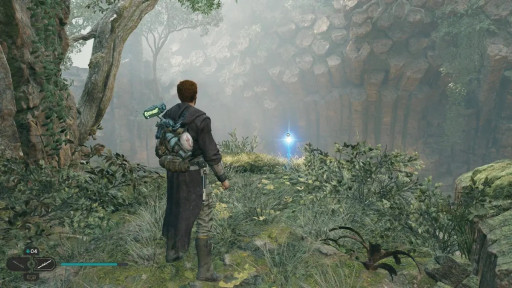
Found inside a narrow pathway in the Forest Array (Koboh).
"Life regenerates up to a minimum amount."
Cost – 3 Perk Slots
The Fortification perk is helpful in the early game, when you have limited stims and a lower health bar.. With this perk equipped, even when you are out of stims and far from safety, you still have a fighting chance at survival. The Fortification perk will let you automatically regenerate enough health so you can tank a few hits from enemies while you duck and weave your way to the next Meditation point.
This perk is great if:
- You are a relatively new player who regularly finds themselves running low on stims.
- You like to explore and venture far from Meditation points.
- You are good at keeping yourself out of trouble when on low health.
1) Persistence Perk (Early Game)

Reward after beating Anoth Sera in the Chamber of Fortitude (Koboh).
"Each enemy killed during Slow gives a small amount of Life."
Cost – 2 Perk Slots
Like the Fortification Perk, the Persistence Perk provides a health buff which is particularly useful during those early game skirmishes. By using the Slow ability, you will replenish your health bar. This perk is particularly useful because it essentially allows you to trade Force stamina for health, with a bonus Slow effect that will leave your enemies exposed to any follow-up attacks. The Persistence Perk is a great way of gaining an advantage in a boss battle when you and your opponent are both running low on health. It is also a great option because it can be unlocked early and is a viable option even in the late game.
This perk is great if:
- You use the Slow ability frequently and have upgraded it on the Skill Tree.
- You frequently find yourself running low on stims and want another method to replenish your health.
- You are happy to trade Force stamina for health in an emergency.
You may also be interested in:
- Top 15 Best Star Wars Characters
- Star Wars Movies: Best and Worst Movies Revealed
- 10 Things You Didn't Know About Darth Vader
- Star Wars: Top 10 Things We Love Most About The Star Wars Series
- The Most Legendary Star Wars Quotes from The Top 25 Star Wars Characters
- 12 Awesome Star Wars Games That Need New Remakes

