What Are The Best Early Armor in Tears of the Kingdom?
In this article, I’ll review the top 5 best early armors you can get in Legend of Zelda: Tears of the Kingdom. While the topic is subjective to some people, I rank the armor by how useful it is for you to progress through the game and if it offers any bonuses. Secondly, I’m ranking based on the risks of getting the armor. Lastly, I’m ranking based on the amount of work to get the armor. Let’s get to it.
5. The Snowquill Armor
Image
The Snowquill Armor is the most important armor to wear when exploring Hebra because it’s freezing! Cold resistant food or elixirs may not be enough, and may fill up unnecessary space in your inventory. Prevent Link from getting hypothermia and get this armor as soon as possible.
In my opinion, the Snowquill Armor ranks #5 because it is extremely useful in higher altitudes when you explore the sky. However, to get this armor early, you may need to cook meals or elixirs with cold resistance to withstand Hebra’s weather. You should wear it when you skydive in freezing altitudes. Sometimes, you’ll want to combine the Snowquill Tunic with the skydive armor, granting you skydive mobility up and cold resistance.
What makes the Snowquill Armor great:
1. It grants Link cold resistance, allowing him to explore more cold areas, such as the skies, or around the Hebra location. You'll notice that with the Snowquill boots, he'll run faster in the snow than without.
2. It's awesome for hunting, specifically in snowy areas such as Hebra. You'll find many predators to hunt, such as cold-footed wolves, Tabantha mooses, snowcoat foxes, grizzlemaw bears, and more. You can scavenge critters such as the winterwing butterfly and the cold darners.
3. It may not offer great defense or attack stats. It's great to start with and upgrade later during the game. You'll want to hang on to it for boss fights in Hebra or anywhere freezing in the sky, such as Colgera, Frost Gleeok, or a Blue Maned Lynel.
Armor Stats
The armor piece together makes up for 9 base defense points.
The full set automatically raises cold resistance
The set bonus grants you immunity from being frozen by ice attacks.
The highest upgrade requires 10 lizalfos tails, and 5 rubies, raising your defense by +8.
How To Get The Snowquill Armor:
Getting the Snowquill Armor is easy in the game. You can buy the full set at Rito Village in the armor shop. You can fast travel through the Gatakis Shrine.
If you haven't unlocked the Gatkis Shrine, Rito Village is Northwest of Hyrule. You can normally walk up to the shop from the shrine by taking the village's stairs. Or you can take the fun and impolite way, ascending up to the Armor shop above the Gatkis Shrine.
Image
Image
The trousers are 1,000 rupees. The Snowquill Tunic is 500 rupees. The Snowquill Headdress is 650 rupees. You’re going to need a total of 2,150 rupees or more. You look good in this Link.
4. Barbarian Armor
Image
The Barbarian Armor is the best early armor to find in Hyrule after visiting Lookout Landing for the first time. Link will need to deliver massive damage to enemies bigger than him. Prevent Link from being an unprepared wimp, and get this armor as soon as possible.
In my opinion, the Barbarian Armor ranks #4 because sometimes the best defense is offense. There are a few obstacles to getting it, such as fleeing from many enemies. It's intentionally worn for fighting, so literally anywhere can work!
What makes the Barbarian Armor great:
1. It is great for fighting big enemies or bosses. The armor may not be great with protection, but delivering powerful blows to enemies and bosses is much more worth it than being conservative in battle. You have to commit to being aggressive with this armor and feel like a true viking because if you hesitate, the armor won't help as much.
2. It is versatile and can handle raiding an enemy campsite. You can quickly clean out a 5+ group of Bokoblins and 1 Boss bokoblin, even when you're in bullet time shooting bomb arrows at them. If holding a high attack power melee weapon, you can slay a normal Bokoblin within seconds.
3. It grants Link an attack up and boosts your damage by 50% for all weapons. Keep in mind that this attack up doesn't apply to charged attacks because of the set bonus.
Armor Stats
It has a starting base of 9 points.
Its perk is granting an attack up.
The set bonus is that it reduces stamina to perform a charged attack.
Upgrading the Barbarian Armor is difficult. To upgrade it at its highest requires 3 White-Maned-Lynel saber horns, 3 White-Maned-Lynel mace horns, 3 bladed Rhino Beetles, and 500 rupees. Prepare to test your might facing Lynels and finding rare creatures.
How To Get the Barbarian Armor:
Getting the Barbarian Armor is much easier at night because you will have greater visibility to see a glowing bunny who will escort you to the hidden caves.
To get the Chest:
It’s located in the Crenel Hills near the Ren-iz Shrine. I marked it with purple for you. Here’s the location below.
Image
Here’s what the cave looks like, overlooking the lake’s edge. You might see a mischievous Fire Wizard dancing around there, taunting you.
Image
Walk through the cave and stay to the right. Avoid the Stone Talus. You’ll see a pile of luminous stones on the wall. Shoot it with some bomb arrows to open it.
Image
Here is where you should find the chest plate.
Image
To get the Helm:
It’s located southwest of the Lanayru Road South Cave. It’s at a tricky spot, precisely canyon-deep. You can fast travel from Yansamin Shrine on Forge Island and glide over it. You can fast travel from the O-ogim Shrine on Lanayru Promenade.
Image
Try to spot the blue bunny at night to see where the cave is. Here’s what the cave looks like. I used some bright gloom seeds to make it visible to you.
Image
There’s a sign that will say that the direction of the statues will lead the way to the treasure. I marked the correct directions with fire for you to where the statues point. From the entrance, make a first right.
Image
Continue toward a path with an area that has statues in a circle. Destroy the left rock rubble marked with fire. You can use plant bombs, cobble crushers, fused rock weapons, etc.
Image
Image
Continue the path, and when you see a passageway, stop. There are a group of enemies that you don’t need to fight. Sneakily, destroy the rubble (marked with a bright gloom seed) with a bomb arrow if you have one. Or you can rush in and use a melee weapon to crush the rubble below, you’re getting the barbarian armor after all.
Image
Fall through the rock rubble, as you’ll land in the water. Continue the clear path, as you’ll see more statues. Use ascend on the 3 statues on your far right. I marked it with fire for you.
Image
And you'll get to earn that helm. By god, that's lots of running for Link already.
Image
To get the Legwraps:
It’s located east of Hateno Village and south of the Retsam Forest. Here’s the location marked in green. It’s easier to see at night, trying to find the glowing bunny. A prerequisite is using fire tools such as Red Chuchu Jelly, flame shield, flame emitter, or fire torch.
Image
Glide down and try to find the bunny. If not, look for a waterfall, the cave resides on the right.
Image
Heads up, there are plenty of enemies when you enter. As you enter, run! You’ll want to find an Ice Like-Like on your left soon.
Image
The Ice Like-Like protects a cave nearby, that's where the treasure is. I marked it with bright gloom seeds for you. Avoid the enemy's ice attacks.
Image
You made it, but it’s in a block of ice. Use fire equipment such as Red Chuchu Jelly and throw it at the block of ice in frustration in this search. You're welcome.
Image
3. Miner’s Armor
Image
The Miner’s Armor is one of the most important armor pieces in the game to explore the Depths because it’s so dark down there! Link will need something bright to explore the depths. Prevent Link from being blind from the dark, and get this armor as early as possible!
In my opinion, Miner's Armor ranks #3 in the game because the Depths is a setting integral to the story. Getting to the Depths is easy by finding a chasm on the surface and falling through it. There’s little risk to getting this armor, such as annoying skeletons getting in your way. Wear this armor while entering dark areas or, primarily, the Depths.
What makes the Miner’s armor great:
1. It creates a glowing light effect around Link. This will make it easy for him to look around his nearby surroundings. This effect is so good when you need to fly around in the depths on a Zonai device, trying not to crash into everything.
2. It offers a neat bonus, producing a glowing trail behind Link. It will help glow dark areas as you continue walking large distances. This will help if you need to backtrack and save some brightgloom seeds.
3. It’s easy to upgrade a few times. The first upgrade requires 10 rupees and 10 brightgloom seeds, raising its defense by 5. The second upgrade requires 50 rupees, 20 brightgloom seeds, and 5 brightcaps. The third upgrade requires 200 rupees, 15 giant brightgloom seeds, 10 deep fireflies, and 5 glowing fish caves.
Armor Stats:
The starting base defense is 9.
It creates a glowing light effect around Link.
It offers a neat bonus, producing a glowing trail behind Link.
The highest upgrade you can get is defense level 20. It requires 500 rupees, 20 giant brightgloom seeds, 10 large Zonaite, and 3 diamonds.
How to get the Miner’s Armor:
To get the Trousers:
You can find the Trouser’s at the Hylia Canyon Mine. Mark it with a color on the map. I marked it blue for you as an example. You can fast travel to the Koradat Lightroot if you can.
Image
Find an uphill edge surrounding the mine and look down the canyon. You should see the mine below you.
Image
Glide and descend toward a small-looking castle in ruins.
Image
The treasure should be right under it. Awesome job getting it!
Image
To get the Top:
You can find the Miner’s Top at the Daphnes Canyon mine. You can fast travel to the Layusus Lightroot.
Image
Follow the fire in the direction it’s pointing, and you should reach your destination. Almost there Link!
Image
Avoid the gloom around the area. Make your way to the mine’s ruins.
Image
It should be right under here.
Image
To get the Mask:
You can find the Miner’s Mask at the Abandoned Kara Kara Mine. You can fast travel to the Tatayam Lightroot. Depending on your progress through the depths, beware of facing Master Kohga if he is there for a fight. Whenever there is an abandoned mine, look out for Yiga Clan Members, posing as travelers or researchers in the depths.
Image
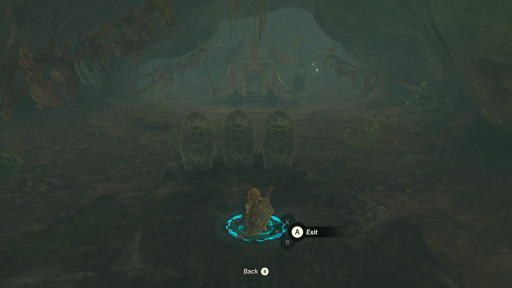
Your treasure should be under the circular structure. Boom, you got the full miner’s set. Congratulations Link!
Image
2. The Climbing Armor
Image
The climbing armor is one of the most important armor pieces in the game because it will allow Link to climb even faster with little stamina. Link will need it to reach soaring heights and hang on to those heights if he can! Prevent Link from climbing exhaustion or atmosphere shock from deadly heights, and get this armor as soon as possible.
The Climbing Armor armor ranks #2 because you will be needing it often, especially if you are a Breath of the Wild fan and are just getting started with Tears of the Kingdom. You’ll need it in the sky, the surface, and the depths.
You should wear it when Link is purposely climbing significant heights. As a reminder, in TOTK, you don’t always have to start climbing from the bottom, as Zonai devices can 100% change your climbing mindset. For example, use a rocket shield to gain height and cling on to a climbing surface.
What makes the Climbing Armor great:
1. It offers to increase climbing speed. For example, there will be many times when you are trying to glide to a floating platform in the sky and may need to hang onto it to climb on top of it. The greatest challenge is maintaining stamina and being strategic about your gliding and climbing skills.
2. It offers some maneuverability to climb when surfaces are slippery in rainy weather. It's not slip-proof! Combine the Froggy Armor set with the Climbing Armor set if you both want climbing speed and have some slip resistance.
3. It does not have as much requirement to upgrade it. Many of the items are easy to find during the games. These items are Keese Wings, Rushrooms, Electric Keese Wings, Hightail Lizards, Ice Keese Wings, and Hot Footed Frogs. The highest upgrade required is giving Fountain Fairies 500 rupees, which will prevent Link from losing much energy when he jumps as he climbs.
Armor Stats
It starts with base 9 defense points.
It offers climbing speed.
The set bonus is that stamina is reduced from jumping when climbing.
How To Get The Climbing Armor:
Find the Climbing Armor during the night time. It makes it easy to see the glowing bunny.
To get the Torso:
You can get the torso piece at the North Hyrule Plain Cave beside the Sinakawak Shrine. You’ll notice a hole next to the dragon tattoo. Fall into it, landing in water.
Image
Image
Continue walking until you find a waterfall. The armor is hiding behind the waterfall.
Image
You’ll find it here.
Image
To find the Boots:
You can find the Climbing Boots in Upland Zorana. It’s located in the Upland Zorana Byroad, and you can fast travel to the Upland Zorana Skyview Tower. Launch yourself up, glide over the summit, and land below the summit. I marked it purple for you.
Image
Here’s where you should be landing at the Byroad Cave. Not at the Summit Cave.
Image
Go to the right fork. I marked it with brightgloom seeds for you.
Image
Make it through the right fork, reaching flooded ruins. Use ultrahand to move the dam up, draining all the water.
Image
Now, you opened the cracked door under the platform with the stairs. I marked it with a brightgloom for you. Walk through, and you’ll get your treasure.
Image
To get the Bandana:
You can find the Climbers Bandana on the right cliffside from Mikau Lake, above the first waterfall and below the second waterfall. I marked it in green here on the map below.
Image
Here’s what the entrance looks like.
Image
Walk through the cave, and you’ll notice a clear uphill with some ice. It's still possible to climb on the rocks even when slippery. If you have the froggy armor, you can put that on to resist slipping. Or you can fuse a rocket with a shield.
Image
Once landed on the top, the far right cave-hole is where the Climbers Bandana is. Yay, you can climb faster now!
Image
1. The Glide Armor
Image
The Glide Armor is the most rewarding armor you can get early in the game because Link will be soaring super high! While there is no food or elixir to make Link fly like Superman, this armor helps Link glide faster in the brutal skies. Prevent Link from falling into a flat and severed pancake, and get this armor as soon as possible!
After you visit Lookout Landing, I recommend finding the paraglider first, especially when achieving the Glide Armor. Acquiring Tulin from the main quest is not required, but Tulin is nice to have in your early air travels. You should have more than 6 Zonai charges before finding the armor.
The Glide Armor is the #1 armor in the game because the sky is a critical element in the entire game. Getting to the sky is easier than you think because you have to find the tall skyview towers. The armor is versatile in many situations, such as defeating enemies in the skies, especially Gleeoks. You can dive faster. With Tulin, you can easily cover more distance from point A to B.
As said in its name, you use the glide armor when skydiving. When you get it early in the game, it will become a natural habit to fast travel to a shrine you found in the sky and glide to a new shrine somewhere else.
What makes the Glide Armor great:
1. It has great air control. Gliding with the armor allows you to glide in all directions in the air while traveling forward without Tulin. Height matters so much, depending on the scale where you want to go. For example, gliding greater distances requires gliding off super high sky areas.
2. It has powerful aerodynamic acceleration for when you're in full dive mode. If you upgrade the armor to the max, you will gain the impact-proof ability. You will have no fall damage whatsoever. RIP Link's knees.
3. It has powerful aerodynamic deceleration, even when you don't have to pull out the paraglider. A feature I particularly love is activating bullet time by pulling on the bow, hunting birds, or slowing down to see where I want to go. Using the Shiekah scope during gliding partially slows down time when you're in the air, allowing you to pin locations with a bird's eye view.
4. It can glide anywhere and anytime, but you have to be creative. Jump off high cliffs to cover greater distances, although those cliffs need to be high enough. Jumping off a flying Zonai device will be needed often, as they will offer alternate angles to glide from (and it looks cool).
Armor Stats
The base defense is 6.
The set bonus is no fall damage.
To upgrade to level 16 defense (highest), obtain 500 rupees, 12 Gleeok wings, 10 Aerocuda wings, and 8 Gibdo wings.
How to get the Glide Armor:
To get the Shirt:
You can get the Glide Shirt at Courage Island. You can get there by visiting Lindor’s Brow Skyview Tower.
Image
Image
If it’s your first time unlocking it, build a bridge over the water with the construction materials nearby. Pick the 3 large wood materials.
Image
Image
Use the Skyview Tower and glide to a floating platform with lots of water.
Image
After landing in the water, talk to a Steward Construct. Eventually, you’ll need to participate in a timed skydive ceremony. If you pass, the Stewart Construct will give you a piece of the skydive armor.
Image
To get the Tights:
You can get the Gliding tights at Bravery Island. You can get there by fast traveling to the Typholo Ruins Skyview Tower.
Image
Image
If you haven’t visited there yet, to unlock the Typholo Ruins Skyview Tower, you have to climb it or use a rocket shield. Remove the metal block on top of it with the ultrahand ability.
Image
If you think you can’t make it to Bravery Island from the Skyview Tower, land on the floating platform with the shrine. It’s the Mayam Shrine. Unlock it, but Link has no time to complete a shrine!
Image
Turn and aim the jump pillar to Bravery Island. Now, use the jump pillar to get to Bravery Island.
Image
Land on the floating platform with lots of water, talk to the Stewart Construct and activate the skydive ceremony.
Image
To get the Mask:
You can get the Gliding Mask at Valor Island. You can get there by traveling to the Mount Lanayru Skyview Tower. If you haven’t unlocked it, walk up Mount Lanayru with some cold resistance elixirs.
Image
Image
If you think you can’t make it with short stamina, I usually like to land here on this floating platform. If you walk ahead to the edge, you’ll have enough stamina to make it below.
Image
Land on the floating platform with lots of water, talk to the Stewart Construct (again) and activate the skydive ceremony.
Image
Good job finding the full Glide Armor! These Stewart Constructs don’t make finding it easy.
Congratulations reader, you made it this far! You deserve some pie and some milk.
Is there a Korok? I'll send him flying to the sky! Is that a Pokémon? Gotta Catchem all!
Read my articles for everything Nintendo especially if you're a Zelda and Pokémon fanatic.