Ark: Survival Evolved is a dangerous game.
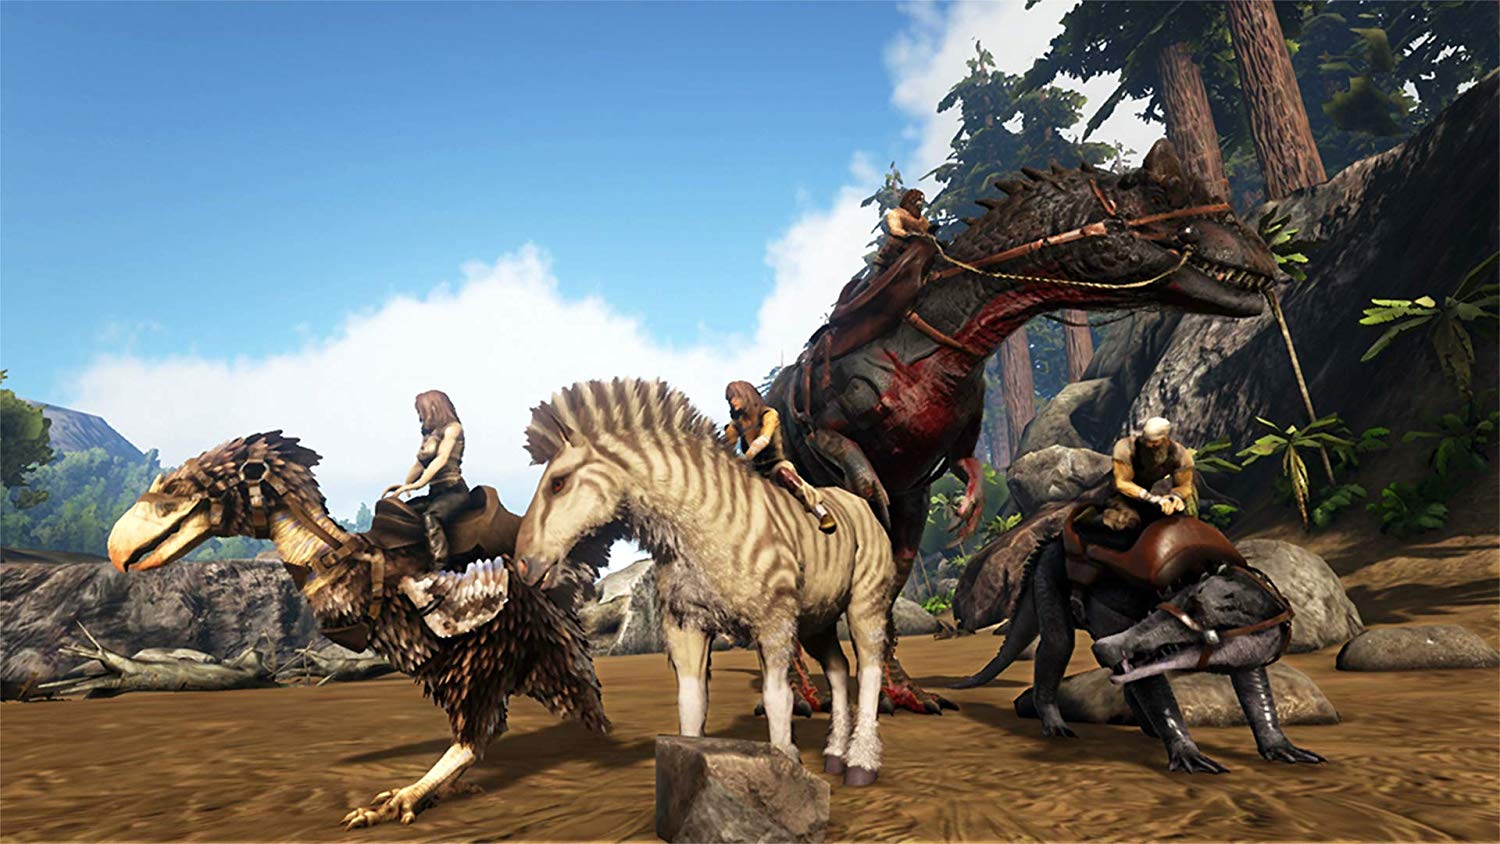
You set out to explore the Ark, hunting wild dodos and taming dinosaurs along the way.
Meanwhile, players are raiding bases with the highest quality loot they can get their hands on. As a new player, you’ll need every advantage you can get in order to survive the Ark.
25. Bloom
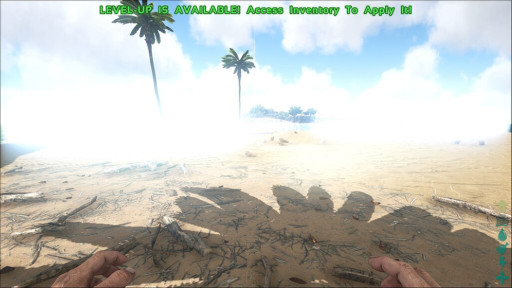
This setting is sadly not available to console players, but it proves very effective for those on the pc. When you play the game, there are two modes: Extreme brightness, and extreme darkness. When you change the bloom to a lower value, you can prevent the extreme brightness of the sky and sunlight while being able to see what you are doing.
How To Apply
- Push “Tab” to open console
- Type “r.bloomquality 0
Advantages
- Being able to see what you are doing at all times
- Not blinded by the sky and sunlight
24. Join Notifications
It is important to know about your surroundings. Every detail is precious in your survival, and if the person you want to raid comes online, you better be aware of it. Turning on the notifications for when other players join your game is an effective way to know what you may be dealing with.
How To Apply
- Pause the game
- Select “options”
- Check the setting “Join Notifications”
Advantages
- Better awareness of surroundings
23. Chat
The server wide chat can be an essential and important tool. Whether you need new recruits or to trade for supplies, this chat can help create friends or strategize against enemies. While the box popping up in the corner can be annoying, it is essential to know about your surroundings and to be able to communicate with players who are both enemies and allies.
How To Apply
- Pause the game
- Select “options”
- Check on the setting “Auto Chatbox”
Advantages
- Access to more people and materials
22. Map Location
If you have access to the controls of the server or save, you may also want to allow for the location of the player to be seen on the map. While most experienced players have the maps memorized, this will help you to familiarize yourself with the different locations of the game. This can also be useful for telling allies your location for trading or to meet for a raid.
How To Apply
- When loading map or save go to general settings
- Check the “Show Map Location” option
Advantages
- Better awareness of surroundings
- Better use of map
21. Corpse Locator

You are bound to die in Ark: Survival Evolved. A lot. This setting is useful for finding your way back to your body to recover your precious gear. Otherwise, you will need to start from scratch.
How To Apply
- When loading map or save go to general settings
- Check the “Corpse Locator” option
Advantages
- Higher chance of recovering loot
- Better awareness of surroundings
20. Increase the XP Multiplier
Experience starts out as an easy to earn and an abundant resource. However, as you reach higher levels, it costs more building and crafting to reach the maximum level. Therefore, by increasing the XP multiplier, you are going to reach better crafting recipes in a shorter amount of time.
How To Apply
- When loading or creating server, access the advanced settings
- Use the slider to adjust the XP multiplier. 1 is the default
Advantages
- Faster access to high level structures and equipment
19. Taming Timer
The most exciting and stressful moment is the taming of your new dinosaurs. You have to battle the torpor, find enough of their preferred food, and protect them from both players and hostile creatures. With that being said, you can decrease the amount of time it takes to tame these dinosaurs to avoid these situations.
How To Apply
- When loading or creating server, access the advanced settings
- Use the slider to adjust the taming timer. 1 is the default
Advantages
- Safer for creature being tamed
- Less resources required
- Faster taming process
18. Harvest Multiplier
Everyone who has spent time playing Ark: Survival Evolved knows that there is a long grind ahead of them. This grind can be easily overcome with a setting called the harvest multiplier. By changing the harvest multiplier, you can adjust how much of a resource you receive from each node. This means that the higher the multiplier, the more wood you get from punching a tree one single time.
How To Apply
- When loading or creating server, access the advanced settings
- Use the slider to adjust the harvest multiplier. 1 is the default
Advantages
- Faster collection of resources
- Faster crafting of structures and equipment
17. Food and Water Drain
Food and water become essential when you first begin your quest for survival. Sometimes, this constant need for food and water can take away from the game and cost you your life.Therefore, it can be advantageous to lower the frequency of needing to eat and drink, or to eliminate it entirely.
How To Apply
- When loading or creating a server, access the advanced settings
- Adjust the slider for food and water drain. 1 is default. 0 is no drain.
Advantages
- Higher chances of survival
16. Wild Dinosaur Level
When taming dinosaurs or other creatures, you want to look for the highest levels you can find, as this will give the dinosaur you tame some better stats. Sometimes, this can be a challenging task. You can, however, increase the maximum level in the settings to avoid finding those level 5 pteranodons.
How To Apply
- When loading or creating a server, access the advanced settings
- Use the slider to adjust the wild dinosaur level to a higher value
Advantages
- Better quality tames
- Save time looking for tames
15. Player Stats Multiplier
Leveling up and receiving 10 health per level while trying to maintain other stats is disappointing. It would be more impressive if you can increase your health by 100 per level or your weight by 250 per level instead. Using this multiplier, you can increase how much these stats are impacted by skill points.
How To Apply
- Press tab to open the console
- Type PerLevelStatsMultiplier_Player[n]=x
- For “n” use numbers 1-11 for each individual stat
- For “x” use the number for how much you would like the stat to increase per level
Advantages
- More room to carry resources and tools
- More health
- More stamina
- Higher chance of survival
14. Egg Hatching Speed
You managed to get two dinosaurs to lay an egg and are waiting for the baby to hatch. Waiting takes forever though, so how can you speed that up? There is a setting that changes the speed of hatching so you can hatch your baby dinosaur in no time.
How To Apply
- When loading or creating server, access the advanced settings
- Use the slider to adjust the egg hatching speed timer. 1 is the default
Advantages
- Faster hatching speed
13. Decrease Wild Dinosaur Damage
Nothing is more annoying than the wild dinosaurs killing and destroying everything they see. If you believe they are too powerful, you can change the amount of damage that these wild creatures do.
How To Apply
- When loading or creating server, access the advanced settings
- Use the slider to adjust the dino damage multiplier. 1 is the default
Advantages
- Higher chance of survival
- Players, dinosaurs, and structures will take less damage
12. Player Resistance
If you believe that you are still taking too much damage, you can easily adjust the player resistance setting. By changing the player resistance setting, you avoid taking more damage without impacting other creatures and structures.You will have the same amount of health, but it will take more damage in order to remove that health.
How To Apply
- When loading or creating server, access the advanced settings
- Use the slider to adjust the player resistance. 1 is the default
Advantages
- Lower chance of dying to creatures
- Lower chance of dying to players
- Higher chances of survival
11. Mating Interval
Ark: Survival Evolved is created with a mating interval to prevent your dinosaurs from popping out babies every few minutes, but that is nowhere near as much fun as having a massive army of baby dinosaurs. Using the mating interval setting, you can change how often your dinosaurs mate to lay eggs.
How To Apply
- When loading or creating server, access the advanced settings
- Use the slider to adjust the mating interval timer. 1 is the default
Advantages
- More baby dinosaurs and eggs
- Faster production of eggs by dinosaurs
10. Day Cycle Speed
Sometimes the day feels way too long, and sometimes it feels to short. Depending on your playstyle, you can adjust the cycle to go faster or slower. You can even stop the cycle from occurring entirely. This means that you can permanently make it day or night.
How To Apply
- When loading or creating server, access the advanced settings
- Use the slider to adjust the day cycle speed. 1 is the default and 0 freezes time
Advantages
- More daylight
- Better visibility
- Customized to your playstyle
9. Baby Mature Speed
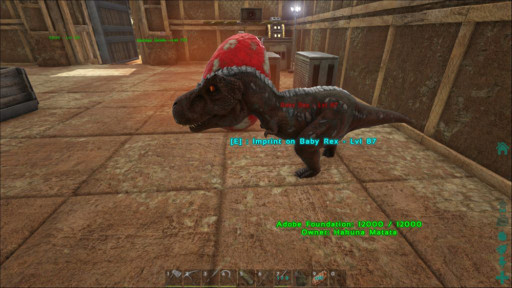
After baby dinosaurs hatch from their eggs, you then have to wait for them to mature. This can take a few minutes to multiple hours to occur. By adjusting the speed at which the baby matures, you can change this to a matter of minutes. This also means that you do not need as many resources to give to these dinosaurs in order for them to mature.
How To Apply
- When loading or creating server, access the advanced settings
- Use the slider to adjust the baby mature speed. 1 is the default
Advantages
- Less resources needed
- Faster speed to mature
8. Corpse Decomposition Time
Death is inevitable, but when you are out gathering resources and do not have a bed to respawn at, it can take forever to get to your corpse. With this setting, you do not have to worry about your corpse disappearing before you are able to recover your precious gear. You can set your corpse to stay where you died for half an hour, but this could allow enemies to know of your whereabouts, so use this setting wisely.
How To Apply
- When loading or creating server, access the advanced settings
- Use the slider to adjust the corpse decomposition timer. 1 is the default
Advantages
- Higher chance of recovering gear
- Better chances of survival
7. High Quality VFX
Everyone loves high quality graphics, but nobody likes a low frame rate and having performance issues. This setting makes the game look better, but it runs much slower. Ark: Survival Evolved is pretty demanding, so it may be worth turn this setting down or even off.
How To Apply
- Pause the game
- Select options
- Turn the high quality VFX to low or a lower setting
Advantages
- Higher frame rate
- Better performance
6. Camera Shake Scale
Little details such as the camera shake scale can provide a nice touch to a game. However, the camera shake scale may cause PvP to become more difficult as you need to combat the shake of the camera while fighting moving players and creatures.
How To Apply
- Pause the game
- Select options
- Use the slider to adjust the camera shake scale to a barely noticeable option or turn it off entirely
Advantages
- Better view of enemies and creatures
- Higher advantage in pvp
5. Graphics Quality
Having the best looking graphics is always nice, but when it causes lag and performance issues, you need to prioritize the looks versus performance. By turning the graphics quality down, you can have a higher frame rate while increasing performance. This is a must for taking on the other players and creatures of the Ark.
How To Apply
- Pause the game
- Select options
- Turn the graphics quality to low or a lower setting
Advantages
- Higher frame rate
- Higher performance
4. View Distance
This setting can go in either direction for giving players and advantage. If you decrease the view distance, you will likely have a higher frame rate and better performance. If you increase the view distance though, you can see farther, meaning you will know where players, bases, and creatures are at further distances.
How To Apply
- Pause the game
- Select options
- Scroll down to view distance and adjust it lower or higher depending on your needs
Advantages
- Better visibility
- Higher frame rate
- Higher performance
3. Harvest Health
Each tree and rock of the Ark have health. When you damage them enough, they lose enough health to disappear or get destroyed. By increasing the health, you increase the potential gain of resources when damaging these nodes.
How To Apply
- When loading or creating server, access the advanced settings
- Use the slider to adjust the harvest health. 1 is the default
Advantages
- More resources from destroying nodes
- Faster crafting of higher level gear
2. Floating Names
In the Ark, you have enemies and allies. If they aren’t your allies, they might as well be your enemy. Identifying these other players can be crucial as to whether you need to be on high alert. By enabling floating names, you will know who is an enemy and who is an ally from afar.
How To Apply
- Pause the game
- Select options
- Check the floating names box
Advantages
- Better awareness
- Higher odds of survival
1. World Tile Buffers
When you aren’t in a certain part of the Ark, it still loads so that when you move to that area, you do not have to worry about loading the rest of the world. However, this takes away from your performance and can hurt your frame rate.
How To Apply
- Pause the game
- Select options
- Change the world tile buffers setting to low or a lower setting
Advantages
- Higher frame rate
- Higher performance

