Various cooperative perks are great for survivors and their teammates; however, this review will look at the most powerful and efficient cooperative perks to be used in the games for an increased win rate.
Now, let the fog reveal the best Cooperative perks for the survivors:
5. Borrowed Time
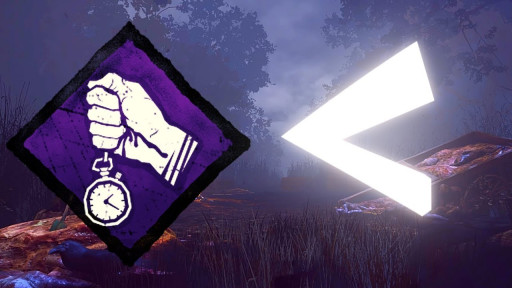
Borrowed Time is a perk that survivors you unhook benefit from the following effects: Extends the duration of their Endurance Status Effect by 6/8/10 seconds. Extends the duration of their Haste Status Effect by 10 seconds.
It is a perk that used to be considered the most powerful perk in the game before the new update came, where all the survivors have endurance status effects once they are off the hooks. It is still a good cooperative perk, which saves a lot of time, and is considered a good perk to use as a team.
Advantages of using Borrowed Time:
- It can save the survivor's life due to the extension of the endurance status effect, which is very effective, especially if the killer is camping and tunnelling, taking this advantage to another level.
Possible Disadvantages:
- The Killer can easily tunnel and wait for the survivor until the perk's power runs out, which rarely happens; however possible if the killer is aware of the perk.
For more information about this perk: https://deadbydaylight.fandom.com/wiki/Borrowed_Time
4. Boon: Shadow Step

Boon: Shadow Step is a perk when you press and hold the Active Ability button near a Dull or Hex Totem to bless and create a Boon Totem. Soft chimes ring out within a radius of 24 metres. Survivors inside the Boon Totem's range benefit from the following effects: Scratch Marks are suppressed. Auras are hidden from The Killer. Both effects linger for 2/3/4 seconds after leaving the Boon Totem's range. You can only bless one Totem at a time. All equipped Boon Perks are active on the same Boon Totem.
The perk is considered to be the second most powerful boon in the game, with the ability to hide any tracks, which is very advantageous when in a chase with the killer, as it will, at some point when in the area, hide traces of scratchcards, allowing you to escape the killer much quicker.
Advantages of using Boon: Shadow Step:
- lt allows you to bring an area of incognito for the survivors; in other words, any survivors who come within the area are invisible in terms of scratch marks, making it much harder for the killer to track.
Possible Disadvantages:
- The Boon Totem can be easily destroyed by the killer, making it unusable unless another totem has been booned somewhere else where it would be harder for the killer to find it.
For more information about this perk: https://deadbydaylight.fandom.com/wiki/Boon:_Shadow_Step
3. Kindred

Kindred is a perk which unlocks potential in your Aura-reading ability: While you are hooked: The Auras of all Survivors are revealed to one another. Whenever the Killer is within 8/12/16 metres of your Hook, their Aura is revealed to all Survivors. While any other Survivor is hooked: The Auras of all other Survivors are revealed to you. Whenever the Killer is within 8/12/16 metres of the hooked Survivor, their Aura is revealed to you.
Kindred is a complete anti-killer perk which is considered to be one of the most powerful aura-revealing perks; it enables you to see the killer within the 16-metre area of the hook in which the survivor is hooked, making it a great perk in terms of getting survivors off "safely" without having to be close to deciding whether it is safe, making it a powerful cooperative perk.
Advantages of using Kindred:
- Allows the other survivors to see the killer's aura, making it much easier for them to unhook you or progress within the game if the killer was camping.
Possible Disadvantages:
-
There are no major disadvantages to this perk other than it can be a waste for high-skilled players who do not require it.
For more information about this perk: https://deadbydaylight.fandom.com/wiki/Kindred
2. Prove Thyself

Prove Thyself is a perk which increases your Repair speed by +15 % for each other Survivor within 4 metres of your location, up to a maximum of +45 %. This effect is also applied to all other Survivors within that range—grants 50/75/100 % bonus Bloodpoints for Cooperative actions. Prove Thyself does not stack with other instances of itself.
It is one of the most powerful progression perks in the game for the survivor, enabling the survivors to increase the repair speed by +15%, allowing you to repair the generator as a team in seconds, making it a very powerful cooperative perk in which the killer will have problems with keeping up.
Advantages of using Prove Thyself:
-
Very powerful for teamwork cooperation, allowing for an increased repair speed on generators, which would make a huge difference in repairing generators.
Possible Disadvantages:
-
No major disadvantages other than wasteful if more than one survivor has the perk in the same area, which of course, cannot be stackable, and it would be a waste for a perk slot for one of the survivors.
For more information about this perk: https://deadbydaylight.fandom.com/wiki/Prove_Thyself
1. Boon: Circle of Healing

Boon: Circle of Healing is a perk when you press and hold the Active Ability button near a Dull or Hex Totem to bless and create a Boon Totem. Soft chimes ring out within a radius of 24 metres. Survivors inside the Boon Totem's range benefit from the following effects: Increases all Healing speeds by 40/45/50 %. Unlocks the Self-Care ability, allowing you to self-heal without needing a Med-Kit at 50 % of the normal Healing speed. Boon: Circle of Healing benefits from its effect. Boon: Circle of Healing does not stack with other instances of itself. You can only bless one Totem at a time. All equipped Boon Perks are active on the same Boon Totem.
The perk is considered the most powerful boon in the game, allowing all the survivors to heal themselves up 50% faster, which is an incredible speed without having to use any items, making it a great cooperative perk with which the killer will have trouble.
Advantages of using Boon: Circle of Healing:
- It allows you to bring an area of healing for the survivors without requiring them to use the med-kit or bring the self-care perk, which is very powerful, especially with the increased healing speed of a maximum of 50%.
Possible Disadvantages:
-
The Boon Totem can be easily destroyed by the killer, making it unusable unless another totem has been booned somewhere else where it would be harder for the killer to find it.
For more information about this perk: https://deadbydaylight.fandom.com/wiki/Boon:_Circle_of_Healing

