Halo Infinite is a game that can be physically and literally played in many different ways. I came to this game with an interesting perspective. I grew up playing games on the Xbox 360 and the Playstation 2, and never thought of using anything other than a controller. In my early 20’s, however, I got a gaming PC, and therefore, switched to exclusively mouse & keyboard. I played lots of Fortnite and Fallout 4, reaping the benefits of a full board of keys to bind, and the movement flexibility and precision of a mouse.
However, once I hopped on Halo Infinite, I found that I was losing a lot of gunfights and missing more shots on mouse and keyboard. I switched to controller, and began my journey to regaining the control I had as an MnK player while stillkeeping the stability I had as a controller player.
I’ll be going over a lot of settings in this article. MnK has its own advantages, for sure, but I will not be covering them in this. The primary goal of this article is to educate you on what each setting does, why it’s important to gameplay, and how you should tune yours based on your play style. I
t’s important to keep in mind that there is no single button layout or setting configuration that will instantly make you better. Getting better at Infinite, or any game for that matter, takes practice and persistence, both of which are assisted by finding the right settings for you. Please think of this article as the beginning, rather than the end.
GENERAL
Button Layout
Image
Using this default layout as a starting point can be very helpful when setting up your controller binds.
There are a few different, premade options to set your controller to. Southpaw, Recon, and Bumper Jumper to name a few.
No layout has an inherent advantage over another. Halo Infinite allows you to map any action to any button as well, letting you go outside the presets.
My best advice, and virtually every Youtuber’s advice, is to choose a layout that feels comfortable. Something else that I think is almost necessary to play Halo comfortably, unless you’re a Halo 2 OG who plays claw, is to use a controller with at least two mappable back paddles.
The only thing that I would say you must do is to map your controller in a way that allows you to jump, shoot, melee, and throw grenades without taking your thumb off of either stick. As a starting point, I set my scheme to bumper jumper, and then tweaked my layout until it felt right.
Thumbstick Layout
Image
Most people look with their right stick and move with their left, but that doesn't mean you have to!
Again, there are a few different layouts. The standard is look and pivot with the right stick, strafe and walk with the left stick. There are various options that you can switch it to, but, like button layout, it really comes down to what feels good.
If you’re right hand dominant, like me, I would play with the Default. If you’re left handed I would try out Southpaw, which is look with left stick, move with right stick, and see if that feels more natural!
Vibration
Image
If you choke in intense gunfights, try turning off vibration to steady your shot.
This is a mechanic that gently vibrates your controller when you’re taking damage. It can be very helpful when alerting you of danger!
Vibration on
Increased awareness of when active damage is being taken.
Vibration off
Allows you to make finer aim adjustments with less pressure.
As a child, I played with vibration. But recently, I’d heard from Youtube creator BBKDragoon that it may impact your ability to aim and add unnecessary pressure.
There are also enough visual and audio cues, without vibration, to alert you of when you’re taking damage.
My advice is to try out playing with no vibration, and see if it improves your mental game/aiming.
MOVEMENT AND AIMING
Invert Look and Flight (x and y axis)
Image
The goal is to be able to aim your banshee bombs. Don't over think it! Do what feels good!
This is, again, a setting that doesn’t matter all that much. Fly banshees however it feels normal to you!
Crouch Behavior
Image
Crouch strafing is often key to winning a gunfight.
This setting lets you choose whether you need to hold a button to stay crouched or just need to press it once.
Hold to crouch
This allows for more flexibility in movement. You can hold the button while you sneak around a corner, and just simply release when you’re ready to attack your enemy.
Press to crouch
If you’re somebody who really loves to crouch walk but your aim is impacted by having to hold, this setting is probably the best for you.
Personally, I don’t like having to press crouch twice, so I would recommend that you play on hold to crouch. Also, this allows me to teabag a recently killed enemy with greater ease and speed. So, it was very important that I got this setting right.
Zoom Behavior
Image
Don't be like this guy! Choose the right zoom mechanics to prevent getting stuck in the scope.
Similar to the crouch mechanic, this setting allows you to choose whether you need to hold down the aim button or just click it once.
Hold to zoom
This allows for more flexibility for hitting long shots in a tight time window, but may impact your stability while aiming.
Press to zoom
This is more in line with classic Halo titles, and allows you to just click zoom once and focus on your aim.
I preferred playing with hold to zoom on for a while, but I recently switched to press to zoom. I did so because I wanted to be able to focus on my aim while in ADS, and not worry about holding another button while making fine adjustments. Additionally, when using a sniper with multiple zoom settings, you can’t go past the initial zoom level with hold to zoom on. So, if you want to hit cross map snipes, I seriously recommend playing with press to zoom.
Movement Assisted Steering
Image
This is how you look when you use the wrong driving mechanics!
This is a helpful mechanic specific to controllers that just simply makes driving easier. Think of it as aim assist for driving. If you want to challenge yourself, I’d turn it off. But seeing as there’s no drift mechanic, like in Mario Kart, there’s no advantage to turning it off. I recommend you keep this on.
Hold to Sprint vs. Maintain Sprint
Image
Sprinting can be the difference between capturing a flag and the enemy taking you out.
As I’m sure you’ve figured out, this all comes down to if you want to press a button multiple times or once to continuously perform an action.
As Youtube creator Shyway put it, the biggest difference here is whether you maintain sprint while changing elevation. With maintain sprint on, you can jump up to a ledge or fall off one and as long as you’re holding forward you’ll keep running. With hold to sprint, you’ll have to press one more button in those same situations, which may cost you your life when trying to escape a sticky situation.
I recommend you play with maintain sprint on. Evading, rotating, skill jumps, and curb-sliding will be easier because of it.
Auto Clamber
Image
Shout out to Standard Ace for this screen grab!
Clambering is a useful mechanic that allows you to hoist yourself up on tall ledges that are just out of reach for something like a crouch jump. Turning this setting on will cause your spartan to automatically hoist themselves up when jumping near a ledge.
Auto Clamber ON
For a lot of scenarios, this is very useful. In general, the less buttons to press for movement, the better. However, you can seriously screw yourself in a gunfight with this setting on, because every time you clamber you sacrifice your aim and ability to shoot. You could be jumping up to a higher ledge to throw your enemy off, but instead accidentally commit to a clamber and give them a chance to finish you off.
Auto Clamber OFF
While, sometimes, it may be inconvenient to have to press the jump button again when wanting to clamber, it feels safe and secure to choose exactly when and where you clamber.
I advise you to try both settings. If you choose to put the setting off, make sure your jump button is easily accessible. If you play with it on, be aware of your surroundings in gun fights, because it may cause you to give your life away for free.
Step Jump
Image
Shout out to Standard Ace for this screen grab!
Enabling this feature allows you to jump up onto small ledges without over exposing your body. Halo’s physics are very lofty and, normally, when jumping onto a small ledge you’ll have to wait a while before you can land.
With step jump, as long as you're pressed into and facing a ledge that’s about hip level or lower, you’ll only jump as high as you need to.
In all honesty, I think there’s no disadvantage to turning this on. It allows for more precise movement and doesn’t hinder your ability to jump high when you need to.
Zoom Reset Behavior
Image
Zooming in improves your aim, but only at the right time.
This setting is a new addition with Season 4. With a gun like the S7 sniper, that has two zoom levels, it can make a difference to zooming in and out.
Infinite Setting
When you zoom in to the second zoom level and then double weapons switch , or “YY”, to exit scope it will return you to the more powerful zoom level when you reenter zoom.
Legacy Setting
With this setting, instead of, often inconveniently, returning to the last zoom level you were at, this will return you to the base scope zoom level, when YYing.
I recommend, like many other settings, doing what’s comfortable. I enjoy being able to YY out of the long zoom, and return to the regular zoom level.
SENSITIVITY AND ACCELERATION
Image
The controller of Master Chief himself!
Look Acceleration
This setting controls how fast your look speed goes from your base horizontal or vertical speed to the maximum speed.
You can set this from 1 to 5. Note that the maximum turn speed is the same regardless of your settings. This just dictates how far you have to move your stick to hit it.
Horizontal Sensitivity
This controls, on a scale of 1 to 10, how fast your stick movement is. The higher you put it, the closer your base speed is to the max speed.
Vertical Sensitivity
This controls, on a scale of 1 to 10, how fast your stick movement is. The higher you put it, the closer your base speed is to the max speed.
Zoom Sensitivity
There are 6 different zoom levels you can customize, ranging from 1.4x to 10.0x. Zoom sensitivity allows you to customize each one. I recommend playing with this if you feel that your shot on a certain sensitivity is too slow or too fast.
I want to reiterate, in this section specifically, that there is no magic formula to getting good. Sensitivity is something that I, personally, have struggled with quite a bit. It all comes down to figuring out your play style.
If you’re somebody who likes to be able to quickly snap to targets and blast heads off, play higher, but if you’re somebody who prioritizes a steady, anchored shot, then play slower. If you’re somebody in between, just play around.
Try to stick to something so that you can form an educated opinion about which settings you tweak. But, additionally, don’t be afraid to change those same settings if they don’t feel right.
TRIGGER DEAD ZONES
Image
Faulty triggers lose gunfights!
Trigger dead zone settings allows you to customize when your trigger’s input registers. There are inner and outer dead zones for both the left and right trigger.
The inner deadzone will dictate the moment the trigger’s input registers, and the outer dead zone is the area in which the trigger is considered to be held down.
Ideally, your inner dead zone begins the moment you press the trigger down, and the outer deadzone, ideally, is when you can’t push it any further.
This is something that is going to help with those whose controllers have seen better days. If you have issues with gun jamming, charging up plasma pistols, or throwing grenades, it’s a good idea to mess with these dead zones. If not, there’s no need to touch them!
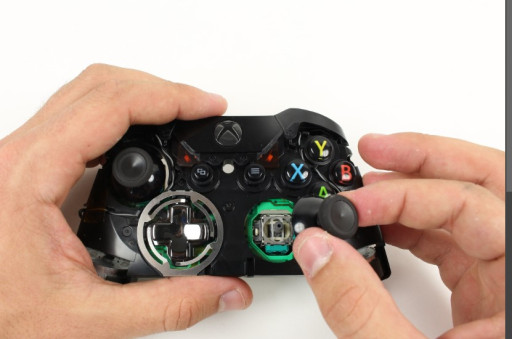
MOVE THUMBSTICK
Image
BE the thumbstick!
Center Dead Zone
Think of this as a tiny circumference under your thumbstick in which no movement is registered. This may be helpful if you are somebody who tends to hamfist your sticks.
If you set this to zero, you’ll move at the slightest touch. If you set this to 15, you’ll need to move your thumbstick much more for movement to register
Additionally, if you’re experiencing drift, this is a tool to help you reduce or remove that.
Max Input Threshold
This is talking about the stick position where the fastest possible movement occurs.
The higher you put this, the faster you get max speed.
For the move thumbstick, a lot of people recommend putting this higher so that your strafe and movement can better match your reaction time. It is, like almost everything on this list, up to your own personal preference.
Axial Deadzone
This, like the center dead zone, will change based on your controller. If you are experiencing drift, you can mess with this to fix that.
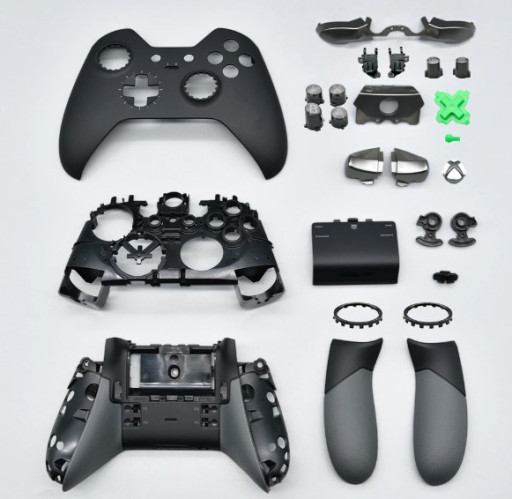
LOOK THUMBSTICK
Image
Nuts and bolts are crucial for the perfect controller build.
Center Dead Zone
Think of this as a tiny circumference under your thumbstick in which no movement is registered. This may be helpful if you are somebody who tends to hamfist your sticks. If you set this to zero, you’ll move at the slightest touch. If you set this to 15, you’ll need to move your thumbstick much more for movement to register
Additionally, if you’re experiencing drift, this is a tool to help you reduce or remove that.
Max Input Threshold
This is talking about the stick position where the fastest movement possible occurs.
The higher you put this, the faster you get max speed.
For the look thumbstick, what you do will depend on your play style. If you are confident in your shot, and want to be able to snap onto targets and 180 in the blink of an eye, turn it up.
If you’re somebody who is less confident in your shot, go ahead and try to play on a lower sense. Much like the move stick, it’s up to you.
Axial Deadzone
This, like the center dead zone, will change based on your controller. If you are experiencing drift, you can mess with this to fix that.
Clearly, there are a lot of settings to go over. If you liked this article, I encourage you to check out some Youtube videos on the subject. There are many knowledgeable creators who make it easy to understand what each setting really does, on a mechanical level.
I have spent a lot of time trying to figure out what sensitivity works the best for me. I feel ok where I’m at now, but I’ve made peace with the idea that that will probably change. The best course of action is to be patient, and try out lots of different settings. You never know what might be perfect for you.