![Warframe Bosses Main Photo [Top 10] Warframe Best Bosses To Kill For Rewards-01](/sites/default/files/styles/responsive_image_600xauto/public/2022-11/top_10_warframe_best_bosses_to_kill_for_rewards-01.jpg.webp?itok=4_Q_g8yQ)
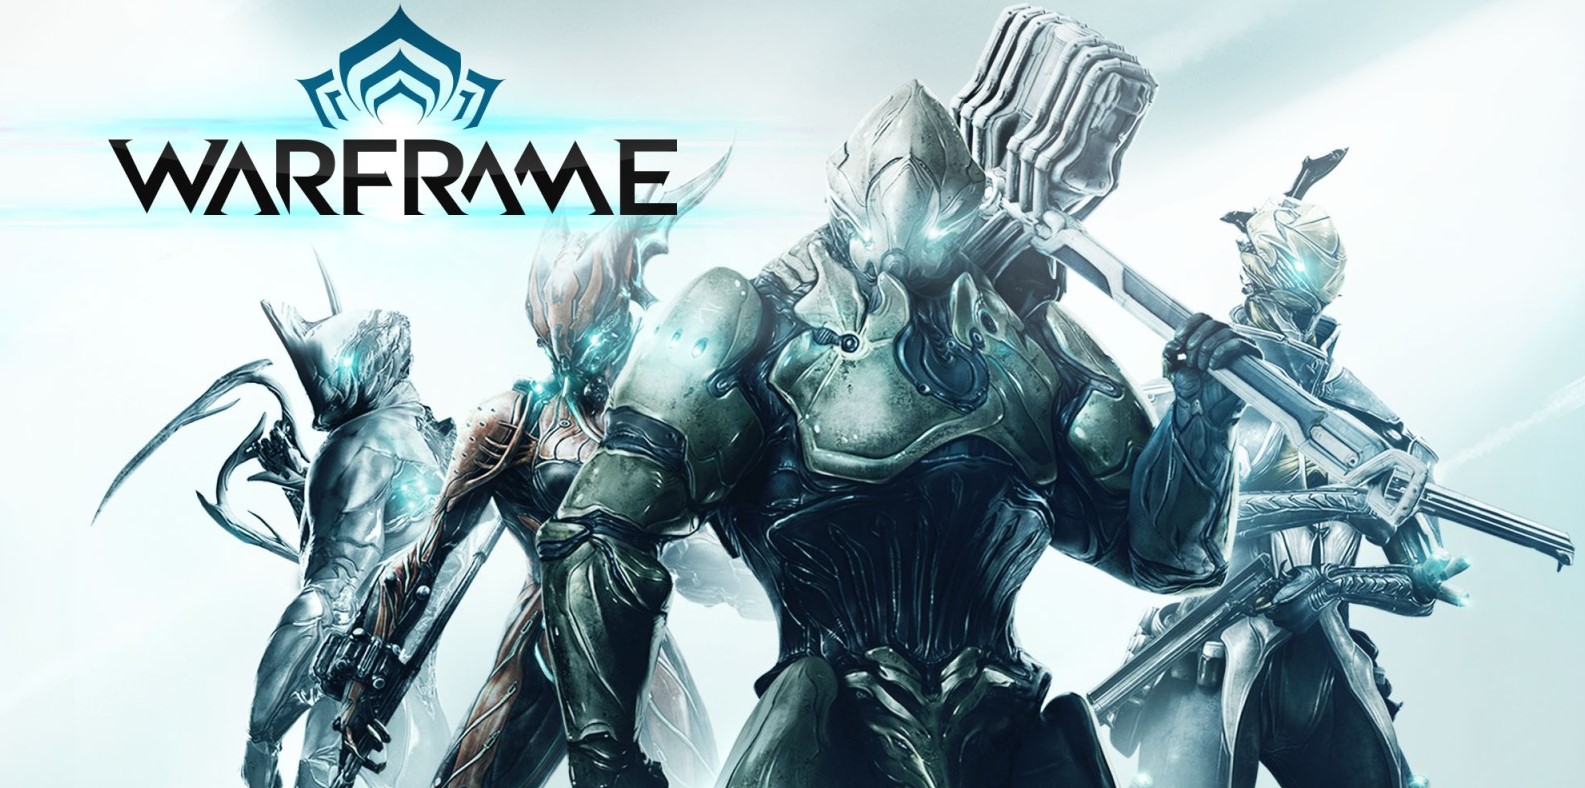
Warframe is a game that has some amazing boss fights. Admittedly it also has some mediocre boss fights, but Digital Extremes (DE, Warframe’s developers) have already reworked some of them. So there’s hope that they rework all of them in the future.
Aside from having fun mechanics, one of the best things about Warframe’s boss fights is their loot. Most of the time they drop Warframes, weapons, mods, and a bunch of other goodies that are exclusive to them. That also gives them some major replay value, which is good because the best boss fights really are great fun.
Here are 10 of Warframe’s best bosses based on the loot and the fight itself. I’ll be ranking these bosses based on when they first appeared in the game. That way it’ll be more useful for newer players who have yet to fight them. This will also help if you’re having trouble beating them ‘cause I’ll tell you how.
I’ll only list the best rewards you get from each boss, most of them drop some basic stuff like common mods and resources. That’s not really the purpose of the boss fights, just a little bonus.
What are your favorite bosses in Warframe? Let me know in the comments!
10. Captain Vor/Corrupted Vor
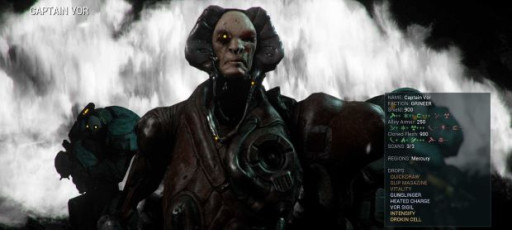
*Insert Vor speech here*
Captain Vor is one of the most significant bosses in the early game. He’s literally the first thing you see as you wake up from cryostasis. He tries to immediately enslave you too so that tends to leave a lasting impression.
Vor is the only boss in the game that you beat on three different occasions (four if you count the little fight you have at the beginning of the game). He’s the boss on Mercury, he teams up with Lieutenant Lech Kril on Ceres to fight you again, and finally, he appears as Corrupted Vor in the Void to exact his revenge on you.
Rewards for killing Captain Vor/Corrupted Vor:
- Seer blueprint (Mercury)
- Cronus blueprint (Mercury)
- Frost blueprints (Ceres)
- Mitter blueprint (Ceres)
- Twin Gremlins blueprint (Ceres)
- Pistol Pestilence (Corrupted Vor)
- Virulent Scourge (Corrupted Vor)
- Toxic Barrage (Corrupted Vor)
- Malignant Force (Corrupted Vor)
Captain Vor/Corrupted Vor behavior and fight mechanics:
- Phase 1: Vor will try to distance himself from you by teleporting away and shooting from afar (he can still fight in melee though). You can use that to your advantage by also using ranged weapons against him. It’s not that hard to chase him down though if you want to use melee.
He will occasionally use his Janus Key to unleash a sustained laser at you, find cover or avoid this with parkour.
- Phase 2: Once Vor loses a third of his life, he will use his Sphere Shield which makes him temporarily invulnerable. He will summon forces but won’t be able to attack in this state. Just fight the reinforcements and wait for his Sphere Shield to go down.
- Phase 3: Phase 2 will repeat once Vor loses two-thirds (⅔) of his life. After that, you can reduce his life to zero and win.
For Captain Vor, He will no longer turn invulnerable after losing a third of his life. Fire at his waist, the part where his upper and lower body should meet but is separated by some swirling Void energy. That is the only part of him that can receive damage.
Best way to kill Captain Vor/Corrupted Vor:
The fight against Captain Vor is pretty straightforward. Concentrate your fire on Vor, as soon as he becomes invulnerable, switch your attention to the surrounding enemies. The fight isn’t really difficult and you should be able to beat him with any Warframe or weapon you want.
His most dangerous attack is the Janus Key laser so if you keep an eye on that and find cover in time, you’ll be just fine.
Captain Vor Boss Fight Guide
As for Corrupted Vor, even though he appears much later in the game, his boss fight is actually even simpler, though he is tougher and stronger. He will have almost all of the same attacks so if you remember how he telegraphs them, simply do what you did in the other fights with him.
Just remember that you can only damage him by firing at his waist.
9. Eidolons
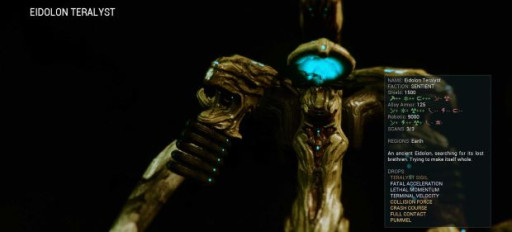
Fighting giant monsters as alien robot ninjas. My inner kid is screaming.
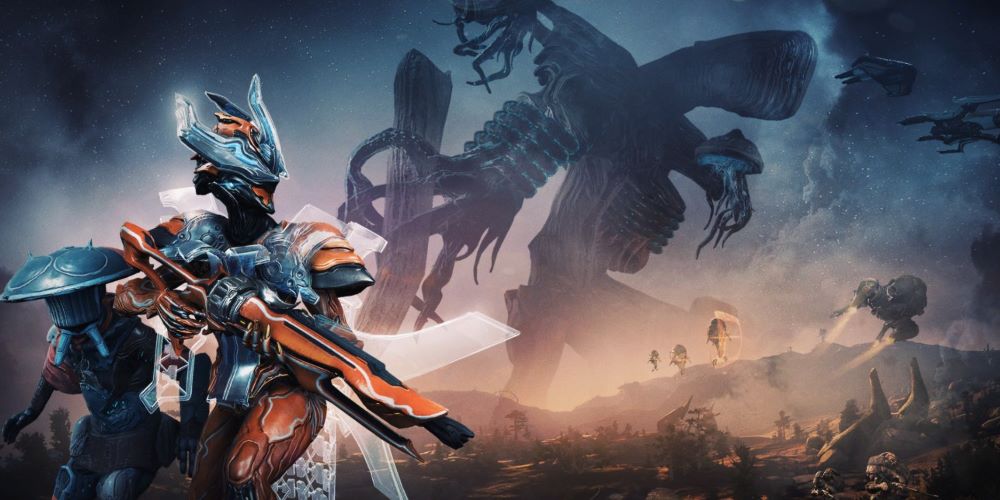
The gigantic monsters that roam the Plains of Eidolon at night are both amazing and frightening. Eidolon hunting is one of the best sources for farming focus for your Tenno’s focus schools. They’re also pretty much the only reliable way to rank up with the Quills and get some nice Amps and Arcanes.
Just a warning though, even though the Eidolons are available incredibly early in the game, you SHOULD NOT fight them until much later in the game. You need to unlock Transference before you can even damage these beasts and you need an Amp to even remotely be effective in this fight. You’ll only be able to talk to the Quills and start getting Amps after Saya’s Vigil and The War Within quests.
Rewards for killing Eidolons:
- Sentient Cores (all types)
- Eidolon Shards (all types)
- Assorted Arcanes
Eidolons behavior and fight mechanics:
- Phase 1: Before facing the Eidolon, go around the Plains of Eidolon and collect Eidolon Lures. Damage them until they become disabled and then hack them to have them follow you (they will regain full health after you hack them).
Depending on which Eidolon you’re currently facing, gather the appropriate number of Eidolon Lures. You need at least two for the Eidolon Teralyst and three each for the Gantulyst and Hydrolyst.
After that, fill up the Lures by letting them absorb three Eidolon Vomvalysts each. You can do this by simply bringing the Lures close to the Vomvalysts. You can also kill the Vomvalysts, they will then transform into a spectral form which you can only kill through your Operator’s Amp. They will then drop a blue orb which you can pick up and bring to your Lures yourself.
This phase is technically not necessary to kill the Eidolon, but it is necessary to capture it which is what you want since capturing it will yield greater rewards.
- Phase 2: Time to start attacking the Eidolon. Traditional attacks won’t damage it, you need to go into Operator mode and attack the Eidolon with your Amp, this is the only way to damage the Eidolon’s shields. You can find the best Amp for Eidolon hunting here.
- Phase 3: Once its shields are down, now you can start using regular weapons to destroy one of the Synovia located in its joints.
The Eidolon Teralyst will have two Synovia on its knees and two on its arms. The Eidolon Gantulyst and Hydrolyst will have two additional Synovia on their backs.
- Phase 4: Once the Eidolon loses a Synovia, it will become temporarily invulnerable and emits an Energy Spike which is five pulses of magnetic energy that will heavily damage you if you don’t avoid it by going away, using your Operator’s Void Mode, or going on a K-Drive (being on a K-Drive causes the attack to miss you entirely).
- Phase 5: The Eidolon will then replenish its shields. Repeat Phases 2-4 until all the Synovia are destroyed. Once the last one is destroyed, instead of emitting an Energy Spike, the Eidolon will call Eidolon Vomvalysts to heal it for 30 seconds. Try and kill as many of the arriving Vomvalysts as you can.
- Phase 6: Right after Phase 5, the Eidolon will get back up and start attacking you again. Only this time, it no longer has shields, you can now damage the Eidolon with regular weapons and no longer have to hit any weak points. Once you beat it, it will either die or get captured if you have enough Eidolon Lures. It will drop tons of loot such as Sentient Cores and Eidolon Shards.
Then, if you want to fight the next Eidolon, go to Gara Toht Lake (check your map) and use the Eidolon Shards you got from the previous Eidolon to summon the next one. All players must do this to summon the next Eidolon.
You will first fight the Eidolon Teralyst, then you can summon the Gantulyst, and after that, the Hydrolyst. Each subsequent Eidolon will get much bigger, stronger, and tougher but the core game mechanics of fighting them remains the same.
Best way to kill Eidolons:
The Eidolons are no joke, unlike some of the other bosses, you really need to properly arrange your loadout to make sure you stand a chance against them.
Only attempt this fight if you already have an Amp.
The best weapon for this battle is the Rubico Prime, this sniper rifle has insane damage potential, and if you mod it for Radiation (the Eidolon’s weakness), you’ll easily be able to take down the Eidolon’s Synovia.
Even though the Eidolon’s attacks are all well-telegraphed, it can be hard to dodge them all due to the chaos of the battle. Try to learn how to dodge each attack.
Check your lures out every now and then to make sure they still have good health. Heal them if you have a healing Warframe. Replace dead Lures before killing the Eidolon.
If you’re new, I advise you to find a squad in the recruit chat to guide you through the process, having a squad is also good so that you have all the roles to make this experience go way smoother. You should have a support player to heal the lures, another support to buff your squad’s damage, and a DPS to quickly dispatch the Eidolon’s shields and joints.
8. Profit-Taker Orb
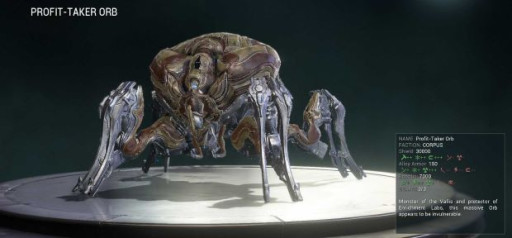
Killing a spider has never been more satisfying
If the Eidolons are the big bosses of the Plains of Eidolon, the Profit-Taker Orb takes the title in the Orb Vallis in Venus. This massive robotic spider is a menace and she’s even accessible at any time of the day too.
Similar to the Eidolons, don’t fight the Profit-Taker Orb yet even though the Profit-Taker Orb can technically be available when you reach Fortuna in Venus. Besides, you have to reach the highest rank with Solaris United (which you also shouldn’t try right away since some of those bounties are way too tough for the weapons and mod you have at the start).
Rewards for killing Profit-Taker Orb:
- Advances, Familial, and Medical Debt-Bonds
- Crisma Toroid
- Charged Bullets
- Contamination Casing
- Large amounts of credits
- Magma Chamber
Profit-Taker Orb behavior and fight mechanics:
- Phase 1: First you have to take down the Profit Taker’s shields. It works the same way as it did in the third bounty, you have to match the Profit Taker’s current weakness which is displayed on its forehead.
If none of your weapons deal that type of damage, you can change her weakness by firing at her with your Operator’s Amp or hitting her with the Paracesis if you have it equipped.
- Phase 2: Once her shields are down, deploy your Archgun and fire at the Profit-Taker’s legs and up to her body.
- Phase 3: Once you reduce 25% of her health, the Profit-Taker will release four pylons which makes her invulnerable. The pylons must be destroyed to proceed. Each pylon will be protected by a bubble that protects them from gunfire. You can pass through the bubble though and start shooting or using your melee on it (sort of like how a nullifier bubble works).
- Phase 4: Once the pylons are down, use your Archgun to once again wilt down her lifebar.
- Phase 5: After she’s down to only 50% health, she will recover all of her shields and you’d have to repeat Phases 1-4. Only this time, she will release six pylons instead of four once she only has 25% health.
- Phase 6: Once that next set of pylons has been dealt with, the Profit-Taker will replenish her shields one last time. You will be given a five-minute timer to take down the shields and the remainder of her life. Should you fail to kill her within that time frame, she will turn invulnerable and your mission will fail.
After you’ve killed her, she will drop her loot of Crisma Toroid and a bunch of Debt-Bonds. Quickly collect them all and rush back to Fortuna or go as far away as possible because the Profit-Taker will self-destruct and kill all Tenno and her loot within 300 meters.
Best way to kill Profit-Taker Orb
Before deciding to take on the Profit-Taker Orb, make sure you have an Amp and an Archgun with a Gravimag equipped, otherwise, you won’t be winning this battle.
Because of Phase 1, try and have all your weapons deal different types of physical and elemental damages to cover up as many weaknesses as possible.
If your Archgun is still on cooldown, try looking for Terra Manker enemies which will spawn around the area. Killing them guarantees a Heavy Weapon Ammo drop which will instantly reset the Archgun cooldown timer.
Like with Eidolons, have a squad prepared if you’re new to this boss fight. Try to have members on your team that will concentrate on DPS and have others that concentrate on support.
Protea is an amazing support Warframe for this because her Dispensary will allow you to constantly replenish your Archgun’s ammo. Keep note though that Dispensary will not remove the Archgun’s cooldown timer, it will just replenish your ammo if you haven’t run out yet.
7. Jackal
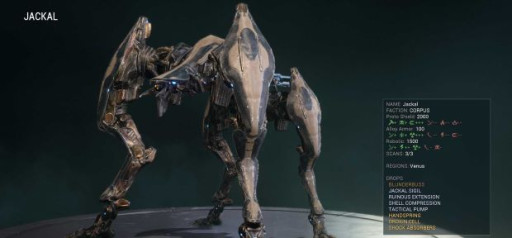
Your first real challenge
The Jackal is one of the first bosses you'll encounter in the game. Located in Venus, you’ll have to get through this mechanical monster to get to Mercury and progress through the game.
The Jackal is on the bleeding edge of Corpus technology. Able to fire machine guns and grenades, generate electric fields, and shake the ground itself. You’ll have a tough time facing it since there hasn’t really been a fight this complicated since the beginning of the game.
Rewards for killing Jackal:
- Rhino blueprints
- Stahlta blueprint
- Stropha blueprint
Jackal behavior and fight mechanics:
- Phase 1: At the start of the fight, the Jackal will fight you using mounted machine gun turrets and grenade clusters. Simply avoid these attacks whenever you can and aim your fire at one of the Jackal’s legs.
- Phase 2: Once you destroy a leg, the Jackal will generate a grid wall in an X pattern, with the Jackal at the center. The wall will spin around and turn from blue to red, when it’s blue, it’s safe to touch, when it’s red, you will be damaged if you hit it.
Either run around them, bullet jump over them, or find cover behind the giant pillars in the room. Note that the grid wall will destroy the pillars after a couple of hits.
Once the grid wall attack is finished, approach the now incapacitated Jackal and press the prompt to stab it with your Parazon.
- Phase 3: The Jackal will move to another room with you in pursuit in a cutscene, it’s pretty much an identical room with new pillars for you to hide behind. Phase 1 and Phase 2 will repeat 3 times with the Jackal getting more aggressive each time. Once you’ve stabbed it with the Parazon 4 times, the Jackal will die.
Best way to kill Jackal:
The Jackal pretty much forces you to master the basics. Learn the traversal moves like bullet jumping, aim gliding, and double jumping to dodge the Jackal’s attacks.
I advise just running around the grid wall instead of hiding or trying to jump over it. Get as close to the center of the grid wall as possible so you can easily go with its spin. The grid wall will occasionally switch rotations after the first time you stab the Jackal with a Parazon so keep that in mind.
6. Stalker/Shadow Stalker
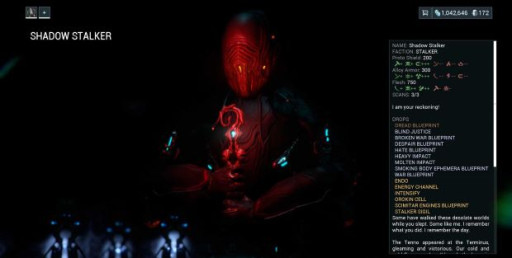
The hunter becomes the hunted
For a new player, that sudden blinking of lights indicating the Stalker is coming can be a nightmare. The fact that this shadowy figure can just suddenly hijack your game and seek retribution can be unsettling for newcomers. That and the fact that he seems to just one-hit you in the beginning.
The Stalker is possibly the most constant threat to the Tenno, he was there at the beginning, and as of the latest update, he’s still out there… watching… waiting.
His loadout is pretty cool too, the chance to get their blueprints whenever you beat him just makes fighting him all the more exciting.
Rewards for killing Stalker/Shadow Stalker:
- Broken War blueprint (Shadow Stalker Only)
- Despair blueprint
- Dread blueprint
- Hate blueprint
- War blueprint (Shadow Stalker Only)
- Scimitar Engines blueprint
Stalker/Shadow Stalker behavior and fight mechanics:
Note: Before you can even fight the Stalker, you must first be marked for death. You get marked for death by killing other bosses in Assassination missions. You will then receive a message from the Stalker, indicating you are now marked. You can check if you’re already marked by going to your profile screen, it’ll tell you on the right side of the UI whether or not you’re marked by the Stalker.
The Stalker mark stacks, so if you kill three different bosses, you will be marked three times and you have to face the Stalker three times before all your marks disappear. However, there is currently no way to determine how many marks you have at the moment.
When you’re marked, the Stalker has a chance of spawning within the first five minutes of almost any regular mission. This chance increases based on the number of marked players currently in the squad.
- Phase 1: The lights will suddenly start flickering on and off. The Stalker will start taunting the player who he is coming after. If that player is you, try and warn your teammates that he’s coming because they won’t see those taunts.
After a short while, the Stalker will spawn near the targeted player. He will spawn kneeling and will be invulnerable for a couple of seconds.
- Phase 2: He will then lose his invulnerability and start attacking the targeted player. The fight itself is simple, just keep attacking the Stalker and avoiding his attacks, there’s no specific weak point you have to aim for to beat him.
- Phase 3: Once his health drops to 10%, he will attempt to run away and will despawn soon. Whether or not you manage to kill him before he escapes, it will be considered a victory and he may drop some loot based on his loot table.
Note that if he manages to kill his target even just once, the Stalker will escape and won’t drop anything.
Best way to kill Stalker/Shadow Stalker:
To be honest, before you unlock Operator Mode, just try and avoid fighting the Stalker altogether. Though, he will try to chase you down so if you want to try fighting, go ahead, he will despawn after he kills you once.
If you’re the target, try and let your teammates do most of the heavy lifting because if you die, the fight is over.
Once you have Operator mode, just go out and start blasting him with your Amp, any Amp will do, then watch his life bar drop. This is the best way to fight the Stalker for beginners.
Once you’ve reached a certain point in the game where you have decent weapons and mods, fighting the Stalker will become a cinch even without your Operator.
5. Ropalolyst

Knock down this flying sentient out of Jupiter’s skies
The Ropalolyst is a huge flying Sentient boss enemy sent by the Sentients to make sure Alad V stays loyal to them. The Roplolyst fight is one of the most unique and fun fights in the game, requiring you to do multiple things aside from just the typical “shoot at it until it dies”.
This boss fight is how you get Wisp, a fantastic support Warframe. It’s also the main source of Amalgam mods, special mods that have a bonus effect apart from their main effect.
Rewards for killing Ropalolyst:
- Wisp blueprints
- Amalgam mods
Ropalolyst behavior and fight mechanics:
- Phase 1: As the battle starts, you will see that you start at a central platform with a terminal in the corner and that there are three other platforms with huge towers in the distance that surround the central platform.
Go to one of those platforms using the wires leading to them. The Ropalolyst will attempt to knock you off the wires by sending an Electric Stream through them, switch to a safe wire, or else the Electric Stream will knock you off the wire and if you fall down, you will spawn back to the central platform.
Once at a tower, the Ropalolyst will fire a continuous laser at you; lure the laser to the tower so that the Ropalolyst destroys it.
- Phase 2: Once the tower is down, switch to Operator mode and fire at the Ropalolyst with your Amp, similar to the Eidolons, this is the only way to get rid of its shields.
- Phase 3: After its shields are depleted, go back to your Warframe and jump up to the Ropalolyst, you can now ride on its back by interacting with it. Once on its back, you can now steer it. Aim it towards the broken tower and ram the Ropalolyst into it. This will shock the Ropalolyst and send it back to the central platform
Note that you only have limited time to ram the Ropalolyst into the tower, if you take too long the Ropalolyst will shake you off its back and replenish its shields.
- Phase 4: The two Ropalolyst Synovia on its hind legs are now vulnerable (similar to the Eidolons). It will attack you with missiles and occasionally grab you, damaging and rendering you immobile for a while. It will also call in Amalgam reinforcements.
Destroy one of the Synovia. Doing so will stun the Ropalolyst and you have 3 seconds to interact with the console in the corner of the central platform. This will trigger a huge laser to fire at the central platform and injure the Ropalolyst.
Failure to trigger the laser within 3 seconds will cause the destroyed Synovia to regenerate.
- Phase 5: Repeat Phases 1-4. Upon the destruction of the third tower, the Ropalolyst’s whole body will now be vulnerable to attack. Reduce its health to zero and activate the laser one last time to finish it off.
The central platform will slowly collapse each time you injure the Ropalolyst with the laser, making it smaller and harder to fight on.
On the destruction of the third tower, the Ropalyst will call Battalysts and Conculysts instead of Amalgams so get your Amp ready.
Best way to kill Ropalolyst:
The Ropalolyst fight can get complicated and chaotic really quick, so you should remember all the steps so you don’t get lost and panic.
If you’re going with a squad, which you should if it’s your first time, have one of your members constantly stand close to the console when destroying the Synovia. The three-second window to activate it is really easy to miss.
The Amalgam and Sentient reinforcements will be few and far in between, so kill them as soon as they arrive so that you have one less thing to worry about.
4. Kuva Liches
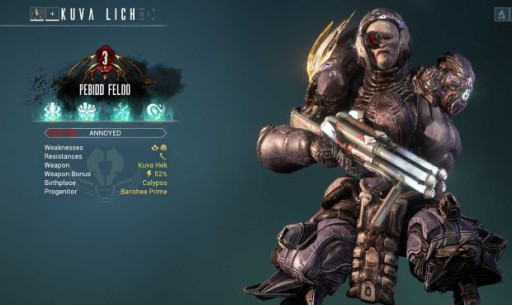
Assassins personally tailored for you, how sweet
Kuva Liches are fascinating enemies in the Warframe universe. They’re personally assigned assassins that have randomly generated names and randomized properties such as weaknesses, weapons, ephemera, and sometimes even personalities. I had a Kuva Lich that had a fear of children, dunno why they sent him to fight the Tenno.
This makes each Lich you fight unique, giving them massive replayability. Once you’ve beaten them, you can choose to either vanquish or convert them. Vanquishing them will kill them and grant you their Kuva weapon and Ephemera if they had one.
Rewards for killing Kuva Liches:
- Any of the Kuva weapons
- Ephemera (if they have one)
- You could spare them and have them join you
Kuva Liches behavior and fight mechanics:
Note: This is just for the boss battle level itself, you would have to do murmurs and get the right order of Requiem mods before you get to this point.
All final Kuva Lich confrontations will take place in a Railjack node.
- Phase 1: The mission starts out as a normal Railjack mission. Complete your objectives before boarding the main enemy ship and confronting the Kuva Liches. The number of Kuva Liches you face will depend on the number of squadmates you have, so if you have all four, you will face each player’s Lich one at a time.
- Phase 2: This fight is actually a lot simpler than the previous Kuva Lich encounters. You no longer need Requiem mods to beat them. Just make their life reach zero and if it’s your Lich, interact with them (you can’t interact with a defeated Lich if it’s not yours). You will be given a choice to either convert or vanquish them.
Best way to kill Kuva Liches:
Pick your best weapons and mod them to match the Kuva Lich’s elemental weaknesses.
It’s up to you but I personally start guessing the Requiem mod order once I reveal the second Requiem mod. By the time I reveal the third mod, chances are that I already know the order. It’s even better if you already have an Oull requiem mod which can take the place of any other requiem mod. If you get lucky, you’ll be able to beat your Lich before you even discover the third mod.
If you’re having trouble surviving the murmur missions, use Rhino. Try to keep Iron Skin constantly active and use Roar to buff your damage whenever you’re having trouble killing something. He’s also readily available since he’s most likely the second Warframe you get.
3. Sisters Of Parvos
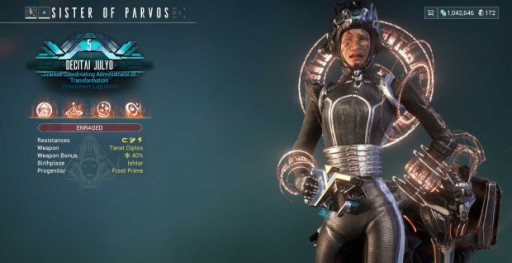
Kill your sister and grab her toys… I’m on a watchlist now. The things I do for your entertainment
The Sisters of Parvos is essentially just the Corpus equivalent of the Grineer Kuva Liches. They function almost exactly the same. The main differences are these:
The murmur and confrontation missions are now against the Corpus
The Sisters give you hounds apart from the Tenet weapons
They will steal large amounts of your credits if you play on their nodes instead of stealing just a small bit of various things which is what the Kuva Liches do.
Their murmur progress bar fills up faster than Kuva Liches so you need to kill fewer hounds than you do thralls. The hounds are relatively stronger and harder to kill though.
Other than that, they still have randomized names and other properties. They now even have some randomized titles which can get pretty ridiculous.
Rewards for killing Sisters Of Parvos:
- Any of the ranged Tenet Weapons
- A whole hound and hound parts
- Ephemera (if they have one)
- You could spare them and have them join you
Sisters Of Parvos behavior and fight mechanics:
Note: This is just for the boss battle level itself, you would have to do murmurs and get the right order of Requiem mods before you get to this point.
- Phase 1: The mission starts out as a normal Railjack mission. Complete your objectives before boarding the main enemy ship and confronting the Sisters of Parvos. The number of Sisters of Parvos you face will depend on the number of squadmates you have, so if you have all four, you will face each player’s Lich one at a time.
- Phase 2: This fight is actually a lot simpler than the previous Sisters of Parvos encounters. You no longer need Requiem mods to beat them. Just make their life reach zero and if it’s your Sister, interact with them (you can’t interact with a defeated Sister if it’s not yours). You will be given a choice to either convert or vanquish them.
Best way to kill Sisters Of Parvos:
As I said, they're the same as the Kuva Liches. Exploit their given weaknesses. Time your Requiem mod guessing right, and use Rhino if you’re struggling with the murmur missions.
2. Stalker Acolytes
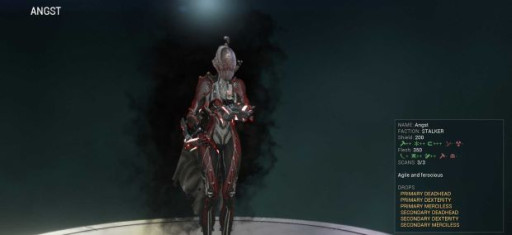
Nothing more terrifying than the Stalker’s angsty teenagers
Angst, Malice, Mania, Misery, Torment, and Violence. Like some sort of dark Power Rangers, the Stalker’s Underlings roam the Steel Path, ready to stop any Tenno who dares take on the challenge.
These guys are a reliable source of Rare Arcanes and Steel Essence which you can use to get a bunch of goodies from Teshin in any of the Tenno relays.
Rewards for killing Stalker Acolytes:
- Rare Arcanes
- Steel Essence
Stalker Acolytes behavior and fight mechanics:
- Phase 1: Acolytes will spawn in any non-Archwing and non-Assassination Steel Path missions. They spawn every 3-8 minutes and which Acolyte will spawn is completely random. Each Acolyte has a unique set of weapons but other than that, they pretty much work like any other normal enemy. Shoot or hit them hard enough and they will fall.
Best way to kill Stalker Acolytes
The Acolytes are all incredibly tough and powerful but that’s all they have going for them. There’s no special mechanic or hidden weak spot, just bring your best weapons and Warframes and fight for your life.
1. Ballas

For the Lotus
Ballas is the “final boss” of Warframe (at least until the next one comes along). The entirety of the game has led to the battle of the Tenno against the deranged Orokin-turned-Sentient hybrid. I can’t really say too much about him without spoiling a whole lot of the game’s plot, so long story short, he’s the bad guy, you’re the good guy. You know what to do.
Beating him will allow you to clear The New War quest and will reward you with the weapons and other things that you unlock throughout the quest.
Rewards for killing Ballas (The New War Rewards):
- Nataruk
- Rumblejack
- Sirocco
- Unlock the Drifter
Ballas behavior and fight mechanics:
- Phase 1: The fight will start with Ballas protected by an impenetrable shield. The Lotus will attack you with a continuous stream of Void energy that knocks the Tenno out of the Warframe when hit. Don’t go back into your Warframe because you actually need the Tenno for this first part.
Use the Tenno to deflect the Lotus’ Void beam and have it attack one of the red spheres floating around the arena. After this, Ballas will summon enemies. Defeat them and repeat this process until you destroy all the spheres.
- Phase 2: The Lotus will regain control and fire the Void beam at Ballas and then collapse, beginning the second Phase. The red spheres will reappear around the arena. Ballas will then fire lasers at the ground which will go up to you (think Devil Jin lasers from Tekken). Stand in front of one of the spheres to bait Ballas into destroying them.
Once a sphere is destroyed, Ballas’ barrier will go down, allowing you to damage him until one of his life bars goes down. Do it quickly though because he will fire a laser at the Lotus which will kill her if you’re too slow.
- Phase 3: After that, Ballas’ barrier will reappear and he will fire a continuous laser that will chase you. Just run around and dodge the laser, it will stop after a while. Ballas will once again fire the laser from the ground up, allowing you to make him destroy another sphere and damage him again. Do that until only one more life bar remains.
Then, just make him destroy one more sphere, and a scripted event and cutscenes will happen until you win.
Best way to kill Ballas:
Unlike the other boss fights in this list, this epic showdown is part of the main quest so difficulty-wise, they didn’t make it too hard since it’s only playable solo. It won’t really matter what Warframe, weapon, or Amp you bring, just learn and remember the mechanics of the fight well.
Staying in Operator Mode will continuously drain your life, so try and time your Transference right.
You May Also Be Interested In:
- Warframe: Best Warframes, Ranked Weakest To Strongest (Warframe Tier List)
- Top 10 Warframe Best Primary Weapons (And How to Get Them)
- [Top 5] Warframe Best Arch-guns And How To Get Them
- [Top 5] Warframe Best Melee Weapons And How To Get Them
- [Top 5] Warframe Best Kuva Weapons And How To Get Them
- [Top 11] Warframe Best Weapons And How To Get Them

