[Top 10] Satisfactory Best Blueprints
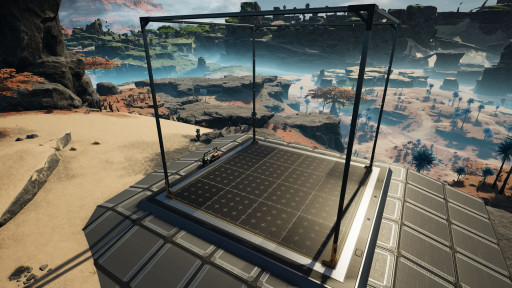
Once you hit Tier 4, you’ll get access to the Blueprint Designer, a specialty build you can use to create Blueprints. These are designs you’ve made yourself that you can repeatedly build anywhere as long as you have the materials.
Satisfactory is a game about efficiency, and being able to build a simple module yourself that you can repeat throughout your factories is only going to aid in that goal. There are an infinite number of things you could make on your Blueprint Designer, so it’s helpful to get some inspiration here and there.
10. 5-Way Splitter
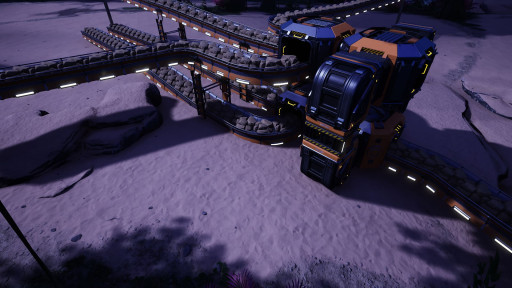
The age-old problem that’s plagued so many Satisfactory players is the 5-Way Split. Splitters, alone, can only split items in 2 or 3 directions, so dividing that into 5 ways is challenging. This design will split your conveyor 5 ways in a simple, compact way.
This is a necessary Blueprint for Satisfactory players at any stage in the game. It’s really easy to put together and it solves so many problems later. I can’t tell you how many times I’ve encountered this issue and having this Blueprint has saved me a lot of headaches.
To build this design, you have the main conveyor belt pass through a merger and into a splitter. That splitter is then broken into 2 other splitters. Both of these splitters use all 3 of their outputs, but one of those 6 is wired back into the initial merger, so the splitters even out in 5 ways.
Reasons to Make a 5-Way Splitter Blueprint:
- Necessary for any player, you will need it at some point
- Useful in other Blueprints on this list
- Compact enough to fit in any factory
9. Screw Crafter
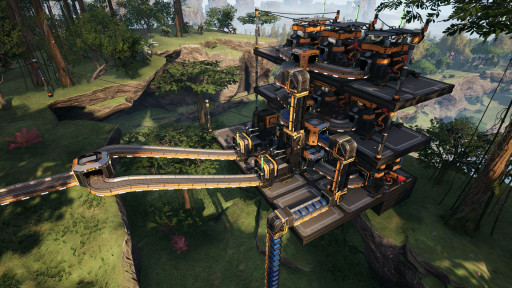
As you progress through Satisfactory, you don’t want to worry about screw production. The simplest solution would be to create one standard screw crafting module to speed up the process.
It’s easy to build this design of a Screw Crafter and it’s fully fed by one Mk1 Iron Miner. It takes 60 iron/minute and pumps out 240 screws/minute. If you want to overclock or upgrade your iron miner you can build even more of these screw-making modules. If you want to use more iron elsewhere, you can also just build half a module and still be functioning at peak screw efficiency.
To build my design, all it takes are 2 smelters, 10 constructors (4 for iron bars and 6 for screws), and enough mergers, splitters, and conveyors to hook everything together. It’s a really simple system for a high screw yield.
Reasons to Make a Screw Crafter Blueprint:
- Really simple and perfectly efficient
- Can be made almost immediately
- Can run with just a Mk1 Miner
8. Bulk Steel Maker
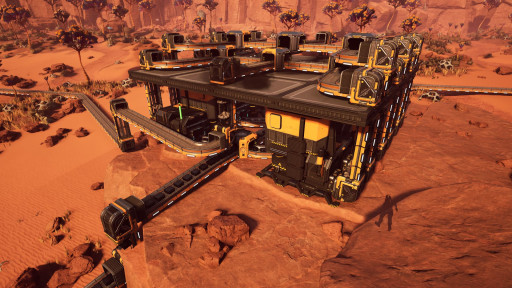
In Satisfactory, Steel can quickly become your best friend and worst nightmare. You need it for pretty much anything in the middle-to-late game, so you may often find yourself falling short with your current production.
This design produces a huge amount of Steel per minute and is perfect for anyone in the late game who needs a quick and effective fix to their Steel shortage. It’s simple, compact, and productive. It even has room to improve if you want to start getting modular with your Blueprints to add more smelters.
This Blueprint uses 240 iron ore and 240 coal per minute and produces 240 Steel Ingots per minute. Its simple 2 floor design uses a layer of sorting and a layer of production. All 8 of its foundries are underclocked to 80% to keep up with default pure Mk2 or normal Mk3 miners.
Reasons to Make a Bulk Steel Maker Blueprint:
- Compact enough for any factory
- Produces a large amount of Steel Ingots
- Can be improved further if necessary
7. Quickwire Master
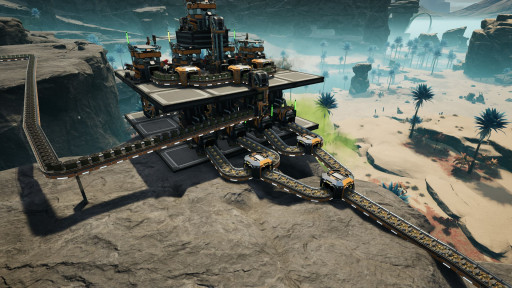
Quickwire is quick and easy to produce, so people tend to expect they always have more of it than they actually do. Rather than get caught in this classic mistake, you need to be prepared for times you may need to increase your Quickwire production. This is why you need a simple Quickwire Blueprint.
This Quickwire maker design uses a Mk2 Miner (or any other way of getting 120 caterium ore per minute) and produces 300 Quickwire. All it takes is 4 smelters and 5 constructors. This should have you set on Quickwire for a while.
In the back of this design I use a 5-Way Splitter, so make sure you have one of those designs from earlier saved. You can also get the 120 caterium ore in multiple ways. You can use a normal caterium node with a Mk2 Miner, or you could overclock/underclock a different tier of Miner.
Reasons to Make a Quickwire Master Blueprint:
- You won’t run out of Quickwire in the later game
- Can use an overclocked Mk1 Miner
- Multiple can be built on a Mk3 Miner
6. Stun Rebar Armorer
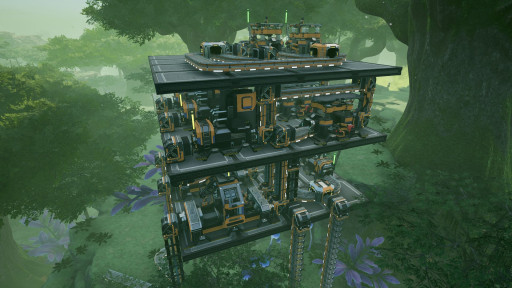
We’ve all had it happen: all you want to do is set up a new factory location and suddenly you’re attacked by a plasma spitter. Dealing with enemies in Satisfactory can be a pain, so you’ll want a quick and easy way to arm up anywhere you go. This machine will take a small input of both iron and caterium ore and automatically make it into Stun Rebar.
Stun rebar is one of the simpler kinds of ammunition in Satisfactory, but it’s really effective. Whether you want to troll your friends in online games or knock your enemy problem down a peg, Stun Rebar is going to be one of the cheapest ways to do it.
In this design, you can input just 60 iron ore and 45 caterium ore per minute for an output of 30 Stun Rebar. It may not sound like a lot, but if you’ve ever used a rebar gun you’ll know that it’s more than enough. Plus, if you have at least Mk2 Miners, you can set up multiple of these.
Reasons to Make a Stun Rebar Armorer Blueprint:
- Just one gives you more than enough Stun Rebar
- Stun Rebar is much more useful than regular rebar
- Multiple can be placed on higher level miners
5. Copper All-In-One
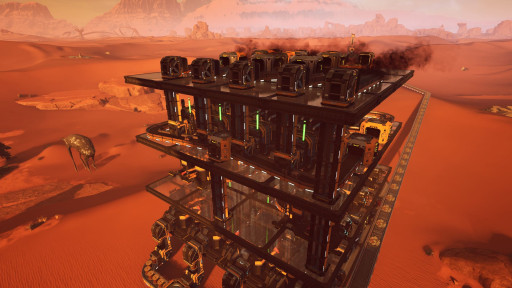
Running out of copper products is something all Satisfactory players dread. It would be nice to have something that can make a large amount of both copper sheets and wire that more advanced players can throw down quickly in order to spend time on other, more complicated projects.
The Copper All-In-One produces a large enough amount of copper product to let you worry about other things. I recommend it to players at any level, as it really helps in an emergency.
This design uses 240 copper ore to produce 240 Wire and 60 Copper Sheets per minute. All it takes is 8 smelters and 10 constructors split over 4 floors to make the perfect copper module for any factory.
Reasons to Make a Copper All-In-One Blueprint:
- Produces a lot of Sheets and Wire
- Solves common copper shortages
- Perfectly efficient and self-contained
4. Quick Base
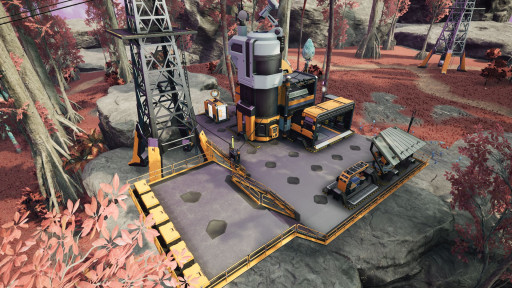
When entering a new area of the map to set up more factories, you’ll want to have a simple base design you can immediately deploy to have a start on resource gathering.
Anytime you go somewhere new, you’ll need to have your basic crafting, storing, and sinking capabilities with you. This is why you should make a Quick Base Blueprint: a small central catwalk platform with opportunities for further catwalk building and anything you need to start industrializing an area.
This Quick Base design includes an Awesome Sink, Awesome Shop, MAM, Equipment Workshop, Crafting Bench, and 6 Storage Crates. It also has a few spots for extending the catwalks out into more factory and enough room for a Power Tower to fit on the Blueprint Designer.
Reasons to Make a Quick Base Blueprint:
- Useful at any point in the game
- Fully customizable to your personal base preference
- Has everything you need for a quick start in a new place
3. Encased Industrial Beam Production
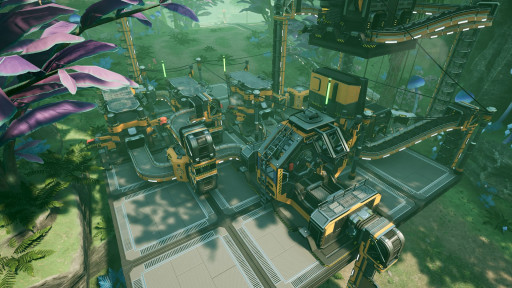
Encased Industrial Beams are notoriously difficult to set up manufacturing for. They eat a lot of resources and produce very little in return, so you’ll want a simple, cookie cutter design that can be deployed anywhere on the map for a quick start to new Beam production.
A design at this level isn’t going to produce a massive amount, but with the power of higher-level miners and overclocking you can set up a few of these per miner. Encased Industrial Beams are absolutely necessary for Space Elevator materials and are the key component in Mk4 conveyor belts, so you’ll need to make as many of them as you can.
This design takes in 90 iron ore, 90 coal, and 90 limestone per minute and turns all of it into just 6 Encased Industrial Beams. They’re difficult and expensive to make, but you have to craft Encased Industrial Beams, so building a simple design like this using just 2 foundries and 2 constructors leading into 1 assembler gives you a simple, repeatable machine that you’ll be using for the rest of your playthrough.
Reasons to Make an Encased Industrial Beam Production Blueprint:
- Its product is absolutely necessary for progression
- It simplifies the overly-complicated EIB making process
- Multiple can be set up on higher level miners
2. Hypertube Station
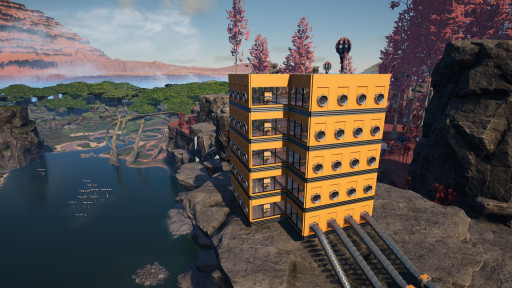
Something not everyone thinks about when creating their factories is building a hypertube station. As your resource gathering spreads across the map, you’ll need a quick way to get from place to place.
Hypertubes are a useful mode of transport because of how cheap they are to set up. They also move you really quickly. A good way to make use of them is a central station, so creating a single-floor module you can use each time you need more exits is always helpful.
This module design uses 16 Hypertube exits per floor and can be built up infinitely depending on how many you need. This may not be necessary for placing around your entire map, but one central station with modular pieces is simple and efficient.
Reasons to Make a Hypertube Station Blueprint:
- Makes travel infrastructure more compact
- Simplifies Hypertube building
- Completely customizable in both look and size of floor
1. Mass Storage
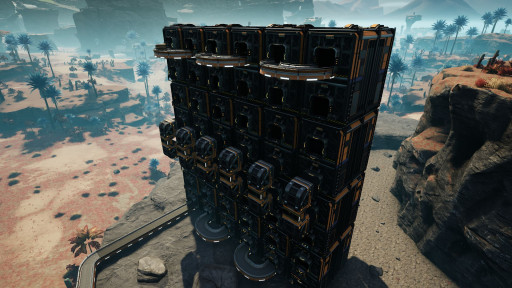
You’ll always want to have quick access to your stored items, and you shouldn’t have to spend time running from one side of your base to the other for each build component. You also shouldn’t have to go the whole way into the sky just to get some basic materials. This is why you need a clean, modular storage system.
You can connect several storage containers together with conveyor belts and lifts to create a uniform storage module. In my design, you can store more than 700 stacks of items, and you can design this to have multiple layers, possibly doubling the storable amount. The items are added to the system at the bottom and end up at the bottom on the other side, allowing for quick access.
Creating a storage Blueprint will save you a lot of time in the future placing conveyor belts, and it ensures that every time you build storage all of the parts will be in the right place. It also encourages you to use symmetry in your factories, as it makes more sense to build the storage areas of your factories in the same way each time, feeding into the industrial aesthetic.
Reasons to Make a Mass Storage Blueprint:
- Can store up to 1536 stacks of items
- Mitigates future possibility of placing conveyor belts wrong (a common issue)
- Slim enough to slot into any factory design
- Can be made with both the regular and industrial storage containers

