![Warframe Index Weapons Main Photo [Top 10] Warframe Best Index Weapons Ranked (And How To Get Them)-01](/sites/default/files/styles/responsive_image_600xauto/public/2022-11/top_10_warframe_best_index_weapons_ranked_and_how_to_get_them-01.jpg.webp?itok=emjhEPst)
The Index is one of the oldest and yet most effective ways of farming for credits in Warframe. I’d say it’s certainly the most consistent one and the one that most players do so you’ll almost always find a team to help you through it.
When it comes to this game mode, players often discuss Warframe selection more often than they do weapon selection. Admittedly, bringing the right Warframe is more important than bringing the right weapon into the Index. But don’t let that fool you, bringing the right loadout is still a game changer and will help you fill your pockets up faster.
Time is money, so I’ll cut the chatter and get right into it. Here are the best weapons to help you dominate the Index and its Brokers:
10. Vectis Prime

Don’t fire until you see the dollar signs in their eyes
You’ll notice that most of the weapons on this list will be weapons that fire one at a time but deal massive damage per shot. And it doesn’t get any more one-at-a-time-y than a powerful, single-shot sniper rifle.
The reason why these types of weapons are great in the Index is that the Brokers tend to move erratically. It’s even worse when you join a squad with high ping. It's hard to spray the enemy with bullets when they’re zipping around you quickly. It’s better to land a single, sure shot and take them down instantly.
For a sniper rifle like the Vectis Prime, it’s best used by the defenders. Warframes that can stun, slow, or lock enemies in place. That way you can properly aim for the head and take them down in a single pull of the trigger.
What the Vectis Prime excels at:
- Downing immobile enemies:
As mentioned earlier, the Brokers can be pretty tough-to-hit targets. So if you bring a Warframe (or work with one) that can slow or stop enemies, you’ll be able to quickly knock them out.
- Headshots:
Since it only fires once before reloading, make sure to make each shot count, aim for the head to get the bonus headshot damage, and maximize your damage output. Also, note that using the Vectis Prime’s zoom further increases the headshot damage you deal with it.
- Reloads:
Despite having only 1 bullet in its magazine, it has a reload speed of 0.85 seconds. That’s the fastest among all sniper rifles, allowing you to fire consistently.
Vectis Prime Stats (unzoomed):
- Critical Chance: 30%
- Critical Multiplier: 2x
- Fire Rate: 2.67
- Status Chance: 30%
- Total Base Damage: 350 (45% puncture)
How to get the Vectis Prime:
Like most Primed weapons, the Vectis Prime’s blueprints and parts are obtainable by cracking Void Relics or trading them with other players. A list of the Void Relics containing this weapon’s blueprints and parts can be found on the “Vectis Prime Wiki” link above.
9. Opticor Vandal

A laser cannon for precise financial takeovers
Compared to the regular Opticor, the Vandal variant features better critical chance, critical multiplier, status chance, fire rate, magazine size, and reload time. It may have a lower base damage, but all the other upgrades make it all worth it.
Use this massive, Corpus-made laser cannon against themselves as you bore huge holes into their pockets… among other things.
What the Opticor Vandal excels at:
- Puncturing armor:
You’ll notice that the Corpus Brokers in the Index all have alloy armor, and puncture damage works great against armor. Further increasing this with damage mods will make the Index much easier for you.
- Maximizing Condition Overload:
You can choose to use the Opticor Vandal’s 30% status chance to trigger several status effects before using your melee equipped with Condition Overload to finish them off.
- Radioactive AoE:
Another great damage type against armor is radiation. Be sure to mod this weapon with radiation damage, that way you could quickly take down the Index’s Brokers. The radiation damage will also apply itself to the Opticor Vandal’s AoE, making even your missed shots deadly.
Alternatively, you could aim for the ground beneath their feet for assured damage.
Opticor Vandal Stats (for a charged shot, not counting AoE):
- Critical Chance: 24%
- Critical Multiplier: 2.6x
- Fire Rate: 2
- Status Chance: 30%
- Total Base Damage: 400 (70% puncture)
How to get the Opticor Vandal:
You get the Opticor Vandal by sealing Thermia Fractures in the recurring event on Orb Vallis on Venus. Once you reach a hundred points, you will receive it as an award. It will come with a free weapons slot and is already equipped with an Orokin Catalyst.
8. Tenet Arca Plasmor

These shots bounce faster than a Corpus debtor’s checks
The Tenet version of the Arca Plasmor features better base damage, critical multiplier, and status chance than its base counterpart.
Another bonus that the Tenet Arca Plasmor has over the normal Arca Plasmor is that its blasts now ricochet off of bodies and surfaces. Allowing you to deal even further damage to enemies that survive your initial blast. Though, due to its innate punch through, bouncing the shots off of bodies can be tricky so you’re better off intentionally making them bounce off of surfaces.
But perhaps the best asset this weapon brings to the Index is that its base damage is purely radiation damage. Radiation damage is the most effective damage type against alloy armor, it has a +75% bonus damage against them. This’ll melt the Index’s Brokers in no time!
All Tenet weapons raise their max rank every time you apply a Forma, capping at rank 40. It will also have bonus damage, the type of damage would depend on the Warframe used to spawn your Sister of Parvos.
What the Tenet Arca Plasmor excels at:
- Having the Tenet Weapon bonuses:
The Tenet Arca Plasmor, once you’ve used Forma five times, will have a max level of 40. It also has the added bonus damage based on the Sister that spawned with it.
- Bouncing back:
Unlike the base Arca Plasmor, the Tenet version features ricochet! The pulses bounce off of walls to potentially deal even more damage.
- Punching through:
This weapon has a default punch through of 3 meters against bodies. You’ll be able to kill Brokers even from behind some cover with this. It could be tricky though since you have to be careful not to let the center of the projectile hit the cover as it’ll cause the projectile to bounce.
- Being radioactive:
One of the best qualities this weapon has that makes it amazing in the Index is it has innate radiation damage. Radiation damage is the best damage type against the alloy armor which the Brokers strongly rely on for their defense.
- Quickscoping:
The Tenet Arca Plasmor has a low aim zoom which is useful since its shots are pretty wide. This makes it easier to aim and hit your targets properly.
Tenet Arca Plasmor Stats:
- Critical Chance: 22%
- Critical Multiplier: 2x
- Fire Rate: 1
- Status Chance: 34%
- Total Base Damage: 760 (100% radiation)
How to get the Tenet Arca Plasmor:
You can get the Tenet Arca Plasmor by vanquishing a Sister of Parvos that was generated with one. Sisters spawn with a random Tenet weapon though so it may take a while to get one to spawn with this.
7. Stropha

Using the Corpus gunblade to fight the Corpus, massive stonks moment
Generally speaking, the Stropha is considered to be an equal, or sometimes even superior, to the Redeemer Prime. Not on this list though.
The Stropha is generally considered to be a crowd control weapon, with its wide shots that can knock entire groups of enemies down. That’s not as useful in the Index where there are only a handful of enemies who, most of the time, won’t stick together and move around a lot.
Nonetheless, the Stropha is still amazing at taking down single enemies. Mod it properly and you’ll be grabbing Index points like crazy.
What Stropha excels at:
- Delivering massive crits:
The Stropha has the highest critical chance and critical multiplier among gunblades (30% critical chance, 2.4x critical multiplier). Making its already deadly base damage even deadlier.
- Abusing Condition Overload:
In the Index, Condition Overload will be your melee weapon’s best friend. Bring some status chance-heavy weapons to stack up the status effects on the Brokers before finishing them off with the Stropha.
- Deleting shields:
Dealing 700 pure impact damage with the ranged attack is sure to get rid of the Brokers’ shields fast. This is ironic as the Stropha is a Corpus weapon and the Corpus are the most shield-reliant faction in the game.
Stropha Stats:
- Attack Speed: 1
- Critical Chance: 30%
- Critical Multiplier: 2.4x
- Status Chance: 14%
- Total Base Damage: 220 (38% slash)
How to get the Stropha:
The Stropha’s main blueprint is a possible drop from the Jackal on Venus (15% drop chance).
The components drop on various levels of the Granum Void. The levels they spawn on are as follows:
- Barrel - Granum Void/Rotation C/22.22%
- Blade - Granum Void/Rotation C/22.22%
- Receiver - Extended Granum Void/Rotation C/29.63%
- Stock - Nightmare Granum Void/Rotation C/29.63%
6. Rubico Prime

Snipin’s a good job
The Rubico Prime features higher total damage, critical chance, status chance, fire rate and faster reload time, and lower zoom (which makes aiming at fast-moving targets easier) compared to the base Rubico.
This sniper rifle is most known for being a beast during Eidolon hunts, but you should know that it’s also great at earning you some moolah. Like the Vectis Prime, use the Rubico to one-shot the Brokers. It even has multiple bullets per magazine so you can afford to miss a shot or two.
What the Rubico Prime excels at:
- Radioactivity:
If you’ve gone on some Eidolon hunts, you know how effective the Rubico Prime can be with radiation damage. You can use practically the same build on the Index. Imagine all that power, but instead of using it on gigantic monsters, you deliver it all to human-sized targets.
- Blowing up heads for cash:
The Rubico Prime has a reduced zoom compared to the regular Rubico. That might sound bad, but it’s definitely a plus in the Index since you won’t really be trying to hit targets from miles away.
- Crits galore:
The Rubico Prime has ridiculous crit stats. It has a 38% critical chance and a 3x critical multiplier. Then you add the bonuses to the critical multiplier that you get from zooming the scope, at max zoom you get a +50% critical damage multiplier. All of this adds up to the perfect Broker sniper.
Rubico Prime Stats:
- Critical Chance: 38%
- Critical Multiplier: 3x
- Fire Rate: 3.67
- Status Chance: 16%
- Total Base Damage: 187 (80% impact)
How to get the Rubico Prime:
Like most Primed weapons, the Rubico Prime’s blueprints and parts are obtainable by cracking Void Relics or trading them with other players. A list of the Void Relics containing this weapon’s blueprints and parts can be found on the “Rubico Prime Wiki” link above.
5. Kuva Nukor
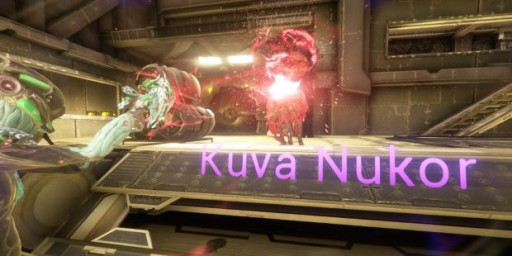
Microwaving saves time and money
It’s no surprise that the best secondary weapon makes for an excellent partner in the Index. Especially since the Kuva Nukor’s base damage is purely radiation. The Kuva Nukor is a beam weapon that chains up to two enemies, and as I mentioned earlier, radiation damage is the best damage type for a weapon to have in this game mode.
But that’s not all.
Another reason why the Kuva Nukor is great for the Index is a hidden status effect called “microwave”. The effect itself isn’t that amazing, it simply enlarges the body part that the beam hits. But this is considered a status effect and it has an infinite duration so helps stack the Condition Overload mod which is also an incredibly useful strategy in the Index.
Also, as with all Kuva Weapons, the Kuva Nukor’s max rank increases every time you apply a Forma, capping at rank 40. It will also have bonus damage, the type of damage would depend on the Warframe used to spawn your Kuva Lich.
What Kuva Nukor excels at:
- Having the Kuva Weapon bonuses:
The Kuva Nukor, after using Forma five times, will have a max level of 40. It also has the added bonus damage based on the Kuva Lich that spawned with it.
- Being radioactive:
One of the best qualities this weapon has that makes it amazing in the Index is it has innate radiation damage. Radiation damage is the best damage type against the alloy armor which the Brokers strongly rely on for their defense.
- Giving away free status effects (so generous):
With a status chance of 50%, the Kuva Nukor ties with the Epitaph in having the second-highest status chance among all secondary weapons. As said earlier, synergize this weapon with Condition Overload to maximize your damage output.
Kuva Nukor Stats:
- Critical Chance: 7%
- Critical Multiplier: 5x
- Fire Rate: 10
- Status Chance: 50%
- Total Base Damage: 21 (100% radiation)
How to get the Kuva Nukor:
You can get this secondary weapon by vanquishing a Kuva Lich that was generated with one. Liches spawn with a random Kuva weapon though so it may take a while to get one to spawn with a Kuva Nukor.
4. Fulmin

AMPlify your chances of getting the Index prize
The Fulmin has two firing modes, its primary fire is a semi-auto mode that fires bolts of electricity. This mode is silent so enemies won’t hear you as long as you make sure to kill your target quickly and away from prying eyes.
Its secondary firing mode is an automatic electric rifle.
For the Index, all you’ll pretty much need is the semi-automatic mode. It’ll be more than enough to one-shot the Brokers for a couple of rounds even on the highest difficulty of the Index.
Another thing the Fulmin has going for it is its ability to replenish its own ammo instead of having to reload. What makes that great is that in the Index, ammo pickups can only be grabbed from certain locations in the game. Running out of ammo is more of a hassle here than in other game modes, so not having to worry about ammo pickups is a huge bonus.
What the Fulmin excels at:
- Getting all up in your face:
The Fulmin’s semi-auto fire works best at close-range like a shotgun. Its projectiles also have a wide hitbox (1 meter) so just aim in the direction of your target and let loose!
- Going viral:
Weirdly enough, despite already having the electricity element required to give it radiation damage, players prefer to run with a viral Fulmin rather than a radiation one. With a little bit of status chance added, the viral status effect could help you take down even high-level Brokers with ease.
- Ammo efficiency:
As mentioned above, the Fulmin doesn’t make use of conventional ammo. It replenishes its ammo on its own after a second of not being in use. It only takes an additional 2 seconds to fully charge its battery from zero. Excellent for a game mode with scarce ammo like the Index.
Fulmin Stats (for semi-auto mode):
- Critical Chance: 30%
- Critical Multiplier: 2.2x
- Fire Rate: 2.17
- Status Chance: 16%
- Total Base Damage: 500 (80% electricity)
How to get the Fulmin:
You can simply buy the Fulmin’s blueprint from the in-game market. You can access the market from the console across the console where you access your quests.
3. Redeemer Prime

Giving “redeeming cash” a whole new meaning
The Redeemer Prime is simply a straight-up upgrade to the regular Redeemer. It dwarfs its little brother in base damage, critical chance, critical multiplier, and status chance.
Another difference: the way it counts combos. With the shotgun blast, when an enemy is hit, your combo counter increases by 5 regardless of how many pellets make contact.
This gunblade is fantastic when you’re single-targeting enemies, which makes it perfect for the Index and bankrupting the Broker one click at a time.
What Redeemer Prime excels at:
- Critical damage:
The Redeemer Prime has the second-highest critical chance and critical multiplier among gunblades (24% critical chance, 2.2x critical multiplier). Giving each of your attacks an extra sting in them.
- Dealing status effects:
The Redeemer Prime also has the second-highest status chance among gunblades (30% for the melee, 9% for each shotgun pellet)
- Abusing Condition Overload:
The great status chance that the Redeemer Prime has only makes having Condition Overload on it even better. Stack up those status effects before blasting your enemies away in a single strike.
Redeemer Prime Stats (for normal attacks only):
- Attack Speed: 0.917
- Critical Chance: 24%
- Critical Multiplier: 2.2x
- Status Chance: 30%
- Total Base Damage: 212 (70% slash)
How to get Redeemer Prime:
Like most Primed weapons, the Redeemer Prime’s blueprints and parts are obtainable by cracking Void Relics or trading them with other players. A list of the Void Relics containing this weapon’s blueprints and parts can be found on the “Redeemer Prime Wiki” link above
2. Catchmoon

The Kitgun to end poverty
Kitguns are Fortuna’s answer to Cetus’ Zaws. You buy the components, whichever you want, and then mix and match them to create your own personalized gun. The Catchmoon is a Kitgun chamber, the part that determines what you fire and is also the only part that gives you mastery rank.
When used on a secondary weapon, the Catchmoon is a semi-automatic pistol that fires a large, high-damage projectile. The Catchmoon also has innate heat damage, so that’s already a step towards the good ole radiation damage. It’s also a Kitgun so what you want it to specialize in depends on you entirely.
What Catchmoon excels at:
- Versatility:
The Catchmoon can match your playstyle when you use the grip and loader that’s right for you. You can make it a status effect dealing weapon to boost your melee or make it a massive critical hitting monster to kill Brokers in one shot.
- Staggering enemies:
All enemies you hit within 9 meters will get an assured impact proc which staggers them. This allows you to escape or deal further damage for free.
- Raw damage:
Of course, it will depend on the other components you choose, but any Kitgun with the Catchmoon chamber generally deals amazing damage.
Catchmoon Stats:
- Critical Chance: depends on the other 2 parts
- Critical Multiplier: depends on the other 2 parts
- Fire Rate: depends on other the 2 parts
- Status Chance: depends on other the 2 parts
- Total Base Damage: depends on other the 2 parts
How to get the Catchmoon:
The Catchmoon blueprint is bought from Rude Zuud in Fortuna in Venus. It is accessible starting at Neutral rank and costs 500 Solaris United Standing.
1. Tigris Prime

The best financial investment you’ll ever make
Here it is the king, or I guess I should say the treasurer, of the Index. The reason is quite simple, you aim at a Broker, click, and then they die.
There are currently three versions of the Tigris, here’s a comparison of the three:
- Critical Chance: Sancti Tigris > Tigris Prime = Tigris
- Critical Multiplier: Tigris Prime = Tigris > Sancti Tigris
- Fire Rate: Tigris Prime = Sancti Tigris = Tigris
- Multishot: Tigris Prime > Sancti Tigris > Tigris
- Status Chance: Tigris > Sancti Tigris > Tigris Prime
- Total Base Damage: Tigris Prime > Sancti Tigris > Tigris
You don’t need to have super precise aim like with sniper rifles, you don’t even have to aim for the head, and if you misfire and only a couple of pellets hit, the insane status chance will make them extremely vulnerable to any melee with Condition Overload.
All of these make the Tigris Prime super simple to use in the Index and with astounding results.
What the Tigris Prime excels at:
- One-hitting Brokers:
Just point this thing at one of the Brokers and fire. Collect their Index points. Profit.
- Inflicting status effects:
With a status chance of 11.25% and a multishot of 8, it’s incredibly easy to get the Tigris Prime to have almost guaranteed status effects every time you pull the trigger (the 11.25% is just for a single pellet). Not to mention, the Tigris Prime fires twice per click, further insuring your status chances trigger.
- Abusing Condition Overload:
On the off chance that a single shot doesn’t kill your target (or maybe you’re doing an endurance run to fight John Prodman and the enemies start getting tougher), they’re going to be riddled with status effects. This means they’ll be really easy to defeat with your melee weapon with Condition Overload.
Tigris Prime Stats:
- Critical Chance: 10%
- Critical Multiplier: 2x
- Fire Rate: 2
- Multishot: 8
- Status Chance: 11.25%
- Total Base Damage: 1,560 (80% slash)
How to get the Tigris Prime:
Like most Primed weapons, the Tigris Prime’s blueprints and parts are obtainable by cracking Void Relics or trading them with other players. A list of the Void Relics containing this weapon’s blueprints and parts can be found on the “Tigris Prime Wiki” link above.
You May Also Be Interested In:
- Warframe: Best Warframes, Ranked Weakest To Strongest (Warframe Tier List)
- Top 10 Warframe Best Primary Weapons (And How to Get Them)
- [Top 5] Warframe Best Arch-guns And How To Get Them
- [Top 5] Warframe Best Melee Weapons And How To Get Them
- [Top 5] Warframe Best Kuva Weapons And How To Get Them
- [Top 11] Warframe Best Weapons And How To Get Them


