If you are new at Overwatch or maybe you want to improve your gaming experience and skills, there are certain settings that would help you get more wins and boost your competitive rank. Make sure you don’t miss them by checking out this list and using their advantage.
25. Exit Battle.net
I recommend exiting the Battle.net launcher once your game has loaded. Other than that, you can exit any background programs that use computing power like Steam client, web browsers, media players. By doing this, you leave more computing power for Overwatch to use which will result in higher performance stats and no distractions.
24. Screen Resolution
Most Overwatch pro players have their screen resolution set to 1920x1080. If you lower your screen resolution in Overwatch, you won’t get a lot of visual benefits. If you don’t have a constant max flow of FPS, you can try lowering your screen resolution to 1280x720 and keeping your graphics at medium or low. That will get you higher FPS and a smoother gaming experience.
23. Aspect Ratio
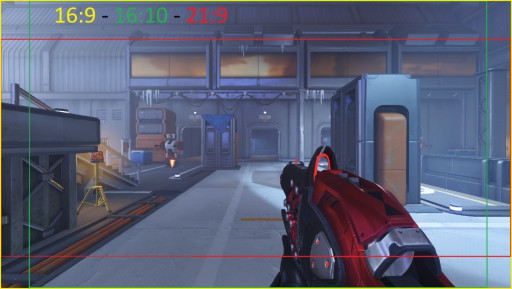
The aspect ratio goes hand in hand with the FOV. Set your aspect ratio to 16:9 (widescreen) and you will get wider FOV. Avoid setting it to 21:9 because that is going to cut off a big amount of your field of view. If you set your Aspect Ratio as instructed above, you get to see more on-screen and have more control over your surroundings.
To set your aspect ratio go to Options – Video – Aspect ratio
22. Antialiasing
Antialiasing is there to reduce rough edges, make everything smooth and improve image quality. It plays a big role in making your game look smooth and perfect, but it is also very demanding.
If you turn it off, the edges in your game will look bad, but you will get an FPS boost. I recommend you put this to low (FXAA), because that will only cost you 3% FPS loss and the edges won’t look that bad.
To change antialiasing settings go to Options – Video – Advanced - Antialiasing
21. Mouse
Picking the right mouse is key for FPS gaming. Try to pick a mouse that has additional buttons that you can set to certain abilities, that way you can act swiftly and consistently in combat. A popular model that even Overwatch pro players use is the Logitech G903, it’s latency, smooth sensor and additional buttons is what will gain you more kills.
20. Mouse sensitivity
Try and train your aim with a lower mouse sensitivity so that you get more precise and consistent aiming. If you use high sensitivity, you can miss a few kills because you won’t have the stability and time that lower settings promise. One in-game tip is to use the same mouse sensitivity on all heroes. If you have perfected your aim with McCree on low settings, you might find it difficult to switch a hero if you are not used to the same settings.
To change your mouse settings go to Options – Control – Mouse
19. Reticle settings
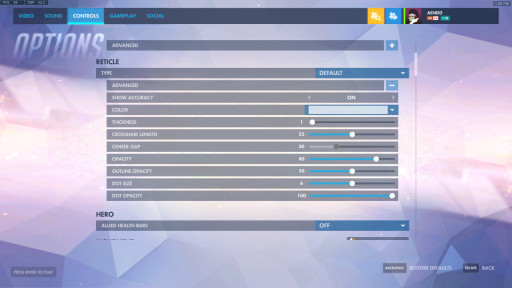
Choosing the right reticle for every hero might be a lot more important than you think. The reticle shows the middle of your screen and the exact location where you will land your shot. There are two things you should consider when setting the right reticle:
1) It should be easy for you to see it, but not distract you.
2) It has to show you exactly where you will land you shot.
One in-game example is the big crosshair that is default for Zarya which can be distracting. The current dot reticle is not a good choice because it is big enough to cover enemy hitboxes at range, and it won’t give you a very accurate aim.
You should also mind the center gap of the reticle, try to keep it smaller so you can be sure that where you aim is where you shoot.
To change your reticle settings go to Options – Controls – Reticle
18. Shadow Detail
Shadow detail sets how complex and smooth the shadows in your game will look. Turning Shadow Detail off will give you an FPS performance boost of around 30%. However, being able to see shadows clearly can be helpful sometimes, it can show you if enemies are hiding somewhere. In that case, you can set Shadow Detail to low.
To change Shadow detail, go to Options – Video – Advanced - Shadow detail
17. Texture Quality
If you keep the texture quality high, you will get sharp and detailed game elements and characters. However, that high texture quality settings uses a lot of video card memory so I recommend you keep it at low to increase performance.
To change Texture quality settings, go to Options – Video – Advanced – Texture quality
16. Refraction Quality
Refraction quality controls the quality of light bending effects for semi-transparent surfaces. In other words, it is going to make transparent surfaces look cleaner and smoother. One in-game example is Reinhardt’s shield. If you set the refraction quality to high, that will make the shield look more realistic and smoother. This is one setting you can keep, it can make in-game elements look good and it will not have a huge impact on your performance.
To set the Refraction Quality go to Options – Video – Advanced – Refraction quality
15. Render Scale
If you lower the render scale below 100%, you will reduce the scale the game renders everything and you will get a performance boost. Turning this above 100% will increase the detail in which the game world is rendered but you will get bad performance. I recommend you set it lower if you want better performance.
To set the Render scale go to Options – Video – Advanced – Render Scale
14. Vsync
Vsync is there to balance the frame rate with the monitor refresh rate for better stability. If you enable Vsync, it will increase your input lag, which is going to ruin your entire gaming experience because your frame rate can drop drastically. Having this setting enabled is simply not worth it. I recommend turning this off.
To set Vsync go to Options – Video - Vsync
13. Set Maximum FPS to Display based
Anything higher than the refresh rate of your monitor will be frames that are rendered but not displayed, wasting computing power for frames you never see. I recommend setting the max FPS to display base so you won’t waste computing power and get a performance boost.
To set it to Display Based go to Options – Video – Limit FPS
12. Lighting Quality
Lighting quality enhances the lighting effects. If you set this to high, local lights will cast shadows. I think that Overwatch already has high forced bloom, so keeping this high will only blind you if you look at light surfaces in game. I recommend keeping this at low because it also boosts you FPS.
To set the Lightning quality go to Options – Video – Advanced – Lighting Quality
11. Turn off Local Reflection
Local reflection shows you the reflections in the Overwatch world, like shadows on the ground and reflections in water or puddles. This is definitely a nice subtle detail for the in-game world, but it is also not that big of a deal. If you want a big and east FPS boost, turn this off.
To turn off Local Reflection go to – Options – Video – Advanced – Lightning Quality
10. Dynamic Reflections
Dynamic reflections will make shiny game elements like metallic walls or floors to reflect all the action in real time. Having this setting on high will lower your performance boost especially in larger battles, your FPS might drop and it will ruin the game performance. I recommend keeping this setting at low.
To set Dynamic reflections go to Options – Video – Advanced – Dynamic reflections
9. Effects Detail
This setting will control how many visual effects are seen at one time and how detailed they are. Basically, it shows how every ability you perform with your hero will look like. Some in-game examples are D.Va’s ultimate and Lucio’s auto attack. If you have it on low, their effects won’t be as exact and detailed. I recommend keeping this on low because it has a huge effect on FPS, especially during big battles.
To set Effect detail go to Options – Video – Advanced – Effect Detail
8. Local Fog detail
This setting controls the quality of fog, clouds and smoke effects. One in game example is the garden area of the Hanamura, you will be able to see all the fog effects there. This can be set up a nice aesthetic, however, it might not be worth it because lowering this option will give you some FPS boost. I recommend keeping this on low.
To set the Local Fog detail go to Options – Video – Advanced – Local Fog detail
7. Ambient Occlusion
This setting adds soft shadows to crevices and objects that are in close to one another and it improves image quality. It will make in game objects like wall fixtures and plants more realistic. You can turn this on if you want the world to appear more detailed and realistic, even though it is not that big of a difference, it also doesn’t impact your FPS that much.
To set Ambient Occlusion go to Options – Video – Advanced – Ambient Occlusion
6. Model Detail
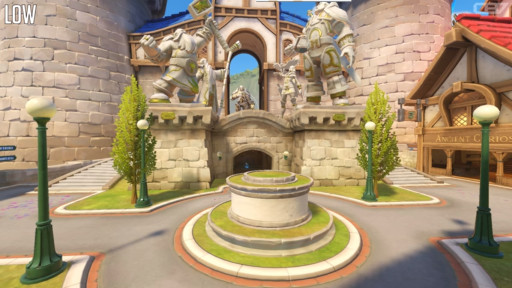
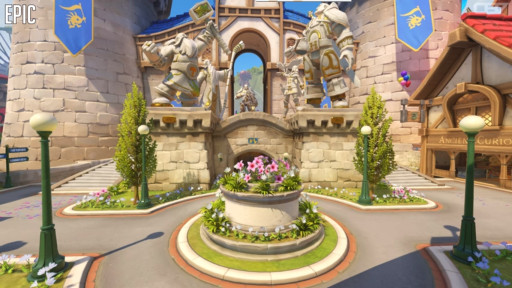
This setting controls the quality and complexity of the game's heroes and objects. Keeping this at high will give you the most details in the characters’ design and map designs but that will cost you some FPS. I recommend you keep this lower, even though that will reduce the look of your hero and environment, it will also gain you some FPS.
To set the Model Detail go to Options – Video – Advanced – Model Detail
5. Turn off Triple Buffering and turn on Reduce Buffering
Triple buffering simply buffers one extra frame to the CPU instead of two. Usually, triple buffering is terrible for FPS gaming because it can get you a lot of input lag and you lose some FPS. If you want to avoid the input lag, I recommend you turning on Reduce buffering.
To turn off Triple Buffering go to Options – Video – Triple Buffering
To turn on Reduce Buffering go to Options – Video – Reduce Buffering
4. Check your RAM
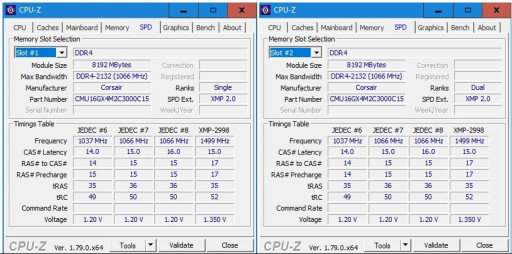
If you have 2 or more sticks on a single channel, put them in dual channel (you can check this by installing CPU-Z). This can give a major performance boost (50 to 70 depending on system). If you are able to increase your RAM speed, I recommend you do it. It makes a big difference in this game and will increase performance.
3. Get an SSD
Install Overwatch on your SSD. Having an SSD will give you faster loading times, your maps will load faster and it will increase performance. This way you will be one of the first to join a game, giving you an advantage.
To install Overwatch onto an SSD make sure you select the Solid-state drive instead of the hard-disc drive (HDD). Even having one SSD on USB2.0 will get the work done.
2. Play in Fullscreen mode
Make sure that you set your game to play in Fullscreen mode instead of Windowed or Windowed Fullscreen. If you set it to Fullscreen, the computer will “focus” more on the game instead of other programs that are active. You will also prevent all kinds of notifications and pop-ups from distracting you.
To set the Fullscreen mode go to Options – Video – Display Mode
1. FOV (Field of view)
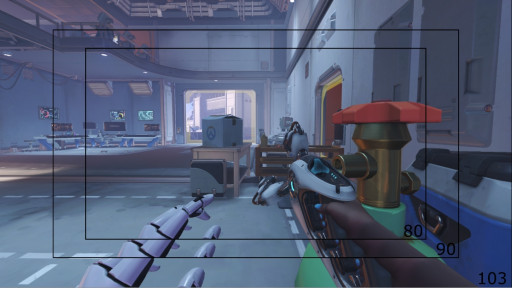
The higher you set you FOV, the more of the screen you will see. Doing this is very important because you have to be able to see the most of the battlefield and what is in front of you. That way you will be ready to take down any surprises and act quickly. Because of these reasons, most Overwatch pros have their FOV set to 103 (which is the max).
To change your FOV go to Options – Video – Field of view
You may also be interested in:
