25. Do Not Reinforce Beside Your Black Mirror
https://youtu.be/FfNym0XpNRM?t=171
This is a mistake that most beginners make and one that annoys Mira players so much. But when the Mira player is a beginner herself, she might also not know that the wall beside the reinforced wall where the black mirror has been deployed shouldn’t be reinforced as well. So, this is very important for players to know, especially for beginners. And of course, the reason why the wall beside the black mirror shouldn’t be reinforced is because it should be used for quick leaning.
Quick leaning is a technique in Siege where you gather intel on the other side of the wall or a corner and if you see an enemy there, you perform a quick lean another time but this time with a gunshot. With good hand-eye coordination, chances are you’ll be able to frag the enemy you just saw during your first lean. With Mira’s black mirrors, you don’t have to gather intel by quick leaning since you’ll be able to see if there are enemies on the other side from the clear view that the black mirror provides. All you have to do is quick lean from the black mirror and frag enemies.
24. Clean the Mirror
https://youtu.be/FfNym0XpNRM?t=227
Now you can do this yourself or you can ask a teammate that is heading out of the objective spot to do it for you. The concept is very simple. When you attach a black mirror on a reinforced wall, some parts of the soft wood on the wall would appear on the edges of your black mirror. They can limit your vision through the black mirror especially since they appear cluttered and they’re kinda big.
Cleaning those soft wood parts will be really beneficial to you because as the video shows, the black mirror will appear much clearer and wider. This will allow you to quick lean much more effectively since there’s not going to be any obstruction to your vision. Your intel gathering capability will also be much better because you’ll be able to cover more angles even if it's just a bit more.
23. Black Mirror Placements on Theme Park
https://youtu.be/FfNym0XpNRM?t=263
Mira is a really great defender when the objective spot is on the initiation room and office on Theme Park’s second floor. She can hold down a standard push on the control or cctv area by reinforcing the left wall facing said area and putting up a black mirror there. That will allow Mira to have two directions when it comes to strafing enemies at the control area. She can quick lean on the door on her left, or from the black mirror’s edge on her right.
Back at the office, as Siege Youtuber alyttleton correctly pointed out, the proper placement of the Mira black mirror would be on the left wall when you’re facing the café hall. That way you’ll be able to hold down the café hall angle and also the yellow stairs angle. It’ll also allow you to move freely instead of getting stuck around the vault area of the office. When you’re a defender, the one thing that you’ll need to avoid is getting stuck in one place.
22. Be a Disciplined Defender
https://youtu.be/FfNym0XpNRM?t=366
When I’m an attacker and I learn that there’s a Mira black mirror in the other room where I’m trying to push, the first thing that I usually do is pre-fire the edge of black mirror, obviously on the soft wall side. I get kills from doing that from time to time because a lot of Mira players, especially new ones, tend to be impatient and are excited to try out quick leaning from the black mirror. However, as Siege Youtuber alyttleton says in the video, you as the Mira player should exercise patience.
Unless you can see that the opponent on the other side of the black mirror is distracted or aiming somewhere else, I actually wouldn’t recommend strafing them as soon as you see them. That’s because that’s too predictable, and you might end up getting hit with a headshot. So, exercise patience and discipline and feel the situation more before you peek and attempt to kill. Remember that you’re a defender and it's your job to play defensively.
21. Create Nitro Cell Holes
https://youtu.be/FfNym0XpNRM?t=449
Mira is best known for effectively holding down angles with the help of her black mirrors which provide her and the defending team two one-way view mirrors that are bulletproof. Mira usually holds angles with her black mirrors by quick leaning and strafing enemies on the other side of the wall. Of course, that’s usually done using her vector .45 ACP submachine gun.
But the vector .45 ACP submachine gun isn’t her only weapon when it comes to holding down angles and scoring kills using the intel from her black mirrors. Her nitro cell is also a very effective weapon for her when it comes to killing enemies on the other side of her black mirror. And that’s only possible to do with the use of high holes which she can create during the prep phase with her ITA12S shotgun.
20. Do Not Create C4 Holes Without Anti-Grenade Gadgets
https://youtu.be/FfNym0XpNRM?t=461
Now, the tip above about creating nitro cell holes early only really applies when you have Jager or Wamai in your team that can protect Mira or any other defender inside the objective spot from grenades. Because while the nitro cell holes are really useful for throwing over nitro cells over to the enemies on the other side of the wall, on the flip side, the attackers can also use those holes for throwing over their grenades.
So, make sure that you do not create those nitro cell holes early on in the round if you do not have any Wamai Mag-NETS or Jager ADS to protect you. Any decent ranked team would always have either Wamai or Jager anyway, but in the lower elo and when you’re solo queueing, you’d always meet teams that do not wanna pick support operators like Wamai or Jager. So, be very mindful of this.
19. Ask for a Mute or Bandit
https://youtu.be/FfNym0XpNRM?t=537
Mira’s black mirror is one of the most powerful gadgets in the game when it comes to holding down angles. It’s no wonder why she’s the most banned operator in the higher ranks. However, just like any special gadget in the game, there are many ways to counter it. Some of the best counters for Mira are Hibana and Ace. That’s because their hard breach devices can be deployed from a distance, and their hard breach devices can destroy Mira’s black mirrors.
That is why it’s very important to support Mira’s black mirror with a Mute signal jammer or a Bandit shock wire. That way, Hibana and Ace won’t be able to easily destroy Mira’s black mirrors from a distance, because if they’re able to do that, life would be very difficult for the defenders. That is why it’s also very important to support the black mirrors with anti-throwable gadgets, so that the Mute or Bandit special gadget protecting them won’t be disabled.
18. Watch out for Twitch Drones
https://youtu.be/FfNym0XpNRM?t=562
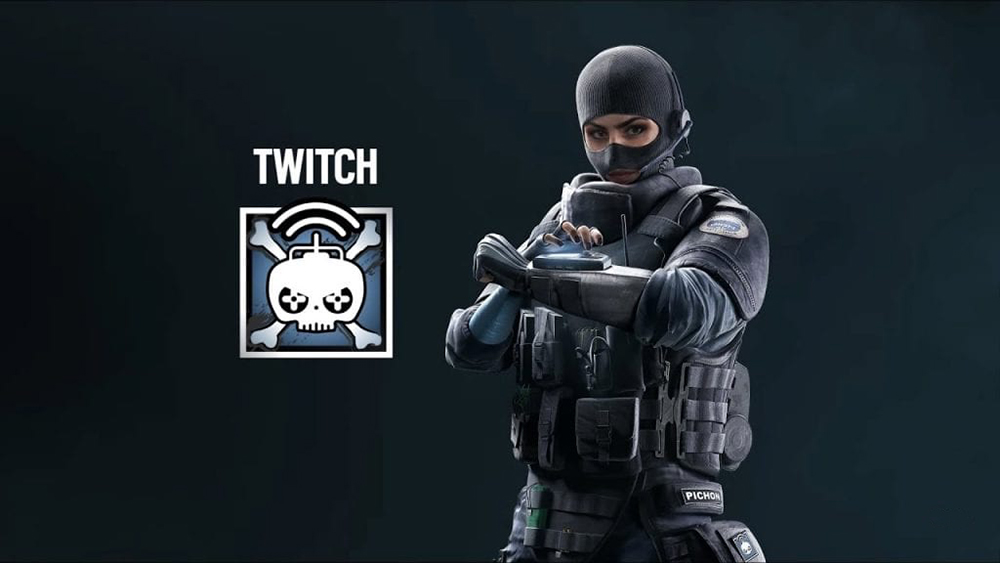
Speaking of ways to counter Mira’s black mirrors. One of them would be Twitch’s shock drones, especially now that they’ve been buffed. They can now jump, and they run more silently. Smart Twitch players are also very patient. They will really wait until the defenders are distracted before they send in their shock drones. That is why it’s really better for the defenders to watch the external cctv cameras as soon as the round starts. That increases the chances of Twitch being detected, and once she’s detected, the whole defender team will be much more wary of her shock drones.
17. Use her Proximity Alarms in Certain Situations
Now I would normally run with the nitro cell when I play with Mira because that just allows me to score extra kills at times and it’s also great at deterring enemies, especially shield operators. But there are some objective spots in some maps where I would be more comfortable with the proximity alarms. One of those situations where I would run with the proximity alarms on Mira is when we’re defending the aviator and games room in the second floor Villa.
Of course, when playing Mira in the aviator and games room, the black mirrors should be on the left wall of the aviator and then the right wall on the games room. I personally love anchoring the left wall of aviator with the black mirror because it’s easy to get kills there from attackers who are swinging the door by the study balcony. The weakness of this position, however, is the top red area where flanking attackers could easily get you from behind. And that’s why for this situation, I run with the proximity alarms, so that I would have some warning when some attackers are flanking.
16. Know When to Open the Window
https://youtu.be/FfNym0XpNRM?t=756
Since the update that made it so that Mira’s black mirrors will be shattered if they get hit by a melee attack, there’s now more reasons for Mira to release the black mirror herself. But don’t get me wrong. Just because your black mirror has been shattered doesn’t mean it’s useless and you should just open it. Even if it's cracked and opaque, the reinforced wall where it's attached would still function normally as a reinforced wall. So, make sure that you don’t eject the black mirror just because it’s been heavily cracked.
So, when is the proper time for you to shoot the red canister in order to open the black mirror? That is when you’re noticing that the attackers are being too comfortable and are just ignoring you. Although rare, it does happen. Either they become too confident because of their smoke grenades or Sens’ R.O.U. Projector Systems, or because a newbie in your team reinforced the wall beside your black mirror. When you see them not paying attention, shoot the red canister and proceed on fragging them.
15. Black Mirror Placements on Clubhouse
https://youtu.be/FfNym0XpNRM?t=1378
Clubhouse is another map where Mira is popular, especially when the objective area is in the basement. What you’d want to do is go to the main bar and reinforce the middle wall and the right-hand wall and then attach your black mirror onto the middle wall. You’ll also want to create a rotation hole on the leftmost wall that you left unreinforced, but what I’ll do differently is to make it larger, because crouching when going through it could make you very vulnerable from the main stairs.
The black mirror placement on the main bar will allow you to guard the main stairs which is a standard area for pushing, and you’ll also be able to keep an eye on the moto room. As for the remaining black mirror, you should reinforce the middle wall on the blue wall and attach the black mirror there. This will help your team watch the generator area because that’s another area that attackers love pushing.
14. Rotation Holes Above Black Mirrors
https://youtu.be/FfNym0XpNRM?t=802
Now, instead of creating standard rotation holes, you can create a rotation hole above your black mirror instead, and this is very effective in some areas. As shown in the video above, it’s a really good tactic for the wall on the office vault spot in Theme Park. You just have to crouch in order to put the black mirror on the lower part of the unreinforced wall and then with your ITA12S shotgun, you can create a hole above it which you can use for vaulting.
That way, you’ll be able to frag unsuspecting attackers that are pushing yellow hall. And with the black mirror there, you can also watch the yellow stairs as well as guard the café area in case an attacker performs a hard breach on the wall on fallen, facing the office vault. This same tactic of creating a rotation hole above Mira’s black hole is also effective on the right-hand wall beside the entryway to the penthouse when you’re in the theater.
13. Kafe Mira Placements
https://youtu.be/FfNym0XpNRM?t=1484
The third-floor objective spot is a very strong place for Mira because her black mirrors will really be able to guard almost all the angles that attackers use for pushing. First, what you’d want to do is reinforce the left side of the wall by the entryway connecting heaven and cocktail, and attach one black mirror there. That black mirror will hold the angle on the B bombsite as well as the entrance on the cigar. On your left, you’d also be able to frag enemies pushing the bar area.
As for the other black mirror, you’d want to go to the tarp area and reinforce the rightmost wall facing the freezer. Then, what you’d want to do is destroy the walls that divide the piano area and the freezer. And once you’re back to your black mirror, you will see that you’ll be able to frag attackers that are pushing through the piano area. You just have to watch out for attacks from the stairs.
12. Border Mira Trick
https://youtu.be/FfNym0XpNRM?t=964
I love using Mira in Border, especially when the objective spot is on workshop and vent. Now, what you’d want to do is from the server room, reinforce the second wall counting from the entrance. That would be the wall where the yellow ramp with gray bars on the side is pointing. Just crouch so that you’ll be able to put one of your black mirrors on the lower part of the wall, and then for the other one, you have to use that yellow ramp to elevate you a bit higher. That way, you’ll be able to put your other black mirror on top of the bottom one, and that’ll help you guard the entrance to the vent as well as its window.
11. When to Use the USP40
Now let me be clear, I do not really advise players to equip the USP40 handgun on their Mira most of the time. The ITA12S shotgun as Mira’s secondary weapon just brings a lot more to the table, especially since head holes and rotation holes are very important to her gameplay. However, there are certain times when I would recommend switching the ITA12S shotgun to the USP40 handgun. One of those times is when you’ve learned from one or two rounds playing against them that the opposing team is very aggressive and likes to rush.
With opponents like that, Mira wouldn’t really have much time to rework the map and create all the holes that she wants, and since the Vector .45 ACP has a really fast rate of fire and only has twenty-five bullets per magazine, it will run out fast during a rush. So, in order to respond to rushes better, you should switch to the USP40 so that you’ll have a backup weapon that can effectively frag enemies when your vector needs to reload.
10. Villa Black Mirror Placements
https://youtu.be/FfNym0XpNRM?t=1117
The strongest black mirror placement in the whole Villa map is the one on the statue area when the objective spot is on the trophy and statue. What you’d like to do is reinforce the middle wall and the right-hand wall facing the master bedroom and attach your black mirror on the middle wall. Now you should destroy the soft wall beside my black mirror and then aim your shotgun to the walls of the closet. That should reach the walls and destroy it, but if not, go to the closet and destroy them up close.
That will give you eyes on the attackers pushing closet. As soon as someone vaults over the window in the closet, that’s almost like a free kill for you. You’ll also have eyes on the middle window of the master bedroom as well as the window by the fireplace. This single black mirror will really deter attackers from pushing through the master bedroom and unless they have a way to destroy your black mirror, they will have to find other paths of attack.
9. Bank Black Mirror Placements
https://youtu.be/FfNym0XpNRM?t=1210
The basement of the Bank map is a very popular Mira spot. It’s just going to be a lot easier to defend it when there’s a Mira present in the defender team. The first thing you’d want to do is reinforce the right wall on the secure hallway facing the cctv. That way, you’ll be able to strafe attackers that are coming in from the server's area. Now, in the video above, alyttleton made c4 holes on the soft wall side, but I would advise to go further and instead of just c4 holes, make a rotation hole that you can vault to.
Now the garage area isn’t really a popular spot anymore for attackers, so you don’t have to use your other black mirror for defending it. Most of the time it’s left empty anyway. So, reinforce the left-hand side of the wall inside lockers facing the main stairs, and attach your black mirror to it. That way, you’ll have eyes on the main stairs and the attackers would really find it hard to push through the main stairs.
8. Coastline Mira Placements
The Coastline map is one of the best maps for playing Mira. Unlike most maps, all the objective spots available in Coastline are great for her. When the objective spot is on the theater and penthouse, the first thing you’d want to do is place a black mirror on the right unreinforced wall of the entrance that connects penthouse and theater. Attach it while crouching so that it will be placed on the bottom part, and you can use its upper part for a rotation hole. So that you can swing by the penthouse through it without getting fragged from the window.
The second black mirror would be inside the VIP area. What you’d want to do is create a rotation hole behind the closet in the penthouse near the bed, reinforce the middle hole facing the big window of the penthouse, and attach your black mirror there. That will help your team secure the window area of the penthouse. Obviously, you’d want to reinforce the wall of the VIP as well as the walls by the bookshelf to protect your back.
7. Don’t Let Them Get Near
https://youtu.be/FfNym0XpNRM?t=697
About a couple of seasons ago, a big change came to Mira’s black mirrors. And that update made it so that Mira’s black mirror can now be rendered useless by a melee attack. That means that if an attacker is able to get near your black mirror, he’ll be able to make it useless with a single melee attack. And that’s why we’re gonna go back to one of the tips above, which is about creating nitro cell holes early in the round.
As long as you have a Jager ADS or Wamai protecting you from grenades, it’ll be safe to create nitro cell holes on the upper portion of the soft wall beside your black mirror. With a nitro cell hole, you’ll be able to throw your nitro cell over to the enemy that is approaching your black mirror in order to destroy it. That is of course if you can’t frag them in the first place by quick leaning and strafing from your black mirror. And there would be times that you’d have to rely on the nitro cell, especially if the approaching enemy is a shield operator.
6. Mira Needs Anti-Grenade Support
https://youtu.be/FfNym0XpNRM?t=602
The soft wall beside Mira’s black mirror will not stay in its original condition for long. That’s because Mira would be using it for quick leaning and fragging enemies on the other side of the wall. That itself will destroy the portion of the soft wall that is beside the black mirror. On the other hand, the attackers will also be return firing and that will cause more damage to that soft wall.
That means that even if Mira doesn’t create nitro cell holes on the upper portion of the soft wall beside her black mirror, it’s still going to be full of holes eventually. And those holes can be used by attackers for killing Mira by throwing frag grenades on her, or stun grenades that will blind and deafen her before they rush in for the kill. This is why it’s always important for other defenders to support Mira with anti-grenade gadgets such as Jager ADS or Wamai Mag-NETS.
5. Put It as Close to the Edge as Much as Possible
https://youtu.be/FfNym0XpNRM?t=193
When it comes to attaching Mira’s black mirrors on a reinforced wall, you would want to attach it as close to the edge as possible. That will allow your quick leans to be more effective and that extra couple of inches of black mirror sticking out of the reinforced wall could actually help prevent you from getting hit with a headshot.
To do this, all you have to do is hold the black mirror, and it’s important that your gadget deployment setting is set to advance for this to work. Go past the edge of the reinforced wall where you want to attach your black mirror, and then slowly go back to the direction of the reinforced wall. You will know once your black mirror is deployable when the LED lights on the black mirror turn green.
4. Go with Her Nitro Cell
https://youtu.be/FfNym0XpNRM?t=126
While I did say in one of the above entries that Mira players shouldn’t sleep on the proximity alarms, that only applies in certain situations and in certain maps. In general, the nitro cell is the best secondary gadget for Mira because it can help her with a lot of things, like being able to deter enemies from pushing the angle that she’s holding, or just by straight up getting her multiple kills.
In some objective spots in certain maps, reinforced walls leave a soft area on top of them and Mira can break those soft spots and use them for throwing over her nitro cell to the enemies on the other side. The nitro cell, however, is very sticky, much like Smoke’s gas grenade, so when doing this, be very careful as the nitro cell might get caught on the roof or on the wall.
3. The Vector Is No Doubt the Best Primary for Mira
https://youtu.be/FfNym0XpNRM?t=141
Unlike for most operators in the game, there’s not really a lot of debate when it comes to Mira’s primary weapon. Considering that her main role is to hold angles with her black mirror special gadget and strafing enemies by quick leaning from it, it just wouldn’t make much sense for her to equip the ITA12L shotgun for her primary. That’s obviously because the ITA12L shotgun would be very limited in range, and would only be able to strafe opponents at close range.
But with the Vector .45 ACP, you as the Mira player can be strafing opponents even at medium to long range. It’s fully automatic and boasts a very fast rate of fire at 1,200. Its magazine capacity is also very decent, and while its damage leaves more to be desired, its very fast rate of fire more than makes up for it. Because of its unreal rate of fire, the Vector .45 ACP is a headshot machine and is a joy to use while quick leaning from Mira’s black mirror.
2. Definitely Go with the ITA12S Shotgun
https://youtu.be/FfNym0XpNRM?t=130
As for Mira’s secondary weapon, there’s also not much of a contest. I would generally advise players who are going to try Mira to run with her ITA12S shotgun. That’s because a shotgun as her secondary will give her a lot of versatility when it comes to opening up rotation holes, foot holes, and head holes. The head holes are very important for her when it comes to throwing her nitro cell at enemies on the other side of the wall, and the foot holes are important for fragging opponents that’s attempting to swing by a segment of a wall.
Mira can also use this shotgun to open up holes on some parts of wooden floors which can provide the defender team a view of the paths that attackers usually take. An example of that is the wooden floor just beside the B bomb and near the door in aviator room in Villa. Breaking a portion of that floor with the ITA12S shotgun will give defenders a view of the entrance to the piano from the art room and frag attackers who will be taking that path.
1. Utilize Her Combo with Azami
https://youtu.be/5fXxt_FGIZI?t=59
If you’re not playing with this operator combo, you’re wasting a lot of the potential of both Mira and Azami. This operator combo is probably the most powerful combination of special gadgets in the game right now, and it’s quite simple to do. All that Mira has to do is attach a Black Mirror on an unreinforced wall, preferably while crouching so that it will be attached on the bottom part, and have Azami make its foot part bulletproof through her Kiba Barrier.
With this simple yet very powerful operator combo, Mira will be able to lock down angles more effectively, because all she has to do is quickly stand up and frag opponents from a crouch position, armed with the intel she’s gathered from her black mirror. And she will be protected from getting strafed from below because of Azami’s Kiba Barrier. With this combo, attackers will not only have to worry about Mira strafing them from the sides of her black mirror, but now they will also have to worry about its upper part.
Attention operator, please be advised. There is a new directive from Six. Read up on these related articles, and prepare for deployment:
You May Also Be Interested In:
- Rainbow 6 Siege Tier List 2021 [Rainbow 6 Siege Best Operators]
- [Top 10] Rainbow 6 Siege Best Weapons
- [Top 7] Rainbow 6 Siege Best Attackers
- Rainbow 6 Siege Attachment Guide (R6 Best Attachments For Every Weapon)
- [Top 25] Best R6 Settings That Give You An Advantage
- [Top 15] Rainbow 6 Siege Best Graphic Settings
- Rainbow 6 Siege Best Weapon Attachments
- Rainbow 6 Siege Best Operators 2021
- [Top 7] Rainbow 6 Siege Best Defenders
- Rainbow 6 Siege Roles Explained And How To Play Each One
- [Top 10] Rainbow 6 Siege Best Players
- [Top 5] Rainbow 6 Siege Best Nomad Loadouts
- [Top 5] Rainbow 6 Siege Best Jackal Loadouts
- [Top 5] Rainbow 6 Siege Best Glaz Loadouts: From Worst to Best
- [Top 5] Rainbow 6 Siege Best Finka Loadouts
- [Top 5] Rainbow 6 Siege Best Lion Loadouts
- [Top 5] Rainbow 6 Siege Best Castle Loadouts
- [Top 5] Rainbow 6 Siege Best Dokkaebi Loadouts
