50. Map Familiarity
Map familiarity is one of the most important things that players should learn when stepping into Siege. The maps in Siege are quite big, and what makes them different from most competitive shooters is that they have a lot of verticality. Maps in Siege usually have two to three stories and that can be quite overwhelming for beginners. But don’t be discouraged, because once you’re familiar with the maps, your life in Siege will be so much easier.
Map familiarity is important in most competitive shooters, even those with simpler maps like Valorant, so just imagine how much it would contribute to your gameplay in Siege maps which are more complex. It’s the reason why veteran players say that the learning curve in Siege is steep, but once you reach the top, you’ll find things a lot easier, and you’ll be able to take advantage of your map knowledge when it comes to ambushing enemies or escaping from them.
49. Know Each Operator Gadgets
The operator gadgets in Siege are like their special abilities and what makes the game different from many other competitive multiplayer games around. An operator’s special gadget is what makes them tick so to speak, and to be able to know how each operator gadget is used will let you play the game with more effectiveness. It will also allow you to counter your opponents better because knowing how their gadgets work will give you a good idea of how they will move or respond to you.
Thankfully, beginners can know each operator's gadgets the easy way - by going into Youtube and watching videos that explain the basics of each operator. After that, my tip is to go into multiplayer matches to try out what you learned by watching the R6 basics on Youtube. You should also try to pick random operators. That way, you’ll be able to experience each operator's gadgets and you’ll know them by heart.
48. Headshots Only in Training Grounds
A lot of players, especially those who do not like messing around in the game settings, are unaware that there’s a headshots-only mode in the Training Grounds. You can set it up by clicking the gear icon from the main menu, and under the General Tab, you’ll be able to see Matchmaking preferences. Click that and scroll down until you see the Lone Wolf Options – Training Grounds. Under it, is Weapon Damage and you can change that to Headshot Only.
With that setting, you’ll only be able to kill the terrorists in training grounds with headshots. It is one of the best ways to practice crosshair placement early on, and once you’re used to proper crosshair placement, you’ll be able to get headshots much easier, which is very important once you get into the higher ranks because the enemies you’ll encounter in those ranks have great reflexes, so the best way to compete with them is to headshot them within your first few shots.
47. Keep Roaming on Defense
Roaming while you’re on defense is one of the fastest ways to learn the ins and outs of the maps in Siege, and as mentioned before, it will be best for you to be familiar with the maps as soon as possible. Now this can be intimidating for beginners and yes, there will be a high likelihood that you’ll get killed, but it’s an important part of your growth as a player in Siege, because the experience will be much more rewarding.
Not only will you be more familiar with the layout of the maps. You’ll also know the usual paths that enemies take, and knowing those usual paths will allow you to ambush them more effectively or escape from them when needed. Knowledge of those usual paths will also allow you to deploy your gadgets better since you’ll know the spots where they’d be more useful in hindering your enemies.
46. Pick Hard Breach Operators on Attack
This is one of the best ways to improve your map familiarity when attacking. That’s because when playing a hard breaching role, you’ll be forced to know which walls are important to be breached, and that doesn’t always apply only horizontally. You can also perform vertical hard breaching, especially with Ace and Hibana, and that will increase your map knowledge, especially of their verticality.
Hard breaching plays a huge role in Siege so it will be good for a newbie player to know the ins and outs of this role early on. It’s also one of the most useful roles on attack when it comes to teamwork, so the beginner player will feel fulfilled when he’s successful in doing it. Knowledge of the important walls or hatches to breach will also help you when you’re playing defense, because you’ll know the spots that the attackers will usually breach in order to push the objective spot more effectively.
45. Customize Your Sensitivity
It is good to find and set up the sensitivity most suited for you early on. That way, you’ll be able to keep playing with the sensitivity that works best for you and you’ll keep getting more used to it. The general rule is that your horizontal sensitivity should be higher than your vertical sensitivity. That is because most of the sudden adjustments in view that you’re going to have to make will be horizontal, while a low vertical sensitivity could help stabilize your aim.
Of course, your ADS sensitivity should be lower than both because when you’re on ADS or aim-down-sights stance, that means that you’re ready to shoot at your enemies, and having high sensitivity while you’re aiming-down-sights can cause your aim to be jittery, and it could be easier to lose control of your overall aim. So at least for the basics, stick to high horizontal sensitivity, low vertical sensitivity, and low ADS sensitivity.
44. Go into Unranked as Soon as You Can
Quick match is a good matchmaking mode to start playing the game. There will be no consequences even if you lose the match, so there will be much less pressure for new players. However, I really suggest new players to go into Unranked mode as soon as they can. That is because Unranked mode will prepare them for Ranked gameplay, and even if they lose, they won’t lose any mmr. Though the stakes would still be higher because one can’t just abandon an Unranked match without a penalty.
Matches in Unranked are a lot more intense and tactical so it will really prepare new players for the gameplay that they’ll encounter once they go to Ranked mode, especially in the higher elos. This is also where beginners can experience a more tactical and organized gameplay, because in quickmatch, especially with the high level players, your teammates and enemies could be quite erratic and play aggressively since they know that they won’t lose anything even if they lose. But in Unranked, the gameplay can be much more serious.
43. Learn the Value of Rotation Holes
Rotation holes play a huge role in Siege’s gameplay, especially when the game mode is Bomb. That’s because they connect the two bomb sites together, and a rotation hole, usually made by destroying the wall that divides the two bomb sites together, will allow defenders to respond to threats on the other bomb site. It will also allow defenders to flank enemies when outmaneuver them when need be.
So don’t be that newbie who’s always in a hurry to reinforce everything. Analyze the objective spot first and see if a rotation hole would benefit your team. In a lot of cases, even if an unreinforced wall isn’t used for a rotation hole, it can also be used for creating more lines of sight or murder holes. They can also be destroyed by an impact grenade later on in order to surprise enemies with a sudden rotation move.
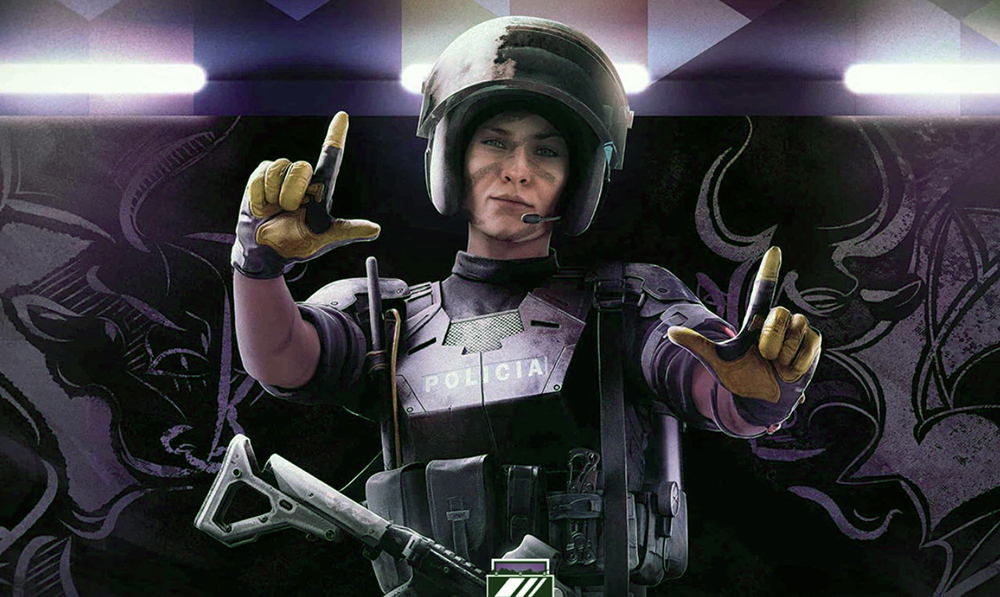
42. Do Not Reinforce Beside Mira's Black Mirror
Speaking of reinforcing on sight, one of the most common newbie mistakes is that they reinforce the wall beside the one where Mira’s Black Mirror is deployed. While it’s not the newbie’s fault that he doesn’t know this and certainly doesn’t warrant getting flamed for, it’s still much better if someone who’s new to the game stumbles upon this guide and learns that the wall beside Mira’s Black Mirror shouldn’t be reinforced.
That’s because Mira, or the defender behind the Black Mirror won’t be able to shoot attackers on the other side of the Black Mirror if the wall beside it is reinforced, thus eliminating a major function of the special gadget. Of course, this knowledge will help the beginners as well when it’s their turn to play Mira. So my advice is, when you see a Mira in your team, don’t hastily reinforce a wall unless you’re sure that Mira won’t use it for her Black Mirror.
41. Do Not Barricade Everything
Another common rookie mistake is reinforcing every window or door that they can during the preparation phase thinking that they’ll be safer if there’s more cover. While having more cover is good, barricading everything and blocking the path for flanking or escaping can do more harm than good in Siege. Especially since the attackers have Fuze or Flores who can send in explosives inside the objective spot from the other side of the wall or even from above.
So think first if the window or door that you’re barricading will really help you and your team or will just act as a trap against you. In many cases, having more windows or entryways open can actually make it harder for enemies to push, because you and your teammates will be able to rate easier and flank them. Having more open areas where you and your teammates can rotate will make the enemy team uneasy because they will always have to watch the flanks.
40. Go into Ranked as Soon as You Can
I mentioned before that once you’re able to, you should start playing and practicing in Unranked because that will prepare you for competitive gameplay. And similarly, once you’re able to go into Ranked matches, I advise you to keep playing there because that’s really where you will experience the fundamentals of Siege.
Quick match is great for some casual fun but most of the time, the gameplay there is quite erratic because a lot of experienced players play very aggressively and without a care in the world since they know they won’t lose anything even if they lose the match. In Unranked or Ranked gameplay, since there’s something to gain and lose, players are more serious, and you’ll notice that their movements are more tactical.
39. Pick Operators That Contribute Even When They're Dead
Newbies will die a lot in Siege, that’s the hard truth, but that shouldn’t discourage you. Thankfully, especially when you’re defending, there are a lot of operators that can contribute to the team even when they’re dead. Operators like Kapkan and Frost can score kills with their traps even when they’re dead, and operators like Valkyrie and Maestro can leave cameras that the whole team can use for intel gathering even when they’ve got taken out.
Being able to contribute even when you die early into the match can really boost your morale when playing Siege and you’ll be able to learn more about the game even when you’re dead by watching the cameras, gathering intel, and advising your teammates on enemy positions. This is another way to be more familiar with the maps and learn the names of each spot, since that will be very helpful for issuing callouts.
38. Rebind Your Keys
The default key bindings are pretty good, but I would encourage newbies to set up their key bindings to what they’re comfortable with early on. For example, because of other games, I’m more comfortable with having the crouch function in ctrl instead of C so I set it to ctrl. Another important skill in Siege that newbies should practice is quick peeking, and others can perform it with the default setup, but I found that I can do it more comfortably with C being the left lean and V being the right lean. Experiment on your key binding setups and find what works best for you.
37. Switch to Night Mode
Night Mode is the best dynamic range setting in Siege because it makes quiet sounds like Caveira’s silent footsteps be more audible, and you’ll be able to hear sound cues further. This is a great partner for any decent 7.1 headset while using spatial sound. With that kind of setup, it’ll be hard for a sound cue to escape your hearing.
The default dynamic range in Siege is Hi-Fi but you can change it to Night Mode by going to options, clicking the audio tab, and scrolling down until you see the dynamic range settings. With a good 7.1 headset partnered with Night Mode in Siege, it'll be much easier for you to detect enemies, even when the sounds that they’re making are small ones like when they’re switching stances or crawling.
36. Take Advantage of the Mute Function
While the Siege devs have taken great steps in reducing the toxicity in Siege, we gamers know there would always be toxic players around. And this could really affect your experience in Siege negatively, especially when you’re still learning the ways of the game by playing solo. That’s why when someone becomes toxic to you just because you’ve not yet mastered Siege’s gameplay, just immediately mute them.
You can do this by pressing tab to see the scoreboard, and beside each player’s names you’ll be able to see a mic and text icons. Clicking a toxic player’s mic and text icon will mute them and they won’t be able to bother you anymore. You can also mute random players’ mics by default by simply going into the audio options and putting the voice chat volume to its lower level. That way, whenever you go into a match, especially competitive ones, you’ll be safe from toxic players.
35. Observe Your Teammates
When you’re alive, especially during the start of the round, always take the time to observe what your teammates do. If your teammates are experienced, keep in mind the spots where they create rotation holes. You should also observe which walls they reinforce and which walls they leave for murder holes or more lines of sight like foot holes or head-high holes.
When you’re dead and the available cameras wouldn’t really be helpful to your teammates, it’s good practice for newbies to go into operator view mode instead and watch how your more experienced teammates move and deal with enemies. That way you’ll be learning even while you’re out of action, and chances are, the more experienced players will show you tricks or moves that you can emulate the next round.
34. Learn to Synchronize Your Movements
Of course, this would be much easier to do when you’re playing with friends and are coordinated through voice comms. But being a player from a server with a lot of language barriers, I’ve learned to coordinate my movements to my teammates’ just by looking at their outlines. And that’s why you should never turn teammate outlines off, even though yes, they can obstruct the view sometimes.
With teammate outline on and with enough experience, you’ll be able to synchronize your push or flank with what your teammates are currently doing, even though you’re not talking to them in voice comms. This generally turns into good results because when you push in one direction and your teammates push from another, your enemies will be more confused.
33. Don't Be Discouraged By The Steep Learning Curve
I’ve invited people I know to play the game only for them to quit after a few games saying that it’s too hard, and I agree, because Siege might actually be the hardest game among the popular fps esports titles available today. That’s because there’s a lot of depth to its gameplay. It’s not only about who has the best aim. In Siege, there would be a lot of times when a team of players with great aim would be beaten by a team of players with mediocre aim but with high IQ.
That’s why I encourage new players to not give up just because they keep dying and placing bottom at the scoreboard. Once you’ve familiarized yourself with the map layouts, life in Siege will be easier and more enjoyable. You’ll also be able to anticipate where the enemies will be coming, and score more kills. Of course, with more knowledge, you’ll be able to counter them more effectively, or escape from them when needed.
32. Familiarize Yourself With The Sound Cues
While night mode dynamic range, a decent 7.1 headset, and spatial sound will go a long way for you to detect sound cues, it will also help for you to familiarize yourself with what each sound cues mean. Because that could let you know which operators you’ll be dealing with if you haven’t scanned them already.
Most special gadgets in the game have their own unique sound, so when one of your teammates steps on a Lesion Gu Mine for example and you’re just a few meters away, you’d know that you’ll have to watch out for more Gu Mines while penetrating the objective spot even without your teammate telling you that there’s a Lesion. That’s just one example of how knowing what each sound cues mean can really help you in Siege’s gameplay.
31. Don't Sleep on the Muzzle Brake
The in-game description of the muzzle brake is that it lowers the recoil of single-shot firing guns, and this leads a lot of players to assume that it’s only great for single-shot firing guns like marksman rifles or pistols. However, it’s also great for stabilizing the subsequent shots of automatic weapons that have a strong first shot recoil.
One of the fully automatic guns where I attach a muzzle brake to is Twitch’s F2 assault rifle. Because the muzzle brake greatly lowers its first shot recoil, the recoil of shots that follow are stabilized, resulting in a better recoil especially for shorter sprays. And just in case you haven’t heard the news, the muzzle brake has been buffed recently. Its recoil control is now up to 50% from 45%.
30. Be Mindful of When to Reload
There has been a recent rework on the reloading of guns in the game and it’s a step in the right direction, because before that rework, players can fake a reload to lure their enemies in, and when the enemy pushes, thinking that they’re reloading due to the reload sound cue, they’ll just cancel the reload animation and score an easy kill.
But after the reload rework, once the player starts reloading, there would only be 1 bullet left in the gun’s chamber until the whole reload process is finished. This also means that players now have to be more careful when reloading and be sure that there are no enemies around when they do so. Because until the reload process is finished, they would only be able to fire that one bullet left in their chamber.
29. Take Advantage of Siege's Verticality
And this is why map familiarity is so important. With enough map knowledge, you’ll be able to take advantage of Siege’s verticality when dealing with opponents. That’s because a lot of objective spots are below wooden floors, and as an attacker, you can destroy portions of those wooden floors to expose the defenders inside, and of course, if you’re playing Fuze, using those wooden floors above the objective spot for deploying your Cluster Charges could score you some kills.
If not, you’ll definitely be able to destroy many of the defenders’ gadgets instead. And with many of the defender gadgets destroyed, it’ll be easier for the attacking team to push. Even on defense, you can take advantage of Siege’s verticality by going above the floor that you expect attackers to be in, destroying a portion of the wooden floor above that floor, and fragging the enemies from above once they’re there.
28. Watch the Cameras When You're Dead
This is one of the best ways to contribute to your team even when you’re dead, and you can do this whether you’re on the attacker side or the defender side. On the defender side, once you’re dead, you can gather intel through the remaining CCTV cameras, bulletproof cameras, Valkyrie Black Eye cams, or Maestro’s Evil Eyes. The defenders usually have the advantage in this regard, because they usually have more cameras than the attackers.
On the attacker side, if you and your teammates were able to place your drones on important spots like common flanking paths, you’ll be able to gather important intel that will help your remaining teammates win. It’s also a great way to increase your map knowledge and be familiar with the callouts. Of course, now that attackers can have more cameras through Zero’s Argus Cams and the cameras that Brava hacks, this part of Siege’s gameplay has become even more important to practice.
27. Learn the Value of Compensators
I talked about the muzzle brake in a previous entry but another very underrated barrel attachment is the compensator. That's because it doesn’t reduce the vertical recoil of weapons unlike the flash hider and it also doesn’t remove the weapon’s muzzle flash. However, it’s a great barrel attachment for weapons that have strong horizontal recoil.
The compensator barrel attachment reduces the recoil diamond size of weapons, and that results in lower horizontal and random recoil from all directions. That’s why if the recoil pattern image of the weapon shows wide or big recoil diamonds, you should consider attaching the compensator, especially now that its recoil control has been buffed and it now reduces horizontal and random recoil from all directions by 35%.
26. Remember What You See on the Kill Cam
The kill cam is one of the reasons why newbies shouldn’t be discouraged even when they keep on dying round after round. That’s because with each death, they can learn something new through the kill cam. The kill cam shows how enemies killed you, so you should pay attention because a lot of times, you’ll be able to learn from the enemy.
I’ve been playing Siege for five years now and from time to time I still learn new angles and hiding spots from the enemies who killed me. So even when you’re raging, pay close attention to how the opponent killed you, because chances are, it will help you along the way. It’s also a good way to learn about your opponents’ usual tactics so that you’ll be able to deal with them better the next round.
25. Know When to Take Advantage of the Angled Grip
Sadly, the angled grip has been nerfed, and that has reduced its popularity among Siege users. Understandably, most players would opt for the vertical grip instead because of its recoil control benefits. However, there are guns in Siege that don’t really need additional recoil control from the vertical grip, and that’s when you should opt for the angled grip instead.
Guns like the ACS12 and UMP45 among a few others will have a very manageable recoil even when you’re using an angled grip. And with the angled grip, you’ll be able to go into aim-down-sights stance faster than normal, so it only makes more sense to use the angled grip on those low recoil guns and benefit from the ADS speed boost.
24. Don't Use Loud Skins
Now a lot of veteran players get away with using loud skins because understandably, they’re very used to Siege’s gameplay, so their reflexes are better and so are their game sense when it comes to Siege. However, as a newbie, even when you get them from alpha packs, I would discourage you from using loud skins.
That’s because loud skins can make your enemies spot you a lot easier, since most loud skins have a high contrast to the usual backdrops in Siege. So go with dark, or even better, gray skin. If you notice in training grounds, it’s hard to notice the terrorists because of their plain gray skins. That’s the look that you should strive for and I can guarantee that it’ll be harder for enemies to notice you.
23. Don't Sleep on the Suppressor
It has been buffed pretty recently and for one season it became the player-favorite barrel attachment. However, I feel like it went back to underrated status after the major buff on the extended barrel which made it so that it now adds 12% damage on weapons. Because of that buff, the extended barrel is now the player-favorite. However, in most cases, I would still advise to run with the suppressor.
That’s because with the suppressor, it will be much harder for enemies to find you since it will remove the weapon’s directional threat indicator and muzzle flash. So unless they’ve already seen you, they won’t get a warning on which direction your shots are coming from. On top of that, it will also be very hard for enemies to hear where you’re shooting from because the suppressor will greatly silence the weapon’s gunshots.
22. Learn the Callouts Early On
Even if you have a mic and can communicate with your team via voice chat, it would be pretty useless if your call outs are somewhere along the lines of “he’s there!” or “over there!”. In Siege, your callouts have to be precise. Preferably telling your teammates the name of the room where you spotted the enemy.
Now of course nobody expects newbies to memorize the names of every spot in the maps. Heck, even veteran players haven’t memorized all of them. But the more you keep in mind, the better. And for those rooms whose names you do not know, you can always see their name at the bottom of your screen as long as you didn’t turn it off in the HUD settings.
21. Take Note of the Spawn Peek Spots
One of the most frustrating things in Siege for newbies is getting spawn peeked. Even those who have been playing the game for a long time still become victims to spawn peeking sometimes. But the best way to avoid getting spawn peeked is to keep in mind the spots that the enemies used to kill you. Again, that’s why the kill cam is so helpful.
With the kill cam, you’ll be able to know which window or door the enemy used to spawn peek you. That way, you’ll be able to avoid those spots next time or even use that knowledge to counter spawn peekers. Of course, if you’re bold enough, you can even try those spots yourself when you’re defending. Knowing the usual spots for spawn peeking will also allow you to always choose the safest spawn area.
20. Take Advantage of Murder Holes
This goes along with the tips on map familiarity and not being so eager to reinforce every wall during the preparation phase. That’s because with good enough map knowledge, you’ll be able to use unreinforced walls to create kill holes. In front of an unreinforced wall, you can just melee one time and that should create a hole that is big enough for you to see enemies on the other side, but small enough for enemies to spot so easily.
There are a lot of great spots for kill holes. One such spot is the left wall from the Top Green in the Kanal map. With a kill hole there, you’ll be able to see if enemies are coming from the printer area, and most of the time, they won’t immediately see your kill hole so you’ll have the advantage. Always analyze the areas in the maps and think of whether the walls would be great for murder holes or if it’s better to just reinforce them.
19. Add Friends
There are a lot of players who start out in Siege solo, and that’s very understandable, I, too, had a hard time inviting my own friends to play Siege. But along the way, you’ll be able to meet good players while you’re playing the game, and my suggestion is to add them and ask them to play with you. That’s because it’s hard to maintain a good winning percentage if you keep on playing with random players.
Having constant people to play with also allows you to learn more team play and coordination, and ultimately, Siege is more fun with friends, so don’t be shy and add people. Of course, another easy way to find people to play with is to join R6 discord servers and R6 Facebook groups. The Rainbow Six Siege community in Reddit is also very active so you can find people to play with there.
18. Change Your Crosshair Color
This is a feature that came late to the game, but nevertheless is very useful. At the accessibility settings, you’ll find the option to change your crosshair color. Now I advise you to use what works best for you. Meaning, what you find the most comfortable with. But I recommend the color green, because there are not a lot of green backdrops or items in the game.
That means there would be much less chance of your crosshair blending in with the backdrop or with an object. With a green crosshair, you’ll be sure that your crosshair will be visible at all times and you won’t lose control of your aim, especially when enemies are nearby. And even though there are a lot of loud skins in the game these days, very few of them are of the color green, so with a green crosshair, you’ll always be sure that you’ll be able to target your enemies well.
17. Adjust Your Graphics Settings
This is one of the most important things to do with the settings early on. I know it’s nice to have great graphics quality in games, especially when your gaming rig has good specs. However, in a competitive shooter like Siege, it’s better to lower your graphics settings. The lower graphics settings will help you spot your enemies better against most of the backdrops in the game and when they’re hiding behind objects.
Just be careful not to put the shadow settings into its lowest value. That's because the lowest value will result in only static shadows, so that will prevent you from seeing the enemies’ shadows. So put shadows in medium settings at the lowest. That will ensure that in certain angles or lighting, you’ll be able to see when enemies are coming through the movement of their shadows.
16. Practice Using High Zoom Levels Early On
Now I know that using high zoom levels, especially when deep inside the mission building, and that mission building has tight angles, can be quite intimidating. Obviously, at close quarters combat, a high zoom level will be at a disadvantage. However, I encourage newbies to get used to at least the scope 2.0x early on. The scope 2.0x has a great balance between zoom level and peripheral view, and the earlier you can get used to high zoom levels, the better.
With high zoom levels, you’ll be able to aim at your opponents more effectively. That’s because high zoom levels will make enemies appear bigger on your screen, and that will allow you to see them very clearly. With higher zoom levels, it’ll be easier for you to go for headsets, and hit enemies behind items in the map. And once you’re more experienced, you won’t be afraid of using even the scope 3.0x at close range.
15. Setup Your Loadout Settings
This is one of the very first things you should do after buying the game and unlocking the operators. You don’t wanna go into a match with a loadout setup that doesn’t feel right. So before going into a match, be sure that you’ve customized the loadout setups of all of the operators that are available to you. And of course, if you need guidance in setting up your loadout settings, feel free to look at my top 5 loadout settings article for each operator.
14. Practice Pre-firing Early On
This is one of the skills that newbies should get used to early on in Siege, and it can be done by applying some of the tips above, especially map familiarity. Once you’re familiar with the map layouts and the usual paths that enemies take, as well as their usual hiding spots, you’ll be able to perform pre-firing with more confidence.
The downside is that if you pre-fire and it turns out that there’s actually no enemy there, you’d end up just giving away your position through your gunshot sound. That’s one of the reasons why I highly recommend the suppressor barrel attachment. Of course, you can also use the sound cues to determine whether pre-firing would be good or not, and once you’re sure that an opponent is in a particular direction, that’s when you should pre-fire.
13. Mind Your Screen Space
The less obstructions to your view, the better when it comes to spotting enemies. And you can free up a lot of screen space by turning off some of the HUD elements on your screen in the HUD settings. One of those useless HUD elements is the stance indicator. You wouldn’t really need that since it would be very obvious to you when you’re standing, crouching, or in a prone position.
You can also free up some screen space by choosing sights based on how much screen space they take up. For example, the scope 2.0x is one of the best scopes in the game because its frame is quite thin and doesn’t take up a lot of screen space. It does have a large gear that takes up a lot of screen space on the upper left area of the screen, but in most areas, it’ll give you a wide and clear view.
12. Adjust Your FOV Settings
The default FOV settings in Siege is 60 and that’s too low, so I highly encourage players to change it to around 80 or more. A lot of Siege pros even use the maximum value which is 90. But for beginners, try to get used to 80 first and see how you feel. That’s because a higher FOV value will provide you with a wider view of your surroundings, but it will make things look further from your front view.
This goes hand in hand with the tip about getting used to high zoom levels early on. With scopes that offer high levels of zoom, you can mitigate the drawback of making your FOV value higher. Customizing your aspect ratio setting will also help you with this, because some aspect ratio will make things appear bigger, and that will further mitigate the effect of higher FOV values making things in front of you appear further.
11. Advanced is the Way to Go
This goes for both gadget deployment and drone deployment. When it comes to drone deployment, once you press the drone button, you will automatically switch to the observation tool view as soon as you deploy your drone. That’s not a good thing when you accidentally press the drone button in the middle of combat. But with advanced settings, you’ll even be able to throw a drone as bait, as deploying a drone won’t automatically turn your view to observation tool view.
As for the advanced gadget deployment, pressing the special gadget button won’t automatically deploy your special gadget. Instead, they will remain on your hand, and you’d have to press left click to deploy them. This is important because it allows you to be more strategic when it comes to using your special gadgets. For example, with advanced gadget deployment, Thermite can easily cancel the deployment of his special gadget, and that’s important in preventing his Exothermic Charge from falling victim to a Bandit Trick.
10. Watch Siege Youtubers
There are a lot of great Siege Youtubers around, but just because a Siege Youtuber has great aim and lightning fast reflexes doesn’t mean they’re also recommended for beginners. I honestly wouldn’t recommend beginners to watch Shaiiko or Beaulo because most of the things that they do with their aim are very advanced and most beginners won’t be able to do it.
The Siege Youtuber that I highly recommend for beginners is Macie Jay. Now don’t get me wrong, a lot of the things he does are advanced too, but he does it more smoothly and in a more tactical way. He has great aim but he relies more on high IQ gameplay, which I think most players who are new to the game would really benefit from. The early Siege tutorial videos of Basically Homeless are great too.
9. Take Advantage of Spatial Sound
Spatial sound will allow you to better recognize if the sound is coming from below, the same level, or above, and that’s a really good thing to have in Siege. A lot of players are unaware of this, but they can actually use it for free on Windows. From the desktop, just right click the sound icon on the bottom left of your taskbar, hover to spatial sound, and click Windows Sonic for Headphones.
This free feature from Windows is good enough, but if you want a better spatial sound, you can purchase DTS Headphone X which is available in the Microsoft Store. In my experience, DTS Headphone X provides the best experience when it comes to recognizing sound cues in Siege, especially when partnered with a good 7.1 headset. DTS Headphone X will make the sounds from the game even crispier and more detailed, so they’re easier to recognize.
8. Go Random
That means pick random operators each time you play until you’ve become familiar with how each operator is played. Yes, you can learn about each operator in Youtube, but just watching something is very different from experiencing it yourself. So while Youtube videos on each operator are very helpful, I still strongly encourage new players to play a wide variety of operators each time they go into a multiplayer match.
That will provide them with enough knowledge, not only for using the operators, but also when it comes to going against them. Because the more you know about an operator, the better you’ll be able to predict how your enemies will move. There are also things about the operator special gadgets that you’ll really only discover through first-hand experience and not through watching videos on Youtube.
7. Practice Low ADS Sensitivity
In general, it is recommended to keep low ADS sensitivity settings, especially for beginners. That’s because most of the time that you’re aiming-down-sights mean that you’re expecting enemies to be in your line of sight, or you already have them in your sights. Most of the big adjustments on view that you’ll be making are outside of ADS, and once you’re already on ADS stance, the lower sensitivity value will help you maintain your aim.
Higher ADS sensitivity settings could make your aim unstable, especially when you’re chasing an enemy who’s moving around a lot with your aim. Siege operators cannot really move as fast as most characters from other multiplayers can anyway, so your adjustments in aim while you’re aiming-down-sights should be minimal so that you won’t lose control of your aim. And once you’re a more experienced player, that’s when you can experiment on higher ADS sensitivity settings, but for now, I would recommend to stick to the basics.
6. Train in Ranked
Ranked is the most competitive game mode in Siege. It’s also the most difficult, especially in the higher elos. So unless you’ve set your mind to only be playing in quick matches, you’d also want to test your skills in Ranked and see what your rank placement will be at the end of the season. And since Ranked is the most competitive game mode in Siege, it’s also the best place to train.
Training for achieving higher ranks of course. If you desire to get better in the game and achieve higher rankings, there’s no better place to train other than Ranked itself. The higher your rank is, the better your opponents will be, and the more you will learn from them. For example, the opponents that you’ll usually encounter in bronze have a much slower reaction time than the ones in gold. So when you get into gold and the more you remain there, the more you can practice against enemies with fast reaction time.
5. Take Advantage of Aim Lab
Aim Lab is a great free software for fps players because it provides training modules dedicated for particular games. Siege is an official partner of Aim Lab and some of the modules they have for Siege training are great. A lot of the Siege modules there feature the same map layouts from Siege, so it’s good for map familiarity as well. If you’re serious about getting good in Siege, I highly recommend creating your Aim Lab routine.
I personally do my Aim Lab routine whenever I start up my computer. It’s like being a real operator and training each day in order to maintain and improve your skills. Having an Aim Lab routine can also prevent rustiness when you’re busy and can’t play for a long time, you can just do your Aim Lab routine for 10-15 minutes each day and guaranteed that it can improve your reaction time as well as your crosshair placement.
4. Learn How to Flank
Outmaneuvering your enemies is one of the best ways to win in Siege, especially against enemies who have better reflexes and aim than you. This is why rotation holes are important, and taking advantage of Siege’s destructible walls goes a long way in winning the round. When you’re flanking, you’ll be giving your enemies more to worry about, as opposed to them just focusing on one direction.
Some of the great flankers on the attacking side are Zofia, Nokk, Iana, and Ying. While on the defender side, great flankers include Alibi, Oryx, Ela, and Vigil. Flanking involves getting around your enemies quickly and surprising them. Taking them out when they’re unaware. And that’s also why rotation holes and having open paths on the objective spot is very important. Without them, it’ll be much more difficult to flank attackers while you’re on defense.
3. Test Your Loadouts at the Shooting Range
It used to be that when players want to test their weapon’s recoil, they go into Training Grounds, formerly known as Terrorist Hunt, and find an area that is clear of enemies and they shoot their guns on the wall. But now, Siege has a very convenient area for testing each of your loadout setups, namely, The Shooting Range. It has two areas, and the first one is the one with a big circular target, and the second one is where you can test your recoil and aim on a training dummy.
Bullets are unlimited in the Shooting Range and you can even set the distance of the target. Perhaps its most convenient feature is that you don’t have to go out of the game mode just to change operators or loadout setup. All the player has to do is press ‘7’ by default, and the game will take them back to the operator selection menu where they can also change their loadout settings without having to go through any loading screen again.
2. Practice Quick Peeks
Quick peeking is one of the advanced skills in Siege that I encourage players to learn early on. There are plenty of Youtube videos on how to do it, and it may seem complicated at first, but with enough practice, anyone could do it. That’s also the reason why I think beginners should get used to performing it early on, because it’ll be one of the handiest skills that they can use once they level up some more and go into Ranked.
The higher elos in Ranked are full of ridiculously skilled players with great aim, and most of all, very fast reflexes, so normal peeking won’t be any good there because that’ll be too slow and chances are, they’ll be able to cap your head before you get back to cover. So I highly encourage learning how to quick peek and keep on practicing it once you’ve learned it. It’s a great way for gathering intel, and once you’ve become more experienced, you can even use it for fragging.
1. Practice Proper Crosshair Placement
Speaking of enemies with ridiculously great reflexes and aim, one of the best ways to combat them is by practicing proper crosshair placement. With proper crosshair placement, the moment you fire your weapon, the shot will go straight to the opponent’s head, thus, taking them out much quicker. Well, at least that’s the theory. Of course, it doesn’t always happen.
But I can speak from experience that once I’ve learned proper crosshair placement, my headshot percentage went up from 30% to 45%. So while instant headshots still won’t always happen, learning proper crosshair placement will really help you take opponents down faster. You can do this by keeping your aim at shoulder level most of the time and practicing it on Training Grounds with headshots-only enabled.
Attention operator, please be advised. There is a new directive from Six. Read up on these related articles, and prepare for deployment:


