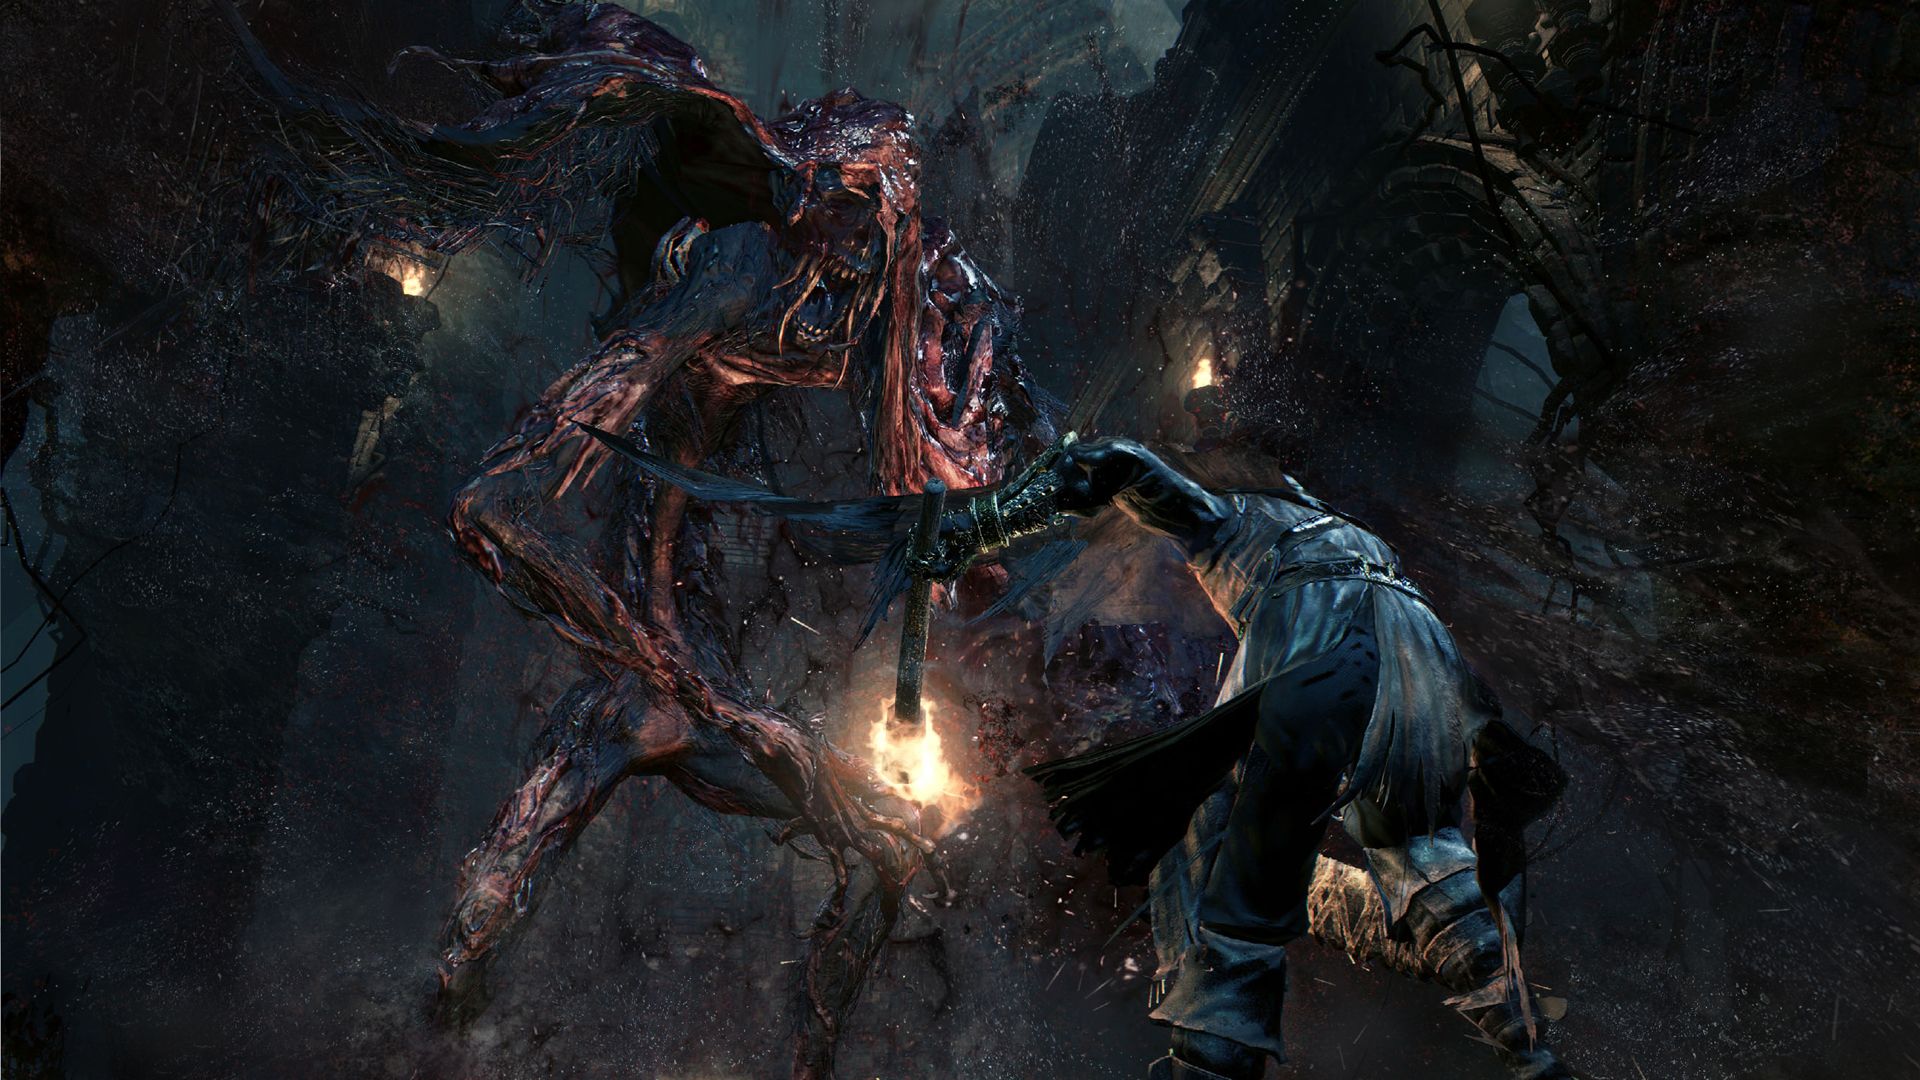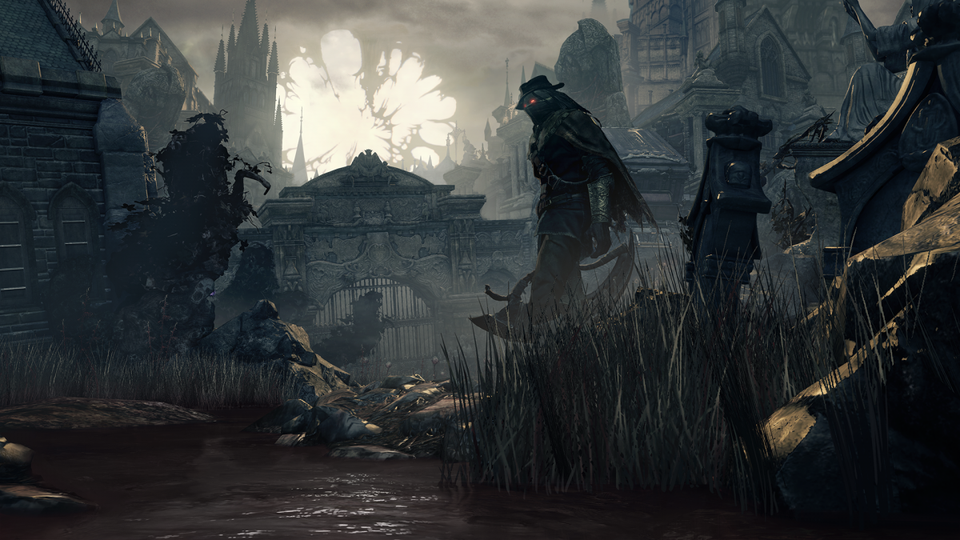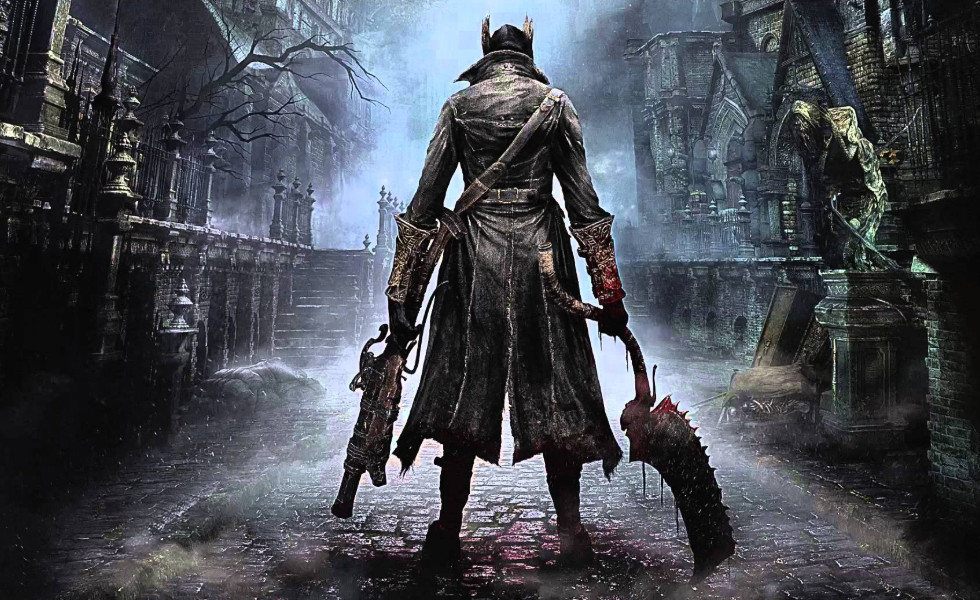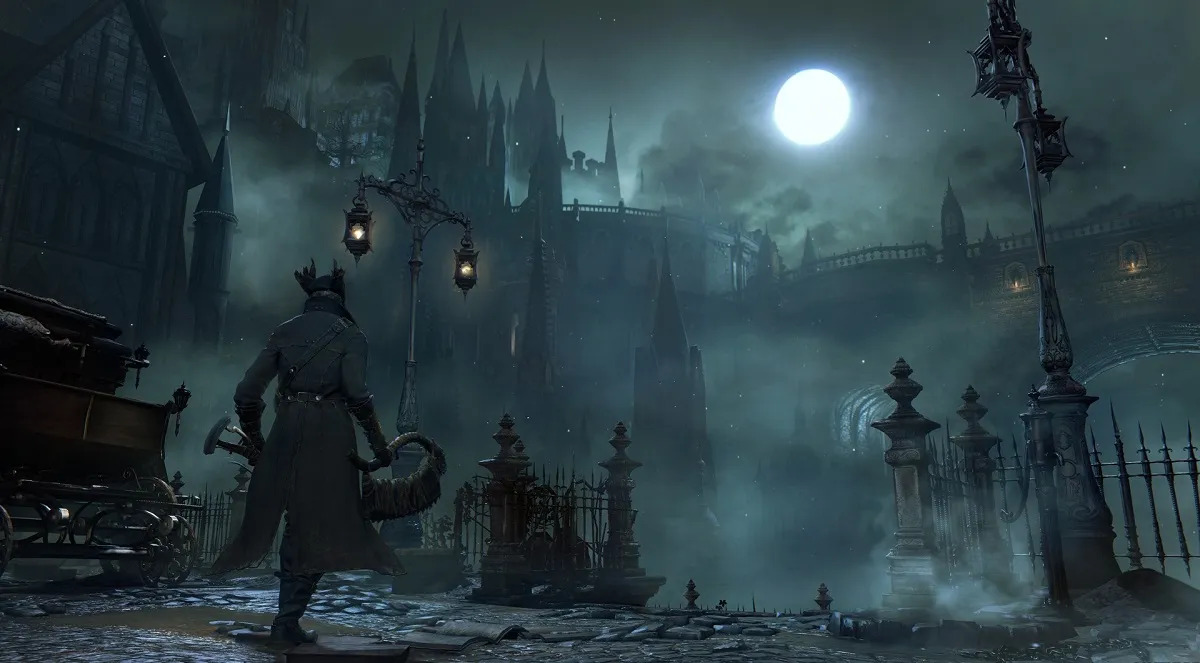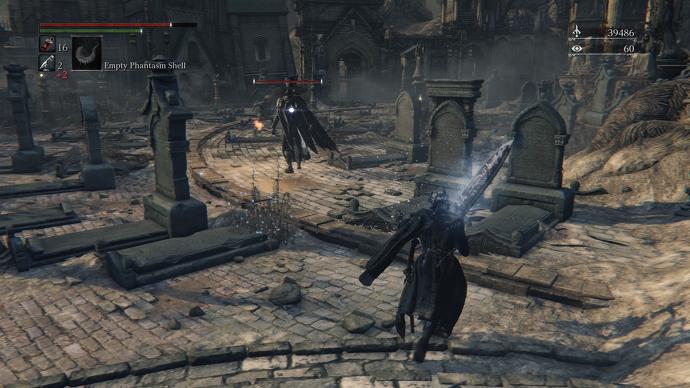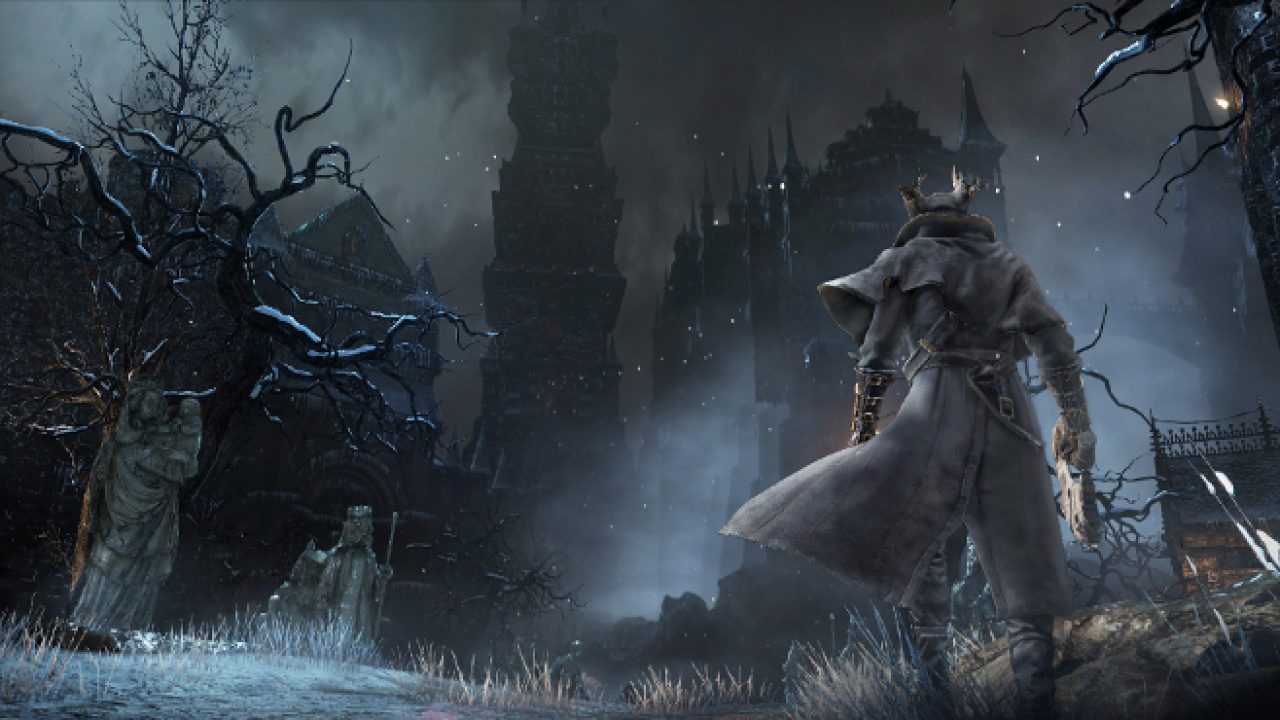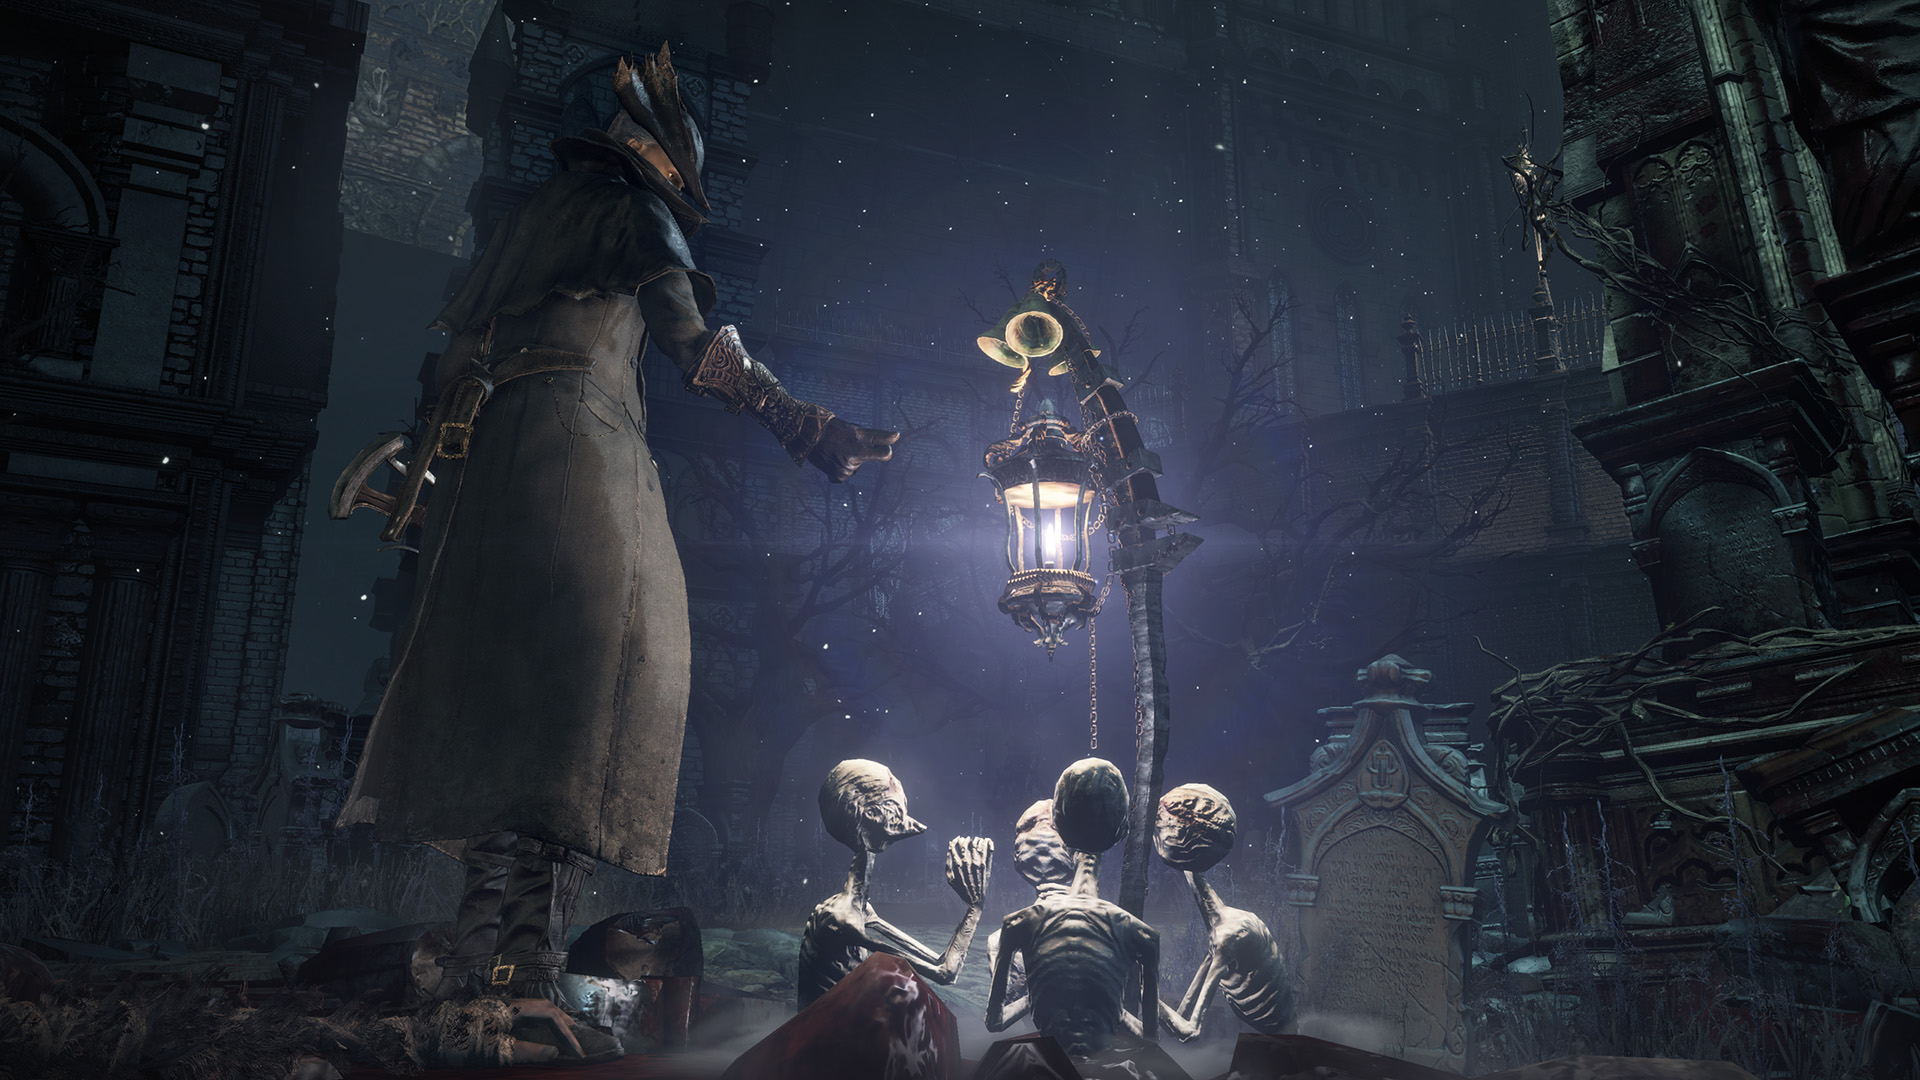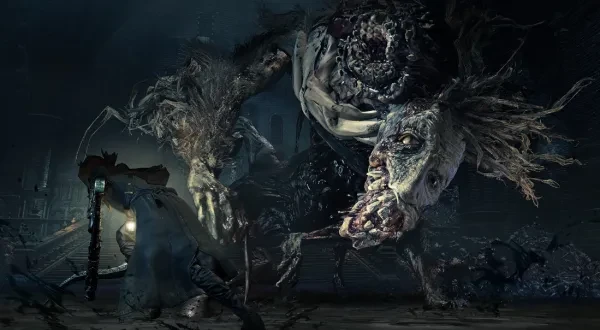
Two people can’t argue that Bloodborne has some of the best bosses in the Souls series, from the horrifying atmosphere to the stunning music to the absolutely ridiculous difficulty!
Bosses in Bloodborne are different than bosses in other Souls games, especially Dark Souls. The fights are more aggressive, the pace is significantly higher, and you’re also missing a shield.
Who is this boss? How am I supposed to defeat it?
These are difficult questions, but don't worry; we've done the 200 hours of gameplay for you and compiled a detailed list of Bloodborne bosses ranked from easiest to hardest and how to defeat them.
Keep in mind that the difficulty of Bloodborne can vary depending on your skill and how long it takes you to find boss weaknesses.
Obviously, spoilers follow. Let’s slaughter some prey!
22. The Witch of Hemwick (Optional)

Witch Of Hemwick boss.
The Witch of Hemwick can be found at the very end of Hemwick Charnel Lane.
This boss is optional but is recommended because it’s the only way to obtain the Rune Workshop Tool, which allows you to equip Caryll Runes.
So why is The Witch of Hemwick last on our list? because it’s a fairly simple boss fight compared to other bosses in Bloodborne. This boss is straight-forward, and there’s nothing too complicated about it.
Stats & Drops: Boss HP 2611 / Echoes 11800 / Bloodshot Eyeball x4.
How to defeat The Witch of Hemwick:
- You should know that there are actually two witches, which are visually identical and can turn invisible. The second witch's HP bar doesn't show up until you kill the first one, but you can still deal damage to it.
- The witches can revive each other in the second phase. You have to quickly finish off either of them so they don’t team up on you.
- During the fight, Mad Ones will spawn. It’s best to ignore them and focus on finding and dealing damage to the witches.
- The witches tend to be on both sides of the wooden ramp in the middle of the room and in the left and right corners of the far north and south sides of the room. So, what you should do is immediately start sprinting and making laps around the room, stay close to the wall, and rotate the camera as you sprint so you can see most of the room while you’re moving.
- Sprinting around raises the chance that you will come into close proximity to invisible witches, and they will become visible as a result. When you see one, use a strong attack and spam R1, as they will vanish quickly after taking damage.
Best way to defeat The Witch of Hemwick video guide:
21. Celestial Emissary (Optional)
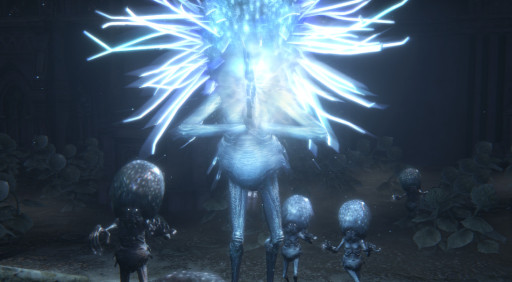
A visually stunning view of the Celestial Emissary.
Celestial Emissary is an optional Great One Boss in Bloodborne. Found in the Orphanage, in Upper Cathedral Ward (requires Orphanage Key dropped from an enemy). Also found in Chalice Dungeons.
The Celestial Emissary can either be the easiest or hardest boss fight for you, depending on how aggressive you are. If you’re too passive, you’ll be overwhelmed by a horde of funny-looking blue guys and die in no time.
Stats & Drops: Boss HP 2764 / Echoes 24640 / Communion (Caryll Rune)
How to defeat the Celestial Emissary:
- The Celestial Emissary boss looks exactly like the other Celestials in the crowd, hiding between them. And unlike them, the Celestial Emissary stays back and doesn’t chase you, giving you a way to recognize him. He also doesn’t have a health bar above his head.
- You get a few seconds to attack the boss if you clear out all the Celestials before they respawn.
- The boss has 3 phases, and is vulnerable to Bolt, then Fire.
- You can punish him during the transformation animation using charged attacks.
- After losing 50% of his HP, the Celestial Emissary grows in size and acquires new attacks.
- After losing 75% of his HP, he will start growing tentacles in his head that hurl arcane projectiles towards you.
- The Celestials keep respawning and will all die once the boss is defeated.
- ATTACK 1: Quad Stomp - four stomps with short intervals. Order: Left Leg, Right Leg, Right Leg, Left Leg.
- ATTACK 2: Torso Drop - Reaches into the air before dropping his body and arms on you. Can sometimes be combined with arm swipe attacks.
- ATTACK 3: Cosmic Barrage - When he transforms, blue tentacles appear from his head and will sometimes emit a blue aura of cosmic energy from his head and shoot 6 rapid cosmic lasers on your current location.
- Other attacks can be a combination of the ones mentioned above from stomps to arm swipes.
- His laser spell can be quite deadly, so standing close to him or behind a pillar is your best chance of avoiding it.
Best way to defeat the Celestial Emissary video guide:
20. Cleric Beast (Optional)
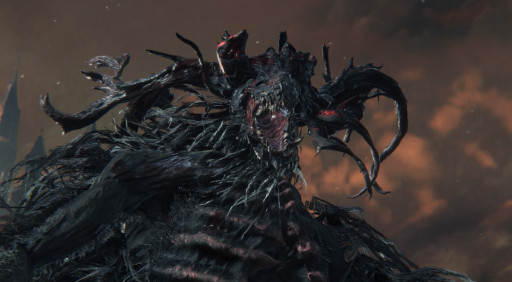
Cleric Beast's deformed face.
The Cleric Beast is an optional boss in Bloodborne. Found in Central Yharnam at the far end of the great bridge. It’s likely to be the first boss you encounter in Bloodborne.
Most players struggle with the Cleric Beast because they’re still new to Bloodborne. What makes this boss hard is the narrow bridge (boss arena), and he takes most of it using his size and sweep attacks, leaving no room for error. Literally.
Stats & Drops: Boss HP 3015 / Echoes 4000 / Sword Hunter Badge
How to defeat the Cleric Beast:
- The Cleric Beast is weak to Serration and Fire, and can be staggered for a short time if you hit his limbs.
- Always dodge and stay behind him, since his left arm does low damage that can easily be recovered via the Rally mechanic (hitting back to regain lost HP).
- Molotov Cocktails mixed with Oil Urns are extremely effective.
- You can summon Father Gascoigne to fight with you, to distract the boss and allow you to deal damage and heal if needed.
- You can shoot his head with your pistol to open him up for a visceral attack that deals massive damage.
- Grab Attack: Cleric Beast has a grab that can be deadly, if you see its left arm swing forward in a grappling motion, get out of the way.
- 4-hit Combo: Wait away from the boss until its last hit slams the floor then counter.
- If he leaps forward, roll into the leap.
Best way to defeat the Cleric Beast video guide:
19. The One Reborn (Main)
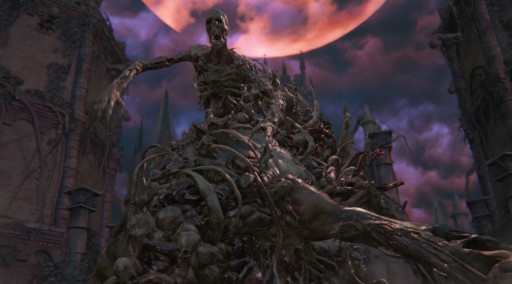
This pile of bone and flesh is The One Reborn.
The One Reborn is a main boss in Bloodborne. Found in Advent Plaza after defeating Rom, the Vacuous Spider. He blocks the only way to get to the Nightmare of Mensis.
The One Reborn is a colossal undead mass of flesh and skeletons that literally drops from a hole in the sky, assisted by red Chime Maidens that shoot fireballs and heal The One Reborn using purple projectiles.
During our first encounter, this boss nearly scared us to death. It’s an ugly view and an ugly fight. There are so many things happening at once.
Stats & Drops: Boss HP 10375 / Echoes 36300 / Yellow Backbone x3.
How to defeat The One Reborn:
- Weak to Bolt and Fire.
- You should first run past the boss and up the stairs in the corner areas and kill the Chime Maidens that are supporting the boss. Careful not to get hit by his Sweeping Corpses attack.
- Head back to the boss arena and engage the boss with melee attacks with a weapon that gives you either quick successive hits or a heavy knockback effect. Target his mid-section; he struggles to hit you if you’re between his middle legs.
- You should also go for his bigger limbs; combos deal a lot of damage.
- If the boss starts to vomit, move away immediately.
- He may summon a rain of body parts that tracks you. Backstep or dodge until the attack stops.
- If he begins to discharge or Vein Shot/Rain of Flesh just run around the arena, and Flailing Corpses is easily countered by backstepping away.
- This boss is easy to stagger, and his weakness to fire and bolt damage is very punishable.
- Try to stay above half health, and do your best to hit and run rather than stick to the boss the entire time.
Best way to defeat The One Reborn video guide:
18. Micolash, Host of the Nightmare (Main)
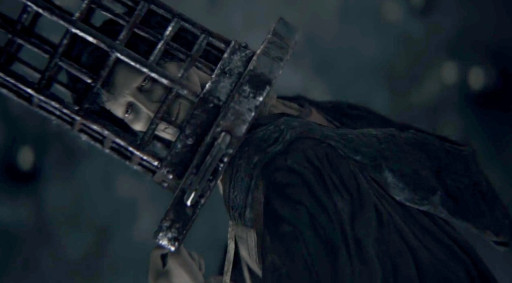
Micolash's creepy look.
"Ahhh Kos... or some say Kosm. Do you hear our prayers?"
Micolash, Host of the Nightmare is a main boss in Bloodborne. Found in the Nightmare of Mensis, take a left from the lantern, then follow the path to the castle and pass through until you reach a long bridge, after which you will find the boss room.
Even though Micolash is number 18 on the list, you’ll hate your life fighting him.
Why? Because it’s such an annoying boss fight. He’s your size, but he runs a lot faster, meaning you’ll be chasing him through a maze the entire time. And once you DO catch him, there’s a good chance he’ll one hit kill you with his stars attack. Not cool, FromSoftware.
Stats & Drops: Boss HP 5250 / Echoes 48400 / Mensis Cage (Head Armor)
How to defeat Micolash, Host of Nightmare:
- You will be fighting him in a maze-like library with staircases, the ground is covered in mist making enemies harder to see. Keep your guard up.
- Micolash is not an aggressive boss, but he has a dangerous A Call Beyond spell, tentacle arms (Augur of Ebrietas), and Ethereal Walkers who help him during the first part of the fight.
- During the first phase, you need to find him and follow him to a dead-end room where you can beat on him until he is at half health and teleports away.
- To trigger his second phase, head up the stairs, past a few of the crossbow mannequins. You will arrive in another area that looks just like the first one. He will be there, but he will soon run into a dead end, dropping a gate that prevents you from entering. Head up the stairs here and you will find a drop down where you can drop into that dead-end room and start the second phase.
- During his second phase, he will be much more aggressive, using Augur of Ebrietas, fists (very weak), and A Call Beyond, which is very difficult to dodge and might kill you with one hit.
- The secret here is to never let him cast A Call Beyond, because if he does then you are pretty much dead. If you stand really close to him, he will never use that spell, resorting instead to his fists and tentacles. If you get too far away and he does manage to start the spell, shoot him immediately; if you catch him early enough, you will stagger him out of the casting.
- A Call Beyond spell will kill anyone at full health. He will sometimes spam this spell. There is no real counter when he does this, since unlike the Augur of Ebrietas, this attack cannot be interrupted, and the missiles will fire even if Micolash is staggered in the middle of this channel animation. Hence the importance of staying right next to him.
- Backstabs (charged R2 to the back) can be performed when he does the Augur of Ebrietas. This is a reliable way to deal tons of damage, particularly during the first phase.
- There are multiple ways to defeat Micolash, and some of them are basically cheats, but overall, if you follow these tips, you should be able to defeat him the intended way, without cheats or exploits.
Best way to defeat Micolash, Host of Nightmare video guide:
17. Living Failures (DLC)
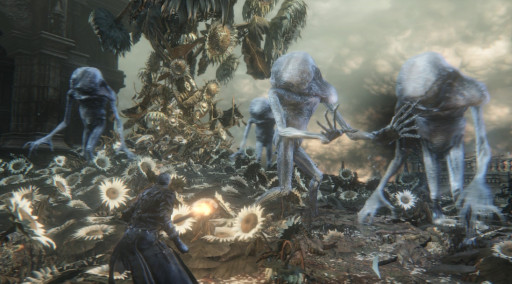
Living Failures resemble the Celestial Emissary a lot.
Our first DLC boss in the list! Living Failures is a DLC boss in Bloodborne. Found by going through the Research Hall and rotating the stairs to gain access to the door that leads to Lumenwood Gardens.
The Living Failures are massive, faceless, deformed, and alien-like creatures. Definitely not the most appealing boss(es) in Bloodborne.
This boss fight resembles the Celestial Emissary boss with a few differences, but the concept stays the same: you’ll be racing against time, clearing enemies before they overwhelm you.
Why is it higher on our list? Because it’s tricky to dodge multiple melee and arcane attacks while maintaining aggression.
Stats & Drops: Boss HP 20,646 / Echoes 22,000 / Astral Clocktower Key.
How to defeat the Living Failures:
- There can be a maximum of 4 Failures at once.
- Even though there are only 4 Failures, they all draw from the same health pool. If one is damaged enough, it will die and have another respawn.
- To create some breathing space, focus on one Failure at a time. Killing it will cause it to respawn elsewhere, leaving you with 3 Failures instead of 4.
- Some enemies follow you around (melee enemies), and some will cast arcane orbs and bolts. Melee ones can easily be dodged and punished.
- Meteors can be avoided by running counter-clockwise, using the Lumenwood tree as cover, and using the Loch Shield.
- Always attack isolated Failures.
- At 60% health (Phase 2), all of the Living Failures will stop and raise their hands toward the sky, using the Meteor Storm ability. The room will get dark, and blue meteors will rain down on the field.
- The Failures will not retaliate when attacked during this phase.
- The boss will now have access to this attack and can perform it at any time during the rest of the fight.
- The attack does not require any specific amount of Living Failures, as long as one is alive, he can perform this attack.
- Summoning Yamamura can make the fight a lot easier, he is encountered earlier in the DLC.
- Use backstabs and visceral attacks, especially on casters.
- They are weak to Bolt and Rapid Poison, use Bolt Paper.
- The Whirligig Saw is very effective, it’s recommended during this boss fight.
Best way to defeat the Living Failures video guide:
16. Mergo’s Wet Nurse (Main)
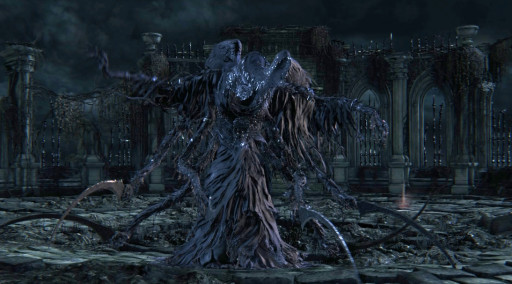
The blade wielding Mergo's Wet Nurse.
Mergo's Wet Nurse is a Great One Boss in Bloodborne and one of the three possible final bosses. Found in Nightmare of Mensis upper part after the elevator, after the Mergo's Loft: Middle lamp.
You enter the arena to the sound of a baby crying. When you approach the crying sounds, Mergo's Wet Nurse, a spirit that doesn’t bleed, pops up and starts the fight.
Mergo's Wet Nurse charges towards you with rapid blade attacks, which seem scary at first, but you later realise that it’s a straight-forward boss fight, especially since you’re now familiar with Bloodborne.
Stats & Drops: Boss HP 14081 / Echoes 72000 / One Third of Umbilical Cord / Unlocks Blood Rock as a purchasable item at Insight Bath Messenger.
How to defeat Mergo’s Wet Nurse:
- Her swinging blades attack may seem intimidating, but if you run around to her back, she can only hit you a couple of times. It's also your best chance to deal some heavy damage.
- At one point, the nurse will create a purple fog that covers the arena, and a clone will appear and attack simultaneously with the real Nurse. Don’t worry, though; this fog will disappear, as will the clone. Be careful not to get hit from behind by the clone during this phase. Other than that, continue dealing damage to the real nurse.
- The clone can be killed with a single hit; get it out of the way first, then concentrate on the real nurse.
- When the purple fog appears, lock on the real Nurse and keep evading counter-clockwise.
- You can stagger her as she casts her purple fog to prevent it from appearing.
- Poison Knives are very effective against her.
- The Arcane weapon buff Empty Phantasm Shell is effective against this boss.
- Most of her attacks (save for the blade flurry) can be rolled under. Pay attention to which way her arms move when she swings them around.
- She is particularly weak to bolt, an upgraded Tonitrus or another upgraded weapon with Bolt Paper can do massive damage to her.
Best way to defeat Mergo’s Wet Nurse video guide:
15. Vicar Amelia (Main)
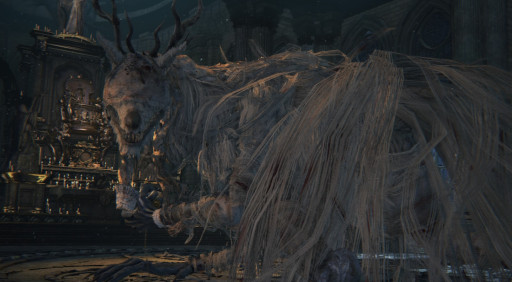
Vicar Amelia lurking in the dark Grand Cathedral.
"Remain wary of the frailty of men. Their wills are weak, minds young."
Vicar Amelia is a main boss in Bloodborne. Found in Cathedral Ward, past the big circular graveyard, up the stairs, inside the Grand Cathedral.
When you enter the final church of the Cathedral Ward to face Vicar Amelia and defeat her, the sky turns dark. At night, some enemies become stronger while others sleep.
Vicar Amelia introduces you to Bloodborne. She forces you to ditch fear and go aggressive. This boss makes you fight your instincts; you have to jump headfirst into death in order to survive.
Stats & Drops: Boss HP 5367 / Echoes 15000 / Gold Pendant.
How to defeat Vicar Amelia:
- Before doing anything, you need to unlock summons in Cathedral Ward. This requires the Hunter Chief Emblem item purchased from the Fountain in Hunter's Rest for 10,000 Echoes. Upon arriving in Cathedral Ward, take the left exit and then the right path past 2 enemies that use walking sticks. This will lead you to a big set of stairs and a giant enemy. Take the stairs upwards and use the Hunter Chief Emblem on the closed gate. This is the quickest way to open the gate and unlock the ability to summon people. This gate can also be unlocked using a lever, but you’ll have to do a lot of running around.
- The fight has 2 phases, Phase 1 at 100% HP - Normal move set. Phase 2 at 50% HP - she receives a healing ability, a few new combos, and becomes more aggressive with attacks.
- She’s weak to Fire Damage.
- Can be staggered and open to a Visceral Attack (when her head is down) during all phases. Triggered by heavy damage to her legs.
- She has a wide variety of attacks, covering her sides, close range, and long range, so there is no "safe" zone; you have to time dodges.
- Staying behind her is unadvised, as her tail blocks you from seeing attacks.
- After each of her attacks, there is an opening for one or two hits, so stay close and dodge in to get close to punish these openings.
- Since this boss heals in Phase 2, it is recommended to bring Numbing Mist with you to stop her from healing. The effect only lasts 30 seconds so reapply if needed.
- Old Hunter Henriet can be summoned for this fight, not to deal damage, but to keep her busy while you deal damage.
- Both legs are weak. Attacking one many times or both moderately will make her drop on her knees, allowing for a Visceral Attack.
- Both arms are weak. Attacking her arms will periodically stagger her. When staggered she lowers her head, which can then be hit.
- Her Head is her true weak point. It is the only body part that can be attacked critically (similar to the Cleric Beast). It also takes the most damage, if you manage to hit it.
- Vicar Amelia has well over twenty attacks. An easy way to survive her without learning them all is dodging to the attacking limb’s side. Most attacks including sweeps are better dodged to the side.
- The Threaded Cane and Saw Cleaver are suggested against her.
- Molotov and Oil Urns are also suggested against her.
Best way to defeat Vicar Amelia video guide:
14. Blood Starved Beast (Optional)
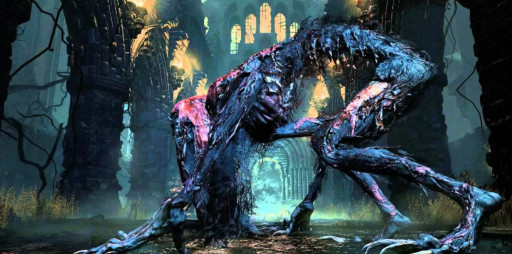
The disgusting abomination of a creature called Blood-Starved Beast.
The Blood-Starved Beast, also known as the Thirsty Beast, is an optional boss in Bloodborne. Can be found in Old Yharnam in a ruined church at the bottom of the area.
While optional, defeating it is required if you want to progress through Chalice Dungeons.
This malformed beast has its skin hanging from its back; it’s one of the most disgusting bosses in Bloodborne. The Blood-Starved Beast moves quickly and executes fast attacks that can be unpredictable at times, making it a troublesome (and certainly unpleasant) boss.
Stats & Drops: Boss HP 3470 / Echoes 6600 / Pthumeru Chalice.
How to defeat the Blood-Starved Beast:
- Boss is weak to Fire Damage.
- You need multiple Antidotes equipped on your quick slot. You can find 3 in the back of the altar in the boss room.
- It’s important to know that the Blood-starved Beast can be parried in all three phases.
- Equip anything that increases damage vs. Beasts to hit harder.
- The boss only attacks from the front, so staying to its side/behind is your best approach. ALWAYS dodge to the left.
- During Phases 2 and 3, the boss attacks in a chain of 5-6 swipes. These swipes usually continue towards the same direction even after you dodge, so use that to your advantage.
- Pungent Blood Cocktail distracts the boss, you can use that to land a few hits.
- Equip the Black Church, Yharnam Hunter Set, or Gascoigne's Set as they have good Slow Poison RES.
- The Blood-starved Beast has 3 phases, observe when it stops and roars:
- Phase 1: 100% HP - The boss is slower and has limited attack combos.
- Phase 2: 66% HP - It gains new attack combos and will now dodge away after each attack, allowing one or two hits before it moves. Its attacks now build up Slow Poison.
- Phase 3: 33% HP - In addition to the previous move set, it uses new combos and becomes more aggressive, Slow Poison liquid now splashes from the beast's body during its attacks.
- Using the Flamesprayer, which can be acquired from Gilbert after entering the citadel, can make this fight ridiculously easy.
- If you haven’t defeated Vicar Amelia yet, consider summoning Alfred to help keep the boss busy.
- If you’re brave enough, you can defeat the Blood-Starved Beast with only 7 well timed parries/visceral attacks.
Best way to defeat the Blood-Starved Beast video guide:
13. Moon Presence (Main)

The beautiful yet creepy Moon Presence.
Moon Presence is the real final boss in Bloodborne. Found in the Hunter's Dream, Moon Presence unlocks if you consume three of the four available "One Third of Umbilical Cord" items, refuse Gehrman's request, and then defeat Gehrman, The First Hunter.
For a final boss, Moon Presence isn’t that bad. Yes, it’s difficult, but it could have been way lower on this list. How come? because the Moon Presence doesn’t require you to defeat Gehrman again if you die. Which makes it a lot easier to manage since it’s just one boss.
Stats & Drops: Boss HP 8909 / Echoes 230000 / NO ITEM DROPS.
How to defeat the Moon Presence:
- The Moon Presence is weak to bolt and fire
- The trick with Moon Presence is to stay in mid-range and force it into its 3-hit combo. Dodge into the third hit and if timed right, you should end up behind it and can manage 1-2 hits before it jumps away. Rinse and repeat.
- Since you don’t have to fight Gehrman again, you can simply use a Hunter’s Mark to replenish your Blood Vials. Even though you probably won’t need to.
- Moon Presence can spawn white balls which burst and rain blood in an area of effect. If covered, the blood works like the Numbing Mist used on Vicar Amelia and you won’t be able to heal for a short period of time.
- You can use Visceral Attacks on the Moon Presence.
- The scary part about this fight is Gaze of the Moon, a cone shaped area of effect attack. It reduces you to exactly 1 HP.
- This attack can’t be dodged and your HP drops to 1 regardless of your build or current stats. It CANNOT kill you.
- This attack makes the Moon Presence exhausted, giving you a big window to strike back and get all your health back through Rally. Keep an eye out.
- If you happen to die during your first attempt with this boss, consider buying the Burial Blade. Its scythe form has high rally so you’re guaranteed to get all your HP back after the Gaze of the Moon spell.
- For Grab attacks, The Moon Presence will swipe twice then do a forward lunge grab. Just strafe around and get a hit in.
- For Jump attacks, time your sidestep then get a couple of hits in.
- Tonitrus levelled to at least +8 is recommended for this fight.
Best way to defeat the Moon Presence video guide:
12. Rom, the Vacuous Spider (Main)

This harmless spider named Rom will give you hell.
Rom, the Vacuous Spider, is a mandatory Great One boss in Bloodborne. Found in Moonside Lake, accessed from the Lunarium at Byrgenwerth College.
Rom is a cute spider. Rom summons an army of smaller spiders. Rom is a nightmare.
This boss fight teaches you how to multitask the hard way. You have to dodge spiders, kill spiders, hit Rom, dodge Rom’s ranged attacks, monitor several moving targets, heal, apply buffs, and sprint all at once.
Before killing Rom, talk to Master Willem in the rocking chair, then kill him to gain the Eye rune. Killing Rom causes the Lesser Amygdala in the Cathedral Ward and other areas to permanently become visible and triggers the Blood Moon.
Stats & Drops: Boss HP 5058 / Echoes 36300 / Kin Coldblood (12).
How to defeat Rom, the Vacuous Spider:
- Very weak to Bolt.
- Arcane RES Armor is helpful against Rom's Arcane attacks.
- Use counter-attacks to kill the spiders to avoid needless damage.
- Rom and its spiders have strong heads, focus on their bodies instead.
- Rom takes damage during teleportation, so use charged R2 for free damage.
- Rom teleports twice after taking enough damage.
- After the first teleportation, Rom will cast Arcane meteors that rain down from above and from the ground, run towards the boss to avoid those from above and away from the boss to avoid those from below.
- Co-op is very efficient against Rom since you can hit her while she’s focused on your partner.
- You should combine Bolt Paper with Ludwig's Holy Blade (Obtained by finding the Radiant Sword Hunter Badge) or a Tonitrus levelled above +5. Spiders die with one hit and Rom takes tons of damage from charged attacks.
- The Tonitrus is extremely effective in this boss fight, make sure to re-buff it after every few hits.
- During Phase 3, Rom does a Body Slam Attack; she will shake her head and her 'tail' if you get too close so make sure not to get too greedy with your hits. This attack can be hard to evade.
Best way to defeat Rom, the Vacuous Spider video guide:
11. Father Gascoigne (Main)

Father Gascoigne is your introduction to Bloodborne.
"What's that smell? ... The sweet blood, oh, it sings to me. It's enough to make a man sick"
Father Gascoigne is a main boss in Bloodborne; he can also be summoned beforehand against the Cleric Beast. He is found at the end of Central Yharnam. Make your way through the sewers area, head up the ladder near the Maneater Boar, and continue forward and left.
Father Gascoigne is you on steroids. Like you, he uses the Hunter Axe and Blunderbuss, except he's faster, hits harder, and turns into a beast at half health. And what makes matters worse, he’s the very first main boss you encounter.
Stats & Drops: Boss HP 2031 / Echoes 1800 / Oedon Tomb Key / Unlocks Gascoigne's Set at the Insight Bath Messenger.
How to defeat Father Gascoigne:
- Father Gascoigne is weak to Fire damage, even weaker in beast form.
- He can be parried to deal visceral attacks against him.
- Molotov Cocktails and Oil Urns are highly effective against him. Aim your throws accurately though because he’s very agile.
- The Tiny Music Box is very important against Father Gascoigne in both forms. It makes him suffer and stop attacking, giving you a chance to charge a backstab followed by a visceral attack.
- Keep in mind that if you use it 3 times while he’s still human, he will transform into a beast immediately, regardless of his remaining health.
- In his beast form, you can only use the Tiny Music Box once.
- The fight has three phases.
- First phase, Father Gascoigne uses a normal Hunter Axe and a Hunter Blunderbuss.
- Second phase starts at 75-80% health, He transforms his Hunter Axe to perform charged and longer reaching attacks.
- Third phase starts at 50% or less, He transforms into a beast, leaping and slashing at you quickly with his claws. Can be hard if you do the wrong moves.
- ATK: Scattergun Burst - You can dodge forward and avoid it, or move backwards and out of its range. You may also use the tombstones in the area to block the shots.
- ATK: Horizontal Chop - You can dodge into or away from the swing to avoid damage. You may also use the tombstones in the area to put distance between you and attack.
- ATK: Spark Uppercut - You can dodge away from it or parry it if your timing is good.
- ATK: Jump Attack - Dodge away from it or use tombstones to block it. There is a good opening after he performs this attack.
- ATK: Charged Spin - Used in phase 2 with transformed Hunter Axe. Dodge away from this attack. There is a good opening after he performs this attack.
- Beast ATK: Aerial Dive, Swipe, Downward Smash, Berserker Slash – Always dodge away and/or parry.
Best way to defeat Father Gascoigne video guide:
10. Shadow of Yharnam (Main)
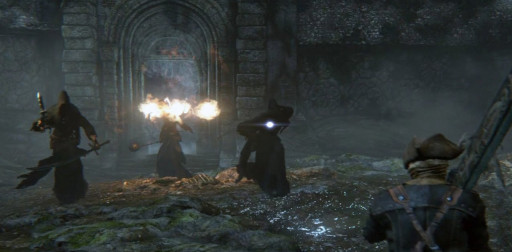
Three Shadows against One Hunter, Who would win?
Shadow of Yharnam is a main boss in Bloodborne. Found at the Forbidden Woods' very end or bottom
You later find out that there are three Shadows instead of one. All three Shadows have a sword, but only two of them can perform ranged attacks. It’s a hard fight because you have to know where everyone is and quickly decide when and which Shadow to attack.
If left alive too long, all three will transform, gaining summoning abilities. There’s a lot to learn during this fight; continue reading.
Stats & Drops: Boss HP 2046+2602+3645 / Echoes 20460 / Blood Rapture Caryll Rune.
How to defeat Shadow of Yharnam:
- One of the Shadows is strong against Bolt and Arcane damage. So don’t waste your stamina.
- There are three Shadows in this fight. The first wields a scimitar weapon in his left hand, the second a scimitar and a candle that works like the Flamesprayer, the third holds a flame in hand that works like a spell.
- Don’t let them swarm you, keep moving around, use rocks and obstacles.
- Lure them one by one, and always target the mage if isolated.
- Phase 2 starts when one Shadow has been damaged below 40% HP, they all transform gaining additional abilities.
- Phase 3 starts when two are dead, or one is dead and the others are at 30% HP, they will gain the ability to summon giant snakes that can one hit you.
- The Shadows can’t heal, so it is recommended to keep them all at close HP so you can skip phases by simply killing them all in one sweep.
- The Shadows can be parried. Getting too close to casters makes them melee, allowing for a parry.
- Tonitrus or Bolt Paper makes this fight much easier because 2/3 are weak to it.
- Summoning is recommended, they usually focus on the summon, leaving you some space to kill off the mage then help your summon against the remaining two.
- The Mage Shadow casts out 3 fireballs that home in on your location. This attack is easily dodged, or you can use the terrain to your advantage.
- The Shadow holding the candle will periodically blow fire in your general direction. Keep your distance and bait the fire. Dodging to the side helps.
- It is very important to charge a power attack and then visceral attack one of them when he’s transforming.
Best way to defeat Shadow of Yharnam video guide:
9. Darkbeast Paarl (Optional)
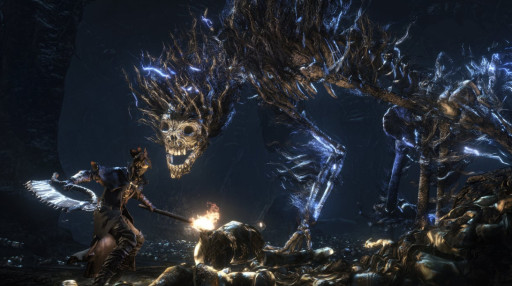
Bone and Electricity, Hunter and Paarl.
Darkbeast Paarl is an optional boss in Bloodborne. Found in Hypogean Gaol, go down the spiral stairs from the lantern and enter the first prison room with two witches and snatchers. There is a hole at the end of the room that leads outside, where you drop down a ledge and fight the boss.
It’s a malformed beast covered in lightning with a body made of skeletons and pieces of bone. The first time you encounter it, you know for sure that you’re in for a tough fight. And that remains true even after you beat it.
It took me hours to finally realise that this boss revolves around a key element in Bloodborne: Camera Lock-On. I’ll elaborate below.
Stats & Drops: Boss HP 4552 / Echoes 23,100 / Spark Hunter Badge (or Bold Hunter's Mark if already acquired)
How to defeat Darkbeast Paarl:
- Boss is weak to Arcane and Fire. It can also be knocked over with R2 charged attacks (especially the Hunter Axe).
- Hunter Axe fully wielded is your best bet here, the spinning attack destroys the boss fight. Ludwig’s holy blade also helps.
- Resists Blunt and Bolt. Obviously.
- This fight requires patience. Watch out for his swipes, usually 2-3 (left, right, or left, right, downward) then go for a hit. Run away, then repeat.
- The camera is your enemy here, unlock it and try to roll through the boss. You will have 2-3s to land hits on it.
- Keep your eyes open for a chance to land a strong attack. The boss fight could end early if you’re observant.
- A minute into the fight, the boss will stand and howl then start to glow. He gets very aggressive at this point so be careful not to get sliced.
- Paarl moves quick, so if you let the camera lock orient you, you’ll be lost. Toggle it off.
- Each of its legs has a health bar, try to alternate between legs to stagger him. His skull can be staggered too, discharging his electricity, and giving you 3-5 seconds to get hits in.
- After losing its electric field, Paarl will try to attack you 1 or 2 times, and then escape to safety and infuse himself with electricity. Apply pressure here, don’t let him recharge.
- You can summon Defector Antal to assist you in the fight. His summon is to the right after you drop down the ledge to Paarl's arena.
Best way to defeat Darkbeast Paarl video guide:
8. Amygdala (Optional)
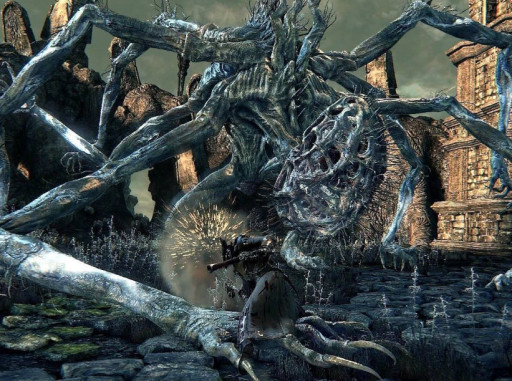
The tiresome boss against Amygdala.
Amygdala is an optional Great One Boss in Bloodborne. It's similar to the large enemies who attempt to grab you with portals, but lighter in color and without tentacles on its head. Found in Nightmare Frontier, at the bottom, near the shortcut lift that is guarded by a Silverbeast.
Amygdala resurrects some traumas, particularly Defiled Chalice Amygdala, my personal most difficult boss. Amygdala is truly frightening if you make the wrong decisions or rely on improvisation.
Stats & Drops: Boss HP 6404 / Echoes 21000 / Ailing Loran Chalice.
How to defeat Amygdala:
- Weak to Arcane, Fire and Bolt. Resistant to Blunt.
- The tricky part about this boss fight is that weak points are mid-air and aren’t always accessible.
- Amygdala has so many arms that it’s sometimes hard to keep up with attacks since most have variable reach.
- Amygdala only takes damage from its head and front limbs. Other areas take little damage unless it’s elemental.
- Aim and shoot projectiles at Amygdala’s head when possible.
- Phase 3 starts at 30% HP, the boss gets very aggressive, it will rip off two of its arms and swing them as weapons. This is where most players struggle.
- Visceral Attacks can be performed on Amygdala's head.
- The fight has 2 chances for a Visceral Attack (between phases), if Amygdala's health is below 10%. Prepare for a third Visceral to end the fight.
- Focus on one limb at a time.
- Ludwig's Holy Blade is highly recommended against Amygdala.
- During Phase 3, if you hit the boss from behind, it should jump then land facing away. This is very useful since you can deal free damage without having to fight head on.
- Amygdala is extremely weak to A Call Beyond.
- Amygdala's vomit deals Fire damage.
- There are many methods to defeat Amygdala, but the most reliable would be A Call Beyond. Get two spells in and see for yourself. Trust me.
Best way to defeat Amygdala video guide:
7. Ebrietas, Daughter of the Cosmos (Optional)
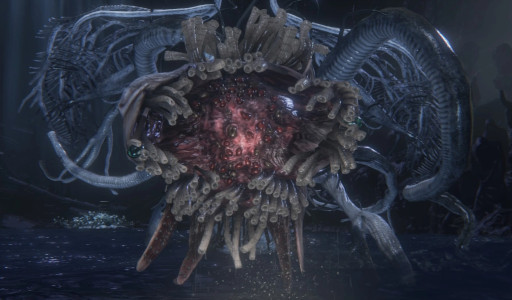
Here's Ebrietas, Can you find her face?
Ebrietas, Daughter of the Cosmos is an optional Great One boss in Bloodborne. Found in the Altar of Despair in Upper Cathedral Ward, break the window in the Celestial Emissary boss room (Lumenflower Gardens) and take the elevator down.
Ebrietas can be the hardest or easiest boss in Bloodborne depending on your luck. She has so much health, and she hits hard, so most players struggle with healing. Plus, she has some nonsense attacks that either kill you or scratch you, all with luck.
It’s such a weird and unpredictable boss fight, and dodging doesn’t cut it sometimes.
Stats & Drops: Boss HP 12493 / Echoes 36300 / Great Isz Chalice.
How to defeat Ebrietas, Daughter of the Cosmos:
- She is weak to Bolt and Thrust.
- Attacking from the sides or behind isn’t that simple because she turns fast and her attacks sweep wide. Stay close though.
- There’s a chance you get stuck between her tails where you are relatively safe against attacks. You have to improvise a little since she’s often unpredictable.
- If you stick to her chest, you can get some hits in and hopefully survive some of hers. Try to punish her belly slam attacks while you’re at it.
- Running in a large circle around her helps you avoid lasers.
- Try to shoot her head with the Canon since it’s a weak point. That gives you a chance for a Visceral Attack combined with a Charged Attack right after.
- You can also bait some of her attacks to lower the head and have a clear attack. BUT, sometimes she'll do a charge attack, which is hard to dodge and is basically a death screen.
- Try to dodge her attacks and stand behind her or to her side, then hit her. Combine it with Bolt paper.
- As for her charge attack, she can charge you at any time or range and this is troublesome considering it’s a one-shot attack. She signals pretty clearly when she is about to charge at you but dodging it is tricky. Try not to get hit by her tentacles. Getting hit by her head or torso does tons of damage but leaves you alive.
- If you are at close range, stand still and take the hit from her head to avoid getting one-shotted. Moving is death.
- If you are far however, just dodge straight away from her or slightly to the left.
- If you are at medium distance, this is where timing and muscle memory comes in, it’s deadly if you dodge too early/late. You need to practise it.
- Ditch the camera lock-on. You need full control over your direction.
- Running around the arena works like magic, it’s a slower approach but it prevents her from doing many attacks so you can punish the attacks you’re confident around.
- Provoking head-slams also works well, again, try to exploit attacks you’re familiar with.
Best way to defeat Ebrietas, Daughter of the Cosmos video guide:
6. Gehrman, the First Hunter (Main)
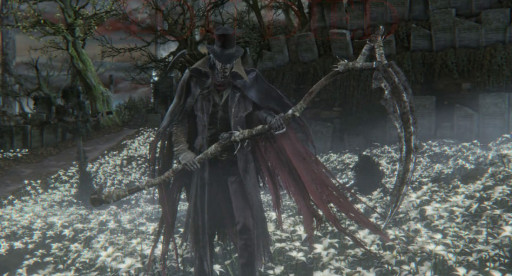
"Tonight... Gehrman joins the hunt...."
Gehrman, the First Hunter is a main boss in Bloodborne and one of the three possible final bosses of the game. Found in the Hunter's Dream, past the gate at the bottom.
You fight Gehrman if you choose the Refuse option when he presents you with two options when you talk to him after defeating Mergo's Wet Nurse.
Gehrman is actually optional, since the game ends if you choose "Submit Your Life."
You will fight the Moon Presence after Gehrman if you have consumed three times one-third of the umbilical cord.
FromSoftware always nails the final boss arenas; Gehrman’s fight is so aesthetically pleasing that you sometimes forget to dodge his attacks. This boss fight is considered hard because it tests everything you've learned so far from Bloodborne, from timing to dodging to parrying. You certainly have to dance with Gehrman rather than use brute force.
Stats & Drops: Boss HP 14293 / Echoes 128000 (None if you fight Moon Presence) / Old Hunter Badge.
How to defeat Gehrman, the First Hunter:
- Gehrman can be parried and punished for the entirety of the fight. Even in his aggressive third phase, he can still be staggered while he uses the charged scythe attacks.
- Don’t hold back on upgrades and resources, Gehrman is a tough boss, you must enter prepared. Upgraded Stamina is recommended.
- Tonitrus works well against him.
- Gehrman usually finishes his combos even when you’re far, so try to observe his pattern.
- Shoot as he slices horizontally with his scythe for easy parries.
- He usually side-swings twice to close the distance, which can be punished with a quick R1 attack.
- Don’t get too greedy, Gehrman fights exactly like you, he’ll hit back.
- If he uses his pistol, try to dodge around him rather than take the hit. It doesn’t damage you that much but the stagger can get you killed.
- Try to bait attacks and go for counter-attacks. It should be swing for you, swing for him.
- If he leaps in the air, get under him. This attack starts rapidly and causes a lot of damage.
- His pistol can parry you even when not attacking, try to spot it and dodge so even if you do get parried, you recover unpunished.
- Around halfway through the fight he'll extend his arms and start channelling energy. This takes about 5 seconds, try to squeeze some charged attacks in if you’re close. If you backstep too late, you'll get caught in the blast which does heavy damage. This killed me multiple times.
- In the second half of the fight, he'll start using the Quickening buff. This makes him invisible and you'll only see him when he attacks. Camera lock-on helps a lot here; it stays locked on even when he's invisible.
- At around 35% HP, he'll go back to using the curved sword and this time he'll use his hunter's pistol. Same as before, time your dodges correctly.
- An important detail you should know is that Gehrman requires some smart Stamina management, you need to be careful with your attacks and dodges. Always leave some Stamina for sudden dodges.
Best way to defeat Gehrman, the First Hunter video guide:
5. Martyr Logarius (Optional)
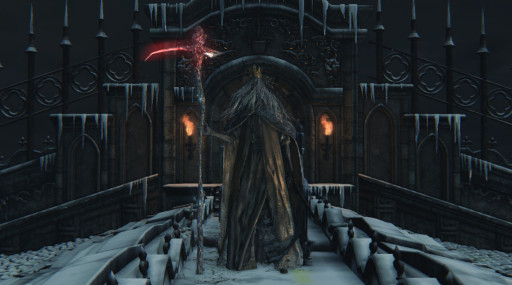
Your reward after climbing a castle for an hour, Martyr Logarius.
Martyr Logarius is an optional boss in Bloodborne. Found in the Forsaken Cainhurst Castle. You must carefully navigate Cainhurst's roof and find a ladder that leads to Logarius.
Martyr Logarius is so high on the list because of the emotional damage done before, during, and after you get to him. You climb a tough path to the castle’s roof just to be welcomed by this King, who can apparently do every type of attack this game has.
You should read his heartbreaking lore after you defeat him. According to Alfred, Master Logarius led the Executioners in a charge against the Vilebloods at Castle Cainhurst.
Logarius stayed behind while the rest of the Executioners escaped. Alfred hopes to go to Cainhurst, avenge Martyr Logarius, and destroy the Vilebloods.
The side quest line is well worth your time. FromSoftware never ceases to amaze.
Stats & Drops: Boss HP 9081 / Echoes 25600 / Crown of Illusions.
How to defeat Martyr Logarius:
- Resistant to Fire, Arcane and Bolt.
- His spells deal Arcane Damage.
- He can be staggered with firearms easily during his second phase when doing physical attacks. Bring Quicksilver Bullets and punish him with Visceral Attacks.
- No, you can't bait him to fall off the roof. You, though, can fly off the roof.
- Use the obstacles on the rooftop to stop his spells. If he stabs the roof with his sword, swords will spawn in the air and shoot at you, quickly lock onto them and shoot them.
- When Logarius buffs himself, he gains an aura that blocks bullets and melee attacks no longer interrupt him. You need to stagger him to break that aura.
- You can backstab him while he’s charging his initial buff, causing him to stagger.
- If you lock on and stand close to him, you can prevent him from casting his buff.
- When going for hit and runs, only do 2-3 hits and then dodge left. He always summons his exploding skull off to his right side, so if you dodge left, it should never connect.
- You can roll through the exploding skull if you’re close to Logarius.
- Use Ludwig's Holy Blade, you need fast attacks and mobility so ditch heavy weapons/forms.
- When he starts flying around, keep an eye on him then dodge towards him as he’s about to hit the ground. Also, he lands stunned for 1-2s allowing you to get hits in.
- This boss fight is very rewarding if you’re patient with dodges and rolls, timing is key against harder bosses in Bloodborne.
Best way to defeat Martyr Logarius video guide:
4. Lady Maria of the Astral Clocktower (DLC)

"A corpse... should be left well alone."
Lady Maria of the Astral Clocktower is a DLC boss in Bloodborne. She was added with The Old Hunters DLC. To find her, open the door after locating the Astral Clocktower and defeating the Living Failures.
This boss fight is this humble writer’s favorite in Bloodborne. From the opening cutscene to Prey Slaughtered, Lady Maria is nothing but entertaining and intimidating.
Lady Maria resembles the Plain Doll, and they’re both voiced by the same person!
The boss will only be initiated once the corpse is examined. After the cutscene, Lady Maria and your character will be placed into set positions, and the fight will begin.
Stats & Drops: Boss HP 14,081 / Echoes 39,000 / Celestial Dial.
How to defeat Lady Maria of the Astral Clocktower:
- This fight has three phases:
- Phase 1: Lady Maria will fight normally with the Rakuyo occasionally switching between transformed and untransformed modes. She can occasionally use her gun too.
- Phase 2: Lady Maria will stab her chest with her two blades, which causes a blood explosion and coat her weapons in it. All of her previously used attacks will now have greatly extended reach and will gain a bloody effect.
- In this phase, she also gains several new attacks incorporating blood.
- Phase 3: Lady Maria will slowly levitate off the ground, then cause a large blood explosion.
- All attacks used in the phases 1 and 2 now ignite fire after the attack is done.
- The fire is ignited slightly further away from the attack, extending the attack's range.
- If you dodge poorly, you get hit by both the attack and the fire.
- Some of her attacks open clear chances for visceral attacks.
- Always dodge to your left to avoid most of her attacks.
- Lady Maria can be parried and staggered during the entire fight. However, she can parry you too during Phase 2.
- Parries in Phase 3 are trickier because the fire ignites AFTER the attack so try to time your dodges correctly.
- It’s a straightforward boss fight, what makes it tricky is timing. So, these tips won’t get you too far if you dodge/parry late. Try to get some practice in.
Best way to defeat Lady Maria of the Astral Clocktower video guide:
3. Ludwig, the Holy Blade (DLC)

"Aah, you were at my side, all along. My true mentor...My guiding moonlight..."
Ludwig, The Accursed is a DLC boss in Bloodborne. He was the first Church hunter and the founder of the Healing Church Workshop.He is also known under his official title, Ludwig, The Holy Blade, and adopts this title in the second phase of his fight.
He is found in The Hunter's Nightmare. What was once a man has become a monster.
It’s a massive understatement to call this boss fight hard; it’s hell. He’s so violent you barely remember to hit back; you’re constantly a step away from death. This boss requires fast reflexes and a lot of experience; he’s not designed for new players, and none of these DLC bosses are either.
Stats & Drops: Boss HP 16,658 / Echoes 34,500 / Guidance / Holy Moonlight Sword.
How to defeat Ludwig, the Holy Blade:
- Ludwig misses some of his attacks so don’t waste your time dodging too much, instead, dodge when necessary while maintaining aggression. Use Rally to gain back lost HP if hit.
Phase #1:
- His first phase is the hardest part of the fight, because he gets so chaotic you can barely distinguish attacks.
- The first few tries should be used to study his movements and his timing. Always close in and get out quickly, never stay close to him for too long at a time., is generally a good strategy.
- Aim for his back legs while placing yourself under him. Also, both his sides are vulnerable for attacks
- When he leaps towards you and claws away with his right arm, quickly dodge under him and get a few hits in before retreating.
- When he jumps up, start running straight away from him. As he has two attacks that begin with a jump so you can’t risk it.
- Again, don’t stay close to him for too long or he’ll punish you with strong slashes.
- When he starts to charge on you, start to circle around him on your right (his left) and get under him.
- Never stay or attack directly behind him as he will knock you down with his hind legs. Approach his sides instead.
- It's highly recommended you summon Valtr, Master of the League for this fight, as he can keep Ludwig busy. Don’t let him take too much damage though.
Phase #2:
- Ludwig becomes more organised when he picks up his blade during the second phase. While still aggressive, his attacks are more visible now.
- He now has increased range and is harder to hit, occupying a smaller area.
- You have to get a little more aggressive here. Dodge through his attacks straight towards him.
- He can slash twice, which sends out energy waves towards you. These can be dodged through.
- If he does a larger charged version though, dodge to his left and dodge under his blade. It’s hard to take this attack head on.
- If he does a charged stab attack, dodge to your right or left.
- His AoE attacks can be troublesome. The first can be identified by holding his blade downwards. Dodge backwards.
- The second AoE can be identified by holding his blade upwards. The attack starts with a standard AoE but then he adds a massive slash to the ground that creates an energy wave.
- This will most likely kill you if you are hit. It’s best to avoid this attack by backing off as he points his sword upwards. Close in on him soon after.
Best way to defeat Ludwig, the Holy Blade video guide:
2. Laurence, the First Vicar (DLC)

"I tell you; I will not forget our adage."
Laurence, The First Vicar is a DLC boss in Bloodborne. He was added with The Old Hunters DLC. He is the only strictly optional boss in the DLC, as defeating him does not advance the story of the DLC.
He is found in the Hunter's Nightmare, in the Grand Cathedral, after the flaming boulder.
Laurence is an interesting boss in Bloodborne; yeah, it’s hard and all. But why is it ranked second?
Because the arena, the insane AoE attacks, the boss's HP, and the boss's nature are all working against you. Laurence makes you hate every second of the fight, and it’s an optional boss too. FromSoft made it skippable, so you feel miserable for not beating it.
Stats & Drops: Boss HP 21,242 / Echoes 29,500 / Beast's Embrace (100%).
How to defeat Laurence, the First Vicar:
- Laurence deals fire and physical damage, so use the Charred Hunter set which has excellent fire resistance. Level 40 vitality can let you take 2-3 hits with this attire.
- For runes, use Guidance (rally potential +20%), Fading Lake (Fire reduction +5%), Clockwise Metamorphosis (max HP +10%) and the Hunter Axe.
- This build depends heavily on aggression, you can switch it if you want a slower pace.
- This boss has 3 phases, the first phase is very similar to the Cleric Beast, in the second phase he becomes more aggressive, and in the third he does a lot of AoE attacks.
- Dodge to his right side when he attacks and stick behind him. This will force him to swipe with his backhand but you can easily dodge towards the hand he's using.
- This also applies to phase 2.
- In Phase 3, he loses his leg and lava starts coming out of his body. He will now focus his attacks through the front, which means you have to stick to his side.
- Always dodge to his right if he's using his right hand, same goes for left hand.
- Equip blood gems that give you high Fire and Physical RES.
- A +10 Whirligig is highly recommended.
- Use Lock-On for the first phase and fight as if it’s the Cleric Beast. Dodge his attacks by dashing back and then on his final swing while he recovers, dash up to him and get 2 good hits in.
- If he backs you into a corner, dodge under his last swipe to get around him. I recommend dodging towards his bigger arm.
- At 40%, Phase 3 starts. Things get a lot harder so save all your resources for this phase.
- Equip the Blacksky Eye and use all your Quicksilver Bullets to deal some bonus damage.
- Try your best not to get cornered, always calculate your next few steps.
- Only attack after he is done with his crawling slashes combo. Try to squeeze one or two hits in. Don't get too greedy.
- He sometimes does a slash with crawling; you’ll see him curl his big arm around his head while recovering, get a few hits in during this time.
- To avoid getting backed into a corner, you should camp a corner during his slashes. When he’s close to you, unlock the camera and run around him, this should keep you safe most of the time.
Best way to defeat Laurence, the First Vicar video guide:
1. Orphan of Kos (DLC)

"Mercy for the poor wizened child, mercy."
And finally, my fellow hunters, we arrive at the hardest boss in Bloodborne.
Orphan of Kos is a Great One boss in Bloodborne. He is considered the final boss of The Old Hunters DLC. He is the son of Kosm. He is found in the Fishing Hamlet Coast.
Our winner is a highly aggressive boss that is extremely mobile, especially in Phase 2, and that can also use ranged attacks. Be prepared for great leaps and long-range attacks. He combines everything you hated about the previous bosses and adds some tricks of his own.
Orphan of Kos is the very last boss in Bloodborne, and he certainly puts up one hell of a fight.
Stats & Drops: Boss HP 19,217 / Echoes 60,000 / Kos Parasite.
How to defeat Orphan of Kos:
- First tip is: Stick to his left side (your right).
- While sticking to his left, circle him and attack to close any distance between you. The second phase will make this easier as avoiding the jump attack lets you get some free hits in.
- He can be parried in both phases. Difficult but possible.
- During Phase 1, the HP restored by Blood Rapture runes is quadrupled. Use visceral attacks to restore your health instead of Blood Vials.
- His lightning attack can easily be avoided by staying in the water rather than on land.
- Once he enters the second phase by performing a shockwave, he will stay in the ground for a couple of seconds. Use them well.
- Don't be afraid to go out over the water, as you can't actually fall in and it doesn't slow you down. It even provides a great amount of space.
- You can easily run under his forward leaping attack and then turn around for a charge attack followed by a backstab. You can bait this forward leaping attack consistently to quickly get through phase one.
- He can be easily staggered by most heavier weapons, or several consecutive hits of lighter weapons.
- His aerial dive attack in the first phase can be dodged by timing a dodge straight at him.
- Orphan is a frequent and fast attacker. That means you want the fastest weapon with the fastest R1 possible (Blades of Mercy, Rakuyo, etc.), and you want to leave yourself as available as possible to quickstep or dodge.
- Some attacks can be interrupted with staggering, which can allow the boss to start a new attack.
- This can be used to your advantage, as it is possible to infinitely loop Orphan with parries.
- Some of his attacks have a longer charge up time. Time your dodges correctly and stay calm.
- Orphan is very mobile, be sure to know where you are so you don't get trapped against a wall. Don't be afraid to back away or run towards the middle of the map to increase your space.
- Some attacks may have a shockwave hitbox, make sure to clear the attack range as well as a shockwave's.
- Phase 2 Orphan is far more mobile than Phase 1. Remember to manage your space.
- Orphan of Kos relies heavily on visual memory, so writing it down here wouldn’t help as much as watching the animations. Below is a tutorial that breaks down the boss fight in full detail.
Best way to defeat Orphan of Kos video guide:
There you have it, hunters! a detailed list of Bloodborne bosses, ranked from easiest to hardest, and instructions on how to defeat them. We hope this proves helpful in your journey in Yharnam!
You May Also Be Interested In:
- [Top 10] Bloodborne Best Weapons (And How To Get Them)
- [Top 10] Bloodborne Best Builds That Are Powerful
- [Top 5] Bloodborne Best Starting Weapons (And How To Get Them)
- Bloodborne All Guns (All Firearms Ranked And How To Get Them)
- Top 15 Games Like Bloodborne (Games Better Than Bloodborne In Their Own Way)
- Bloodborne 2 Release Date - And 10 Features We Want
- [Top 5] Bloodborne Best Guns and How To Get Them
- Top 5 Bloodborne Best Armor Sets
- [Top 5] Bloodborne Best Guns and How To Get Them
- Bloodborne 2 Release Date - And 10 Features We Want

