Deck 10: Giant Balloon Combo

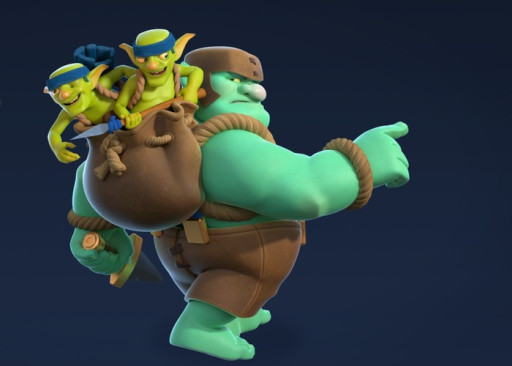
This is a classic deck that seasoned pros and beginners can master. The pure simplicity of the deck may make some players underestimate its value, but don’t be fooled. The focal point of this deck is the Giant Balloon combo attack. If you use the right strategy, this can be a game changer.
What is Great about this Deck
- Half of the cards in the deck are Common cards. This means they are easy to collect and level up.
- It uses the Balloon unit, one of the most powerful units in the game, to its full potential.
- The versatility of the chosen cards provides a perfect mix of offensive and defensive abilities.
How the Giant Balloon Combo Deck is Played
- This deck revolves around getting your Balloon unit to your opponent’s tower. Once your Balloon is there, it will destroy the tower in seconds. The biggest obstacle is getting the Balloon there in one piece.
- When deploying the Giant Balloon combo it is vital that you deploy the Giant first. The Giant has a lot of HP and the Balloon does not. Deploy the Giant as close to the opponent’s tower as you can and wait until the tower’s archer locks onto the Giant. Only then should you deploy the Balloon unit.
- This deck requires patience. Both the Giant and the Balloon unit is five elixir, meaning that you have to wait until your elixir bar is full before launching your attack.
- The three spells (Arrows, Fireball, and Log) are used to protect your Giant Balloon combo. Units like Minion Horde are especially dangerous to the Balloon’s health. The Fireball and Arrows spell provides the protection you need so the Balloon can reach the opponent’s tower. Barbarians and Skeleton Army threaten the Giant (who is protecting the Balloon), and the Log is effective against these units.
- The next biggest threat to your Giant Balloon offense are defensive buildings, specifically the Inferno Tower. The best way to combat the Inferno Tower is to save up the max amount of elixir, but this time instead of deploying the Giant as close as you can get to the other player’s tower you will place it as far back as you can. The Giant moves slowly, so this gives you time to build up more elixir. By the time the Giant moves into enemy territory you have enough elixir to deploy the balloon and support units (Goblins, Minion Horde, or Barbarians). With the aid of the support units you should be able to take down the Inferno Tower quickly.
- You can use your support units for offense and defense. The spells can also be helpful when defending your own towers. In addition, if you needed you could use the Giant as a sacrificial pawn. You can do this by deploying the Giant close to your tower when you see that your opponent has just placed a lot of offensive units. By doing this, the enemy units will target the Giant instead of your tower. This will buy you time to place other units and for your tower’s archer to deal damage.
Cards
- Giant
- Balloon
- Goblins
- Barbarians
- Minion Horde
- Arrows
- Fireball
- Log
Deck 9: M/M Combo
This deck optimizes the classic Miner and Mortar combination. Being able to deploy a close-combat attack with a distant attack puts the perfect amount of pressure on your unsuspecting opponent.
What’s Great about this Deck
- The Miner and Mortar (M/M) combination lets you attack the enemy tower from both sides of the bridge.
- All the cards in this deck are low cost. This makes it easy to spam your opponent, giving you plenty of opportunities to overwhelm them.
- This deck has units that are effective against ground and air units.
How the M/M Combo Deck is Played
- The Miner and Mortar (M/M) are the center of your offensive strategy.
- The Mortar’s reach lets you place the unit on your side of the bridge, turning it into an offensive building.
- The Miner can dig undetected anywhere on the board, many players choosing to send it straight to the enemy tower.
- Units like Spear Goblins, Goblin Gang, Bats, and Rascals can aid the offensive team or stick back to help defend your home base.
- The Log and Fireball are used primarily for defense, but if the opportunity presents itself, send them on over to the other side.
Cards
- Spear Goblins
- Miner
- Goblin Gang
- Mortar
- Fireball
- Bats
- Log
- Rascals
Deck 8: Fork in the Road

The Fork in the Road deck uses an aggressive offensive strategy in which you attack both side towers at the same time. Your opponent, usually unable to adequately defend both sides, has to choose which one to protect and which one will die. If your opponent is paralyzed with indecision, you might even take both towers down.
What’s Great about this Deck
- The Elixir Collector helps offset the high cost of some units.
- You can use a baiting strategy.
- If timed right, this deck will also force your opponent to choose between their two towers.
How the Fork in the Road Deck is Played
- Beware of Fireball and Rocket when deploying your Three Musketeers. This unit costs nine elixir to deploy so if they get killed right away it is a colossal waste.
- To prevent your Three Musketeers from being ambushed, you can use the baiting strategy. Place the Elixir Collector down to do so. Many players feel the need to attack the Elixir Collector and will send a Fireball or Rocket your way. That is when you need to deploy your Three Musketeers. Timing is important for this strategy because sometimes they will only fall for the bait once.
- Another way to play the Three Musketeers is to place that at the very bottom middle of the board. This will make the Three Musketeers split off, two will go one way and one will go the other. When the Three Musketeers get near the bridge, deploy the Battle Ram to the side with the single Musketeer. This will force your opponent to choose only one of their towers to defend because they usually can’t defend both.
- You can use the other cards as supporting offensive units or defensive units.
Cards
- Battle Ram
- Elixir Collector
- Goblin Gang
- Miner
- Minion Horde
- Three Musketeers
- Zap
- Ice Golem
Deck 7: Kill Them with Inconvenience

The attack units in this deck cost a minimal amount of elixir and this is used to your advantage. When deploying these low-cost cards, your opponent is reluctant to spend their elixir to kill them and they usually just let your units run their course. That line of thinking works if it is just once or twice, but if you are sending a constant stream of units that your opponent lets slide, those damage points add up.
What’s Great about this Deck
- Fairly cheap deck.
- Provides a failsafe for when your opponent’s tower has a small number of HP but you just can’t seem to get any units through (Rocket, anyone?).
- Has dedicated defensive units.
How the Kill Them with Inconvenience Deck is Played
- The goal is to carve away at your opponent’s tower little by little until you can finish it with the Rocket.
- Planning the optimal time to get the Goblin Barrel to hit the tower is vital to success. To do this, you will have to use the Princess as bait. Place the Princess down and your opponent will usually use their arrows, fireball, or zap to kill her. Once you know that those cards are now out of your opponent’s hand for the time being, send in the Goblin Barrel.
- If your opponent doesn’t fall for the bait, then your Princess will tick down the enemy tower’s HP instead of the Goblin Barrel. It is a win-win.
- To help the Goblin Barrel do even more damage send in the Ice Spirit. Most players won’t bother to kill the Ice Spirit because it has a negative elixir tradeoff, and it doesn’t do that much damage anyway. However, if you can get your Goblin Barrel to land right as the Ice Spirit hits the tower your Goblins will do maximum damage.
- For defense, your Log, Knight, and Goblin Gang will be your go to units.
Cards
- Knight
- Princess
- Ice Spirit
- Goblin Gang
- Rocket
- Goblin Barrel
- Log
- Tesla
Deck 6: My Precious

There are many differences between this Golem and the Golem from LotR. For one, our Golem is stoic. None of that crazy chattering and bouncing around. Second, he gets the job done. However, they both seem to have an infinity for shiny gold. Use this deck and Golem will help you increase your wealth by obtaining an inordinate amount of gold, and don’t worry, this gold won’t corrupt your mind.
What’s Great about this Deck
- Uses the Golem unit for a strong offensive push.
- This deck has two legendary units stacked inside. Their nuanced powers give personality and adaptability to your gameplay.
- All the cards can be utilized for offense and defense, giving you flexibility in your gameplay.
How the My Precious Deck is Played
- Golem is the center of your offense; he is expensive so you need to deploy him at the back of the field, near your tower. This gives you enough time to build up more elixir so you can deploy supporting units by the time Golem has crossed into enemy territory.
- You can use the rest of your cards as you see fit. They can be effective at offensive support and defense. It is up to you in how you would like to use them.
- The Baby Dragon and Tornado spell make an impressive combination. You can use the Tornado spell to gather all enemy units together. The allows the Baby Dragon to use its splash damage to rain down fire on all enemy units at once.
- Be careful when using Electro Dragon. If not placed properly, it will die almost immediately and you will have wasted half of your available elixir. Remember, Electro Dragon is a supporting or defensive unit only. Never sent it to attack on its own.
Cards
- Tornado
- Baby Dragon
- Mega Minion
- Electro Dragon
- Golem
- Lumberjack
- Bandit
- Barbarian Barrel
Deck 5: Graveyard Poison

This morbid deck gives off that creepy, Halloween vibe. And in the spirit of Halloween, this deck uses primarily spells for its offensive strategy, giving it a unique twist.
What’s Great about this Deck
- Use spells for offense.
- Great spooky aesthetic.
- Makes use of one of the cheapest cards in the game (Skeletons).
How the Graveyard Poison Deck is Played
- Set up the Goblin Hut by your tower. This allows the units produced to make slow and steady damage to the enemy tower.
- Deploy the Baby Dragon or the Knight (depending on if your opponent is using air or ground units) and get the enemy tower’s archer to lock on (because both the Baby Dragon and the Knight have a higher HP).
- After deploying the Baby Dragon or the Knight add the Graveyard and Poison spells directly to the enemy tower.
- You can also use the Baby Dragon and the Knight can also for defense. In addition, the Skeletons are an excellent distraction and a net positive elixir exchange against large offensive units (P.E.K.K.A, etc.).
Cards
- Baby Dragon
- Goblin Hut
- Graveyard
- Knight
- Log
- Musketeer
- Poison
- Skeletons
Deck 4: Fly Baby Fly

Take advantage of Clash Royale’s air units with the Fly Baby Fly deck. This deck has three powerful air units, two of which are the center of the offense. This is a perfect choice of deck for someone who is flexible and enjoys keeping their opponent on their toes. It combines a slow build up offense with the option to deploy a sneak attack. In addition, the defending units and spells are adaptable as you can use them for offensive support when you see fit.
What’s Great about this Deck
- Run a fun and dynamic offense by mixing the lengthy offensive strategy using the Lava Hound or quick, sneak attacks with the Miner and Mini P.E.K.K.A.. This leaves your opponent frazzled, never knowing if they need to save up elixir for the Lava Hound or deploy immediately for Mini P.E.K.K.A. and Miner combo.
- The Lava Hound is very hard to destroy because of its high HP so it can soak up a lot of damage. This makes getting it to your opponent’s tower easy, especially if you use your supporting units.
- Occasionally you will come across an opponent who is ill equipped for air attacks and, having no way to defend, you will destroy their three towers with ease.
How the Fly Baby Fly Deck is Played
- With this deck your main offensive strategy revolves around the Lava Hound.
- The Lava Hound is expensive, taking seven elixir to deploy, so it is vital that when you have saved up the right amount of elixir, you start your Lava Hound back by your tower. This gives you enough time to build your elixir supply back so you can drop your supporting units when the Lava Hound crosses into enemy territory.
- The fundamental supporting unit in the deck is the Baby Dragon. When the enemy tower archer locks onto the Lava Hound that is when you want to deploy your Baby Dragon. The Lava Hound has a lot of HP so it will easily survive to the tower. The Baby Dragon is there to defend the Lava Hound from enemy units.
- You can use the Mini P.E.K.K.A. and the Miner for defense and a sneak attack. If you notice that your opponent must be low on elixir it is the perfect time to launch your Mini P.E.K.K.A. and Miner. The Mini P.E.K.K.A. is quick and the Miner, as you know, digs under the ground and pops up wherever you desire, including going straight to the enemy tower.
- You can use the two spells (Poison and Lighting), the Guards, and the Inferno Dragon primarily for defense but you can also use them for supporting offensive units when you see fit.
Cards
- Lava Hound
- Inferno Dragon
- Baby Dragon
- Mini P.E.K.K.A.
- Miner
- Guards
- Poison
- Zap
Deck 3: Cloak and Daggers

The Cloak and Daggers deck is a magical and mysterious deck we have named after two units who have cloaking abilities (Bandit and Royal Ghost). Play this right and you’ll pocket many wins.
What’s Great about this Deck
- You finally get to use the P.E.K.K.A.
- You have two cloaking units.
- The Magic Archer can shoot through units to apply damage to the enemy units and whatever is behind it (more enemy units or even the enemy tower).
How the Cloak and Daggers Deck is Played
- In this deck you rely on the cloaking units to do most of the damage to the enemy base. These cards, Bandit and Royal Ghost are ones that your opponent has to respond to immediately.
- The Battle Ram is another attack card that requires your opponent’s attention immediately. This puts a lot of pressure on your opponent, giving them many opportunities to make a mistake.
- Poison and Magic Archer are primarily offensive units.
- When defending your base, the P.E.K.K.A. is vital because enemy units have to get through them before they can get to your tower. It is especially good for defending against Hog Riders because it can usually take it out with one attack motion.
- Electro Wizard and Zap are good defensive cards.
Cards
- P.E.K.K.A.
- Magic Archer
- Battle Ram
- Electro Wizard
- Bandit
- Royal Ghost
- Zap
- Poison
Deck 2: Light up the Giant

The Light up the Giant deck optimizes the Royal Giant’s abilities. By making the Royal Giant the center of the offense, the other cards can provide effective support, defending the Royal Giant against almost all attacks.
What’s Great about this Deck
- Effective offensive and defensive options.
- Versatile cards.
- This deck prepares you for almost all scenarios.
How the Light up the Giant Deck is Played
- The Royal Giant is the center of your offensive strategy with this deck.
- The Royal Giant’s distance attack that focuses in on buildings is a superb way to tick down the enemy tower’s HP.
- The Furnace complements the Royal Giant because it provides a constant stream of Fire Spirits that defend the Royal Giant against smaller air and ground units (e.g.: Minion Horde or Skeleton Army).
- All the other units are used to protect the Royal Giant as it attacks.
- You use all the supportive units for defense.
- While on the defensive, the Lighting spell is ideal for protecting your tower against bigger offensive units.
Cards
- Royal Giant
- Baby Dragon
- Mega Minion
- Guards
- Barbarian Barrel
- Electro Wizard
- Furnace
- Lightning
Deck 1: Royal Spirit

This is the most honorable deck in Clash Royale. Use the tried-and-true Royal Hogs and Ice Golem combo attack to destroy enemy towers while defending your home base with a host of adaptable cards.
What’s Great about this Deck
- The Royal Hogs and Ice Golem is a very popular and powerful offensive combination.
- Supporting units are very versatile in that you can use them for offensive and defensive tactics and they can target ground and air units.
- You get the chance to use the revamped Healing spell in the form of the Heal Spirit.
How the Royal Spirit Deck is Played
- The primary goal is to get the Royal Hogs to the enemy tower.
- To do this, place the Ice Golem first and follow it with the Royal Hogs.
- To supplement the attack, let the Earthquake spell loose and deploy the Heal Spirit.
- You can use the Three Musketeers for offense and defense. If you use them for offense, your deck so your opponent can’t kill them all at once.
- The Hunter, Skeletons, and Log are there primarily to provide defense to your towers. The Hunter is very versatile because of its ability to target ground and air units and deal a lot of damage.
Cards
- Royal Hogs
- Earthquake
- Heal Spirit
- Skeletons
- Ice Golem
- Three Musketeers
- Hunter
- Log

