I always get asked what the best killers are, and what gives the best results. This is an updated killers top ten list that includes the latest killers. As the game adds updates and nerfs, this list is subject to change, and this is also just my humble opinion. ENJOY!
This list will be the top ten best killers in Dead by Daylight. I have put together this list of top ten killers. (Based on their base kit perks and individual power.) Each killer starts with 3 base kit perks. Starting from level 35 every killers base kit perk will become “teachable perks”. What this means is that you will be able to learn their perks on other killers through the blood web. Each killer can only equip 4 perks within a single loadout. So choose wisely which perks you would like to bring into the fog. ALSO, not all killers in this game have good perks. Most killer players all run the same 4 perks regardless of whatever killer they are playing. So I am going to state which perks each killer starts with.
10. The Twins
Image
POWER:
You play as Charlotte who can attack the survivors to down them and hook them, but you can also play as Victor, her conjoined twin brother to hunt down the survivors. Victor is FAST and nimble. He can pounce on survivors and show Charlotte where they are, and he doesn’t have a terror radius, so listen to the grunts. Victor also can’t hook a downed survivor. So when you down a survivor as Victor, switch back to Charlotte and go hook them.
PERKS:
Hoarder - Survivors reveal their location when they interact with a chest or when they pick up an item within (up to) 64 meters (depending on the Tier of the perk) of your location. The trial begins with up to 2 additional chests in the environment.
Oppression - When you damage a generator, up to 3 other random generators also begin regressing. If the affected generators are being repaired, any Survivors repairing them receive a difficult Skill Check.
Oppression has a cooldown of up to 120 seconds (depending on the Tier of the perk).
Coup de Grace - Each time a generator is completed, Coup de Grace grows in power. Gain a token. Consume one token to increase the distance of your next lunge by up to 60% (depending on the Tier of the perk).
9. The Huntress
Image
POWER:
Huntress is armed with an axe that she uses as her basic attack, and hatchets to throw at survivors. The longer you hold down the button the faster and further she will lob the hatchets. She only has 5 to start with though so if you miss then you have to reload them by opening up lockers around the map. The best way to counter her is to make her miss by looping around objects because she has a lengthy animation to take her hatchets out.
PERKS:
Beast of Prey - Grants the Undetectable status effect after gaining Bloodlust Tier I. The status effect is removed once you lose Bloodlust.
Gain up to 50% (depending on the Tier of the perk) more Bloodpoints for actions in the Hunter category.
Territorial Imperative - Survivors’ auras are revealed to you for 3 seconds when they enter the basement and you are more than 32 meters away from the basement entrance.
Territorial Imperative can only be triggered once every up to 30 seconds (depending on the Tier of the perk).
Hex: Huntress Lullaby - Survivors receive up to 6% (depending on the Tier of the perk) regression penalty when missing a Skill Check while healing or repairing. Each time a Survivor is hooked, Huntress Lullaby grows in power. It affects healing and repairing Skill Check warnings. 1 to 4 tokens: The time between the Skill Check warning sound and the Skill Check becomes shorter. 5 tokens: No Skill Check warning This is a Hex perk, meaning it is activated via a totem that spawns within the map. It emits a bright flame on the totem. It CAN be destroyed by the survivors leaving you with only 3 perks left for the entire match.
8. The Plague
Image
POWER:
The plagues power is called Vile Purge, she vomits all over objects around the world as well as survivors. Survivors get sick and are put into the broken state and therefore they can not be healed while in this state. Around the map will contain cleansing fountains, if a survivor uses one, the plague is notified and can use the same fountain to get Corruption Purge which makes her vomit very deadly, it acts as a ranged attack. The best way to counter her is to rush out gens and not to cleanse unless deemed necessary.
PERKS:
Corrupt Intervention - 3 generators located furthest from you are blocked by The Entity for up to 120 seconds (depending on the Tier of the perk) at the start of the trial. Survivors cannot repair these generators for the duration. (I LOVE this perk.)
Affected generators are highlighted by a white aura.
Infectious Fright - Any Survivors that are within your Terror Radius while another Survivor is put into the dying state will yell and reveal their location to you for up to 6 seconds (depending on the Tier of the perk). *This perk is really good on one-hit killers such as Hillbilly, Cannibal, and Oni.
Dark Devotion - You become obsessed with one survivor. Hitting the Obsession with a basic attack transfers your Terror Radius to the Obsession for up to 30 seconds (depending on the Tier of the perk), and sets its radius to 32 meters.
You are granted the Undetectable status effect for the duration.
The survivor with the transferred Terror Radius is also considered to be “inside the Terror Radius” for other purposes. This perk can be paired nicely with other perks.
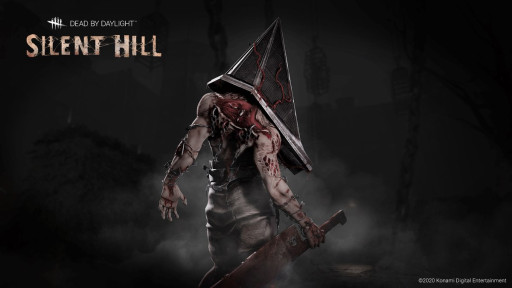
7. The Executioner
Image
POWER:
"Rites of Judgement" (Hold the Power button to activate, then move forwards in any direction to carve a Torment Trail into the ground.)
"Punishment of the Damned" (Press the Attack button while Rites of Judgement is active to perform Punishment of the Damned.)
This unleashes a wave of force in the form of an Attack Trail, damaging any Survivors in its path.
"Cage of Atonement" (Press the Active Ability button while standing over a dying Survivor afflicted with Torment to send them to a Cage of Atonement)
Survivors in a Cage of Atonement undergo the regular Sacrifice process as if they were on a hook.
PERKS:
Forced Penance - Survivors who take a protection hit are inflicted with the Broken status effect for up to 80 seconds (depending on the Tier of the perk).
Trail of Torment - After kicking a generator, you become Undetectable until the Generator stops regressing or a Survivor is injured or put into the dying state by any means. During this time, the generator’s yellow aura is revealed to survivors.
This effect can only trigger once every (up to)80 seconds (dependent on the Tier of the perk).
Deathbound - When a survivor heals another Survivor for one health state at least 32 meters away from the killer, the survivor performing the healing action will scream, revealing their location and activating Deathbound for the next 60 seconds.
During that time, the Survivor will suffer from the Oblivious status effect when further than (up to) 16 meters (depending on the Tier of the perk) away from the healed survivor.
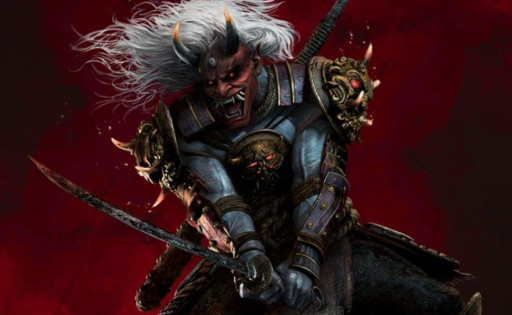
6. The Oni
Image
POWER:
The Oni is a big samurai that utilizes strength to destroy his foes. He is armed with two weapons, a katana, and a club. In his normal mode, he uses his katana as his basic attack. Whenever he hits a survivor, the survivor leaves blood orbs that the oni absorbs. This also acts as an easy way to find injured or newly healed survivors, whenever survivors vault, or stay still for a while the blood orbs stack up underneath them. When he collects enough blood orbs, he then can trigger his power called Yamaoka's Wrath. When this happens, the Oni will roar across the map, and be able to dash across the map swiftly with his club. Any survivors he catches while in this dash will be downed instantly. If you hear this beast coming towards you, RUN! Use windows and pallets to get away from him until his form resets and he is back to the basic form. My god is it terrifying though.
PERKS:
Zanshin Tactics - The auras of all pallets, breakable walls, and vault locations are revealed to you within a 24-meter range.
When a Survivor is damaged, Zanshin Tactics becomes inactive for up to 40 seconds (depending on the Tier of the perk).
Blood Echo - When hooking a Survivor, all other injured Survivors suffer from the Hemorrhage and Exhausted status effect for 45 seconds. Blood Echo has a cooldown of up to 80 seconds (depending on the Tier of the perk).
Nemesis - A Survivor who blinds you or stuns you using a pellet or locker becomes your Obsession. Anytime a new Survivor becomes the Obsession, they are affected by the Oblivious status effect for up to 60 seconds (depending on the Tier of the perk) and their aura is shown to you for 4 seconds.
5. The Artist
Image
POWER:
The artist is armed with a sword/claw combo that forms out of ink. Her powers are birds that you can summon and throw out towards survivors to alert you of their presence. Kind of similar to the perk “Spies from the Shadows” but base kit, and not reliant on a perk. If you hit a survivor using your birds it also counts as a hit. The way to counter her is just to run straight. Don’t try to loop or hide if you are seen. Her birds will find you. Survivors can hop into lockers to get rid of the birds that are lingering on them, as well as use flashlights to move her static birds from their original position.
PERKS:
Grim Embrace - Once all four survivors have been hooked at least one time, all of the generators will be blocked by the entity for 30/35/40 seconds (depending on the tier of the perk.) The aura of the obsession will also be revealed for five seconds.
Scourge Hook: Pain Resonance - When the trial begins four random hooks will be turned into Scourge Hooks. These hooks can be seen with special white auras by the killer. When a survivor is placed on a Scourge Hook, the generator with the most amount of progress will explode and cause it to lose 9/12/15% of its progression (depending on the tier of the perk) as well as cause it to regress if nobody works on it. Survivors working on the exploding generator will scream.
Hex: Pentimento - The killer gains the ability to see the auras of cleansed Totems. These Totems can be changed into Rekindled Totems. As more Rekindled Totems are created, more debuffs are given to survivors. These are: One Totem - Repair speed is reduced by 20/25/30% Two Totems - Healing speed is reduced by 20/25/30% Three Totems - Recovery speed is reduced by 20/25/30% Four Totems - Gate Opening speed is reduced by 20/25/30% Five Totems - All Totems are blocked by the Entity
If survivors find a Rekindled Totem before five are created, they can be cleansed once more where they will be destroyed for good. This is a Hex perk, meaning it is activated via a totem within the map. It emits a bright flame on the totem. It CAN be destroyed by the survivors leaving you with only 3 perks left for the entire match.
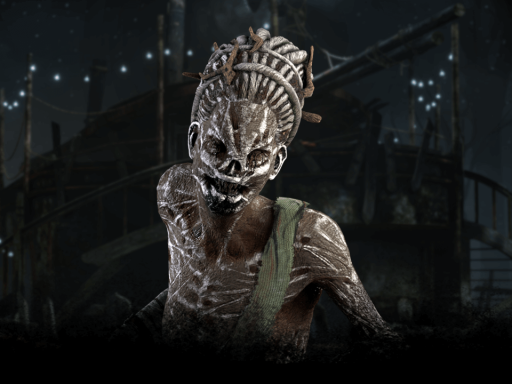
4. The Hag
Image
POWER:
The Hag is armed with just her hands! She can place traps down that survivors can trigger that give them a little jump scare, she can then teleport to wherever the trap got triggered around the map. Flashlights can destroy her traps. The best way to counter her traps besides flashlights is crouching, if you crouch the trap will not trigger.
PERKS:
Hex: The Third Seal - Hitting a survivor with a basic attack while the Hex Totem is active applies the Blindness status effect. The effect applies to up to 4 survivors (depending on the Tier of the perk) last hit. The Hex effects persist as long as the related Hex Totem is standing. This is a Hex perk, meaning it is activated via a totem within the map. It emits a bright flame on the totem. It CAN be destroyed by the survivors leaving you with only 3 perks left for the entire match.
Hex: Ruin - All generators are affected by Hex: Ruin. While a generator is not being repaired by a Survivor, it will immediately and automatically regress repair progress at up to 200% (depending on the Tier of the perk) of the normal regression speed. The Hex effects persist as long as the related Hex Totem is standing. (This is still one of the most used perks on killer builds to this day despite its age.)
This is a Hex perk, meaning it is activated via a totem within the map. It emits a bright flame on the totem. It CAN be destroyed by the survivors leaving you with only 3 perks left for the entire match.
Hex: Devour Hope - When a survivor is rescued from a hook at least 24 meters away, Devour Hope receives a token. 2 tokens: Gain up to a 5% (dependent on the Tier of the perk)Haste status effect, 10 seconds after hooking a Survivor, for 10 seconds. 3 tokens: Survivors suffer from the Exposed status effect 5 tokens: Grants the ability to kill Survivors by your hand without needing to hook them three times. This is a Hex perk, meaning it is activated via a totem within the map. It emits a bright flame on the totem. It CAN be destroyed by the survivors leaving you with only 3 perks left for the entire match.
3. The Spirit
Image
POWER:
The Spirit is armed with a knife that comes out of her hands as she hits a survivor. The Spirit can turn invisible while she is using her power, but the way to balance this is she can not see blood left by injured survivors and scratch marks left by running survivors. When she is using her power she relies heavily on grass moving sounds of foot movement as well as injured grunts.
PERKS:
Spirit Fury - After breaking up to 4 pallets (depending on the Tier of the perk), the next time you are stunned by a pallet, The Entity will instantly break the pallet. You still suffer from the stun effect penalty. (Paired beautifully with the perk Enduring from the Hillbilly.)
Hex: Haunted Ground - Two trapped Hex Totems will spawn in the Trial. When either one of the two trapped Hex Totems is cleansed by a Survivor, all Survivors suffer from the Exposed status effect for up to 60 seconds (dependent on the Tier of the perk). The remaining trapped Hex Totem immediately becomes a Dull Totem. This is a Hex perk, meaning it is activated via a totem within the map. It emits a bright flame on the totem. It CAN be destroyed by the survivors leaving you with only 3 perks left for the entire match.
Rancor - You become obsessed with one survivor
Each time a generator is completed, all Survivors’ locations are revealed to you for up to 5 seconds (depending on the Tier of the perk). Once all generators are completed, the Obsession has the Exposed status effect and you can kill your obsession.
2. The Blight
Image
POWER:
He can bounce off of walls to catch a survivor off guard and he is very FAST whenever he does so. He takes some skill and training to get good with him but once you do, game over. This hunched-over beast is so fast that before you truly notice him, it’s too late. He does make a loud grunt however when he uses his power. So if he sees you, RUN! There is also a decently long cooldown when you are done using his power.
PERKS:
Dragon's Grip - After kicking a generator, for the next 30 seconds, the first Survivor that interacts with it will scream, revealing their location for 4 seconds, and becoming afflicted with the Exposed status effect for 60 seconds.
Dragon’s Grip has a cooldown of up to 120 seconds (depending on the Tier of the perk).
Hex: Blood Favour - When a Survivor is hit with a basic attack, pallets within 16 meters of your location are held in place by The Entity for 15 seconds. These pallets cannot be pulled down. Hex: Blood Favour has a cooldown of up to 60 seconds (depending on the Tier of the perk). This is a Hex perk, meaning it is activated via a totem within the map. It emits a bright flame on the totem. It CAN be destroyed by the survivors leaving you with only 3 perks left for the entire match.
Hex: Undying - While Hex: Undying is active, Survivors within 2 meters of any totem have their aura revealed for up to 6 seconds (depending on the Tier of the perk). When another Hex totem is cleansed, transfers to an available dull totem around the map, losing any tokens in the process. This is a Hex perk, meaning it is activated via a totem within the map. It emits a bright flame on the totem. It CAN be destroyed by the survivors leaving you with only 3 perks left for the entire match.
1. The Nurse
Image
POWER:
She can teleport using what is known as “Blinks”. The longer you hold your power button down, the further you can teleport. If you have addons, you can extend your teleports even further. The Nurse can even teleport through objects. So if done correctly, you will NOT be able to loop a good nurse. She can hit directly right out of her blink which makes her extremely strong as most killers have a cooldown period to hit a survivor. After you hit a survivor or miss a blink, however, prepare for one LONG cooldown where the nurse puts her head down.
PERKS:
Stridor - Breathing of Survivors in pain is up to 50% louder (dependent on the Tier of the perk) and regular breathing is up to 25% louder (dependent on the Tier of the perk). (Pairs beautifully with The Spirit)
Thanatophobia - For each injured, dying or hooker survivor, all survivors receive a penalty of up to 5% to a maximum of up to 20% (depending on the Tier of the perk) to repair sabotage, and totem-cleansing speeds.
A Nurse's Calling - The auras of Survivors who are healing or being healed are revealed to you when they are within up to a 28-meter range (dependent on the Tier of the perk).
Thank You For Reading
That concludes my Top 10 list of the best killers in Dead by Daylight for 2022! Thank you very much for taking the time to see which killer is right for you! All of the killers in the game are very fun and worth trying. Also, keep in mind this list is completely based on my individual opinion. If you want to know more about all things Dead by Daylight, click down below!
Until next time, I’ll see you all in the fog!
")