Rainbow Six Siege is one of the few competitive games that has a gameplay which is deeply connected to its settings. Because of this, players can tweak their own settings in order to fit their own play style and maximize their gameplay potential. Here we are going to take a look at the fifteen most important settings in Rainbow Six Siege that can give you a competitive advantage.
DISPLAY
15. 16:10 Aspect Ratio
Above is Pengu’s youtube video where he discusses the differences between 16:10 and 4 : 3. For context, 4 : 3 aspect ratio is what most professional players are using. But in this video, Pengu, one of the top Siege pros, says that he prefers 6:10 when he’s playing online matches. That is because latency and ping can make opponents appear to move very fast in 4 : 3 aspect ratio. As for this author, I prefer the 6:10 aspect ratio because it gives me enough zoom while also not sacrificing a lot of peripheral vision.
Advantages:
- You won’t lose a lot of peripheral vision compared to other aspect ratios
- Will still allow you to see your enemies in front view clearly
- Recommended by Pengu himself
How to apply:
- From the main menu, click the gear icon on the upper right corner of the screen
- Click options
- Click Display
- Scroll down and set Aspect Ratio to 6:10
14. Field of View between 70-80
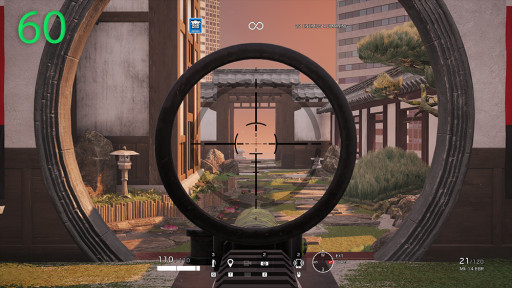
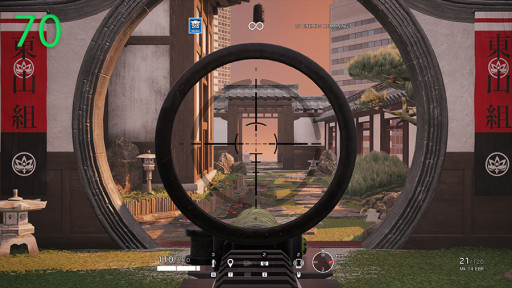

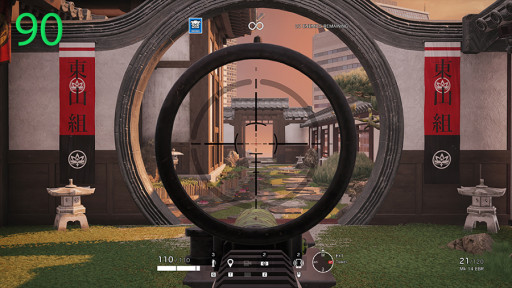
As you can see from the images above, the differences between each FOV settings is that lower value means more front zoom but less peripheral view, and higher value means more peripheral view in exchange for less front view zoom. So, for this setting, we recommend to get the best of both worlds and be in the middle, which is 70-80. This way, you won’t have a problem seeing enemies in front of you, they will also appear bigger, while also not sacrificing a lot of peripheral view.
Advantages:
- More peripheral view while not sacrificing a lot of front view zoom
- Higher values also consume more video memory, so with this, you’re not sacrificing more frame rates
How to apply:
- From the main menu, click the gear icon on the upper right corner of the screen
- Click options
- Click Display
- Scroll down and check set Field of View to a value of somewhere between 70-80
13. Refresh Rate 144hz or Above

Even if you’re getting more than 100fps while playing Siege, it won’t really matter if you’re still playing with a 60hz monitor. If you are, then for competitive gaming, you should really upgrade now to a 144hz monitor or above. That way, you can capitalize on more frame rates, with better frame rates, the smoother the game will be. And your reaction time will definitely be faster.
Advantages:
- More frame rates
- Better reaction time
- You’ll be able to see enemies faster
How to apply:
- From the main menu, click the gear icon on the upper right corner of the screen
- Click options
- Click Display
- Scroll down and check set Field of View to a value of somewhere between 70-80
SOUND
12. Dynamic Range - Night Mode

Night mode allows you to better hear quiet sounds like the sounds of footsteps, camera switching sounds, action sounds like crouching or going prone. This is a great sound setup for detecting enemy movements. It also increases the range of your hearing.
Advantages:
- Hear footsteps and other sound details better
- Hear further
How to apply:
- From the main menu, click the gear icon on the upper right corner of the screen.
- Go to Audio
- Scroll down and adjust Dynamic Range to Night Mode
11. DTS Headphone X
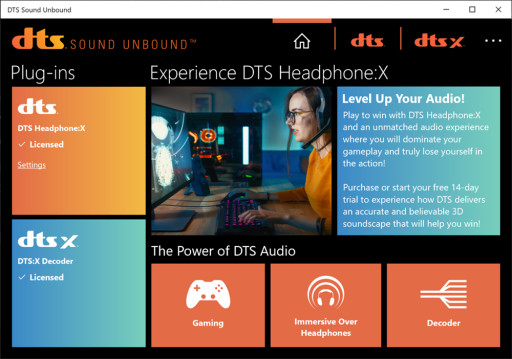
DTS Headphone X is premium spatial sound. Yes, you need to pay for it in Windows, but it’s definitely worth it especially when partnered with a good 7.1 headset like the Hyper X Cloud II. Spatial sound details where the sound is coming from, whether it's from below, above, or in the same level as you are. In case you do not have the budget, there is a free alternative to this which is available in Windows. The Windows Sonic for Headphones. But for Siege, this author highly recommends the DTS Headphone X.
Advantages:
- Better sound details
- Better audio quality
- You’ll definitely be able to hear important sounds in Siege
How to apply:
- Go to Microsoft Store
- Download DTS Sound Unbound
- Purchase your license
MOUSE
10. Mouse Macro – Back
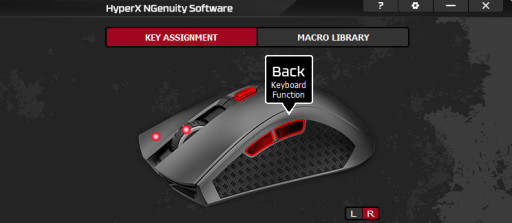
Most gamers nowadays, especially Siege players, have a gaming mouse. And most gaming mice have extra buttons such as the back and forward button, as well as the DPI button. You can use this to your advantage by assigning Siege functions to them. E.g. I recommend assigning the Secondary Gadget to the back mouse button. This will allow you to deploy secondary gadgets faster, and most importantly, throw grenades faster and more accurately.
Advantage:
- Easier hit the throw grenade button
- More accurate throws
How to apply:
- Open your gaming mouse’s driver
- Go to macros
- Change each button’s functions
9. Mouse Macro – Forward
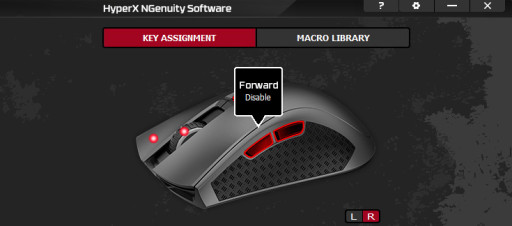
For the forward button, I recommend assigning the melee key. With that, you won’t mistakenly hit C or B when trying to melee an enemy, which we all know frequently happens to everyone, even to veterans.
Advantage:
- Easier and faster to melee opponents
- You won’t press C or B anymore instead of V when trying to melee enemies
How to apply:
- Open your gaming mouse’s driver
- Go to macros
- Change each button’s functions
8. Mouse Macro – DPI
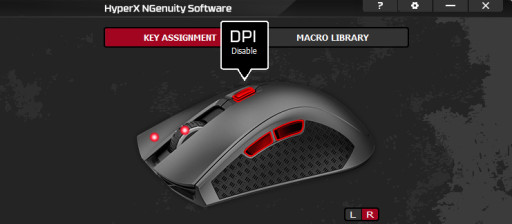
This button is basically useless after you’ve found the right DPI settings for you. Therefore, you can use it to your advantage by assigning something like the Switch Ability mode to it. This will allow you to quickly switch from automatic to single shot firing. This is also very useful for operators like Capitao or Zofia whose special gadgets can switch projectiles.
Advantage:
- Will work great on operators like Capitao and Zofia
How to apply:
- Open your gaming mouse’s driver
- Go to macros
- Change each button’s functions
7. Raw Input - Mouse/Keyboard - Off

Based on experience, raw input in Siege is quite buggy, therefore I recommend to just turn it off and trust your own mouse settings. It should be enough. Besides, turning it on won’t produce any noticeable differences in performance or reactivity.
Advantage:
- Avoids raw input bugs
- Off is enough for you to win games, there’s really no noticeable improvements even if you turn it on
How to apply:
- From the main menu, click the gear icon on the top right of the screen
- Go to Controls
- Under Controls, the first setting is Raw Input- Mouse/Keyboard
- Turn it off
GRAPHICS
6. Texture Quality - Low
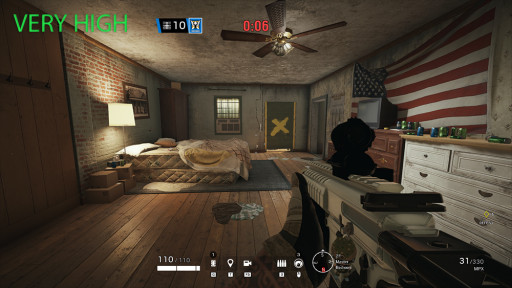
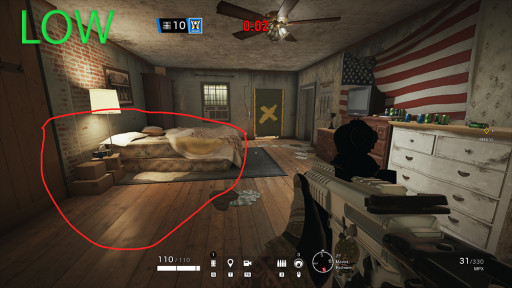
As you can see from the pictures above. Texture quality only adds useless details in the environment. Details that you won’t need in a competitive game. Details that can even allow the enemy to blend to the surroundings. Putting it on low will also add frame rates for you to capitalize on.
Advantage:
- Clearer visual of enemies
- Minimizes details that can help enemies blend to the surroundings
- Lesser distractions
How to Apply:
- From the main menu, click the gear icon on the right corner of the screen
- Go to Graphics
- Click Texture Quality and set it to low
5. Texture Filtering - Linear
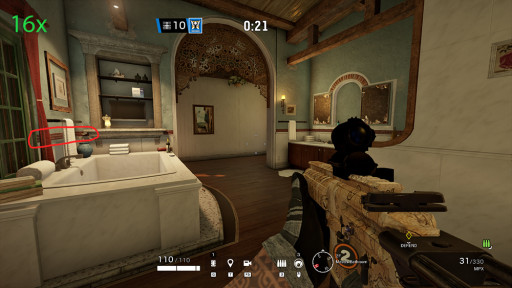
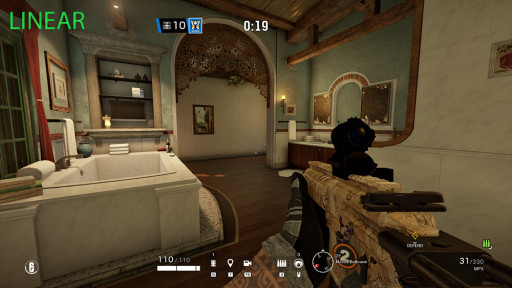
Anisotropic filtering is another setting that adds useless details but can be heavy on performance. So, for this setting, my recommendation is to put it on linear and benefit from the additional frame rates.
4. Shadow Quality - Medium
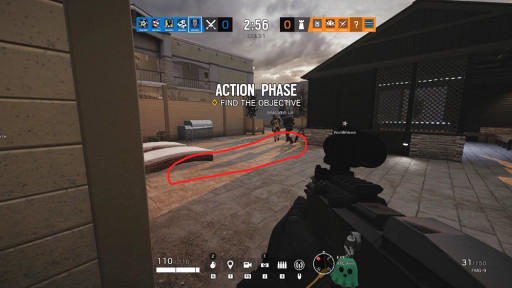
Definitely don’t max this setting out, because it can eat up frame rates, but don’t make the mistake of setting it to low either, because low will only produce static shadows, therefore, there won’t be situations where you will be able to anticipate the enemies coming because of their shadows.
Advantages:
- More frame rates
- You’ll still be able to see enemies approaching by seeing their shadows
How to Apply:
- From the main menu, click the gear icon on the right corner of the screen
- Go to Graphics
- Click Shadow Quality and set it to low
3. Reflection Quality - Low
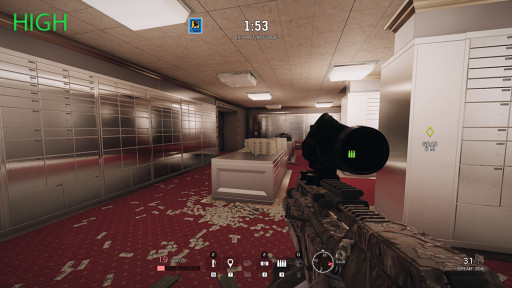
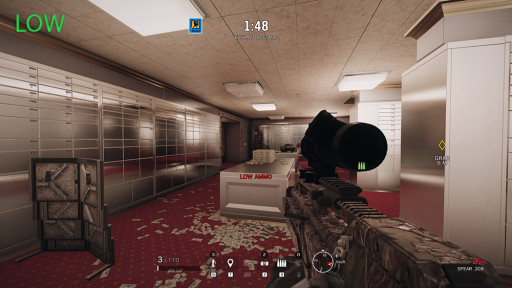
I’ve ran several tests and found absolutely no difference in visuals whether it's on high or off, so you might as well set it to low and benefit from any additional frame rate.
Advantages:
- Added frame rates
- Less distraction
How to Apply:
- From the main menu, click the gear icon on the right corner of the screen
- Go to Graphics
- Click Shadow Quality and set it to low
2. Ambient Occlusion - Off
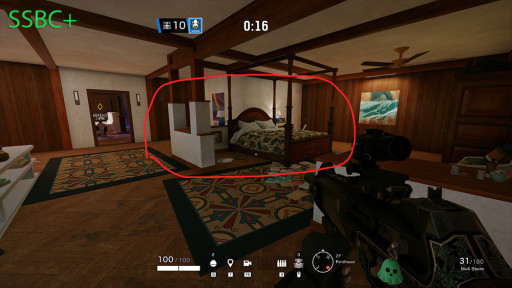
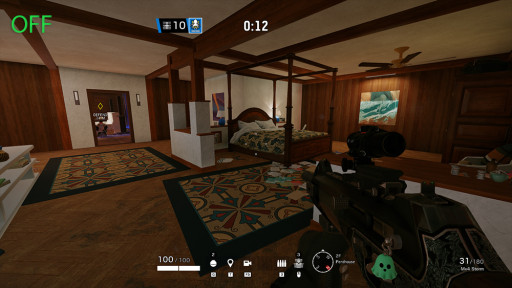
This has a clear effect on the surroundings. The difference may not be that clear in the images above unless you zoom them or you try the settings on your own, but ambient occlusion only adds deeper and finer shadows in the environment. Basically, it makes some corners darker, and that can make it harder for you to see your enemies hiding in corners. Therefore, it’s better to turn it off.
Advantages:
- Brighter corners
- Easier to spot enemies
- More frame rates
How to Apply:
- From the main menu, click the gear icon on the right corner of the screen
- Go to Graphics
- Click Ambient Occlusion and turn it off
1. Lens Effects - Off
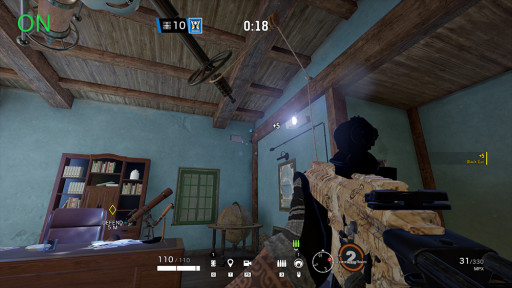
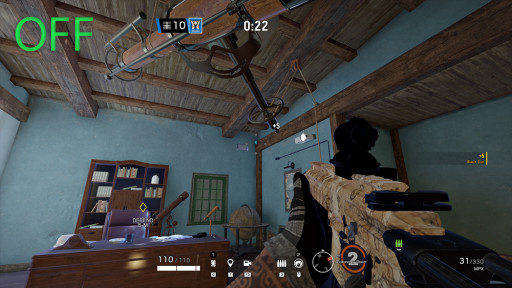
Do not be afraid to turn Lens Effects off. You’ll still be able to spot Valkyrie’s cams or other light producing enemy gadgets just the same whether it's on or off. The big problem with on is that it adds a lot of intensity to lights on the environment. Lights that you don’t need and can potentially even disrupt your vision. Which we cannot have while playing competitively.
Advantages:
- Less distraction
- Clearer view
- More frame rates
How to Apply:
- From the main menu, click the gear icon on the right corner of the screen
- Go to Graphics
- Click Lens Effects and turn it off
Attention operator, please be advised. There is a new directive from Six. Read up on these related articles, and prepare for deployment:
You May Also Be Interested In:
- Rainbow 6 Siege Tier List 2021 [Rainbow 6 Siege Best Operators]
- [Top 10] Rainbow 6 Siege Best Weapons
- [Top 7] Rainbow 6 Siege Best Attackers
- Rainbow 6 Siege Attachment Guide (R6 Best Attachments For Every Weapon)
- [Top 25] Best R6 Settings That Give You An Advantage
- [Top 15] Rainbow 6 Siege Best Graphic Settings
- Rainbow 6 Siege Best Weapon Attachments
- Rainbow 6 Siege Best Operators 2021
- [Top 7] Rainbow 6 Siege Best Defenders
- Rainbow 6 Siege Roles Explained And How To Play Each One
- [Top 10] Rainbow 6 Siege Best Players
- [Top 5] Rainbow 6 Siege Best Nomad Loadouts
- [Top 5] Rainbow 6 Siege Best Jackal Loadouts
- [Top 5] Rainbow 6 Siege Best Glaz Loadouts: From Worst to Best
- [Top 5] Rainbow 6 Siege Best Finka Loadouts
- [Top 5] Rainbow 6 Siege Best Lion Loadouts
- [Top 5] Rainbow 6 Siege Best Castle Loadouts
- [Top 5] Rainbow 6 Siege Best Dokkaebi Loadouts


