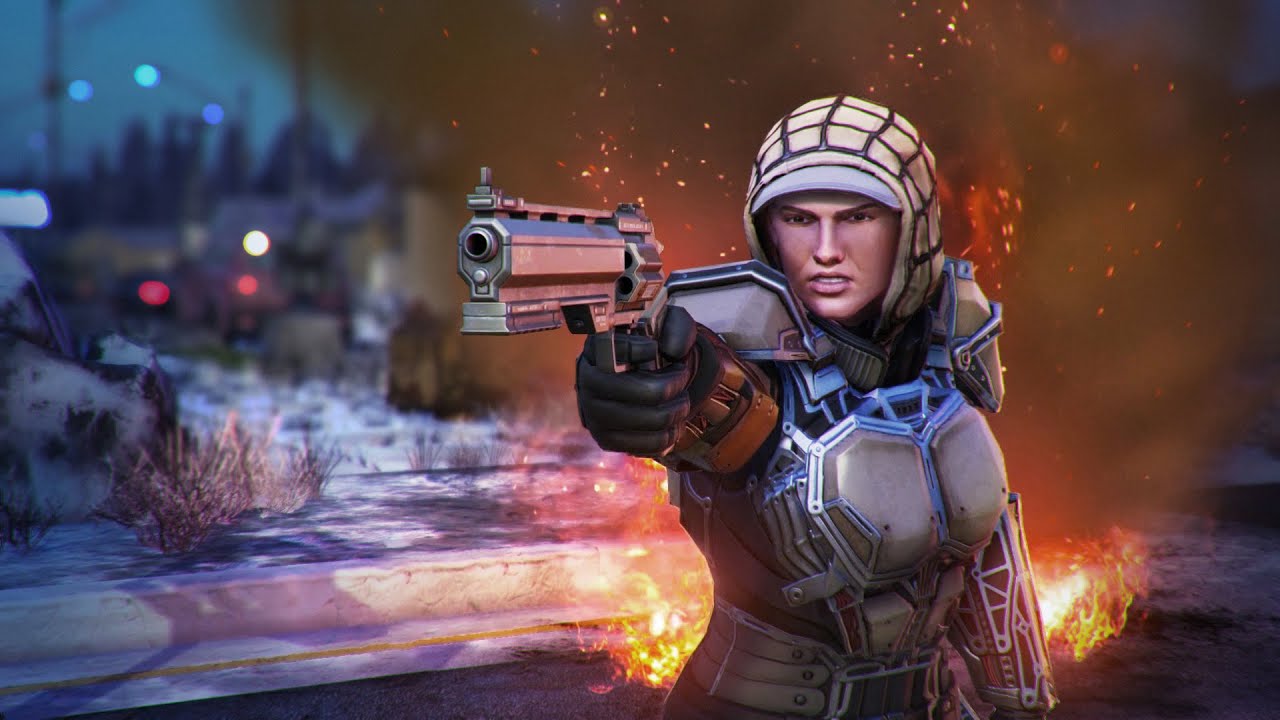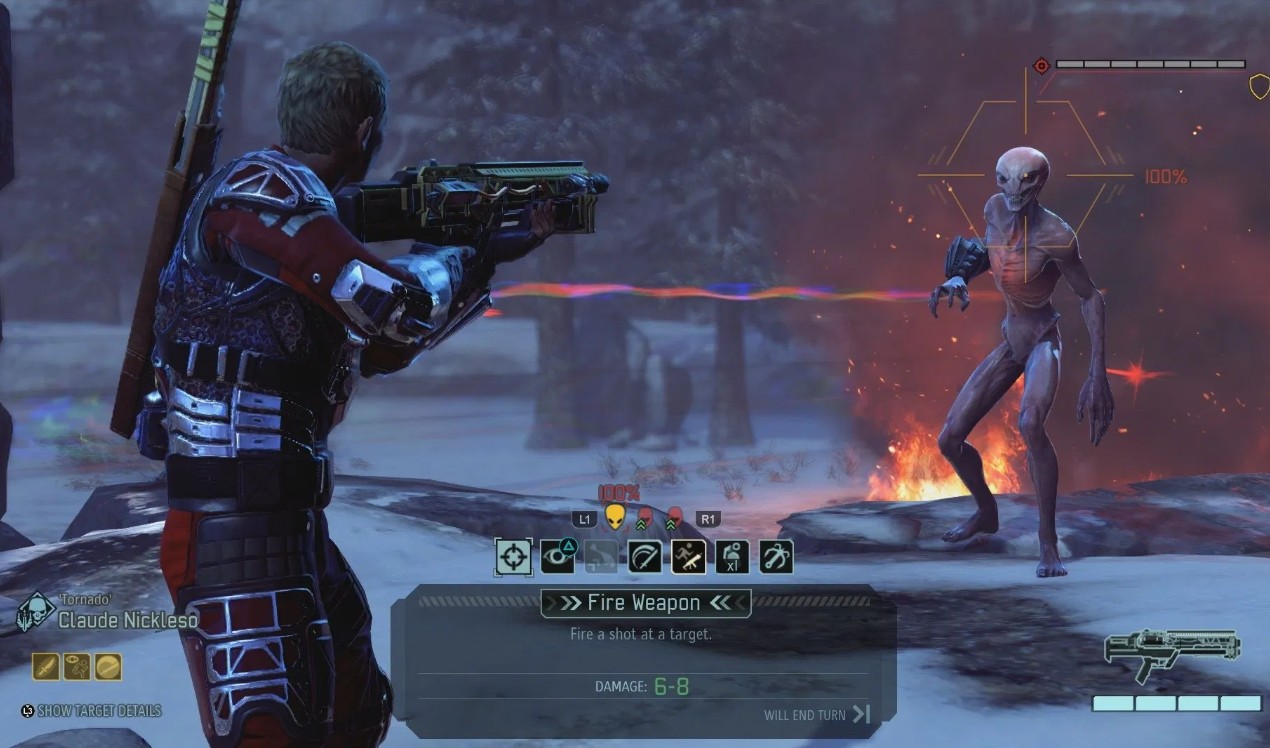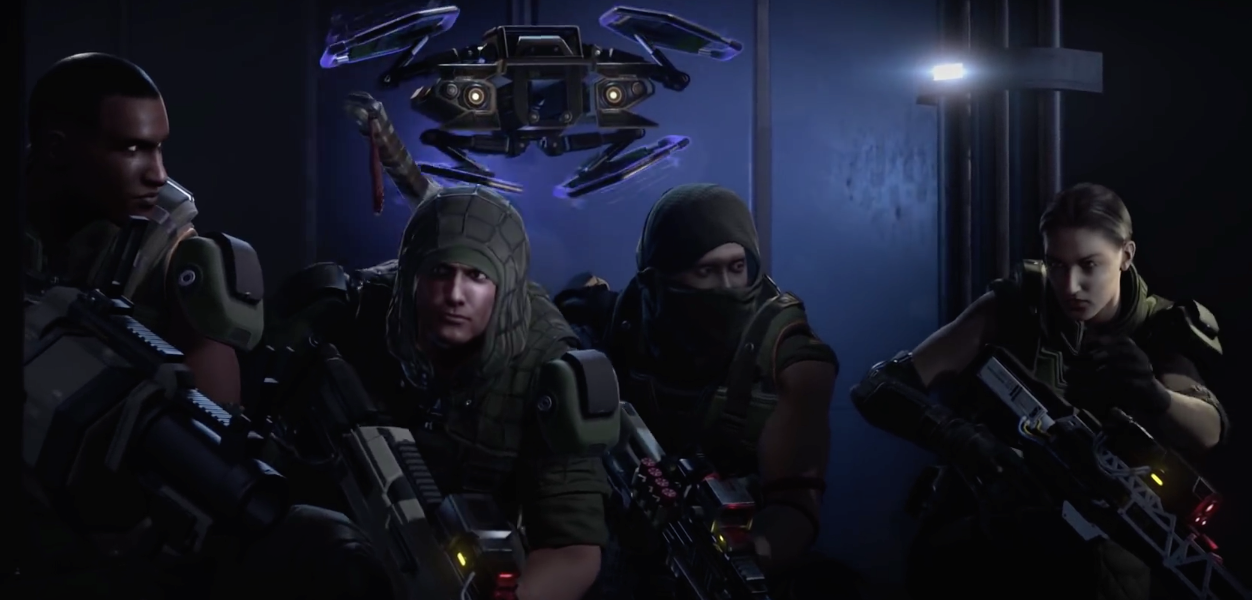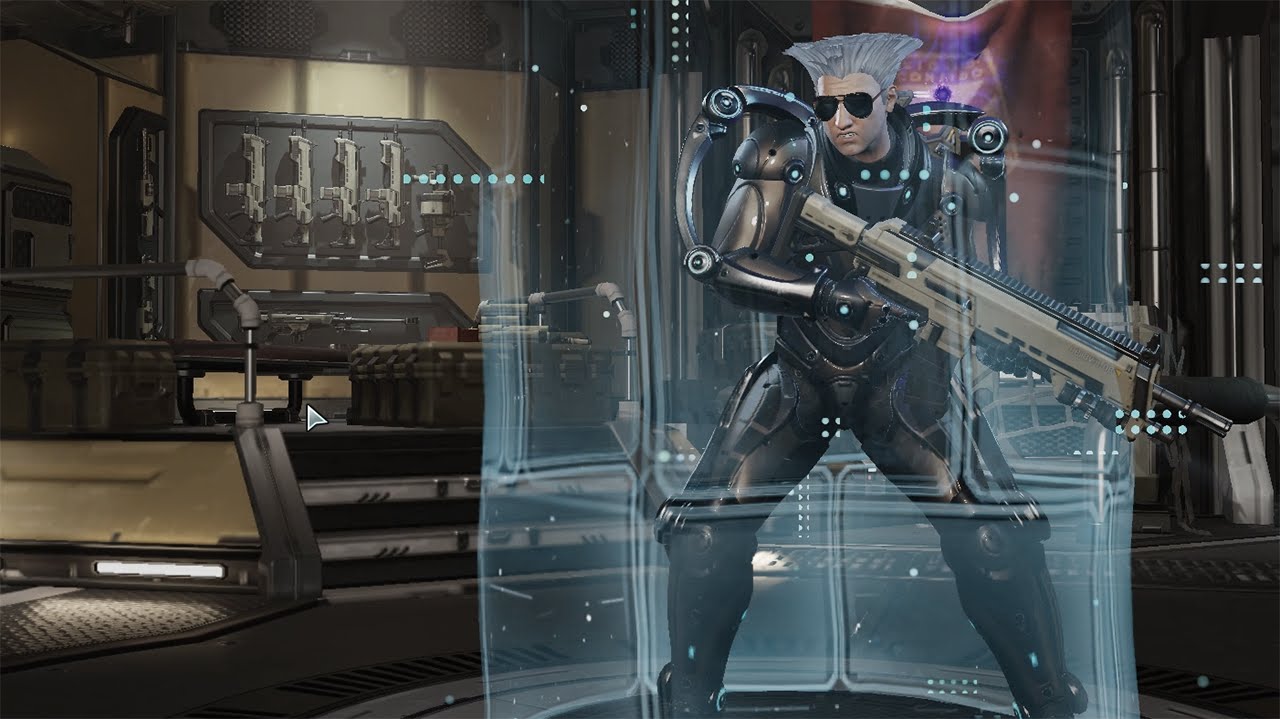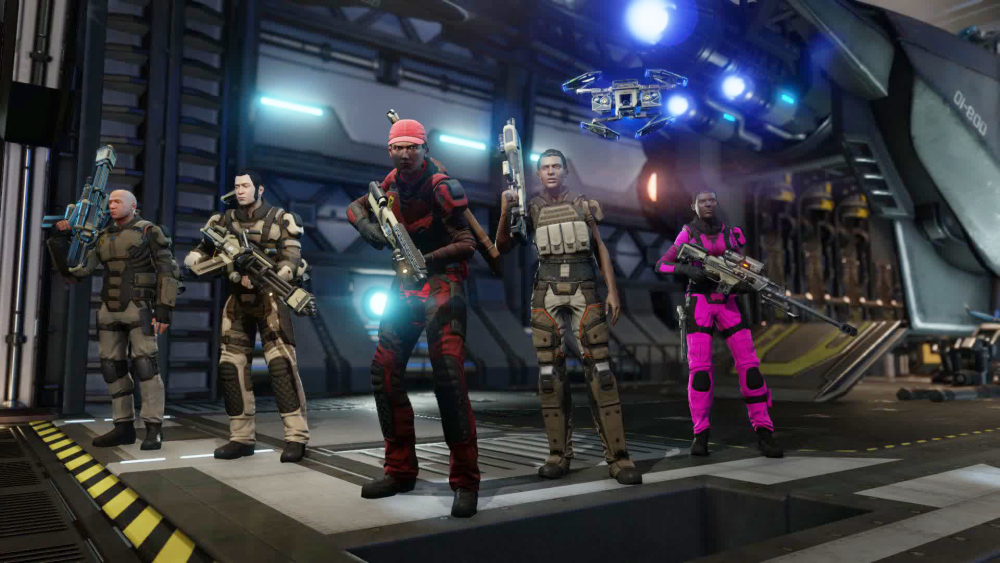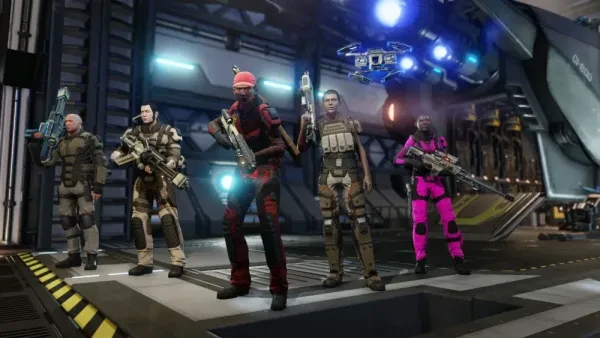
X-COM as a series is grounded in preparation and squad management, knowing your abilities, and planning for the enemy’s actions ahead of time. While there is plenty of wiggle room for building your soldiers however you so feel, there is certainly the ideal way to have your squad function and an ideal place and role for every class to fill.
I’ll start by saying that XCOM 2 leans heavily into offense rather than defense in which you are aiming to eliminate as much of the enemy as possible before they have the chance to retaliate. WotC offers several challenges that make this ideal extremely difficult, but the premise stands: you don’t want your enemy to take any actions if you can help it.
That said, we’ll be delving into how to utilize each Class to ensure your soldiers will remain healthy while the enemy is left wondering what hit them. For the sake of continuity, all classes will be addressed as they appear with the War of the Chosen and other DLCs in mind.
Videos serve as a general idea, but you will notice I sometimes differ from the choices made there based on my own experiences.
Vanilla Classes
Ranger - Shock Trooper
With the introduction of the Reaper class in WotC, the Ranger has effectively alleviated of the necessary role of a scout, freeing them up to focus on their true calling: a rapid maelstrom of damage. That said, a Ranger’s scout abilities can prove to be valuable and greatly alter the pace of combat and your battlefield awareness.
The first point to note in building a Ranger is your preference between Phantom and Blademaster. This choice is a simple matter of whether you are regularly fielding another unit for scout purposes. Overall, as a major damage source for the squad, it is preferable to get the Ranger in as much combat as possible rather than worrying about maintaining their concealment, so Blademaster over Phantom is a general rule here.
While the Sword is an extremely strong early game weapon and benefits from having no accuracy roll (meaning attacks are overwhelmingly likely to hit most targets with few exceptions), the shotgun scales with flanking and other benefits like weapon upgrades (which are only available to ranged weapons unless you are sporting certain game mods). Increased critical capabilities and access to insta-kills (via the Repeater attachment) or free second shots (via the Hair Trigger) makes the shotgun a much more formidable weapon with greater damage potential than the sword overall. This is further supported by picking up Hunter’s Instinct from the Guerilla Tactics School which provides increased damage and crit to flanked enemies.
A final note for Ranger tactics is that they tend to overextend and thus be caught out by groups of enemies, landing themselves in precarious situations likely to get them killed and/or put the squad in a fight against multiple pods (enemy groups), which is never good.
Shock Trooper Excels In:
- Death-nado. Extreme Mobility and Enemy Harassment.
- Constant Flank Threat
- High Crit Chance and Damage
- Melee Neutralizer and Enemy Drop Zone Sweeper
Build details:
Blademaster
Melee attacks have +10 Aim and +2 Damage.
The aim bonus makes the sword a 100% hit chance weapon against the majority of enemies while the damage bonus increases the sword a weapon tier causing it to deal the same damage a Magnetic Rifle would. This is overwhelmingly powerful going into mid-game and by that time you will likely have upgraded the sword anyway meaning the Ranger continues to have among the highest damage potential with ridiculous accuracy.
Shadowstrike
If the soldier's position is unknown to the enemy before initiating an attack, their attacks have +25 to Aim and crit chance.
This might seem a bit odd but hear me out. To be frank, most enemies do not use overwatch, and even when they do it’s often easier to deal damage to that enemy to remove it rather than relying on an ability to avoid it. Now, there is also some concern that Shadowstrike only has one chance to proc (if you are not taking Conceal or gaining concealment some other way), but this is not entirely true. It is, in fact, possible to move your Ranger out of the line of sight of the enemy (move behind a wall or other obstacle) and then trigger a melee attack from that new position. In this manner, the attack was activated from a position where the enemy could not see you and thus Shadowstrike will proc. “Abusing” the mechanics in this manner allows the Ranger to get an aim bonus high enough to bring their hit chance up to being able to 100% the hardest to hit targets in the game.
Run and Gun
Immediately provides an additional action point, which cannot be spent on movement.
Hands down a must for a ranged-Ranger and an invaluable ability regardless. The extra action may be used on almost any other action besides movement and melee attacks meaning items, objectives, and other options are open to the Ranger after using this ability. As with the Assault class in the previous game, this ability is a bread-and-butter ability, and I don’t see much reason to not take it.
Bladestorm
Enemies moving adjacent to the Ranger provoke melee 'reaction fire', as do enemies that perform any kind of action adjacent to the Ranger. Bladestorm can only activate once per turn on a given enemy, however.
Honestly, this over Implacable is hard to completely justify. I’d say it’s a toss-up, and either choice is a strong one but, I prefer Bladestorm even though this build is more of a ranged build. With Bladestorm, you can bait out melee attackers for easy damage and, if done correctly, outright cause them to kill themselves on your unit. This is very useful, particularly against Vipers. Furthermore, if you move adjacent to an enemy and damage them but don’t kill them, Bladestorm will proc on their next action (with some exceptions such as teleportation) and deal significant damage to them again often leading to their death due to the sword's high damage. Possibly the strongest point is that Bladestorm can trigger on each enemy once per turn that takes an action next to the Ranger, which means you can sit your Ranger in the middle of an enemy dropzone and watch as they slash each enemy for significant damage. Keep in mind that Bladestorm acts like Covering Fire Overwatch, meaning it triggers BEFORE the enemy action, potentially stopping the action entirely.
Untouchable
If the soldier lands a kill, during the next enemy turn the first time the soldier should have taken damage from enemy action they won't, even if it's an action that is normally incapable of missing such as a grenade.
In comparison to its competitor, Deep Cover, Untouchable is a bit of a no-brainer. While Deep Cover can be nice, it relies on your Ranger not taking any actions which are against the idea that they should essentially be dancing all over the battlefield like a death-nado. Untouchable rewards your death-nado nature by providing you invulnerability against the first thing that targets you. Do note that this does not account for exploding enemies, should you decide to melee one, and does not account for terrain hazards.
Reaper
An activated skill which consumes no action points. After activation, the Ranger's very next Slash in the turn is guaranteed to hit. Furthermore, if that Slash kills its target, the Ranger is granted an action point. From there, Slash's accuracy behavior returns to normal, but each Slash in the turn that kills its target will still grant the Ranger an action point. Conversely, each such successful kill (Including the first one) lowers the Ranger's Slash damage by 1 for the rest of that turn.
Why take this over Rapid Fire considering this is technically not a melee-oriented build? Well, quite frankly, the clean-up potential that Reaper has outweighs the double-shot of Rapid Fire. With Reaper, it is possible to have the rest of your squad soften up a group of targets and have your Ranger finish off all of them. That said, this ability is more geared toward being an “oh crap” button should your squad end up facing multiple targets while you are in poor positioning. Where it may seem like there is no way to kill each target without taking massive damage, the Reaper ability could allow you to escape that. Furthermore, the hit guarantee that it provides is perfect for extremely hard-to-hit targets.
Grenadier - Tank Buster
The Grenadier comes in strong as a heavy gunner/support unit which should be utilized as a means of improving your squad's chance to hit, via destroying cover, or as an armor shredder. Destroying cover is always a great choice, while abilities that improve the aim bonus squad mates get it also a hefty boon. Collateral damage and battlefield control is the name of the game here. The Class’s grenade launcher allows them to strategically place grenades where they would be most beneficial and carries with it an improved radius that even applies to support grenades such as Smoke Grenades. That said, the most optimal build focuses on maximizing AoE as well as armor shred in which you could completely shred the armor of the most heavily armored target in the game with one soldier freeing up your others to wreak havoc.
A major point for this build over, say, a build that focuses on using the Cannon and abilities that rely on firing said weapon, is that the Grenadier has horrible aim growth (the worst of all classes). True, you can make up for this in several ways, but I find that if the only way it's viable is due to loads of specific gear then the build is viable but not optimal.
What Tankbuster Excels In:
- Maximized Armor Shred
- Battlefield Control By Limiting Cover and Manipulating Terrain
- Set Up Teammate Shots
- Maximized Grenade Potential
Build details:
Shredder
Cannon has Shred equal to weapon's tech level.
WoTC has made this choice for the Grenadier much less necessary, as Shredder can be trained on other classes via the Training Center, but it is still a strong choice and never underestimate how much you will be needing Shredder moving past early-game. Blast Padding is a pretty good utility ability but I would pick it up later if you have the extra AP to do so and feel like you want it.
Suppression
A single enemy target in range becomes Suppressed until the start of the user's next turn. A Suppressed target suffers -50 to Aim, and if it moves the Suppressor will immediately take a reaction fire shot at the target for free. Additionally, if the target was on Overwatch, its Overwatch is permanently removed, even if the Suppression ends prematurely. Suppression ends if the reaction shot is triggered or if the Suppressor takes damage. Consumes 2 ammo to initiate.
Against its competition, Suppression is the go-to here. Even so, it is still a rather mediocre skill overall. While it is useful as a sort of improved Overwatch, it is not as much of a game-changer as one would expect from abilities gained throughout a class tree. It is worth noting that Suppression penalties stack with other aim penalties, so it is possible to ensure a target has no, or practically no, chance of hitting your soldier.
Heavy Ordnance
Whatever grenade is in the bonus grenade-only slot gains an additional use. This applies to all grenades, including support grenades and the Frost Bomb.
If it weren’t for WotC’s introduction of the Training Center I might vie for Holo Targeting over Heavy Ordnance but since it is possible to train Holo Targeting on other classes, or this one later if you wish, I would say that Heavy Ordnance is more integral and beneficial.
Volatile Mix
Grenades do +2 damage to units.
Quite simply invaluable even if you had not taken Heavy Ordnance before. This ability also happens to provide damage to offensive grenades that do not have any innate damage (meaning the Frost Grenade is even more amazing). Along with the other upgrades you will accumulate for grenades, this makes the explosive damage the Grenadier can dish out absolutely devastating.
Salvo
Firing a grenade or using a Heavy Weapon as the first action doesn't end the soldier's turn.
Action economy is the name of the game with XCOM, and that makes Salvo an easy choice even though Hail Of Bullets isn’t particularly bad, per se. While shooting two grenades in one round is a tad aggressive considering their limited number, it can be a complete game-changer if need be. Even without using two grenades in one, the Grenadier could grenade and then follow up Cannon for even more shred on the target.
Rupture
Expends 3 ammo, but is guaranteed to crit on a successful hit and the target permanently suffers from the Rupture status, which causes all following attacks to do an additional 3 damage per hit.
This CAN be a bit of a toss-up round between Rapture and Saturated Fire, but if you are following this build then you probably aren’t worrying much about increasing your Grenadier’s aim meaning that Saturated Fire is the worse option since it rolls for each target and suffers from any cover they may have. Still, potentially targeting 5+ enemies (anything in a cone) is rather tempting but I would still choose Rupture. The main benefit here is creating a single-target nuke opportunity for your squad and being able to essentially guarantee that your squad eliminates an enemy in one round. The best part here is that each attack gets bonus damage so you would take whatever abilities create the most attacks on a single target e.i. a Sharpshooter utilizing Quickdraw and Fanfire would generate significantly more damage than a single sniper rifle shot.
Sharpshooter - Sheriff
Let’s just go ahead and put it out there: the Gunslinger abilities (pistol abilities) that the Sharpshooter can acquire are simply far more powerful than the other tree. XCOM 2 has done something interesting in respect to the sniper class: where the pistol was simply a backup weapon in the previous game, half of the Sharpshooters skills are dedicated to ensuring that the pistol is a viable and effective secondary weapon instead of being something to cover you if things happen to go awry. As such, the Sharpshooter appears to be the most egregious example of splitting a class in half. The reasoning behind this build focuses around pistol skills which grant a great deal of damage potential to an ammo-less weapon and often allow you to fire your weapon multiple times in a single turn and tends to overshadow the pure range and power of the sniper rifle.
Another big reason to prefer the Gunslinger tree is that XCOM 2 often presents the player with timed missions. The player is readily encouraged to keep moving, and the sniper rifle comes with the limitation of not being able to be fired unless you have two action points available. So, theoretically, you don’t want your Sharpshooter to move around much - you want to find high ground and camp out. That sounds fine on paper. So you think, “Fine. I’ll just allow one soldier to camp out in a nice nest and everyone else can do the necessary footwork,” but there is a greater issue in the game’s mechanics. While Squadsight is an amazing and useful ability, Sharpshooters are hindered by an aim penalty for firing at extreme distances (-2 Aim for every tile of Squadsight). This is incentive enough to not leave your Sharpshooter on the other side of the map and just happily fire away.
Lastly, I would like to mention Breakthroughs. These Research events can increase the damage of the pistol which is normally half of what the Sniper Rifle can dish out. While Breakthroughs are random and you can’t necessarily account for them being accessible in any given run, if they do happen to appear in your run you are easily looking at a pistol using Sharpshooter having much greater damage potential than a Sniper Rifle. And that’s not even factoring in Ammo Items which also increase the pistol’s damage with every shot. All that said, let’s get into the choices and the whys.
What Sheriff Excels In:
- Multiple Shots In One Turn
- Little To No Ammo Concern
- Arguably The Best Single-Target Nuke
Build details:
Long Watch
Sniper Rifle Overwatch is now Long Watch, able to trigger on targets at Squadsight ranges.
Even though the idea of this build is to keep your Sharpshooter closer to the action than you would otherwise think to, there is no reason to simply throw away the core of the class. Covering the squad is a large part of what the Sharpshooter does, and this ability complements that perfectly. The other option is Return Fire which is one of those abilities that sounds cool on paper but falls short in practice. Again, this build is essentially saying you should keep your Sharpshooter relatively close to the action, but by no means would you want your Sharpshooter to be under fire enough for that ability to pay off.
Lightning Hands
Fires the Pistol as a completely free action, otherwise functioning as a normal Pistol shot.
You’ll hear me say it again and again, but action economy is the name of the game. If you can fire your weapon twice with no penalties whatsoever there is no reason to not make that choice. This serves as the first incentive to keep your Sharpshooter within reasonable combat range: if you don’t you are simply throwing away the potential for free damage.
Quickdraw
Firing the Pistol as the first action of the soldier's turn does not automatically end the soldier's turn
Between Death From Above and Quickdraw, you could go either way. Both of these abilities somewhat follow the action economy rule in that fact that Death From Above refunds (actually it sets you to one action point, regardless of what the game says) an action point and Quickdraw allows you to fire your pistol and then do whatever else you were thinking of doing (potentially allowing you to fire twice). I say Quickdraw over Death From Above with the idea of the Lost in mind, where the pistol is particularly useful because it has no ammo to worry about. Reasonably, I would be looking to buy Death From Above as soon as you have the Training Center.
Faceoff
Fires the Pistol at every enemy in range, once apiece.
Frankly, just much more versatile and useful than its competing ability. Kill Zone isn’t horrible by any means but factoring in that Faceoff can fire at an unlimited number of enemies due to the pistol having no ammo, can be paired with any other action you want to make including free pistol shots, and doesn’t suffer from aim penalties that Kill Zone has due to it being technically an Overwatch ability and may suffer from firing at things at Squadsight distance, Faceoff is the better choice if you’re going to be keeping you Sharpshooter near the fighting anyway.
Steady Hands
If the soldier has not moved in the previous turn, their next shot gains +10 to Aim and crit chance.
That’s what the game says anyway, but in practice, that’s not what happens. Steady Hands provides your Sharpshooter with the bonuses so long as they do not move during their turn. Also note that the bonuses only apply to the first shot you take during your turn so you cannot gain the bonus on multiple pistol shots, or a Sniper Rifle shot after a pistol shot. Anyways, it’s a neat passive ability and preferable over the Aim ability which requires that you Hunker Down to gain +20 Aim on your next turn. While that is a sweet bonus, it's generally preferable to do anything else besides Hunker Down. That said, because WotC allows you to take both abilities, you could provide your Sharpshooter with +30 Aim to secure damage/a kill.
Fan Fire
Fires 3 Pistol shots at a single target.
If it allows you to fire your weapon more than once, it’s a pretty good bet to take that ability. The only reason to consider otherwise is that the pistol is potentially a low damage weapon and enemies with Armor can eat low damage attacks. That’s something you would normally cover for with grenades or Grenadier shred but since WotC has a plethora of ways to increase the pistol’s damage, choosing Fan Fire over Serial is a no-brainer (and even without that, Serial is still just a worse ability overall). Set up the right way, Fan Fire is a single-target nuke ability allowing you to remove a target from the field while leaving the rest of your squad free to do whatever they please.
Specialist - Guardian Angel
With the introduction of WotC, we are met with having a second look at the Medical Specialist. In Vanilla, once a player got used to the mechanics and flow of the game, it was more like a minute safety net to have a medic around just in case you messed up or got unlucky. Unlike in the original game, you are not expected to trade hits with the enemy and heal up frequently, in fact, I would say that taking hits feels more like you made a mistake rather than an inevitability. Not a problem, just a note. That said, with the introduction of the Chosen and Rulers your squad is again in a position where damage can be unavoidable and the need for a medic to keep people on their feet is back to being invaluable.
The Specialist as a whole is a powerful support unit while also maintaining a great aim stat and offering some particularly useful abilities to your squad. With the introduction of the Training Center, you can now take almost all Specialist abilities (which I would recommend even to the point of saving your XCOM AP to give them more abilities) and turn them into the most valuable unit in your squad. I’ll focus on what I believe to be the preferable first-time selections as your soldier ranks up and try my best to explain why one over the other but do keep in mind that going back to spend AP on the other skill is probably well worth it.
What Benefactor Excels In:
- Unmatch Support and Utility
- Mitigate “Guaranteed” Damage
- Superior Overwatch Ambush
Build details:
Combat Protocol
The Specialist sends the Gremlin to do guaranteed damage (2/4/6 for Mark I/Mark II/Mark III Gremlins) against a target the Specialist has Squadsight line of fire to. This completely ignores Armor. Some targets will take bonus damage from Combat Protocol. The bonus damage is 2-3/3-4/4-5 for Mark I/Mark II/Mark III Gremlins, working out to a total of 5-6/7-8/9-10 against robots.
This little guy can come in clutch in several situations and clean up enemies that are being particularly pesky (either because of natural defense or utilizing high cover). Early-game, I recommend this over Medical Protocol because you should not find yourself in situations where it’s ideal to heal rather than simply pushing through and finishing the mission. Once your soldier is wounded, they are going to suffer downtime for that wound regardless of if you medikit them or not and you will only further increase their downtime if they happen to get hit again after a heal. Note that building the Training Center ASAP is recommended if you build this way because you will want to pick up Medical Protocol.
Revival Protocol
Once per mission, the Specialist may remove all negative mental effects, up to and including Unconsciousness, from a single ally
While Haywire Protocol is a neat ability, it’s not the best thing early game, and then moving forward it has some issues with not targeting enemies that would seem like viable targets (in this I mean that targets that are affected by Bluescreen Rounds does not always mean they are hackable). Revival Protocol (I feel like I’m going to be saying this a lot about this Class’s abilities) can come in clutch when dealing with negative effects that are fairly commonplace in XCOM 2 and considering the game’s emphasis on action economy, this is invaluable. A bit of a shame it only works once per mission but that simply requires you to consider when it would be best to use. Normally, you would only want to use this on Unconscious allies as this state takes them out of the fight and requires you to use another soldier to pick them up horribly crippling your squad’s effectiveness. Last note: if you manage to stack Hack increases on a Specialist definitely consider Haywire just as, if not more, useful. The ability to turn an enemy Sectopod on its allies is an outstanding feat.
Field Medic
Grants 2 Medikit charges, assuming a Medikit is equipped
This assumes you have gone back to pick up Medical Protocol by now, otherwise, this is rather pointless. Specifically, note that this requires you to equip a Medikit otherwise it has no effect. Considering the greater chance of taking damage from Chosen or Rulers in WotC, this should come in handy. Again, this is a case where I would take both abilities if I could. Early-game, taking Scanning Protocol would be a bit of a waste as a scout unit would perform the task of revealing enemy units and revealing the map. The real benefit of Scanning Protocol is revealing hidden enemies, such as Chryssalids, but again this is not an early-game issue and I would opt for the increased healing potential and just pick up Scanning Protocol when possible.
Threat Assessment
Aid Protocol now grants the target a Covering Fire Overwatch shot in addition to its Defense bonus, but also has its cooldown increased by 1 turn
This is the no-brainer of the Specialist tree. The competition here is Covering Fire which is literally the same ability but, Threat Assessment allows you to apply that ability to another unit AND provide them a defense boost. While the little addition of Covering Fire Overwatch triggering from any enemy action is nice, it is crippled by the fact that Overwatch has an inherent Aim penalty, and if you think the enemy is not going to move and thus not trigger your regular Overwatch, why didn’t you just choose to shoot at them instead? The final say I have on this is that the Specialist can Aid Protocol themself meaning Threat Assessment literally gives your Specialist access to Covering Fire. Moving on, Threat Assessment/Aid Protocol doesn’t stop a unit from taking any available actions that they have so you can slap this on anyone and have them take their full turn with a floating bonus. And last but not least, if you use this on a unit that is performing the opening attack of an Overwatch ambush, that unit will take an Overwatch shot on top of their original attack!
Guardian
Each time an Overwatch shot hits its target, there is a 50% chance the soldier will remain in Overwatch
Speaking of improved Overwatch ambush mechanics, Guardian chips in here as well. This is a fantastic ability that is a simple coin flip whether or not your soldier will take another Overwatch shot and the best part is that every Overwatch shot causes it to flip the coin again. This means it is completely possible to get 3, 4, or even 5 Overwatch shots in a row (though improbable). This is a step above Ever Vigilant which is not a bad ability but the context of it only working if you take no other action (such as Aid Protocol or reloading or interacting with an objective) makes it the worse option.
Restoration
The Gremlin Heals or Revives every member of the squad, depending on which they need. Squad members who need neither are skipped. One charge
The Specialist’s “oh-crap” button and with more reasons than ever to have it since the inclusion of Rulers and the Chosen. This ability can bring your entire squad from the brink of complete disaster. This ability effectively uses Medical Protocol on each soldier who needs it. It also removes statuses such as Unconscious so it can serve as another charge of Revival Protocol if you need it. Capacitor Discharge is not a bad ability to take, especially if you find that you don’t need dramatically powerful group heals. It’s more like a grenade than the other GREMLIN abilities and provides moderate damage in a moderate range.
Psi Operative - Psyker
Due to the way that Psi Operatives are trained and grow, this is going to be the section that doesn’t necessarily work as the others do. Psi Operative abilities are trained in the Psi Lab and they are randomly available meaning there’s not exactly a step one, step two order to choosing their abilities. I’ll organize this section just like the other sections but note that you may run into one ability sooner than another. Also, worth noting is that the Psi Operative can take all the abilities available to them so long as you continue training them. For the sake of brevity, I will not talk about all of the abilities but I may refer to all of them here and there. Of course, some abilities are preferable over others and may be more or less useful but nothing is stopping you from training one ability if you decide to take another. I’ll generally note which ones are the most powerful and the ones that you should take if you are in a rush and don’t want necessarily train a Psi Operative for the foreseeable forever (because it can take quite some time as abilities are typically trained within 5 days on normal difficulty, but some take longer).
What Psyker Excels In:
Enemy Manipulation
Mitigating Squad Ailments
Guaranteed Damage
Build details:
Stasis
Stuns a target enemy, but also makes it immune to all effects until the user's team's next turn. Doesn't necessarily end the user's turn.
This ability should not be underestimated. Being able to stun an enemy for an entire round is invaluable, just make sure that if you plan on damaging the target at all do the damage first because this will cause the target to be immune to damage and untargetable. The utility of this ability is great enough that an Operative with only this ability is still a great boon to the squad.
Inspire
Grants an action point to an ally the soldier has line of fire on, potentially granting the ally an additional turn if they're currently out of action points. Cannot be used on machines.
WotC has several options for granting extra actions to squadmates. Bondmates can do this with one another, and Skirmishers can gain a similar ability. That said, anything that allows you to grant extra actions is kind of a go-to for ability choices. The other choice at this rank would be Insanity which seems much better than it is. A low-level Operative is much more likely to cause Disorient or Panic on a target rather than Mind Control them and this is somewhat bad for several reasons. Disorient is an underwhelming outcome in comparison to what you would want - the Mind Control. If you are hoping for Disorient, then a Flashbang would be better as it is AoE. Panic is somewhat terrifying due to the fact that in most cases you are forcing the enemy to flee to better cover AND make an attack on you. Yes, they are very likely to miss but the problem is you’ve caused them to retreat to a position that is most likely harder for you to hit them at. Also, targets that have grenades are prone to throw them which means you’ve almost guaranteed that you are going to take damage. Insanity can definitely be impressively useful if you Mind Control but it's more of a gamble skill that can often not be worth it.
Soul Steal
Soulfire now heals the Psi Operative for half the damage it deals. Requires Soulfire.
Note that you should go back and attempt to pick up Soulfire if you haven’t by this point. If you don’t have the chance to then you would be taking Stasis Shield which is a mediocre ability with specific uses that aren’t really frequent. Soul Steal is just a flat boon as it allows you to do damage and heal at the same time. Granted, you shouldn’t necessarily be planning on this coming in handy very often, but it can certainly get you out of a bind.
Solace
Negative mental effects on the Psi Operative, as well as all allies within 4 tiles, will be automatically blocked as well as purged if a unit suffering an effect ends up in the radius.
With WotC changing how this functions a bit this ability is much more useful than before where it was already rather useful but not quite a clutch ability. Now, when you purge a squadmate of a mental effect such as Panic they will have their actions refunded instead of simply being cured and out of action points. This was always the desired effect and was a bit disheartening when it appeared to not work that way in the base game. This ability can be particularly useful when dealing with Chosen as they tend to lay down mental effects often.
Fortress
The Psi Operative is immune to damage over time effects and explosive damage.
Quite possibly the most amazing passive ability in the game which generally guarantees that your Operative is just going to brush off a handful of the effects that can end a soldier’s career. The explosive damage resist in particular is the most blatant form of being quite overpowered. That said, it’s not exactly very often that you will notice this benefit outside of being a little less terrified that a car is going to explode while you’re hiding behind it. The other option at this rank is Schism which boosts Insanity and makes it a bit more viable, but I would still ignore it unless there is no other choice.
Domination
Permanently Mind Control a target with a +50 chance to success. Only one enemy can be Dominated per mission, but if Domination fails it goes on a 4 turn cooldown, allowing endless attempts until successful. If the Psi Operative dies, is Stasised (Including via Sustain triggering) or Evacuates, their Dominated unit will instantly revert to enemy control.
Much more reliable than gambling on Insanity though by this rank your Psi Operative will have a much greater Psi stat so Insanity is inherently much less of a gamble. Permanent Mind Control is extremely useful, as you can no doubt imagine, and allows you to disrupt the enemy’s actions by either harassing their units or baiting out attacks so that they are essentially wasting them on not your squad.
Void Rift
Does 2-3, 4-5, or 3-7 damage based on Psi Amp tier to all enemies in a 5 tile square, with a 50% chance to attempt to inflict Insanity on each given enemy in its radius that is susceptible to Insanity.
This is where you would finally feel confident taking the Insanity gamble, not to mention that guaranteed damage through Armor is incredibly strong. While the strength of the ability isn’t such that it can serve as a target nuke like Null Lance, it has the added benefit of being a reliable AoE (Null Lance can hit all targets in a line, but you will very rarely have the chance to target more than two enemies and even that is still fairly rare) and the Insanity roll can completely dismantle enemy groups that are susceptible to it. Although I did not highlight taking Schism, acquiring it will improve this ability by adding extra damage and a Rupture effect which applies +2 damage to targets for the remainder of the round allowing Void Rift to further serve as a set up for the squad to demolish targets.
SPARK - Steamroller
SPARKs are interesting in that they are very strong early/mid-game and easily outclass other squad members because of their innate abilities such as being resistant to fire and poison and the ability to traverse terrain effortlessly for Height Advantage on attacks, on top of having Armor, Defense, and more HP readily available. Moving into the late-game, they tend to taper off as they do not increase their health value (outside of upgrading their armor) and they cannot be customized as much as your typical soldiers with Ammo Items or other equipment.
Now, in theory, the SPARK is supposed to be a tank unit that can be used to soak up damage from enemies and provide some devastating attacks with heavy weapons and natural shred. In practice, the SPARK is only much tougher than your regular troopers up to about mid-game at which point HP and Defense for your regular troopers is either greater or matching what the SPARK contributes on the survivability spectrum. It is much more likely that you will be using the SPARK as a damage dealer due to their abilities and their proclivity for gaining Height Advantage on the majority of their shots. On normal difficulty, their Aim is somewhat stronger than most soldiers due to enemies not having much in the way of Defense stat, so this further pushes them into a damage dealer rather than the squad’s damage sponge. That coupled with the fact that the Defense oriented skill tree for the SPARK is all-around underwhelming when looking at the Offensive abilities and you’ve got a class that continues to push the base idea of XCOM 2: offense is a much better defense.
What Steamroller Excels In:
- Reliable Damage Dealer
- Cover Destruction
- Extremely Versatile Multi-action Turns
Build details:
Adaptive Aim
Overdrive shots no longer accrue Aim penalties for successive shots
Normally using Overdrive and shooting multiple times accrues -15 Aim for each successive shot. That in itself makes using Overdrive to take multiple shots at a target somewhat crippled. Taking Adaptive Aim completely shreds the downside, and that alone makes it a stronger choice than Bulwark which, unfortunately, is also a very good ability. Adaptive Aim in WotC is even more appealing as SPARKs can now equip weapon upgrades so you can readily abuse Hair Triggers or Repeaters.
Strike
The SPARK performs a move-and-melee strike on a single target. This strike has +20 to Aim, and does 7, 9, or 11 damage based on the SPARK's chassis tier. Crits will add 2 damage in all cases.
Admittedly, this stacks a bit better with Bulwark but the competing ability, Rainmaker, it is so underwhelming it’s not worth taking at all. +2 damage to Heavy Weapons and an increased effect radius sounds good but it’s not exactly impressive considering Strike is akin to the Ranger’s Slash if not for the fact that it has a long, 4 turn, cooldown. This works out well for an Overdrive chain in that you can dash ahead to melee on target and now have better Aim on anywhere nearby.
Wrecking Ball
When Overdrive is active, the SPARK can freely move through destructible terrain, destroying it in the process
This falls right in line with taking Strike before as this will allow you to maneuver through terrain to deliver Strike hits at your leisure. Furthermore, this can be used to fiendishly destroy enemy cover to open them up for the rest of your squad. Something I did not know was that XCOM 2 has a waypoint system allowing you to pick exactly what path your unit will walk, using this will allow you to deliberately walk through as much terrain and cover as you want and maximize this ability’s potential.
Bombard
Launches the BIT at any location any member of the squad can currently see, hitting in a 3-tile wide radius for 3-4, 5-6, or 7-8 damage (Based on BIT tier) and destroying all destructible terrain objects in its radius. Can pass through ceilings on the way out and in, and will punch a hole through them in the process. 1 charge.
An easy choice here, as anything with as much destructive potential as Bombard is an obvious ability to take, especially considering that Repair only really stands out if you are constantly fielding multiplier SPARKs. Environment manipulation is the main draw here even though the damage is quite nice as well. Bombard can be used to reliably destroy most kinds of Cover as well as floors and roofs for extra damage from falling.
Hunter Protocol
If an enemy first activates within the SPARK's line of fire, the SPARK has a 33% chance of taking a free Overwatch shot at that unit, assuming the unit actually moves.
Another no-brainer simply because Channeling Field is extremely lackluster. It might be worth taking if SPARKs could benefit from buying skills with AP but since they can’t it’s a hard skip. Hunter Protocol can take some effort to get working right as its activation requirements are quite specific but once you get a hang of it (it’s essentially an Overwatch Ambush specific ability) it’s a near ⅓ chance to take a free shot at enemies that move during their pod activation, and because its almost exclusively an Overwatch Ambush ability, it does not suffer from the Aim penalty other Overwatch shots suffer from.
Nova
A completely free, instant-use attack that does 6 damage to all units within 3 tiles of the SPARK, ignoring Armor. Has no cooldown, but each time Nova is used it will do 0+2 damage per use to the SPARK, with this self-damage only resetting once the mission is over with.
Thank the Ethereals this ability comes with a downside otherwise this would easily be the most overpowered ability in the game. Even so, it is extremely strong and the drawback only stops you from spamming it. The first use of the power is free and only has penalties for continued uses which means at least once per mission you can set up a rather devastating combo considering this takes no action points to activate. Furthermore, the damage that it does to the SPARK if you use it a second time, can be mitigated entirely if you take no other damage since SPARKs heal some of their damage after mission completion.
WotC Classes
Just a short note here: WotC Classes are considered Hero units meaning that their abilities are quite strong and geared for a specific purpose. That said, unless you are modding the game, you typically do not receive many of these soldiers (two per class at the most, typically) and they are far more strongly oriented toward relying on their specific abilities than your general troopers who can often fall back on their customizable kit to make up for weaknesses.
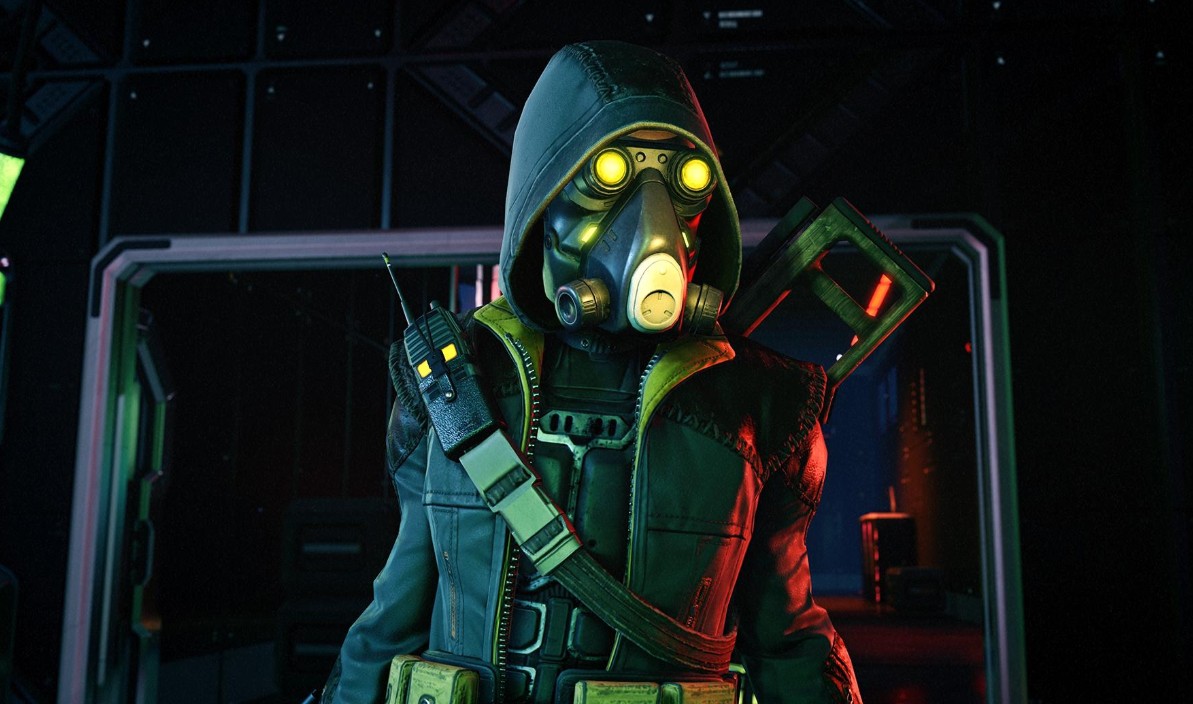
Reaper - Hitman
THE game-changing class. The true scout class where the Ranger was the only viable option before. Reaper comes in and makes the Ranger’s scout abilities almost laughable because of how much better this class is at filling the role. That said, unlike the Ranger, they are almost purely a scout class as their ability to engage in direct combat is significantly hindered by their unique weapon which has horrible initial ammo and underwhelming damage for being a weapon that you would think would be akin to the Sniper Rifle. This is something of an intentional nerf as Reapers can move and fire, have much greater Aim due to their class and weapon than a Sharpshooter does, and can often fire from Concealment without breaking it via their unique Shadow ability. While in Shadow, the Reaper is the undisputed scout class benefiting from severely diminished enemy sight radiuses as well as increased Mobility meaning they can almost fearlessly wade into enemy positions where the Ranger would think twice. And due to Shadow, the Reaper can contribute to combat while still having a fair chance to remain concealed so that they can continue to scout ahead without alerting enemy pods.
As far as WotC classes go, I won’t be mentioning the extra XCOM Abilities that are available to them since they are all random and there is no guarantee which ones will be available. Think of them as possible bonuses, the majority are fairly good and worth taking a look at whenever you can.
What Hitman Excels In:
- Superior Ambush Potential
- Picking Off Enemies
Build details:
Remote Start
The Reaper expends 1 ammo to fire on an environmental explosive, which causes it to instantly explode, doing twice its usual damage with twice its usual radius. This does not risk breaking Shadow.
Talk about strong! While this ability is rather situational it is still fairly likely that you will have a situation in most missions where you can make use of it. The thing here is that environmental explosions deal quite high damage (6 is the norm, I believe) and Remote Start doubles that damage. This is easily enough to nuke the majority of targets. And then we go on to talk about the fact that it does not break Shadow AND you can couple it with Claymore if you want to extend the explosion or just want to cash in for even more damage. Furthermore, it can be done as many times as you can make it work. Your Reaper has effectively turned the majority of maps into a death trap. The biggest downside is that it’s not the best for timed missions because there is no way to guarantee the enemy walks where you want them to.
Target Definition
Any enemy the Reaper ever personally sees is permanently marked and will remain visible to the player even when not visible to any of the player's units. Such marked units will show up in orange when not currently visible to any player units.
Shrapnel is an okay ability if you are prone to using the Claymore but as a single-use ability, it does not provide the same constant bonus that Target Definition does. Target Definition is a quality of life passive ability that allows you to keep track of enemies without having your Reaper follow them around. This is most effective when considering the Chosen Assassin who is typically leaving your line of sight every turn, but can also be useful in several other situations.
Silent Killer
Shots that kill their target do not increase the chance of Shadow breaking, but still roll for the possibility of breaking Shadow.
This happens a few times in XCOM 2 but this is the most egregious example of an ability’s description completely failing to explain how the ability works. In actuality, Silent Killer means that a Reaper can reliably land kill shots on targets while never breaking Shadow. You see, while the first shot from Shadow increases the reveal chance, Silent Killer rolls before that increase is applied meaning it’s rolling a 0% chance and will continue to do so as long as you are landing kill shots every time. Reapers that achieve this rank are now able to maintain Shadow and perform their role with essentially no chance of being revealed at any point while being able to reasonably contribute to your squad’s firepower.
Blood Trail
When firing on an enemy that has taken damage earlier in the turn, the Reaper does +1 damage.
Due to the way that Resistance Classes function, you can go back and buy whichever ability you want whenever you have the points to. In this case, I would forgo purchasing either Sting or Soul Harvest. Now, with Silent Killer, a bonus to damage can help you lock in that kill to ensure your Reaper remains in Shadow.
Banish
The Reaper fires on a chosen target until either the target is dead, or the Reaper runs out of ammo. These shots all occur at a -15 Aim penalty and are completely unable to crit. Banish is guaranteed to break Shadow.
Potentially the strongest single-target nuke in the game but is held back by the Reaper’s less-than-great weapon. This is unfortunate but it is possible to gear the Reaper to max out the damage potential, most notably Superior Extended Magazine. Banish is, as such, a pretty good ability but tends to fall off when compared to other single-target nukes like Sharpshooter pistol spam. Even so, Banish is capable of dishing out great damage and is a good ability to have should you find that you need it.
Homing Mine
Claymores can now be attached to enemies and will explode if the enemy takes damage. A Homing Mine applies its Shred before the damage that detonated it applies its own damage.
Homing Mine’s utility allows you to create even more impressive ambushes. The game doesn’t say so but Homing Mine increases the throw range of Claymore meaning you have greater ability to set up Claymore the way you want, and it being attached to enemies alleviates the issue of not wanting to place Claymore before you are ready to shoot it. At this point, it’s worth looking back to Shrapnel and Highlands if you have the AP to spare.
Skirmisher - Predator
All of the WotC classes are hybrid classes but where the Reaper feels more grounded in its obvious role, the Skirmisher does in many ways feel like a Ranger sporting a slew of additional action granting abilities or abilities that simply ignore normal action flow. That said, there is great emphasis on their Grapple ability and the game refers to them as “hit-and-run” combatants for this very reason. This is mostly true because Grapple is a free action that allows them to close on enemies and then Grapple away all in one turn.
You will quickly note that the Bullpup unique rifle they use suffers Aim penalty for range similar to the Shotgun and improved Aim for being as close to the target as possible. This turns the Skirmisher into a close-range combatant just like the Ranger with more terrain traversal at their fingertips. That simple fact means that the Skirmisher suffers from Aim penalties less frequently because they have fairly reliable means of gaining Height Advantage. That said, the Skirmisher suffers from Cover where the Ranger would not in many cases as their “hook” abilities are hindered by Cover.
What Predator Excels In:
- Insane Action Economy
- Terrain Traversal/Closing On The Enemy
Build details:
Wrath
Attempts to pull the Skirmisher adjacent to a chosen target. This effect has +25 Aim over the Skirmisher's innate Aim, and is affected by height advantage, the target's Defense, and the target's Cover, but distance has no effect. If the pull succeeds, the Skirmisher automatically and unavoidably hits the target with their Ripjack. Doesn't necessarily end the turn.
You’ll notice here I skipped out on the first rank abilities entirely. Frankly, Reflex and Total Combat are so underwhelming they’re almost an absolute waste to purchase instead of saving AP for later abilities. Wrath is pretty much the inverse of Justice but works on all targets instead of just ADVENT. The downside of Wrath is that it is significantly more dangerous than Justice but since Grapple is free to use you can more or less reliably avoid this problem.
Whiplash
Performs a completely free instant attack on a single target, using standard Aim calculations with no distance modifier. Does 6 damage against most targets, doubling to 12 against various robotic enemies. One charge per mission.
Free damage with decent Aim considering there is no penalty for distance and your Skirmisher is more than likely going to be attacking from Height Advantage more often than not. Slap on the increased robot damage and this is a no-brainer buy with no practical reason to not take as soon as you can.
Combat Presence
Immediately grants an action point to an ally the Skirmisher has line of fire to, giving them another turn if they are out of action points. Costs one action point. Does not necessarily end the Skirmisher's turn.
Between this and Retribution it is genuinely hard to say. While Retribution is essentially Bladestorm from the Ranger tree, it is unfortunately plagued by it not activating BEFORE enemy attacks like Bladestorm does. Why? I am not sure. It just doesn’t. This makes it considerably less amazing as Bladestorm can negate your Ranger from taking damage while Retribution will not. That said, Combat Presence falls into the realm of action economy abilities so places it high on the list. Bondmates get this ability, sure, and it functions with fewer limitations such as LoS BUT Combat Presence isn’t limited by charges making it quite viable. I would pick up Retribution as well as this skill, honestly. Interrupt is a little too finicky to be something you would be looking to use each mission.
Reckoning
Performs a move-and-melee slash with the Ripjack. Does not necessarily end the turn, and always uses 1 action point. Uses normal Aim behavior, with +20 Aim.
And now the Skirmisher straight up gets the Ranger’s Slash which further pushes the Skirmisher into the “hit-and-run” aesthetic they say it was designed to be. You’ll notice by this point that the Skirmisher is even better at dancing all over the battlefield than the Ranger. The only reason the Skirmisher isn’t flat out better is because of equipment limitations where the Bullpup has lower damage in general and the Ranger gets better upgrades for their melee. Waylay is the other option at this rank which is not a bad choice but perhaps something you would only pick up if you had the AP to spare as it is mainly an Overwatch Ambush skill and Overwatch Ambush opportunities aren’t necessarily in wide abundance.
Retribution
Enemies moving adjacent to the Skirmisher provoke melee 'reaction fire' with the Ripjack, as do enemies that perform any kind of action adjacent to the Skirmisher. Retribution can only activate once per turn on a given enemy, however.
I stated that this was a good buy if available. Considering the three abilities that are available at this rank, Manual Override, Battlelord, and Judgement, I would highly recommend using the AP now for Retribution. OR anything else. Manual Override might be the closest to worth taking but using an action to lower the cooldowns of your abilities is often less optimal than just taking two shots or taking a move or some other action. Battlelord is good in theory but doesn’t trigger nearly as much as you think it would (the game more or less lies here as MOST actions the enemy takes doesn’t activate this ability); you would have to be taking multiple shots on your Skirmisher for it to truly matter, and this is a horrible strategy as you are liable to take a lot of damage as a result. Judgement is a neat concept but again underwhelming as you need to be shot at and considering how late in the game you would be at this point, there are many enemies you are facing that aren’t even affected by Panic in the first place.
Templar - Maelstrom
And we come to the biggest hybrid of them all: Psi Operative/Ranger slapped together to create a melee-focused psionic class. It’s interesting to note that WotC has hybridized the Ranger class (where I suppose the Ranger was hybridized already considering their Scout tree is negligible more often than not) in all the new classes with two of them emphasizing melee and one flat out reworking the Ranger’s secondary purpose into a full-on role. XCOM 2 in general is faster-paced than its predecessor and I think the WotC classes are reflective of the devs leaning focus into guerilla warfare tactics that emphasize mobility and rapid target neutralization.
Anyway, Templars have the same issue that Rangers do (and Skirmishers) in that they are very likely to be caught out in awkward positions due to their proclivity for melee. This is a thing most players will notice early on since melee abilities are extremely tempting because, in most cases, closing on your enemy is preferable to secure damage/a kill. Naturally, they lean into skills that help them with that point (like Skirmishers) which makes them a little less of a concern than throwing your Ranger into the fire especially considering your Ranger has a generally better ranged weapon and more kit customization which leads to a ranged build being more impressive especially by the late game.
It’s important to note that, unlike other melee classes, the Templar cannot miss (I suppose this is borrowing mechanics from psionic abilities) and Rend (their version of Slash) allows them to move after hitting a target meaning they are nowhere near as awkward about getting caught out as the Ranger is. Their other ability, Volt (essentially Soulfire), cannot miss either but considering it costs Focus and has similar damage to the Autopistol, it isn’t as great as one would think considering the entire class is geared toward melee and Focus is important for several other things (such as increased damage, increased Mobility, etc.)
The thing about the Templar is that while the Ranger may have seemed like an absurdly strong early-game class, the Templar remains above-averagely strong due to their innate abilities to deal guaranteed, unmitigated damage while ensuring they are not at risk of receiving a bunch of damage on the enemy turn. As such, the Templar melee abilities stand out over the ones that would have you do anything else, not to mention melee generates Focus which increases the Templar’s stats in the field.
What Maelstrom Excels In:
- Death-nado+
- Guaranteed Damage
- No-Risk Tanking
Build details:
Parry
When Momentum is triggered, the Templar may elect to spend the bonus action point on Parry. Parry ensures the next attack on the Templar fails, but only if it occurs before the start of the Templar's next turn.
This ability is so powerful I would consider it essential for the class. As long as you are not playing recklessly, you can ensure that your Templar is not going to take damage and still be able to happy-slap around with Rend to their content. Watch out for environmental hazards, triggering extra enemy pods, and psionic attacks, but otherwise, the Templar is capable of being the most aggressive class in your squad at nearly no risk at all as soon as you acquire the next ability:
Deflect
When the Templar has Focus, incoming attacks have a chance of failing entirely. 30%/40%/50% chance per attack at Focus Levels 1/2/3.
Again, ignoring a rank of abilities here for a stronger one (and later better ones since you didn’t “waste” the AP). Both Pillar and Stun Strike are utility abilities but aren’t as viable as you may think. I may still vie for Pillar because you can block ladders or support another unit from losing Cover, but the fact that it costs Focus hampers it; if you are already playing decently, you won’t need it (if you’re into more reckless play, it’s pretty neat). Stun Strike is a squad set up but is hampered by placing your Templar in danger to make use of it. Deflect? Quite simply a chance to negate damage.
Deep Focus
Maximum Focus is now 3.
All you are doing with this is increasing your Templar’s potential. More Focus equals better stats. There is no reason not to acquire this passive as soon as you are able.
Invert
Immediately swaps the Templar with a visible enemy unit. Costs 1 Focus Level. Does not necessarily end the turn.
Utility and distance closing. You could either use this to land an enemy inside your squad’s kill box or move an enemy outside of their effective range. Not to mention, since it doesn’t end your turn, you can extend your potential Rend range. You should utilize this very carefully, but it is still quite a powerful ability.
Arc Wave
When performing Rend, the Templar automatically produces a shockwave that travels 5 tiles out while spreading, doing damage to all enemies in its wake and damaging destructible terrain. Has no friendly fire. Kills produced by the shockwave will give the Templar Focus, just as a direct Rend kill.
A good one for knocking out clumped-up melee targets, but probably won’t come up as much as you would hope. Still, Arc Wave is essentially free damage on targets anywhere near your original target so it’s a decent choice. Also, as you upgrade the Templar’s Gauntlets, Arc Wave has a fair chance of destroying Cover as well, meaning you can potentially open your squad to better shots.
Ionic Storm
The Templar moves to a tile within their movement range and attacks every enemy nearby them. Can be cast at any Focus Level, and always consumes all Focus, but also generates Focus from kills. Damage and area of effect scales to current Focus Level, with an area of 2/3/4 tiles at Focus Levels 1/2/3. 5 turn cooldown.
A rather simple choice when comparing the others. Ghost is a strange ability and extremely situational; it can use SOME of your Templar’s abilities and it doesn’t function like a normal soldier in most cases (e.i. Interacting with Objectives). Void Conduit is limited to ADVENT, which is a pain considering by this time you would be in that late-game where ADVENT are not your biggest concern. Ionic Storm is a very reliable damage dealer, can be used to completely wipe pods, and if it does you have just refunded the Focus it cost to use in the first place meaning your Templar is right back to Parrying the first attack against them and potentially Deflecting others not to mention an increased Dodge rate.
You may also be interested in:
- 21 New Awesome Games Like XCOM 2 (Games Better Than Xcom In Their Own Way)
- XCOM 2 Best Builds For Each Class
- XCOM 2 Best Base Layouts
- XCOM 2 Best Research Orders That Are Excellent
- XCOM 2 Best Armors For Each Class
- XCOM 2 Best Enemy Mods For A New Challenge
- XCOM 2 Best Weapons That Wreck Hard
- XCOM 2 Best Mods Right Now
