These items are crucial early game because they will help you advance through the story and overall gameplay. This list goes from the tutorial to when you visit the school.
10. Your Bag
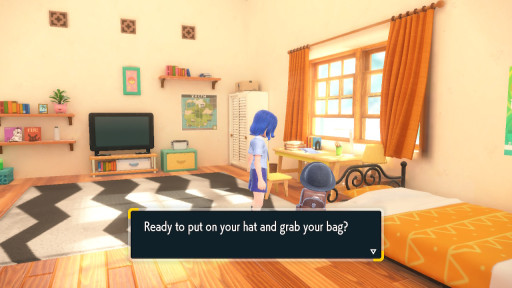
When you start the game tutorial, you should get your bag.
Your bag is the most crucial item. It stores lots of valuable items along your journey, but you can’t store them without it!
Why your bag is great for Early game:
Your bag is where you will store plenty of early items throughout the tutorial, such as Potions, Super Potions, TMs, Exp Candy, Sandwich ingredients, and more.
You’ll unlock part of the main menu, where you’ll see an icon saying “Bag.” By clicking A on Bag, you can view all the items you can put into it. Familiarize yourself with the Bag menu, which will display categories of items you will achieve.
Bag stats:
The Bag menu displays:
- Medicines
- Poké Balls
- Battle Items
- Berries
- Other Items
- TMs
- TM materials
- Treasures
- Picnic Items
- Key Items
How to get Your Bag:
Talk to your mom and then Director Cavell. They'll prompt you to get your backpack when they both sit down for a cup of coffee.
9. Adventure Guide
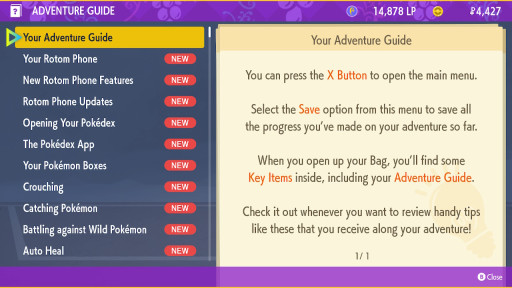
Your Adventure Guide is the most self-explanatory item you already have when you start the game.
Your Adventure Guide is easy to forget because it stores all the pop-up "handy tips" you receive from the game.
You don't want to forget the Adventure Guide because it has useful information.
Why the Adventure Guide is Great for Early game:
- If you want to view any of the pop-up handy tips again, visit your Adventure Guide!
- There will be lots of information to review during your journey in case you need to re-read it. For example, you could learn how to use your Rotom Phone or Catch Pokémon.
- There will be complex handy tips that may be difficult to understand at first and may deserve a re-read, especially handy tips that have lots of pages. The “How to Make Sandwiches” guide has 5 pages explaining where to get ingredients, how to make a sandwich, and what effects come with the sandwich you create.
Adventure Guide stats:
- In-game description: A mysterious and convenient notebook that contains all the advice a Trainer receives out on an adventure.
How to get Adventure Guide:
Good news! Your avatar already has the Adventure Guide in your Bag's “Key Items” section.
8. Rotom Phone
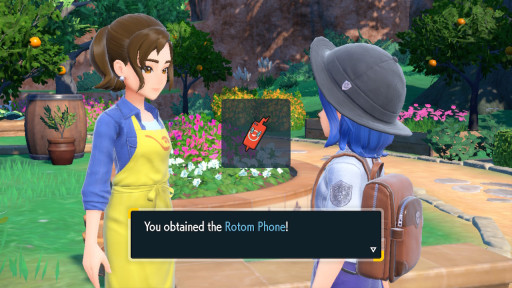
The Rotom Phone lets you view your map, profile, Pokédex, and overall progress.
The Rotom Phone will be the most used item because you'll catch lots of Pokémon, battle Gyms, and keep track of your badges.
Why Rotom Phone is great for Early game:
- You'll catch lots of Pokémon, and there's so much to learn about them. Use the Pokédex to view your library of what Pokémon you caught. Learn about a Pokémon's type, habitat, and moves it can learn.
- By checking your Pokédex frequently, you can receive awards such as Stardust, a valuable item for making early money. The more volumes you gain, the more you can receive many awards, such as evolution stones and an assortment of Pokéballs like Ultra and Exp Candy.
- Paldea's huge, and you'll explore a lot, such as using the Flying Taxi to travel quickly to places. To unlock locations with a Flying Taxi, you must visit those locations with a feather mark or Pokémon Center.
- At some point, you might question yourself: "How many badges do I have?" View your profile on your Rotom Phone and look at the Badges Collected section. It shows the total you earned. To find out which Pokémon Gyms you have completed, return to the map. Hover the map cursor on a Gym. If it shows a badge with a large icon, you won that Gym. Gyms marked with the “!” symbols are Gyms you have to battle.
Rotom Phone stats:
- In-game description: The latest model of smartphone. A Pokémon called Rotom lives within it, and it can be used to run all sorts of handy apps.
Views:
- Map Section
- Profile Section
- Pokédex Section
How to get the Rotom Phone:
After getting your bag, head outside. There will be a cutscene where your mom gives you a gift for your first school day.
Super important advice for using the Rotom Phone:
For the 1’st time looking at your map, immediately press the right stick button to orient the map to face north.
This means the app maps are locked where north stays north, and rotating the map is disabled.
Some players may find a rotating map annoying.
7. Potion
Potions are medical items that heal your Pokémon during a Pokémon battle.
Aid and heal your Pokémon when they have low HP, and they can deliver another turn to use a move during battle.
Why potions are great for Early game:
- Potions are great early game because you'll face plenty of trainers during your journey. The trainers and you will have low-level Pokémon with low base HP, so using a potion will be essential to winning a battle. Facing trainers early in the game is how your Pokémon level up, and you get familiar with their strengths and weaknesses. Don't let your Pokémon faint during a battle, and if you keep your Pokémon alive during battle, your friendship level will increase.
- Use potions when you're facing a Gym Boss. 20 HP isn't much for the first gym you'll face, Cortondo. So it's important to find many in the wild for free or buy many at Pokémon Centers.
Potion stats:
- In-game description: a spray-type medicine for treating wounds. It can be used to restore 20 HP to a Pokémon.
Best way to use them:
- When your Pokémon's HP is orange during battle, use a potion.
How to get Potions when starting the game:
Location 1:
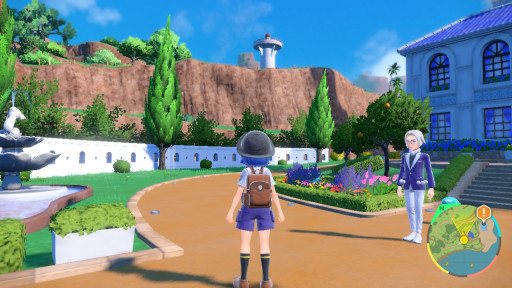
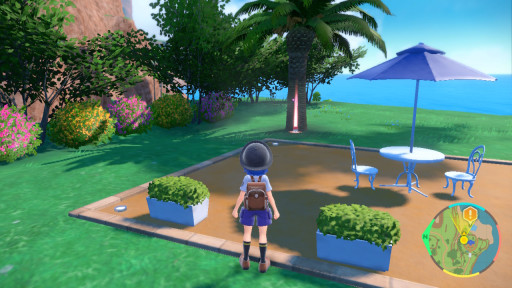
You can get your 1’st potion after you choose your starter Pokémon. Head this way, on the left path, from Director Clavell.

Continue the left path until you see a pretty sitting area. The potion is by a tree.
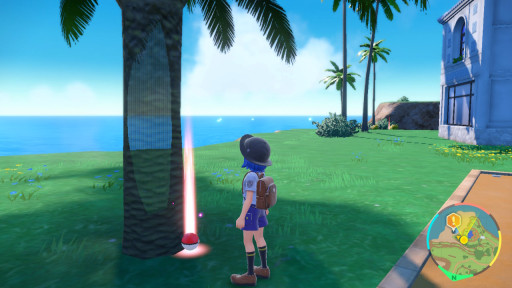
This is where the potion is.
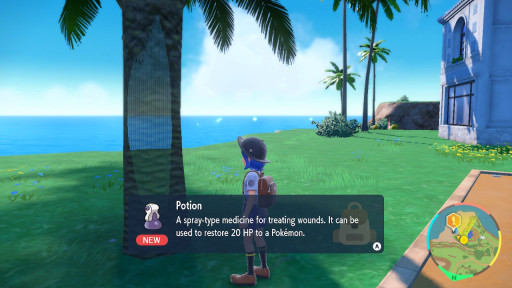
Yay!
Location 2
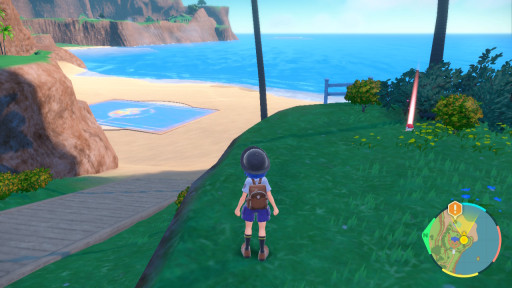
There’s another one here before you walk toward the beach. It is on the right from the staircase.
Location 3:
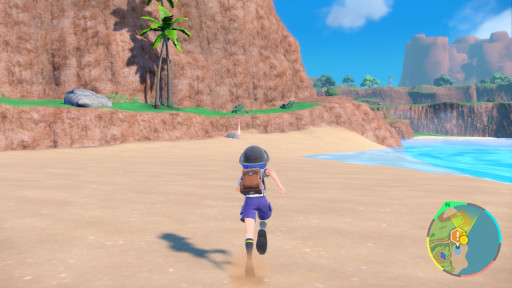
There’s another free potion. It’s on the shore, by the water, north of the battle court where Nemona waits for you. You may see it glimmering from a distance.
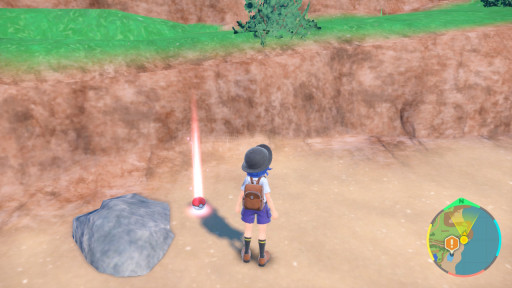
It’s right behind this rock.
Location 4: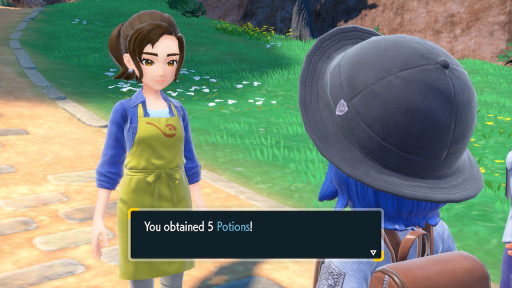
After battling Nemona on the beach, your annoying mom will embarrass you by interrupting your playdate with Nemona. Mommy gives you 5 potions.
Where to get more potions:
You can always buy more potions at Poké Marts.
6. Antidote
Antidotes heal your Pokémon to get rid of a poison effect.
Antidotes are an essential medicinal item during battle, especially when facing trainers with Poison-Type Pokémon or Pokémon that know Poison-Type moves.
Why Antidotes great for Early game:
- Antidotes are great for early game because you’ll face trainers with Poison-Type Pokémon after you leave school. Farming Antidotes early will help cure poison effects from your Pokémon during battle.
- Save some antidotes when you face the Montenvera Gym. It’s the only Gym where your Pokémon are most likely to get poisoned from Toxtricity.
- If you desire to tackle the Team Star storyline after school, save your antidotes to face Team Star’s Poison Crew.
Antidote stats:
- In-game description: A spray-type medicine for treating poisoning. It can be used to lift the effects of being poisoned from a Pokémon.
How to get Antidotes when starting the game:
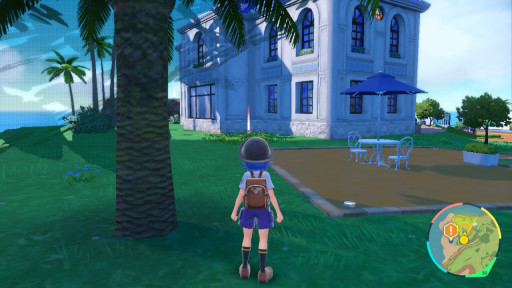
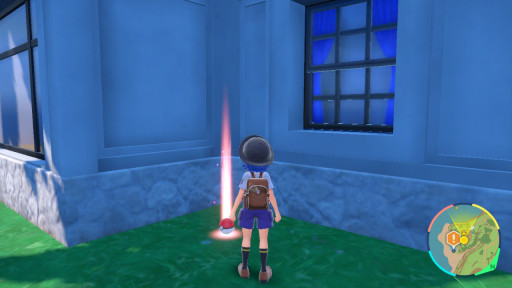
From when you received the 1’st potion, head this way. The antidote is outside, behind the house, nearby the cute sitting area.

Grab the antidote.
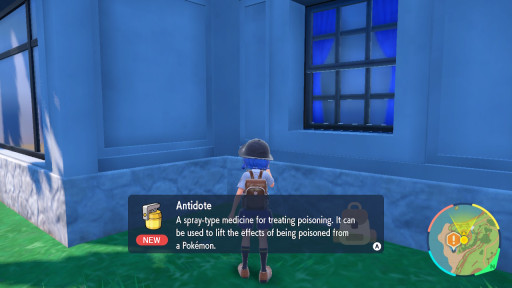
Yay!
How to get more Antidotes:You can always buy more antidotes at Poké Marts.
5. Pokéballs
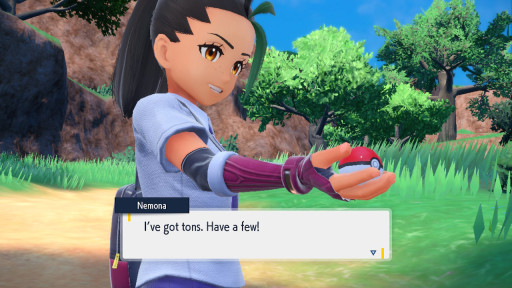
A Pokéball is a throwing item meant to catch Pokémon.
Pokéballs are essential to catch Pokémon, as Pokémon will assist your journey to become Champion. Various types of Pokéballs make catching certain Pokémon easier. For example, use Dive Balls to catch Water-Type Pokémon. Use Nest Balls to have more success catching low-level wild Pokémon.
Why Pokéballs are great for Early game:- You must get Pokéballs early to build a roster of your first 6 Pokémon and beyond. There’s so much Pokémon in Paldea, and you will uncover all types of Pokémon that may be useful for battling trainers, gyms, and offline solo tera raids.
- The first Pokéballs you achieve from Nemona will become essential because your avatar has little money. Your budget after defeating Nemona increases a little, and your Avatar should have about $10,300. A normal Pokéball costs $200.
- Make your first 15 free Pokéball catches worth it, as you should aim to find your favorite Pokémon, such as fan favorites. You can catch plenty of fan-favorite Pokémon after you go to school, such as Pikachu, Evee, Riolu, and more.
Pokéball stats:
- In-game description: A device for catching wild Pokémon. It’s thrown like a ball at a Pokémon, comfortably encapsulating its target.
All Types of Pokéballs:
The Best (useful Pokéballs, and great design):
- Quick Ball: Nearly 100% Catch Rate on the first throw. Useless if 1’st throw isn’t caught.
- Master Ball: The famous Pokéball designed to catch Mew or Mewtwo. 100% Catch Rate.
- Ultra Ball: 2x Capture Rate
- Luxury Ball: Pokémon grows friendlier after catching it. 1x catch rate.
- Timer Ball: The longer the battle lasts, use this after 10+ turns. 30 turns = 4x Catch Rate
- Repeat Ball: Meant for catching a species you repeatedly caught. 3.5x Catch Rate.
- Fast Ball: For catching Pokémon with a 100 Speed stat. 4x Catch Rate.
- Premier Ball: An elegant Pokéball that looks better than the original. Made for players who grew up in early 2,000's. 1x Catch Rate
- Normal Pokéball: The classic nostalgic design made for older players who grew up in the 90's. 1x Catch Rate.
- Heavy Ball: Catching 450+ heavyweight Pokémon. It's another nostalgic 90's era Pokéball. +20x or more Catch Rate.
- Beast Ball: Designed for catching Ultra Beasts. Made for players who're nostalgic of Sun and Moon. 5x Capture Rate
The Rest (useless Pokéballs, and bad design):
- Friend Ball
- Great Ball
- Heal Ball
- Net Ball
- Nest Ball
- Dive Ball
- Dusk Ball
- Safari Ball
- Cherish Ball
- Dream Ball
- Heavy Ball
- Love Ball
- Lure Ball
- Moon Ball
How to get Pokéballs when starting the game:
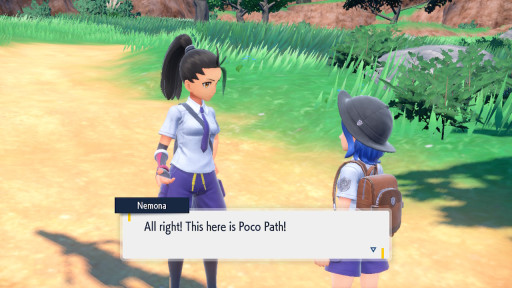
Face Nemona in a battle. After the battle follow Nemona to the point where she guides you to Poco Path.
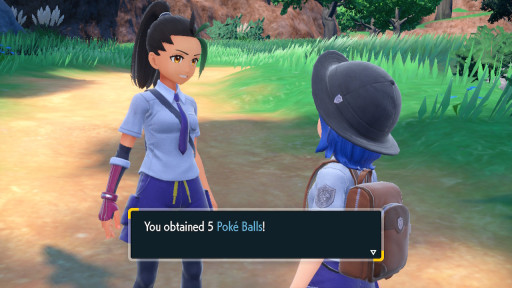
She’ll help you catch your first Pokémon when battling a Lechoink and give you 5 Pokéballs. Your starter Pokémon will gain some Exp points.
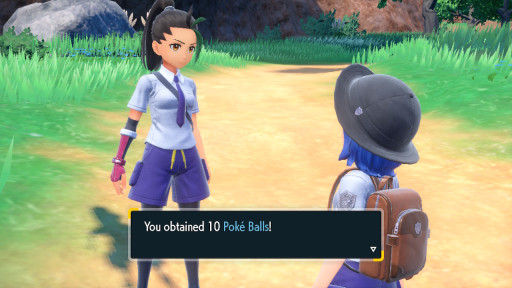
After catching a Lechoink, or if you’re not interested in catching it and defeating it, Nemona will give you 10 more Pokéballs. You should have 15 Pokéballs. That’s enough to catch a few early Pokémon as Nemona waits for you.
Before you move on to go down to the beach, pick up all the glowing Pokéballs you see on the ground. There are more Pokéballs and Potions. At least catch 3 more Pokémon. Those are:
- Flechling
- Hoppip
- Tarountula
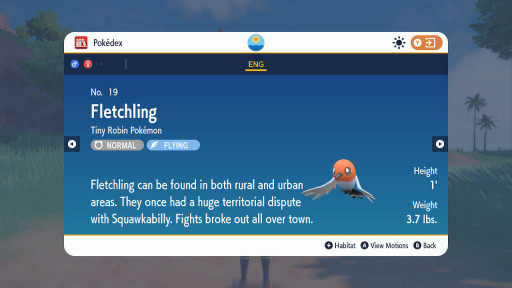
In case you don’t have Fuecoco, catch a Flechling, which is a Normal and Flying Type Pokémon.
It evolves into Fletchinder and Talonflame by changing into a Fire and Flying Type.
Early game, lots of Pokémon are weak to fire.
It’s tricky to catch a Flechling, so when you see one, follow it and crouch.
When it lands on the ground, face toward it and press ZR to catch it.
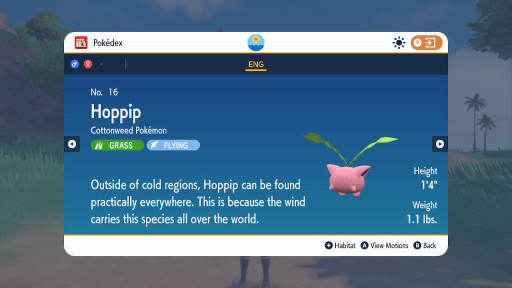
Hoppip is a Grass and Flying-Type Pokémon.
It has useful abilities such as Leafguard which prevents status conditions in harsh sunlight.
It can learn a variety of moves to attack opposing Pokémon with Poison moves and health draining Grass-Type moves.
It may assist you with your first gym battle in Cortondo.
It can also help face the Stony Cliff Titan since Rock-Type Pokémon are weak to Grass-Types.
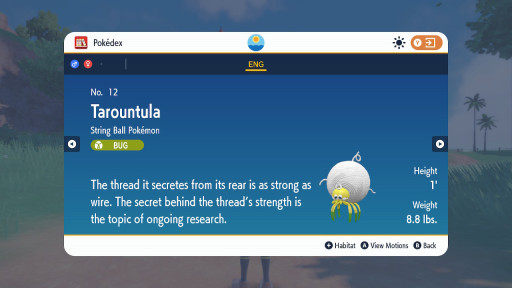
Tarountula is a Bug-Type Pokémon.
It has a useful ability named Insomnia preventing it from falling asleep.
This is good for battling trainers who have Normal and Fairy-type Pokémon.
It’s a useful Pokémon that can learn Bug, Dark, Normal, Fighting, and Poison Moves.
Its unique Poison move, Gastro Acid, eliminates the effect of the target’s Ability.
This move can be effective for the first time you attempt raids.
How to get Pokéballs:You can always buy Pokéballs at Poké Marts and Delibird Presents.
4. Tera Orb
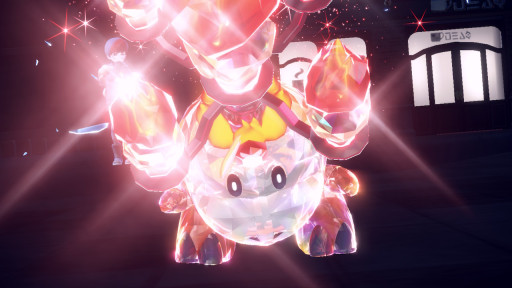
The Tera Orb is a special item that causes your battle Pokémon to Terastalize and become stronger in battle.
Terastalization is Pokémon Scarlet and Violet’s main premise. When Pokémon Terastilize, they turn into a Tera-Type in battle and use a Tera move to knock out the opposing Pokémon. It’s much needed in the game to fight against Tera-Type Pokémon.
Why Tera Orb is great for Early game:
- The Tera Orb will become essential to all battles you face because it strengthens your Pokémon during battle. Your early roster of low-level Pokémon will enhance their moves while you battle Trainers, Gym Leaders, Team Stars, and the Titans.
- Using the Tera Orb is essential when attempting your first few offline solo Tera Raid battles. The point of Tera Raid battles is that you’re trying to catch the opposing Tera-Pokémon, and Tera-Pokémon usually are stronger than Pokémon roaming in the wild. During the Tera-Raid battle, you must Terastalize your Pokémon to defeat the opposing Tera-Pokémon after a few successful hits. Ideally, you should Terastalize your Pokémon to defeat the opposing Tera-Pokémon’s shield.
Tera Orb stats:
- In-game description: An orb that holds within it the power to crystalize. When it is charged with energy, it can be used to cause Pokémon to Terastalize.
How to get the Tera Orb:
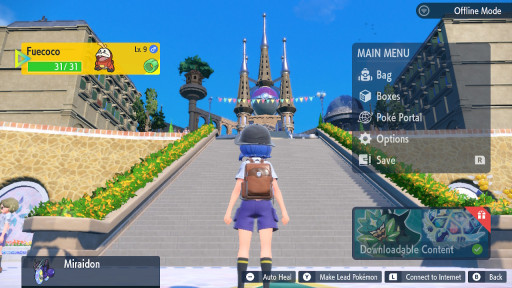
When you go to school for the first time, walk up the annoying and long stairway.

There will be an interactive cutscene, and you will battle Team Star grunts, Grunt A and B. Grunt A and B are bullying Penny, you should save her.
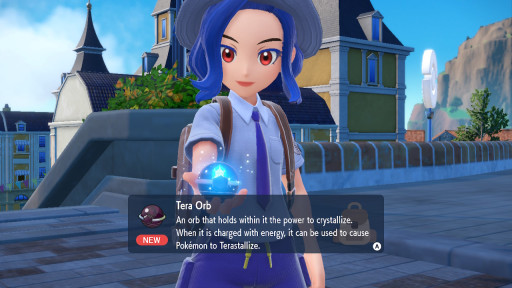
After defeating Grunt A, Nemona will meet up with you and give you the Tera Orb. Use the Tera Orb on your Pokémon to kick Grunt B’s butt.
3. Revival Herb
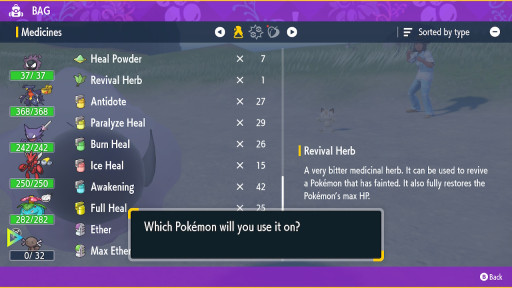
Revival Herbs fully restore a Pokémon’s max HP while reviving them during battle.
Revival Herbs are better than normal revives because they will save you time. No one likes to revive and manually heal their Pokémon during battle because it wastes time and turns. That’s why you should get Revival Herbs! The only downside is that they lower friendship levels with your Pokémon.
Why Revival Herb is Amazing for Early game:
- The Pokémon you’ll catch early game are very weak, and they’ll likely faint during battles while facing Trainers, Gym Leaders, Team Star Members, and the Titans. Revival Herbs will save the hassle during battle if you can revive and heal a fainted Pokémon in 1 turn instead of using a Revive and Potion on the next.
- When you face the Titans, you’ll want Revival Herbs because they’re super strong and know how to use super effective moves. Your low-level Pokémon can take out the first few Titans, such as the Stoney Cliff Titan and the Sky Titan. Your Pokémon may need Revival Herbs during the fight, especially when they have the type advantage against the Titans.
- Farming lots of Revival Herbs early game will prepare you for future events later in the game, such as attempting the Pokémon League and the DLC. Battles in the DLC are tougher than in Paldea, such as Blueberry Academy’s style of double battling.
Revival Herb stats:
- In-game description: A very bitter medicinal herb. It can be used to revive a Pokémon that has fainted. It also fully restores the Pokémon’s max HP.
How to get Revival Herb:
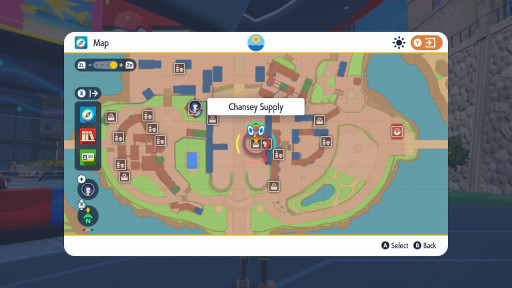
It’s located here near the main plaza.

It’s super close to school, so it will be convenient to make frequent returns.
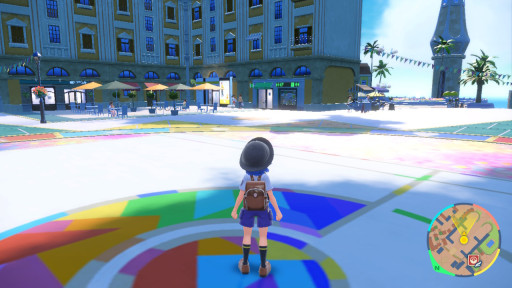
Face this direction from the battle court, and walk straight ahead.
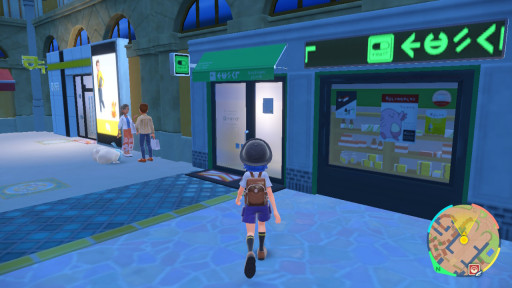
Enter the Chancey Supply. The game allows you to walk in the door without pressing any buttons.

This is where to find it in the Chansey Supply List. As a reminder, this is what the Chansey Supply will look like when you first enter. As you progress through the game, such as battling Gym Leaders, more items will appear.
2. Power Weight
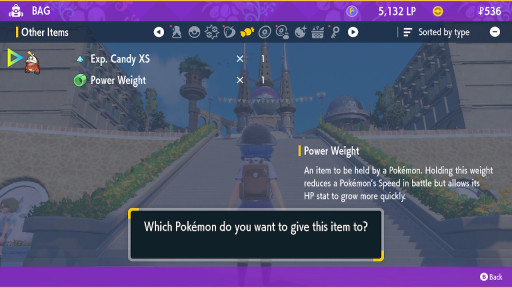
The Power Weight is a general goods item that allows you to train your Pokémon to gain more base HP during any battle.
The Power Weight is one of the best Power items because it will allow weak Pokémon you just caught to gain more HP. The more HP a Pokémon has, the better.
Why the Power Weight is Awesome for Early game:
- You’ll catch lots of Pokémon during your journey, and there will be lots of training. Many of those Pokémon you catch are low-level and weak. Expedite the process so they can gain more HP during a trainer or Gym Leader battle.
- You should emphasize battling many Trainers before you face Gyms because battles against Trainers are easier. Plenty of them itch for a battle in the wild.
- Use it on your starter Pokémon that you chose from the beginning of the game. You don't want your starter Pokémon to easily faint. You should prioritize their training the most, as they should have the highest HP than the other Pokémon you have. You can always alternate the Power Weight to other Pokémon as a held item or buy another Power Weight.
Power Weight stats:
- In-game Description: An item to be held by a Pokémon. Holding this weight reduces a Pokémon’s Speed in battle but allows its HP stat to grow more quickly.
How to get the Power Weight:
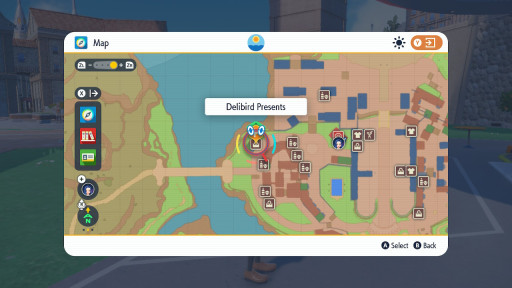
Go to the Delibird Presents west of the plaza.
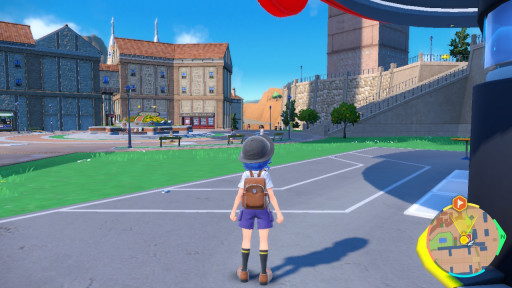
From this Pokémon Center, Mesagoza West, go straight from here.
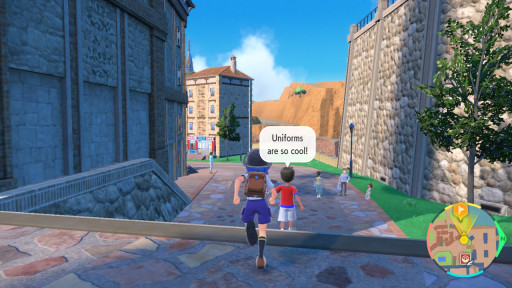
Go across these stairs.
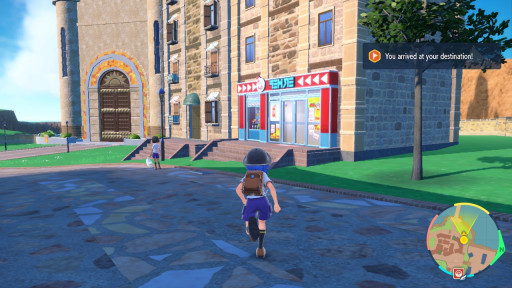
You made it to Delibird Presents!
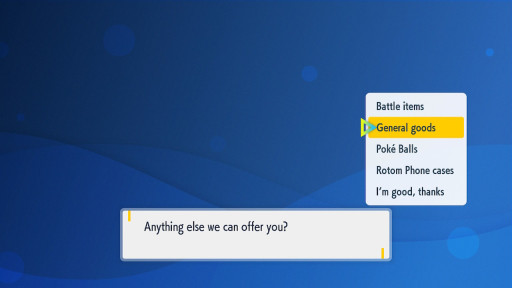
Select “General Goods.”
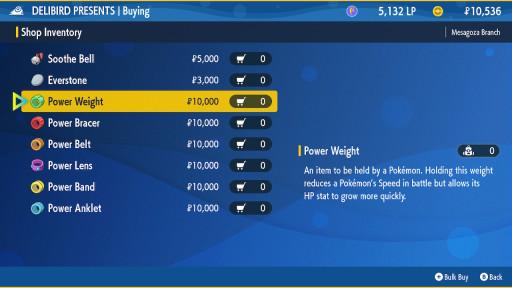
Select the Power Weight, and get to training! All Power items are fantastic, but the most important Power item early game is to make your Pokémon build more base HP.
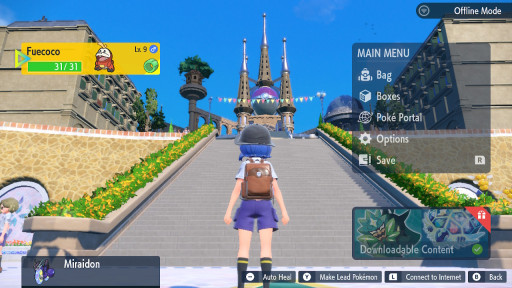
As an example, here is Fuecoco’s HP stats before facing Team Star. It’s equipped with the Power Weight.
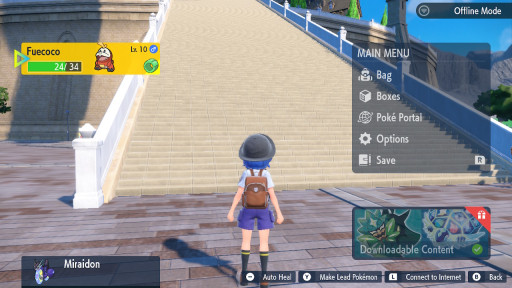
Fuecoco’s HP slightly increased after battling Team Star. It progressed from HP 31 to HP 34.
1. Soothe Bell
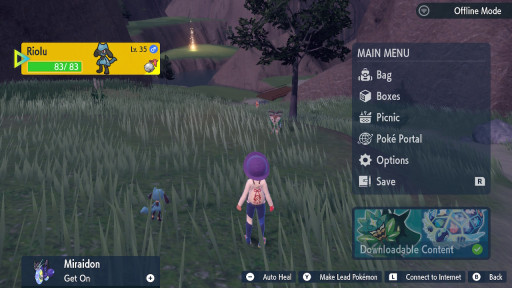
The Soothe Bell is a training chime that makes tough Pokémon more friendly to train.
The Soothe Bell is crucial to get early in the game because you will eventually run into a strong Pokémon in the wild or a Tera Raid. Many of those strong Pokémon have specific natures where they won’t obey your commands, and the Soothe Bell can calm them to trust you.
Why the Soothe Bell is great for Early game:
- You want stronger Pokémon to catch, and it’s possible to catch them early, even if you have weak Pokémon. Most strong Pokémon are built into the Tera Raid system, while some roam the wild. The point is that they have difficult natures to control, making it difficult for you to command them and they disobey as a result. It can be a frustrating process.
- For example, Pokémon with Naive, Rash, Impish, and Serious natures will disobey following your commands during battle and may go to sleep. A Soothe Bell as a held item can calm them during battle.
- Use this for many early Pokémon you can catch in the game, especially catching tough Pokémon in their first evolution.
- They’re commonly used on Pokémon such as Pichu, Evee, Chansey, Igglybuff, Azurill, Snom, Riolu, and Gible. For example, give Riolu a Soothe Bell and develop friendship levels. It will be easier to train it when it evolves into Lucario. It will also soothe Lucario’s preferred adamant nature.
Soothe Bell stats:
- In-game description: An item to be held by a Pokémon. The comforting chime of this bell calms the holder, making it friendly.
Give a Pokémon a Soothe Bell if they have the following natures:
- Bashful
- Hardy
- Docile
- Quirky
- Serious
- Lonely
- Adamant
- Naughty
- Brave
- Bold
- Impish
- Rash
- Sassy
- Timid
- Hasty
- Naive
How to get the Soothe Bell:
Follow the exact instructions from #2 on how to get the Power Weight to Delibird Presents.
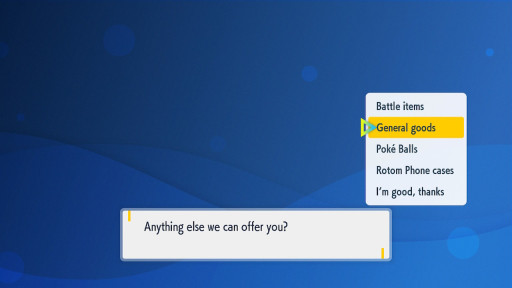
Select “General Goods.”

Buy the Soothe Bell and get to training!
I'm going to catch a Psyduck now, but thanks for reading!
