We are back again with a new guide for Black Desert Online. In this entry, we are going to talk about a topic that most adventurers, if not all, want to talk about all the time: Silvers! Where to get the most trash for silver and other similar questions, as silver is very important to all players for gear enhancement and obtaining desired items on the market for their final builds.
With that being said, I have gathered an updated list of Black Desert Online’s best grind spots for money that is proven to work and is accurate with the game’s current meta.
Please keep in mind that all of the data on this list was compiled using ONLY a blue loot scroll and NO Agris. Also, note that the recommended AP data on this list is not the same as what you can see on the World Map in-game because it is the suggested AP range you should have for your grind to be efficient and not a waste of time. So let’s start!
10. Castle Ruins
Let’s begin this list with a complicated one so we can finally put it away: the Castle Ruins. I said complicated because it is highly advised to form a party of three members if you are going to farm on this spot. This map is also highly contested, especially if you want to run the circular inside route of Castle Ruins, and be prepared to be dueled for spot by another party as well.
Why Castle Ruins is a Great Farming Spot
- 407,000,000 average silver / hour.
- Trash loot here sells for a significant price compared to the other maps not included on this list.
- The Castle Ruins have a huge mob density partnered with very consistent trash loot drops, making the Castle Ruins one of the best places to grind for silver.
- Party grinding means the grind is less boring, especially with your BDO friends.
How it Works:
- Recommended AP: 284.
- Form a party of three members with gear ratings close to the recommended AP.
- It is better to have some sort of communication in your party, like Discord voice chat. Communication is essential on this map, not only for efficient mob pulling but also when other parties vie for a spot.
- There is only one main rotation here in the Castle Ruins, and it is the greatest for trash per loot gains. However, you can find the Southern Mountain Range on the outskirts of this zone as an alternative, but it is not as good as the main rotation, which is located at the innermost area of the Castle Ruins.
9. Swamp Naga Habitat
Number 9 is Swamp Naga Habitat or Elvia Nagas, depending on your preference. It was once considered the worst place to farm because the normal mob spawn of the commanders here was very inconsistent, but after the rework, farming these Nagas became amazing. The spawn mechanics now are very consistent. Commanders will now spawn a consistent 9 mobs per commander, which will give you a lot of trash loot each and every time. Elvia's weapons are now working properly thanks to the said rework for this map, making your grind faster and very efficient.
Why Swamp Naga Habitat is a Great Farming Spot
- 409,500,000 average silver / hour.
- Not a crowded farming zone. You can rest assured that you will not be competing for a spot anytime soon.
- The rework patch notes made a lot of improvements on this map.
- This zone drops "Moon’s Split Nail". One of which sells for a whopping 226,000,000 silver just for a single drop. Imagine having a lot.
How it Works:
- Recommended AP: 290.
- Head to Naga Marsh or to the Southern Plain of Serendia and start looking for a Poisonous Swamp Plant or the 3 Naga Commanders, which are always grouped together in one cluster.
- Kill those elite mobs near the Poisonous Swamp Plant. Those Naga commanders will spawn 9 normal mobs each once they reach a certain HP level. Kill everything and move to another mob cluster.
8. Bloody Monastery
Making another appearance in my BDO guide is the Bloody Monastery at number 8. Well, this is a broken map when it comes to the XP rate and also the trash loot rate. There is a lot worth mentioning about this map, especially what kind of loot you can find here. On top of the huge quantity of trash loot, you can also find Moon’s Split Nail here, the item needed for creating the Revived Lunar Necklace. Not only that, but there is an intriguing loot called "Seed of Void" here. What’s interesting about it is that a single piece of this item sells for an instant 10 million silver to the NPC. I will be leaving information down below about how you can maximize your chances of getting the Seed of Void for more efficient money farming.
Why Bloody Monastery is a Great Farming Spot
- 425,900,000 average silver / hour.
- A lot of expensive loot can be gained here, including Moon’s Split Nail.
- Mob density is high, and there is a grinding mechanic you can use to maximize your earnings in farming Bloody Monastery.
How it Works:
- Recommended AP: 294.
- The interesting part is how you can increase your chances of looting a lot of those 10 million silver per piece loot, Seed of Void. Here's how.
- Take note of the mobs with the word "Violent" on their heads. That is the specific mob you will be aiming to kill as many as you can and make a pattern with their positions on the entire map of Bloody Monastery. This will serve as your main rotation with these violent mobs as your primary target while killing all the normal mobs as well.
- With these kinds of mechanics, you will be maximizing your silver gain as these violent mobs hold the highest drop rate for the said 10 million worth of loot.
7. Tunkuta
An interesting entry in our number 7 spot is the Tunkuta. Commonly known as the "Turos" spot, as it is the place where you can loot one of the most popular endgame belts, the Turo’s Belt. Caphras Stone, along with other expensive loot, does drop here very often, and with that, you should not be surprised if you find this zone a bit crowded. Despite that fact, you can still find Tunkuta a good spot for farming for money, and it's definitely worth checking out.
Why Tunkuta is a Great Farming Spot
- 437,000,000 average silver / hour.
- Turo’s Belt drops here.
- Caphras Stone drops every 2 minutes on average.
How it Works:
- Recommended AP: 289.
- You should form a party of 2 members here, as it is the ideal way of running this spot.
- There are five ideal ways to grind this spot. Regardless of what kind of rotation you use, you will pretty much end up with the same trash loot rate as the other rotations available.
- Actually, this is a very straightforward map with rotations you can make on the fly as soon as you arrive in Tunkuta. There are no complicated mechanics, and you can even go the old way of just killing everything that mobs. Essentially, your aim is to be mobile as much as possible and kill as many as possible.
6. Orc Camp
At number 6 on our list is the Orc Camp. Elvia Orc Camp is by far the most perfectly balanced zone in Black Desert Online. Marni’s Realm installment made the Orc Camp into your must-not-miss daily 1-hour grind. This is also the special time where you should consider using all of your loot-enhancing buffs because you will not be contested here by any player. You are very much alone here, killing, grinding, and looting to your heart's content. Doing so will make you squeeze a lot more on this map for a whole hour of your session. You will surely come back here every single day for more once you see how much you can earn with just a single hour alone.
Why Orc Camp is a Great Farming Spot
- 466,200,000 average silver / hour.
- The Seed of Void drops here quite often. It is a drop worth 10 million silver per piece.
- Uninterrupted grinding session. Well, except if your internet connection tries to stop you.
How it Works:
- Recommended AP: 290.
- Every spot rotation has orc wizard mobs that deal lots of damage when left unnoticed and a prison, a little cage-like with lights.
- The first thing you must do before starting grinding your rotation is clear off each and every prison around your rotation area, then escape to a safe place, as all of the aggro mobs are surely following you now. Just not too far.
- Once this is done, head to the first prison cage you destroyed, and there you will notice lights appearing within that certain area. By then, you may start grinding as the enemies are now more vulnerable to damage in the same way that you destroyed all of the prison cages.
- Just keep in mind to be mindful of the prison cages' lights and continue to destroy them first once they respawn. Your rotations will be smooth and efficient as long as your prison cage rotation order is the same as your mob clearing order.
5. Abandoned Monastery
Abandoned Monastery has taken the fifth spot. I am pretty sure that you can make a lot of money grinding this spot as it drops Dawn Earring. As we all know, Dawn Earring’s availability in the marketplace isn’t that high. That’s why grinding for the earrings alone can assure you a steady flow of money so you can progress your gears on your desired build for the endgame. Ancient Relic Crystal Shards also drop here, adding to the reasons why you should grind this map instead.
Why Abandoned Monastery is a Great Farming Spot
- 470,000,000 average silver / hour.
- Dawn Earring drops here. These earrings are not very available in the marketplace most of the time, assuring you a demand if you are going to sell them.
- It's easy to run; has no complicated rotation methods; and is a very peaceful, undisturbed grind for you and your party mate.
How it Works:
- Recommended AP: 291.
- This is a two-man party spot. Please keep that in mind.
- There are plenty of ways to gain access to this spot. The most famous and easiest one is to go to the mountains exactly where the icon of the Abandoned Monastery is located on the world map. There you will see a very large cave entrance. You won’t miss it, trust me. It is called the main entrance to this spot for a reason.
- Once you have entered the entrance, proceed to kill as much as you want. There is no right or wrong way to do rotations on this map, as it is just a straight path. Make a U-turn at the very end, then farm again.
4. Gyfin Rhasia Underground
Let’s make this list a bit more intense with Gyfin Rhasia at number 4. Despite its super complicated mechanics, I am mentioning the color-to-color bonus damage against the big mobs here. This spot never ceases to tempt adventurers to stop grinding this spot, especially for silver. From a very huge area with lots of mobs to kill, Caphras Stone drops, Tungrad Belt, the Tungrad Necklace, you can’t just say no to this map. However, the current marketplace is bloated with Tungrad Belts and Tungrad Necklaces, but don’t you worry as you can still make a lot of money via trash loot.
Why Gyfin Rhasia Underground is a Great Farming Spot
- 474,500,000 average silver / hour.
- Tungrad Belt and Tungrad Necklace drop here.
- Caphras Stone drops every 1 minute and 20 seconds on average.
How it Works:
- Recommended AP: 297
- There are more than 10 towers in the zone, and all you have to do first is find 2 of them, which are near each other. Basically, the choice will vary based on the player’s preference. As long as you can secure 2 towers that are near and comfortable for you to go back and forth as your grinding rotations, that will be great.
- You need to remember this always, as this mechanic is vital for your efficient XP grinding. There will be 3 sets of elites per tower spot, not only categorized by their appearance and abilities but also categorized by color coding that represents the buffs you will get from them.
- Blue - Gyfin Rhasia Guard the one with shield and sword [Resolve]
- Purple - Gyfin Rhasia Flamen the slender magic caster [Denial]
- Red - Gyfin Rhasia Crusher the big guy with a mace [Anger]
- These buffs will give you some sort of color-coded buff with which you will gain a damage boost against the elite of matching color with the buff that you have. Simply put, the order is Blue > Purple > Red > Blue. For example, if you kill the Blue Elite-Gyfin Rhasia Guard, this will then give you the purple-colored buffs(remember the order?) which will grant you a damage boost against denial monsters, and that includes the Gyfin Rhasia Flamen, the purple elite. In short, your first elite kill will be harder since you don’t have any damage boost buffs, so I suggest killing first which of those 3 elites you are most comfortable killing without buffs, and then working your way up with the color-matching buffs to gain the advantage of these damage boosts. Or have it in the standard order: kill the guard first, then the flamen, and last the crusher.
- To maximize your XP gains, keep an eye out for the despair mobs. These mobs respawn in exactly the same locations within any tower spot. Killing them will benefit your XP gains as it will let the tower spawn more mobs for 8 minutes. The spawn rate of these despair mobs depends on how fast you kill those 3 elite mobs.
- Another interesting mechanic of this zone is the spawning of "The Butcher" or Butcher of Gyfin Rhasia, which most players say its spawn rate or appearance is heavily influenced by your current drop rate buffs. When the butcher spawns, all three groups of the elite mobs of the tower will freeze. They won’t attack and will not move until the butcher is slain. Once you are finished, all three elite mobs will wake up and attack you instantly, and you will get the butcher buff (yellow color-coded), which will make the other 3 color-coded elites very squishy with your buffs. Despite the butcher’s buffs being the strongest amongst buffs you may get while grinding, not paying attention right after the butcher was killed proves to be very fatal.
- The last mechanic of this zone you should know about is the enraged mode of the 3 elite mob groups. It does rarely happen in grinding sessions, but when it does, you will probably be dying or plain dead as the 3 elite mob groups will instantaneously attack you, even without the butcher being slain.
3. Sycraia Abyssal Ruins (Lower)
Diving in on our number 3 spot is the Sycraia Abyssal Ruins (Lower). If the upper level is only good for XP grinding, the lower level of the Sycraia dungeon is best for its loot drop rate. Not only is the Tungrad Ring farmable here, but you can get a lot of Black Magic Crystals here as well. So check out this spot and see if it’s worth your while. Well, I am very sure it is very worth your grinding time.
Why Sycraia Abyssal Ruins (Lower) is a Great Farming Spot
- 490,000,000 average silver / hour.
- Tungrad Ring drops here.
- Caphras Stone drops every 2 minutes on average.
- Black Magic Crystal Haven.
How it Works:
- Recommended AP: 289
- There is a huge density of mobs in this area. You will be staying in one part of this dungeon for most of your grinding session. It's pretty much like running the Star’s End but without the towers and requires a bit of running here and there.
- As long as you have the recommended AP, you can run this dungeon pretty easily yet very efficiently.
2. Hexe Sanctuary
Our runner-up for this list is the masochist’s paradise, Hexe Sanctuary. What makes this zone great enough to deserve the number 2 slot? I’ll start with the reason that will blow your mind. Hexe Sanctuary drops an item called "Blessed Soul Fragment," and here, my friend is an 8.1 billion silver drop per piece. Yes, I really said Billion silver, not just Million. If you are very lucky with your RNG, you will be rich in no time here. But before you rush straight to this place, you must be warned that only come grind to this zone if you really mastered your class already as you will be needing a lot of your intense gamer skills and dodging here to the test. Hexe Sanctuary does feature a mechanic similar to what Star’s End has, but in a more hardcore way. If you are looking for a challenge alongside your money grinding, this spot may be just for you.
Why Hexe Sanctuary is a Great Farming Spot
- 523,000,000 average silver / hour.
- The Blessed Soul Fragment drops here. An insanely rare boss drop worth 8.1 billion a piece.
- It is not boring to grind at, and you will find this place challenging yet fun to grind at. Well, if you got bored and you stopped paying attention, your character is guaranteed to die here.
How it Works:
- Recommended AP: 302
- Once you’re in the area of Hexe Sanctuary, find a floating red portal-like thing and make it your spot.
- It is not hard to miss, and you will find a Skeleton Witmirth (the one with the chained tombstone on its back) and a Green Orc Skeleton Warrior roaming nearby that floating red portal.
- Start by hitting the Green Orc Skeleton Warrior and you will notice that you will be surrounded by a lot of normal mobs in no time. Every time you kill normal mobs, they will become red mists or red souls, depending on how you like to describe it, and the Skeleton Witmirth will then absorb those for you.
- Once our tombstone-carrying guy gathers enough red souls, Skeleton Witmirth will become killable. This a friendly reminder that this guy hits like a truck, so you better dodge all of Skeleton Witmirth’s attacks as much as you can.
- When the Skeleton Witmirth is slain, a stronger version of the Green Orc Skeleton Warrior will spawn with a label of Unstable Soul on top of it, along with a lot of normal mobs again. Dodge as much as you can, or you will find yourself doing a respawn. Focus on killing the Unstable Soul Orc Skeleton Warrior, and it will deal decent damage to the normal mobs surrounding it when it dies.
- If you see a message on your screen saying "A raging specter in search of souls has appeared," keep an eye out for Soulless Skeleton Warrior because they will try to explode near you, and it will deal significant damage to everything around that exploding skeleton warrior. What you can do is simply go away from the AOE of the explosion and let it explode. The explosion will also deal damage to the normal mobs caught upon exploding and will help you clear out mobs.
- At this point, you can either move on to another location or remain in the same location until Hexe Marie spawns there. Just a fair warning: Hexe Marie is very challenging to kill. Thread with caution, and the decision is yours to make.
1. Quint Hill
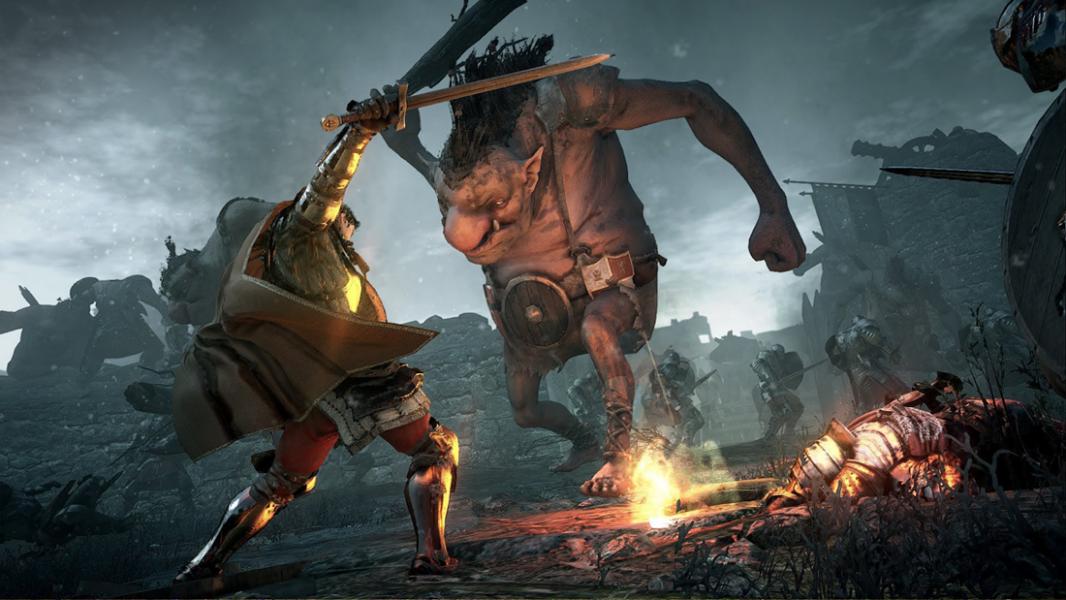
And the moment you have all been waiting for is finally here: the unveiling of the best spot for grinding money. This is Quint Hill! This zone boasts very expensive trash loot, sellable for 96,750 per piece. Crystallized Despair also drops here a lot more often compared to Hexe Sanctuary. The mechanics are also far less complicated. It is also a far more pleasant grinding experience as there are very few mobs here and they have a very large hit-box. Memorizing Ancient Trolls’ attack patterns and dodging them is very easy to do. It is a well-deserved first place in our list without a doubt.
Why Quint Hill is a Great Farming Spot
- 539,700,000 average silver / hour.
- Trash loot is almost four times the price of the trash loot you can get from Hexe Sanctuary.
- The mechanics here are far too easy and less complicated compared to Hexe Sanctuary.
- Also drops the 8.1 billion silver worth item, the Blessed Soul Fragment.
How it Works:
- Recommended AP: 305
- Unlike Hexe Sanctuary’s first-step mechanics, the floating red portal’s significance here is if you manage to get Ancient Spirit Light for extra damage buffs to make mobs easier to kill.
- What you need to do first is find a petrified Ancient Troll surrounded by 3 moving trolls. Kill the 3 moving trolls first to make the Ancient Troll Shaman on the center killable.
- As soon as the Ancient Troll moves, kill it. Once the ancient troll reaches 40% health, it will fall to the ground, rise up again, and become petrified, waking up surrounding trolls and starting to attack you.
- Lure as many trolls as possible near the now petrified Ancient Troll and attack them while staying very near the petrified Ancient Troll to wake it up. Once it does, it will petrify the other trolls surrounding him instead. The petrification will only last a short while, so make sure to gain benefit from it by trying to take down those mobs as fast as you can.
- You will be killing them at this point and moving on to the next spot after killing them. Just make sure to use Ancient Spirit Light as soon as you get one with the floating red portal to make your grind easier and faster.
With that, we conclude our money-making guide and I do hope you like our guide for [Top 10] BDO Best Grind Spots For Money. This may be a very long entry, but rest assured its long content is worth your while to read as it is very accurate and up-to-date with Black Desert Online’s current patches and meta. Drop a comment in the comment box below about how you feel, suggestions, or anything you want to say about our list today. Until next time, Peace!
You may also be interested in:
[Top 10] BDO Best Grind Spots For Agris
[Top 10] BDO Best Grind Spots For Skill Points
[Top 10] BDO Best Grind Spots For 200 AP
[Top 10] BDO Best Grind Spots For 240 AP
[Top 10] BDO Best Grind Spots For Caphras
[Top 10] BDO Best Outfits For Male Characters (And How To Get Them)
[Top 10] BDO Best Outfits For Female Characters (And How To Get Them)
[Top 15] BDO Most Expensive Items Sold In The Marketplace (And How To Get Them)
[Top 10] BDO Most Popular Classes (Ranked)
