![[Top 10] MTG Arena Best Historic Decks that Wreck Hard! (Feb 2021) [Top 10] MTG Arena Best Historic Decks that Wreck Hard! (Feb 2021)](/sites/default/files/styles/responsive_image_600xauto/public/2021-01/young_pyromancer.jpg.webp?itok=iBhjUCeA)
Not much has changed in the Historic meta this past month. Most of the top-tier decks are still intact but others are getting less gameplay than they have before. A huge chunk of the meta is creature-based and aggressive in nature, pushing control decks to lower usage in Bo1. The majority of creature decks are based around low-cost creatures that aim to overwhelm the opponent’s board state. Other decks that are still very powerful are those that employ ramp in their tactics. Here are the best Historic Bo1 decks before the new set arrives. Expect a huge shift in the top decks this first few days of Kaldheim.
10. Bant CoCo
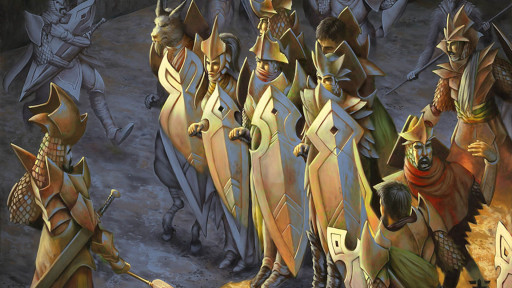
What’s good about this deck?
- In a format that is creature-heavy, using ways to cheat your creatures into the battlefield is a huge advantage
- With Collected Company, you can wait out playing single creatures per turn, for a bigger haul during your opponent’s turn
- This is particularly great as it can dodge board wipes or it can easily rebuild your board state post-wrath
- There are a lot of creatures that cost 3-mana or less in the current format
- Especially in Blue, Green, and White, these low-cost creatures are abundant which makes Bant the go-to colors for playing CoCo
- This also gives you a high hit chance when you cast CoCo, reducing the probability of whiffing
How to play this deck effectively
- As much as possible, use Collected Company at the opponent’s end step to prevent them from immediately destroying or wiping your creatures off the board
- This is one reason why Collected Company is a great card to have in creature decks since it functions basically like a flash deck where you get to place creatures during your opponent’s turn.
- Keep on casting your creatures so that Vivien will have targets
- Your creatures are mostly very small which makes Vivien relevant. It can help accelerate your damage output by giving +1/+1 counters to 2 of your creatures each turn.
- When you combo this with Collected Company, you get to attack with the creatures immediately during your turn.
Decklist
- 2 Vivien, Arkbow Ranger
- 4 Llanowar Elves
- 4 Luminarch Aspirant
- 3 Meddling Mage
- 2 Selfless Savior
- 4 Scavenging Ooze
- 4 Deputy of Detention
- 3 Glasspool Mimic
- 3 Linvala, Shield of Sea Gate
- 3 Militia Bugler
- 2 Lurrus of the Dream-Den
- 4 Collected Company
- 3 Breeding Pool
- 4 Hallowed Fountain
- 4 Temple Garden
- 2 Glacial Fortress
- 2 Sunpetal Grove
- 4 Branchloft Pathway
- 2 Forest
- 1 Plains
9. Lurrus Auras

What’s good about this deck?
- Lurrus is still a very good card despite the number of graveyard hate decks that you may encounter in Historic
- Historic is transitioning to a more creature-heavy format which makes Lurrus a pretty good card to have
- You get loads of card advantage with Sram and Kor Spiritdancer
- Both of these creatures let you draw cards every time you cast an enchantment spell, allowing you to draw more threats
How to play this deck effectively
- Nothing is better than just slamming your creatures on the board and not worrying about board wipes
- Just play your creatures and pump them with your enchantments because you will most likely draw into an Alseid or Selfless Savior or any other cards that can protect one of your threats.
- If you get unlucky and get your whole board wiped, don’t worry because you probably drew a lot of cards that can replace those creatures and enchantments
Decklist
Lurrus of the Dream-Den - companion
- 4 Alseid of Life’s Bounty
- 3 Selfless Savior
- 4 Kor Spiritdancer
- 4 Siren Stormtamer
- 3 Sram, Senior Edificer
- 4 Cartouche of Solidarity
- 4 Staggering Insight
- 4 Curious Obsession
- 4 Sentinel’s Eyes
- 4 All That Glitters
- 4 Hallowed Fountain
- 4 Glacial Fortress
- 2 Castle Ardenvale
- 1 Castle Vantress
- 4 Fabled Passage
- 4 Plains
- 3 Islands
8. Red Deck Wins

What’s good about this deck?
- RDW is a constant in the metagame no matter what format you play in
- This may be a huge downside since most people will already know what to expect from your deck but in Bo1, you are still very likely to run over your opponent
- Aside from that, there are other iterations of mono-red that other people are more scared of such as Goblins. This helps you fly under the radar and be a sleeper deck where your opponents are just not ready to deal with your threats.
How to play this deck effectively
- Utilize Soul-Scar Mage’s prowess to deal extra damage
- Aside from Prowess, you can use its skill to lessen the impact of large creatures by giving them -1/-1 counters
- String together your spells
- Once you have Thermo Alchemist and Runaway Steam-Kin on the board, you need to identify what spells to play first in order to get the maximum damage output in the most efficient way possible
Decklist
- 1 Torbran, Thane of Red-Fell
- 4 Soul-Scar Mage
- 4 Bomat Courier
- 3 Thermo Alchemist
- 4 Ghitu Lavarunner
- 3 Runaway Steam-Kin
- 3 Slaying Fire
- 4 Skewer the Critics
- 4 Light Up the Stage
- 4 Shock
- 4 Wizard’s Lightning
- 4 Lightning Strike
- 4 Needleverge Pathway
- 4 Sacred Foundry
- 4 Inspiring Vantage
- 4 Ramunap Ruins
- 2 Mountain
7. UW God-Pharaoh’s Gift

What’s good about this deck?
- A very difficult value engine to stop once it gets going
- Once you already have GPG on board, you can extract a whole lot of value from your creatures in the graveyard.
- You can put more bodies on the board, draw cards, or simply annihilate your opponent
- You have a flexible game plan with this deck
- Of course, your main game plan is to put GPG on the board and resurrect your creatures. However, you can choose a variety of creatures to resurrect depending on the situation. This makes the deck versatile even if it has the same concept all throughout
How to play this deck effectively
- Fill up your graveyard in the early stages of the game
- Try to put creatures and at least one GPG at the start so you can be ready in the mid to late stages of the game
- Usually, the only cards that you will hard cast are Minister of Inquiries and the occasional Champion of Wits
- Both of these provide card advantage one way or another so they are very important at the start of the game
- Once you enter the late game, resurrecting them will keep your engine going as they will fill your graveyard with more materials you can utilize
Decklist
- 4 Minister of Inquiries
- 4 Angel of Invention
- 4 Champion of Wits
- 1 Platinum Angel
- 2 Dream Trawler
- 4 God-Pharaoh’s Gift
- 2 Wrath of God
- 4 Chart a Course
- 4 Refurbish
- 4 Strategic Planning
- 1 Search for Azcanta
- 2 Cast Out
- 4 Hallowed Fountain
- 4 Glacial Fortress
- 3 Irrigated Farmland
- 3 Ipnu Rivulet
- 1 Castle Vantress
- 5 Plains
- 4 Island
6. UW Control

What’s good about this deck?
- It features a more diverse set of spells that can counter your opponent’s threats and create threats for you
- Although Bo1 is not the ideal format to play UW Control, you can still tackle a wide range of decks with its diversity
- For example, you can now counter the activated ability of Priest of Forgotten Gods or even Krenko, Mob Boss
How to play this deck effectively
- You don’t want to miss land drops in your first turns so you need to do whatever you can to have a good mana base setup for your late game shenanigans
- Use Search for Azcanta to help filter cards that you need in the match-up and you can cycle Censors and Shark Typhoons to help you draw into either a land or a specific threat that you want
- Don’t be afraid to use Wrath of God early
- Using wrath spells on a board that contains two creatures are more than alright especially if those two creatures are part of the opponent’s combo
- Otherwise, if you are just getting dinged for a few damage each turn, you may just want to wait out another threat before casting your wrath.
Decklist
- 2 Narset, Parter of Veils
- 3 Teferi, Hero of Dominaria
- 2 Dream Trawler
- 3 Censor
- 1 Tale’s End
- 2 Absorb
- 2 Disallow
- 2 Thirst for Meaning
- 4 Wrath of God
- 2 Commit // Memory
- 1 Approach of the Second Sun
- 1 Grafdigger’s Cage
- 2 Search for Azcanta
- 2 Baffling End
- 2 Cast Out
- 3 Shark Typhoon
- 4 Hallowed Fountain
- 4 Irrigated Farmland
- 4 Glacial Fortress
- 3 Castle Ardenvale
- 2 Castle Vantress
- 2 Field of Ruin
- 2 Fabled Passage
- 3 Island
- 2 Plains
5. Rakdos Arcanist

What’s good about this deck?
- Cheap, replayable spells
- You can completely derail the opponent’s strategy by casting multiple Thoughtseizes or Claim the First Borns with Dreadhorde Arcanist
- These cards are very powerful now since there are many combo decks as well as decks that employ cheap creatures
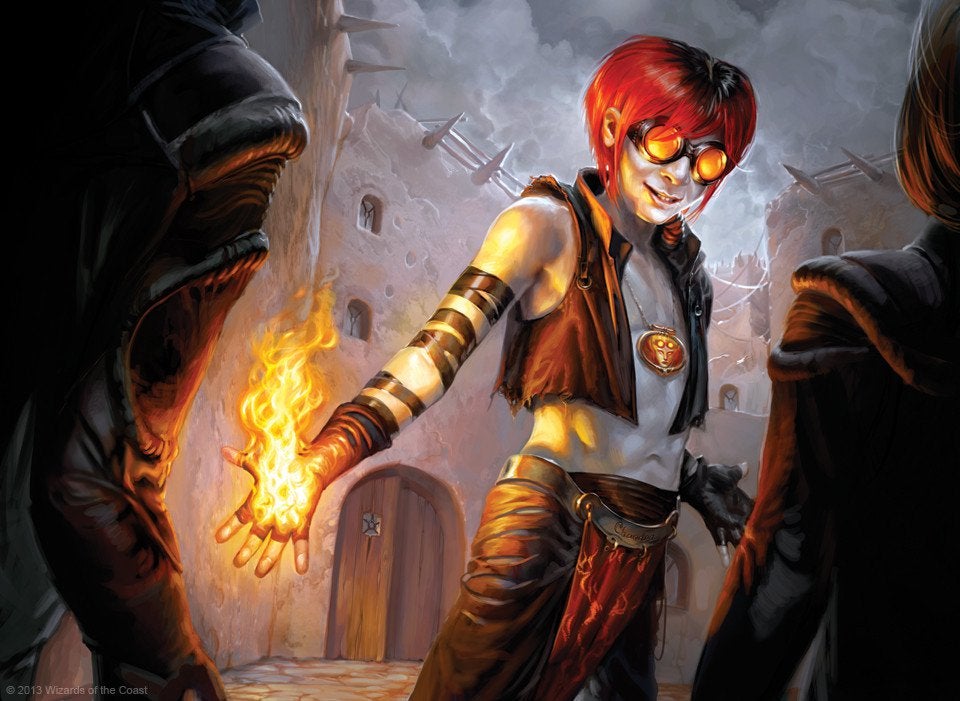
- Young Pyromancer creates bodies not just for attacking
- You can also cast spells to produce tokens that can stand their ground and provide blockers for you. You can also use these tokens to enable your other spells such as Village Rites
How to play this deck effectively
- The ideal play is to have a Turn 1 Stitcher
- This ensures that you have a few spells that you can recast with your Arcanist
- Another good play against control matchups is Thoughtseize as you can easily remove one of their most valuable cards immediately
- Know which spells to use in your matchups
- Cast Kroxa if you know that your opponent is holding his combo pieces
- Cast Arcanist if you think it will survive and it can attack next turn
- Cast Pyromancer to get your board more stabilized. This can also pressure your opponent’s life total
Decklist
- 4 Stitcher’s Supplier
- 4 Dreadhorde Arcanist
- 4 Young Pyromancer
- 4 Kroxa, Titan of Death’s Hunger
- 4 Thoughtseize
- 4 Village Rites
- 3 Claim the Firstborn
- 2 Agadeem’s Awakening
- 1 Bedevil
- 4 Claim // Fame
- 1 Fatal Push
- 2 Bloodchief’s Thirst
- 2 Spark Harvest
- 1 Spikefield Hazard
- 4 Blood Crypt
- 4 Dragon Skull Summit
- 1 Temple of Malice
- 1 Castle Locthwain
- 1 Castle Embereth
- 3 Fabled Passage
- 2 Mountain
- 4 Swamp
4. Gruul Aggro

What’s good about this deck?
- A good balance of attack and ramp makes this a well-rounded deck in all phases of the game
- An early game ramp that translates to early game aggression is the main selling point of this deck.
- Scavenging Ooze and Embercleave are two cards that can swing the momentum towards your favor in similar matchups
- Having an Embercleave ready is always a good thing especially when you are up against decks that run many creatures that can chump block
- Scavenging Ooze is good in any matchup but it earns its stripes against Sacrifice decks and Arcanist decks as it can completely neutralize their gameplan
How to play this deck effectively
- To set-up the aggressive part of your deck, you need to bring in your ramp
- With 12 cards capable of ramp, you are highly likely to get these in your first few turns when they are most critical
- Once you have a significant mana advantage over your enemy, it’s just a matter of converting that advantage to a win
- There’s no other strategy here than to just turn your creatures sideways
- Attacking is the key and holding out on your attacks will do more harm than good
- Of course, you still need to be careful with how you pick your attacks but Settle the Wreckage is no longer widely played in the format so that’s one less thing to worry about
Decklist
- 4 Burning-Tree Emissary
- 4 Llanowar Elves
- 4 Lotus Cobra
- 4 Pelt Collector
- 4 Bonecrusher Giant
- 3 Questing Beast
- 2 Kazandu Mammoth
- 4 Gruul Spellbreaker
- 4 Scavenging Ooze
- 4 Embercleave
- 1 Collected Company
- 2 Shatterskull Smashing
- 4 Stomping Ground
- 4 Cragcrown Pathway
- 2 Ramunap Ruins
- 1 Castle Embereth
- 2 Hashep Oasis
- 2 Mountain
- 5 Forest
3. Goblins

What’s good about this deck?
- There’s something about this deck that just makes it very consistent
- Maybe it’s because you can search for specific cards, filter your deck, or ramp into Muxus but this deck is very consistent compared to other decks of this type
- You have an aggressive deck that is not reckless
- Usually, when building mono-red, people just think of winning the game instantly so they place the cheap creatures and spells to give the highest damage output
- The good thing about Goblins is it functions the same way but this is a deck that can still compete even if you get to Turn 20 or basically the end game
How to play this deck effectively
- Proper set-up will give you an advantage
- Wily Goblins and Skirk Prospectors are your go-to plays as they will help you ramp
- Another play after getting Skirk Prospector is to get a Conspicuous Snoop as it can help you look for Muxus
- Pressure your opponent with vicious attacks
- There are many copies of lords in the deck that will pump your creatures so dealing extra damage is highly likely while you are waiting for Muxus
Decklist
- 4 Skirk Prospector
- 4 Wily Goblin
- 4 Goblin Matron
- 3 Conspicuous Snoop
- 2 Goblin Ringleader
- 4 Goblin Warchief
- 4 Muxus, Goblin Grandee
- 3 Krenko, Mob Boss
- 3 Legion Warboss
- 1 Goblin Chainwhirler
- 2 Temple of Malice
- 1 Phyrexian Tower
- 2 Castle Embereth
- 19 Mountain
2. Sacrifice
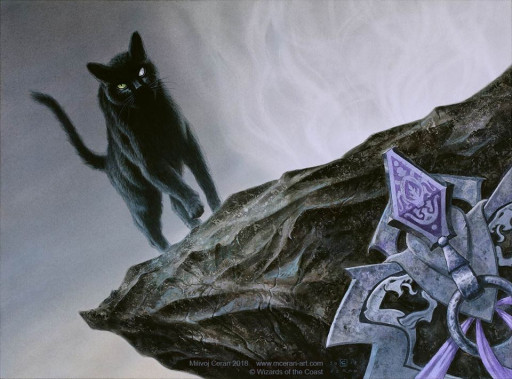
What’s good about this deck?
- A very reliable combo deck that can simply beatdown the opponent
- Since this deck has many different pieces that you can combine to make the combo work, it makes it a very reliable and consistent strategy
- Even if you don’t complete the combo pieces, you can simply beatdown your opponent with your creatures especially if you have a Dreadhorde Butcher on board
- You have loads of creatures that can be recovered from the graveyard
- Aside from the usual Cauldron Familiar-Witch’s Oven combo, you also have access to Scrapheap Scrounger and Gutterbones
- This will be a very annoying deck for your opponent as you can just sacrifice creatures then get them back again.
How to play this deck effectively
- Get your combo pieces on the board before you start sacrificing material
- Of course, the simplest combo you can get is the Cat-Oven combo and if you have that in your starting hand, you can already start pinging your opponent with 1 damage per turn
- As much as possible, however, try to wait for a Mayhem Devil to amplify your damage more. This is also applicable if you have a Fabled Passage on the board.
- Keep swinging with your other creatures
- If you have a Dreadhorde Butcher or a Scrapheap Scrounger, might as well just swing for the fences as they are not good at blocking.
- Plus, using the Butcher often will just result in an exponential increase in your damage output
Decklist
- 4 Cauldron Familiar
- 4 Dreadhorde Butcher
- 4 Priest of Forgotten Gods
- 4 Mayhem Devil
- 4 Midnight Reaper
- 3 Woe Strider
- 3 Scrapheap Scrounger
- 2 Gutterbones
- 4 Claim the Firstborn
- 4 Witch’s Oven
- 4 Blood Crypt
- 4 Dragon Skull Summit
- 2 Castle Locthwain
- 2 Phyrexian Tower
- 1 Field of Ruin
- 2 Fabled Passage
- 6 Swamp
- 3 Mountain
1. Temur Ramp

What’s good about this deck?
- You have the perfect combination of ramp, card advantage, and total beatdown
- WIth Red, Green, and Blue colors, you practically get the balance of all strategies that these colors have to offer
- Ramp is still a very powerful concept that you can abuse in this meta
- Having 3 mana at turn 2 is already a huge advantage especially if you are up against a non-aggro deck
- Even if you face aggro decks, most likely their early game advantage will be lessened or even neutralized with the amount of value you can generate
How to play this deck effectively
- Ramp, ramp, ramp!
- There’s no other effective way to use this deck than just focusing on getting the early mana advantage
- This will guarantee earlier access to your big hitters as well as your major spells
- Keep swinging for the fences
- Once you have the mana advantage, deploy your big creatures and start swinging
- Even if you get your board wiped, you will still have a lot of mana to help you rebuild your board state so don’t worry about it and just swing
Decklist
- 4 Uro, Titan of Nature’s Wrath
- 3 Lotus Cobra
- 3 Bonecrusher Giant
- 4 Terror of the Peaks
- 4 Beanstalk Giant
- 2 Questing Beast
- 1 Ashaya, Soul of the Wild
- 1 Ulamog, the Ceaseless Hunger
- 2 Ugin, the Spirit Dragon
- 4 Growth Spiral
- 4 Genesis Ultimatum
- 3 Cultivate
- 4 Cragcrown Pathway
- 4 Riverglide Pathway
- 4 Ketria Triome
- 4 Forest
- 3 Island
- 2 Mountain
- 2 Fabled Passage
You may also be interested in:
- The 10 Best MTG: Arena Decks
- MTG Arena Guide, Tips and Tricks
- Best Ways to Get Wildcards in MTG Arena
- [Top 7] MTG Arena Best Artifact Decks That Wreck Hard!
- [TOP 5] MTG Arena Best Control Decks
- [Top 10] MTG Arena Best Historic Decks That Wreck Hard!
- MTG Arena Best Packs To Buy – A Guide for Beginners and Intermediate Players
- MTG Arena: Best Ways to Get Cards
- Top 15 Best MTG Arena Mythic Rares
- MTG Arena Ranking System Explained
- The Best Singleton Decks in MTG Arena
- [Top 5] Best MTG Arena Aggro Decks
- [Top 5] MTG Arena Best Angel Decks
- [Top 10] MTG Arena Best White Decks
- [Top 10] MTG Arena Best Black Decks

