Deck 10: The Common Man
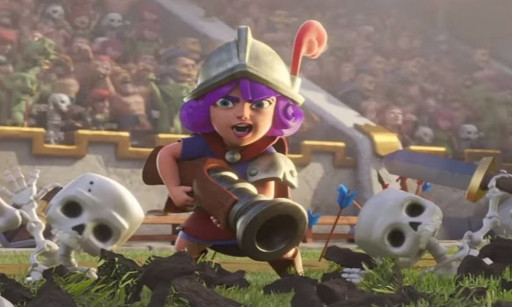
There are 13 arenas in Clash Royale, so if you are in arena 5 you still have a long way to go. Each arena unlocks more cards that you can put into your decks, giving you more variety and more opportunities to be creative. There are quite a few cards available to you in arena 5, but you will find yourself using many of the same combinations over and over again. To spice things up, number 10 on our list is a deck that has no Epics or Legendaries.
What’s Great about this Deck
- Made up entirely of common cards.
- Easy to level up cards.
- Versatile deck.
How The Common Man Deck is Played
- The only dedicated offensive card in this deck is the Giant. The Giant is a unit that only targets enemy buildings. This means that he won’t attack enemy units. It is great to have him in your deck because he can’t get distracted by enemy troops. However, provide support because he also can’t defend himself from enemy troops. Luckily for him, he has a high HP so he can withstand a lot of damage.
- You can either deploy your Giant right at the bridge or at the back of the board. Deploying the Giant right at the bridge means your opponent has less time to put together a defense. Putting the Giant at the back of the board means that you have more time to build up elixir while he meanders to enemy territory. This makes providing backup much easier.
- The Bomber is the only troop unit that does splash damage. This makes him very effective against the Skeleton Army and the various types of Goblins. Many opponents will try to counter your Giant with a mass attack like the Skeleton Army. Sending in the Bomber after the Giant will provide good support.
- You will also need to provide air support for your Giant. Minion Horde can be especially dangerous if they are not taken out. This deck provides many options for dealing with an air attack. You can either use Arrows or Fireball, or you can send in troops that can attack air units like Archers or the Musketeer.
- Defensively, all the units can be used, even the Giant. If there is a big rush of enemy troops you can drop the Giant down to distract them and pull their focus away from your tower. Goblins and the Bomber also make great defensive units.
Cards
- Goblins
- Arrows
- Fireball
- Bomber
- Archers
- Knight
- Musketeer
- Giant
Deck 9: Hog in a Barrel
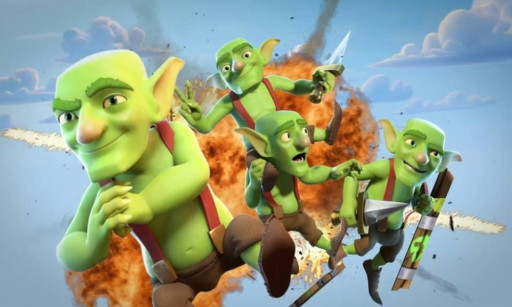
The Goblin Barrel is a card that is unlocked in Arena 1, and it still remains popular among players that are in Arena 13. It is a very useful card and because it has been around since the beginning, many players have been able to level it up and max it out. This deck and many others on this list incorporate the Goblin Barrel into their offensive strategies.
What’s Great about this Deck
- Uses the Fire Spirit that you unlock in Arena 5.
- Uses the Goblin Barrel.
- Has dedicated offensive and defensive units.
How the Hog in a Barrel Deck is Played
- The Hog Rider and Goblin Barrel are the center of this deck’s offense. The Hog Rider is similar to the Giant in that it only targets enemy buildings. You can shoot the Goblin Barrel anywhere on the board, including right to the enemy tower.
- Save up your elixir and when you have at least 9 deploy the Hog Rider right at the bridge. Immediately throw the Goblin Barrel towards the same tower and place the Fire Spirit down behind the Hog Rider.
- The Fire Spirit will kill any low HP units commonly used to deter Hog Rider (e.g.: Minions or Skeleton Army). The presence of the Fire Spirit will discourage your opponent from putting down units. That hesitation will allow the Hog Rider and Goblins from the Goblin Barrel to do max damage to the tower.
- Keep sending in this combination of units and observe how your opponent is responding. Later in the game when you have established your pattern you can send in additional troops in the offensive push to mix things up or to better support the Hog Rider. For example, if they wait until the Fire Spirit has hit the tower and then they put down their Minions you can be prepared to put down your Musketeer to counter that as well or you can use Zap to stun them, giving the Hog Rider more time to get to the tower.
- For defense, the Inferno Tower will protect you against tank units like the Giant or Golem. Groups of smaller units will quickly overtake the Inferno Tower, however. Zap and the Fire Spirit work well against these smaller units.
Cards
- Fire Spirit
- Zap
- Fireball
- Musketeer
- Hog Rider
- Inferno Tower
- Skeleton Army
- Goblin Barrel
Deck 8: Giant Witch
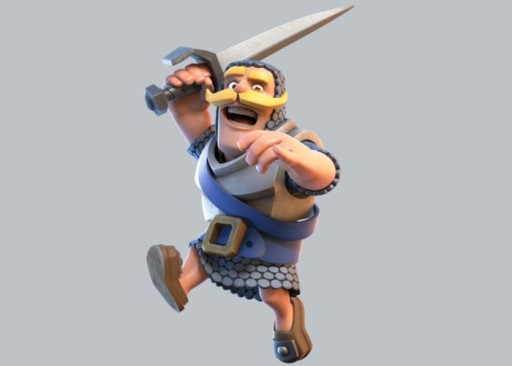
The Giant Witch combination is one of the original high cost attack strategies in Clash Royale. This can be a very powerful deck, but it takes patience and a good sense of timing to make work.
What’s Great about this Deck
- Use a classic attack combination.
- Good introduction deck for more strategy based playing.
- This deck is expensive, so it can reinforce the life skill of saving.
How the Giant Witch Deck is Played
- Use the Giant and the Witch together in an offensive attack. There are two common ways to organize this attack.
- The first is better for the beginning of the game (especially as an opening move if you have both cards in your hand). Both the Giant and the Witch cost 5 elixir, meaning that deploying them both at the same time will completely drain your elixir supply. For an aggressive push, save up and place both down at the same time at the bridge. This is a strong attack, and your opponent will have to scramble to defend.
- The second way in which you can use this combination is by placing your Giant at the back of the board. The time in which it takes the Giant to cross the bridge gives you time to build up more elixir. Once the Giant has crossed the bridge send in the Witch right after this. This option is better for when your opponent has grasped your strategy and is already expecting this combination attack. This allows you to send in more supporting units to completely overthrow your opponent’s forces.
- Always make sure that the enemy tower locks onto the Giant first before sending in the Witch. The Giant has higher HP so can withstand more damage.
- Use your Arrows and Fireball to defend against Minions, Goblins, or Skeleton Armies.
- You can use all of your cards on defense. The Canon is a dedicated defensive building and will pull away units from your tower. You can use the others as either defense or offense.
Cards
- Canon
- Minions
- Arrows
- Knight
- Fireball
- Musketeer
- Giant
- Witch
Deck 7: Lava Witch

Slow but steady wins the race.
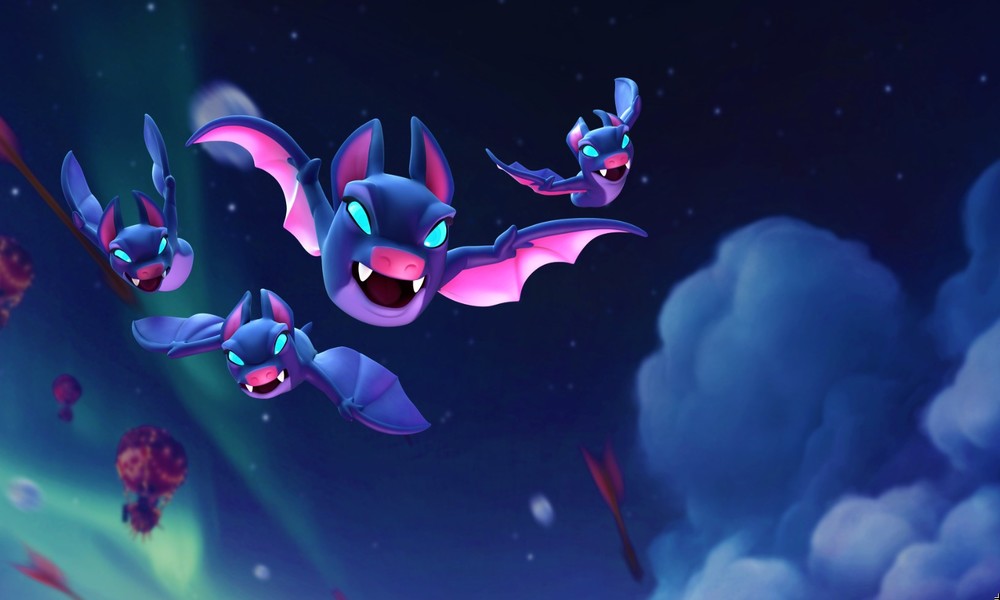
The Night Witch is one of the eight cards that you can unlock in Arena 5. She is a more moody version of the current Witch. Instead of summoning Skeletons to do her bidding, she summons Bats. The Night Witch, however, cannot attack air units like the Witch so she is at a disadvantage when going up against enemy troops like Baby Dragon or Minion Horde.
What’s Great about this Deck
- Uses the Night Witch that you unlock in Arena 5.
- Uses a lot of air units.
- Uses an aggressive offensive strategy.
How the Lava Witch Deck is Played
- The center of your offense will be the Lava Hound. The Lava Hound is expensive and slow moving, so you will want to deploy the Lava Hound at the back of your board.
- When the Lava Hound crosses into enemy territory, wait until the enemy tower locks onto it and then deploy the Night Witch as the primary supporting unit.
- Depending on how your opponent has chosen to defend against your attack, you will either add more pressure by deploying the Battle Ram or you will add more supporting units.
- Fireball, Mega Minion, and Minions are the supporting units for both offense and defense.
- Use the Tombstone for defense only. Put it down when you anticipate a surge will be coming your way. If it expires on its own, then it usually signals a waste of elixir because the Skeletons it spawns are so weak they never get to the enemy tower to do any damage. The Tombstone is used to slow down enemy units on defense only.
Cards
- Fireball
- Lava Hound
- Mega Minion
- Minions
- Night Witch
- Battle Ram
- Tombstone
- Zap
Deck 6: Battle Hog

Olly olly oxen free.
This is a very ambitious deck because it contains three of the eight new cards that can be unlocked in Arena 5. Play this right and you’ll pocket many wins.
What’s Great about this Deck
- Uses the Wizard, Bats, and Magic Archer that you unlock in Arena 5.
- You finally get to use the P.E.K.K.A.
- The Magic Archer can shoot through units to apply damage to the enemy units and whatever is behind it (more enemy units or even the enemy tower).
How the Battle Hog Deck is Played
- The Hog Rider and the Battle Ram are the center of your offensive strategy.. Both are units that target enemy buildings only. These units are also both quick, so when you put them down, place them as close to enemy territory as you can. This puts a lot of pressure on your opponent, giving them many opportunities to make a mistake.
- You can either put both the Hog Rider and the Battle Ram down on the same side, or you can put them on opposite sides (each targeting a different side tower). Putting them down on opposite sides will often make your opponent choose which tower to defend, leaving one open. Don’t stick with just one of these strategies. Mix it up during the match to keep your opponent on their toes.
- The Magic Archer and Poison make for great supporting units in the offensive push. Once your Battle Ram or Hog Rider makes it to the enemy tower, drop the Poison spell around it. This will deal damage to the enemy tower and defend your troops from enemy units. The Magic Archer is a great supporting unit because it can target both ground and air units. It also has the unique ability to shoot both enemy units and what is behind them.
- When defending your base, the P.E.K.K.A. is vital because enemy units have to get through them before they can get to your tower. It is especially good for defending against Hog Riders because it can usually take it out with one attack motion. Many people will want to use the P.E.K.K.A. as an offensive unit because it is so powerful. However, it is extremely hard to get the P.E.K.K.A. to the enemy tower and if your opponent defeats it before it gets to their tower it usually means a negative elixir trade for you. Using the P.E.K.K.A. for defense is a better strategy. Plus, if it survives it will advance offensively towards the enemy, so perhaps you can have the best of both worlds.
- You can use the rest of the units for defense or offense.
Cards
- P.E.K.K.A.
- Magic Archer
- Battle Ram
- Wizard
- Bats
- Spear Goblins
- Zap
- Poison
- Hog
Deck 5: Giant Miner

Watch your step.
In Clash Royale there are three Wizards: the Ice Wizard, Electro Wizard, and (fire) Wizard. The Wizard thinks he is pretty cool because he doesn’t have a preface to his name, making him think he is the original. However, he is the only one of the three that isn’t a Legendary, so it comes out in the wash.
What’s Great about this Deck
- Uses the Bats, Wizard, Poison, and Tornado cards that you unlock in Arena 5.
- Simple approach to offense and defense.
- Versatile cards.
How the Giant Miner Deck is Played
- The Miner and the Giant will be your go to offensive units.
- Depending on the situation, you can either deploy the Giant toward the back of the board or right at the bridge. Placing the Giant at the back of the board gives you more time to replenish your elixir, but it also gives your opponent more time to mount a defense. Placing the Giant at the bridge limits your remaining elixir, but it puts more pressure on your opponent. You will have to decide which is best. For example, if your opponent just used a lot of elixir, putting the Giant near the bridge would be the better choice because you know that your opponent will struggle to defend immediately.
- Wait until the enemy’s tower has locked onto the Giant before deploying the Miner. This allows the Miner to sneak in and do more damage to the tower.
- You can use the Poison spell to defend your Miner as it attacks the enemy tower.
- The Wizard and Tornado are an excellent combination that you can use on offense or defense. The Tornado will gather all the enemy units into one spot, and then the Wizard can attack them all at once with his splash damage.
- The other cards in the deck are supporting units that you can use for offense or defense.
Cards
- Bats
- Giant
- Wizard
- Barbarian Barrel
- Mega Minion
- Miner
- Poison
- Tornado
Deck 4: Baby Hound

How many licks does it take to get to the center of a tootsie pop?
Take advantage of Clash Royale’s air units with the Baby Hound deck. This deck has three powerful flying units. This is a perfect choice of deck for someone who is flexible and enjoys keeping their opponent on their toes. It combines a slow build up offense with the option to deploy a sneak attack. In addition, the defending units and spells are adaptable as you can use them for offensive support when you see fit.
What’s Great about this Deck
- Uses the Poison spell that you unlock in Arena 5.
- Run a fun and dynamic offense by mixing the lengthy offensive strategy using the Lava Hound or quick sneak attacks with the Miner and Mini P.E.K.K.A.. This leaves your opponent frazzled, never knowing if they need to save up elixir for the Lava Hound or deploy immediately for Mini P.E.K.K.A. and Miner combo.
- Occasionally you will come across an opponent who is ill equipped for air attacks and, having no way to defend, you will destroy their three towers with ease.
How the Baby Hound Deck is Played
- With this deck, your main offensive strategy revolves around the Lava Hound.
- The Lava Hound is expensive, taking seven elixir to deploy, so it is vital that when you have saved up the right amount of elixir, you start your Lava Hound back by your tower. This gives you enough time to build your elixir supply back up so you can drop your supporting units when the Lava Hound crosses into enemy territory.
- The fundamental supporting unit in the deck is the Baby Dragon. When the enemy tower archer locks onto the Lava Hound, that is when you want to deploy your Baby Dragon. The Lava Hound has a lot of HP, so it will easily survive to the tower. The Baby Dragon is there to defend the Lava Hound from enemy units.
- You can use the Mini P.E.K.K.A. and the Miner for defense and a sneak attack. If you notice that your opponent is low on elixir it is the perfect time to launch your Mini P.E.K.K.A. and Miner. The Mini P.E.K.K.A. is quick, and the Miner digs under the ground and pops up wherever you want, including right next to the enemy tower.
- You can use the two spells (Poison and Zap), the Mega Minion, and the Inferno Tower primarily for defense, but you can also use them (minus the Inferno Tower) for supporting offensive units when you see fit.
Cards
- Lava Hound
- Inferno Tower
- Baby Dragon
- Mini P.E.K.K.A.
- Miner
- Poison
- Zap
- Mega Minion
Deck 3: Poisoned Barrel of Miners
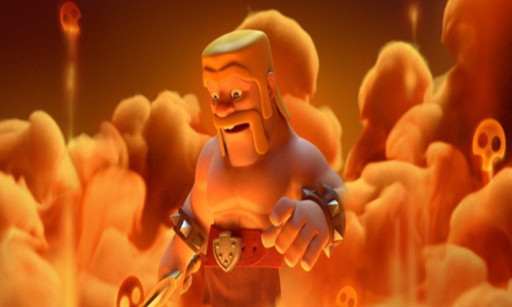
Death is creeping right around the corner.
This deck is made up of fairly inexpensive cards. When deploying these low-cost cards, your opponent is reluctant to spend their elixir to kill them, and they usually just let your units run their course. That line of thinking works if it is just once or twice, but if you are sending a constant stream of units that your opponent lets slide, those damage points add up.
What’s Great about this Deck
- Uses the Furnace, Bats, and Poison that you unlock in Arena 5.
- All the cards in this deck are low cost. This makes it easy to spam your opponent, giving you plenty of opportunities to overwhelm them.
- This deck has units that are effective against ground and air units.
How the Poisoned Barrel of Miners Deck is Played
- The Miner, Goblin Barrel, and Poison spell are the center of your offensive strategy. The added up cost of their elixir equals 10, which is the max amount of elixir you can hold at a time. Ideally, you will want to save up until you max out your elixir and then deploy all three cards at the same time.
- This deck allows you to split up your offense if you want to. For example, you can deploy the Miner and the Goblin Barrel at the same time, but instead of sending them to the same tower you can send them each to a separate side tower. This will force your opponent to choose which tower to defend, spreading them thin.
- The Furnace further lets you split up your offense. You can place the Furnace on the side that you are not actively attacking. The Fire Spirits that the Furnace spawn are not significant enough to defend against on their own, so your opponent will most likely just let them hit the tower. Over time, this can add up.
- Spear Goblins and Bats can aid the offensive team or stick back to help defend your home base.
- The Barbarian Barrel and Fireball are used primarily for defense, but if the opportunity presents itself, send them on over to the other side.
Cards
- Spear Goblins
- Miner
- Goblin Barrel
- Furnace
- Fireball
- Bats
- Barbarian Barrel
- Poison
Deck 2: Golem and Co.

It's a winter wonderland.
The Golem is an intimidating card. It is intimidating to defend against, and it can be intimidating to put in your deck. When you use Golem correctly, you can use that intimidation factor to your advantage.
What’s Great about this Deck
- Uses the Furnace, Bats, and Wizard that you unlock in Arena 5.
- Effective offensive and defensive options.
- Versatile cards.
How the Golem and Co. Deck is Played
- Golem is the center of your offensive strategy.
- Golem is an expensive unit, so you will have to save up. You will also need to deploy Golem at the back of the board so you can build up more elixir as it approaches the bridge.
- Golem pairs with the Miner and Goblin Barrel on offense. Both the Goblin Barrel and the Miner can be sent straight to your opponent’s tower. Let the enemy tower lock onto Golem and then send in the Miner and the Goblin Barrel. The two of these cards will do a great deal of damage while your opponent is distracted with Golem.
- The Furnace complements Golem as well because it provides a constant stream of Fire Spirits that defend Golem against smaller air and ground units (e.g.: Minion Horde or Skeleton Army).
- Like the previous deck, you have the option to attack both side towers at the same time.
- All the other units are supportive units that can be used on defense and offense.
Cards
- Golem
- Baby Dragon
- Miner
- Bats
- Goblin Barrel
- Wizard
- Furnace
- Zap
Deck 1: Golnado
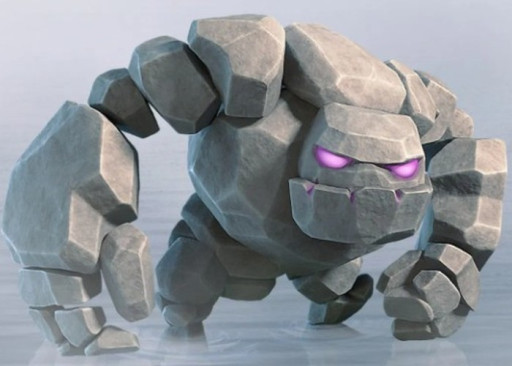
Heard of Sharknado? Now get ready for Golnado.
This deck weaponizes the forces of nature. By controlling Tornado season and bringing stone to life, your opponent will not know what hit them.
What’s Great about this Deck
- Uses the Tornado you unlock in Arena 5.
- Uses the Golem unit for a strong offensive push.
- This deck uses the Tornado/Baby Dragon combination. This is very effective for getting rid of enemy units on either offensive pushes or defensive stands.
- You can utilize all the cards for offense and defense, giving you flexibility in your gameplay.
How the Golnado Deck is Played
- Golem is the center of your offense.
- Golem is expensive, so you need to deploy him at the back of the field, near your tower. This gives you enough time to build up more elixir so you can deploy supporting units by the time Golem has crossed into enemy territory.
- The Baby Dragon and Tornado spell make an impressive combination. You can use the Tornado spell to gather all enemy units together. The Tornado allows the Baby Dragon to use its splash damage to rain down fire on all enemy units at once.
- Barbarian Barrel is like The Log; it can crush lower HP units on defense or offense. It also slows down attacking units.
- Over 2/3rds of your cards can damage air units. Use this to your advantage in defense.
Cards
- Tornado
- Baby Dragon
- Mega Minion
- Archers
- Golem
- Zap
- Spear Goblins
- Barbarian Barrel
You May Also Be Interested In:
- [Top 10] Clash Royale Best Arena 12 Decks
- [Top 10] Clash Royale Best Arena 8 Decks
- [Top 10] Clash Royale Best Arena 6 Decks
- [Top 10] Clash Royale Best Arena 5 Decks
- [Top 10] Clash Royale Best Arena 4 Decks
- Top 7 Clash Royale Best Legendary
- Top 10 Clash Royale Best Arena 7 Decks
- Top 10 Clash Royale Best Decks
- Top 15 Clash Royale Best Cards
- Clash Royale Best Way To Spend Gems

