This writer has self inserted.
Welcome to the unforgiving world of Kenshi. A harsh, unfair world that hates you and wants you dead. The perfect place for this masochistic writer to get their game on and show you the ropes.
In this guide, I’m hoping to give you the best way to get yourself started so that you don’t rage quit at the first group of hungry bandits that beat you within an inch of your life, rob you of your food and leave you for dead.
While there are many ways of starting and going about Kenshi, this is more or less an agreed upon method as well as the main start that the game recommends as the way to be played. There is no right or wrong way to do this so I’m going to leave it as open ended so you can make your own way in Kenshi. So without further ado, I shall insert myself to the surface of the broken moon.
1. Setting up your game
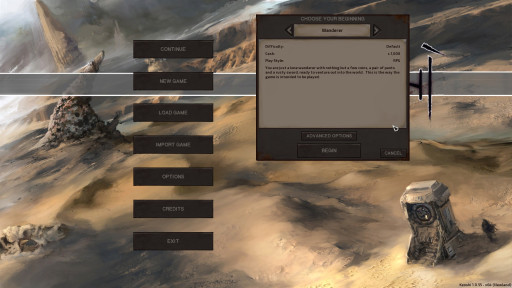
The game screen when you first boot up Kenshi
As you can see, when you first select “New Game” you are greeted with the “Wanderer” start. This is the way that Kenshi is intended to be played. There are others but if this is your first time, pick this one.
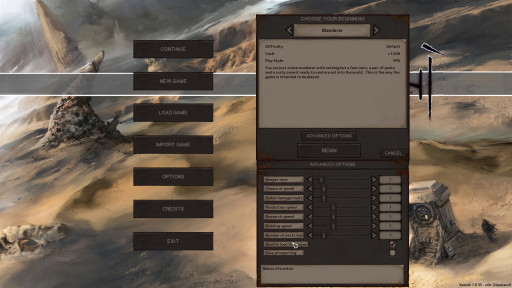
Kenshi’s advanced settings
You can play around with the advanced settings that alter the time it takes to perform certain tasks, the damage taken, the chance of death in a character, hostile fuana nests, prospecting which I’ll explain soon and of course, whether or not life is fair.
Bandits will loot your characters on the default setting which is precisely what would happen if starving bandits beat and robbed you. I’d recommend you keep it on unless you really need some stablisers for your first time.
2. Character Creation
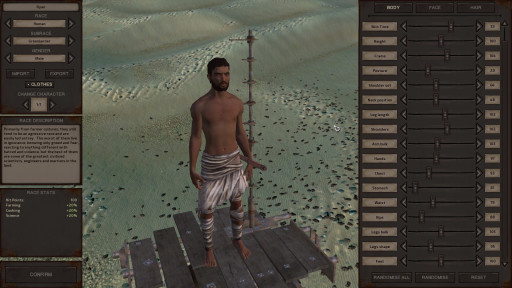
Here you can build whatever character you want. You can pick from several different races that also have their own subraces within them. Each of them come with different stat boosters depending on what race and subrace they are. They even eat more or less food with Shek eating the most and Hivers eating the least.
Greenlanders, for example, have a boost to farming, cooking, and science. They also have a base of 100 hitpoints. There is a lovely race description that gives you a little bit of insight into the lore of Kenshi.
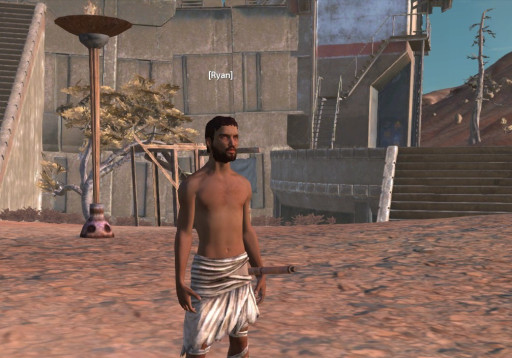
So after making a character that somewhat resembles my good self, it was time to self insert in my skinny, fragile frame. To be molded by the harsh lands of Kenshi.
3. Welcome to The Hub
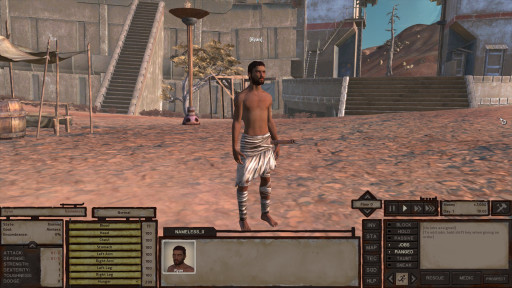
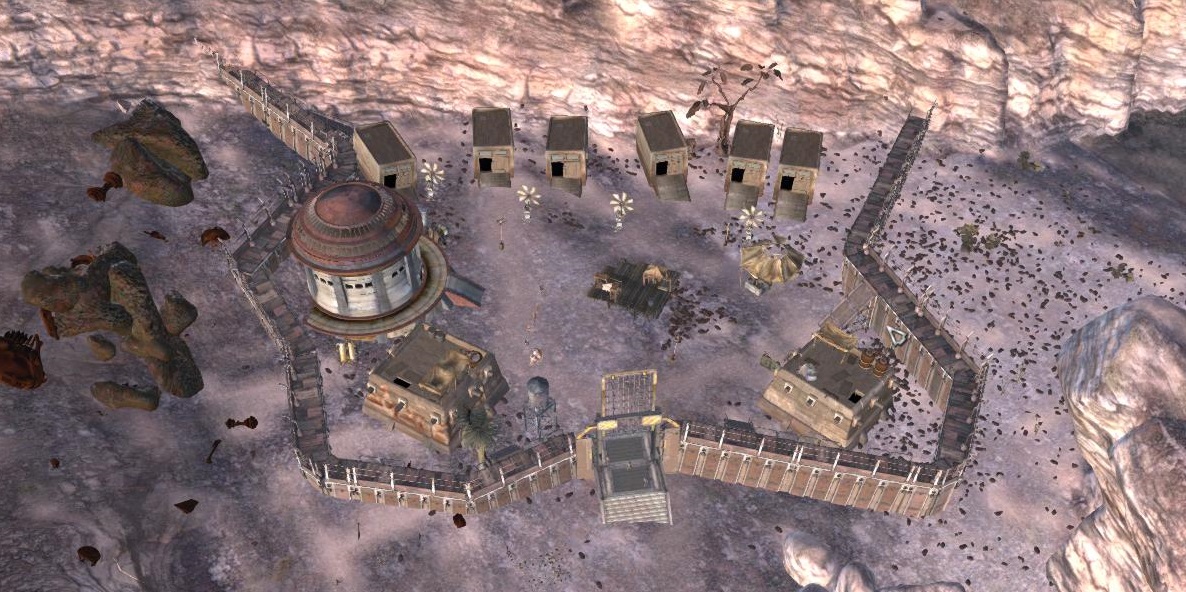
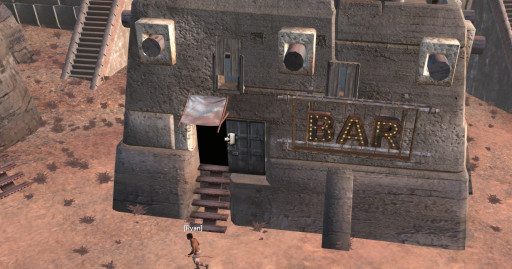
Welcome to The Hub, Me. And of course, you dear reader as we begin our adventure together. The Hub is the rough and tumble town of Holy Nation Outlaws and there’s really bugger all else to it.
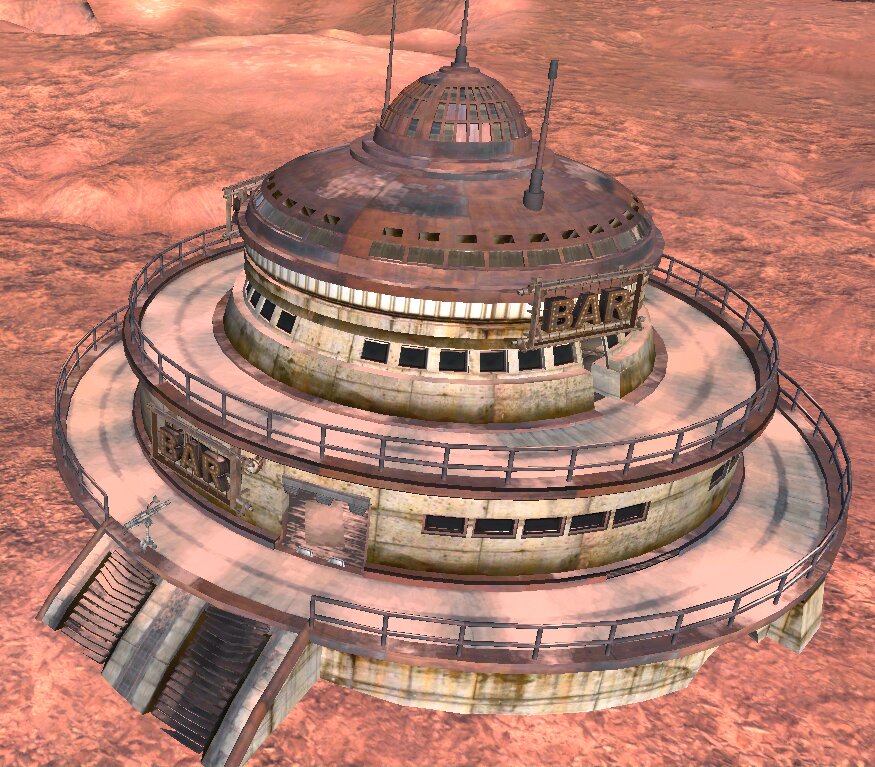
Broken buildings and not very much else. Still, it’s safe and guarded and I have 1,000 Cats (Catans) to my name so I’m doing relatively ok. First things first, though. I gotta head to the bar.
Moving around is as simple as right clicking where you want your selected character to go. You can move the camera around them with the W,A,S,D keys. Rotate it with Q and E or by holding your mouse wheel down and moving the mouse accordingly. Zooming in by simply scrolling the mouse wheel.
You also don’t need to follow your character. They will move where you want them to go and the camera can be moved around them. If you double click their icon in the middle of the UI or double tap the number key that corresponds to their place in the party, in Ryan’s case, number 1, the camera will jump to them and follow them wherever they move unless you move the camera again.
4. The UI
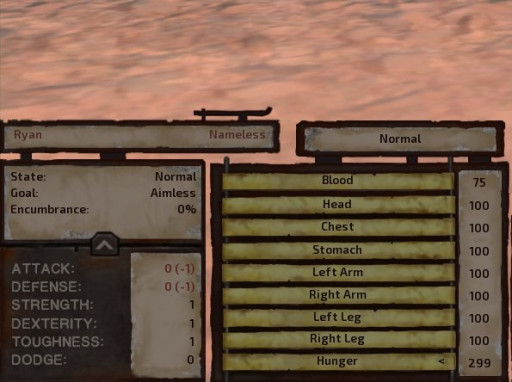
The UI in the left corner
The UI contains a lot of information and can seem a little daunting but don’t worry, we’re going to make sense of it.
Here you can see the UI in the bottom left corner of the screen. It contains information about the character that you have selected. It has their name and the faction they belong to, top right. A new start will always have a “Nameless” faction.
You can see their state, goal (what they’re doing or attempting to do) and how encumbered they are. Their stats in the bottom right affect the characters' combat. Attack and Defense can be negatively or positvely affected depending on things like equipped armour and weapons, injuries and even the environment.
To the right of all that is the stats of your character's individual limbs and body parts. Damage sustained to them will affect the character in different ways. Such as having an arm crippled means that the character will be unable to use that arm. It will dangle to one side like a cheap string of sausages.. With a leg injured, the character will limp. With a leg zeroed, your character will crawl along the floor, dragging it through the dirt.
Be warned, you can lose limbs. Once they’re gone, they’re gone for good. You can’t grow them back. However, the good news is you can replace them with robotic prosthetics if you can get your hands, or the hand you have left on them.
Body parts will take damage and bleed. If your character bleeds too much, they can pass out and die. Injuries can heal but they will require medical attention. Resting in a bed will also heal your character much faster than if they are walking around doing stuff.
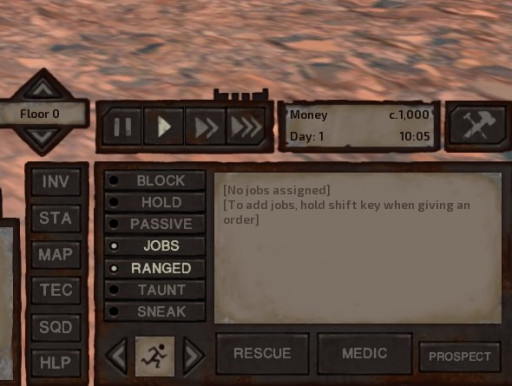
The UI on the bottom right.
In the bottom right of the screen, you’ll see this UI. It lists information such as the time of day, the day you’re on. The speed of the game can be adjusted by clicking the buttons next to the clock and money counter or by pressing F2 (normal speed) through to F4 (the fastest speed the game will run at). You can pause the game entirely by pressing the spacebar.
You’ll also find the current jobs that the selected character has assigned to them. There are also toggles to make the character passive, sneak, taunt enemies, hold position, use ranged weapons, block melee only, and toggle their jobs on and off. The running stick figure is the character's run speed. Currently selected at the fastest run speed, Ryan here is going to sprint everywhere I tell him to go.
On the left side are information pages such as the character’s stats that can also be accessed by pressing C. The map that can also be accessed by pressing M. Their inventory that can be accessed by pressing I. The research screen, T for its shortcut. And finally, the help screen which can be accessed by pressing F1.
Don’t knock the help screen. It’s incredibly useful and detailed. It can help out in a pinch and save you googling things or checking the wiki.
Also present are the “Rescue”, “Medic”, and “Prospect” buttons which I’ll get onto in a bit. The top right button with the crossed tools is the build menu which can be accessed by pressing B.
However, poor Ryan here has barely much to his name and he won’t be building anything anytime soon. He’s got bigger things on his mind. Much more important things. Such as his grumbling stomach.
5. Hunger
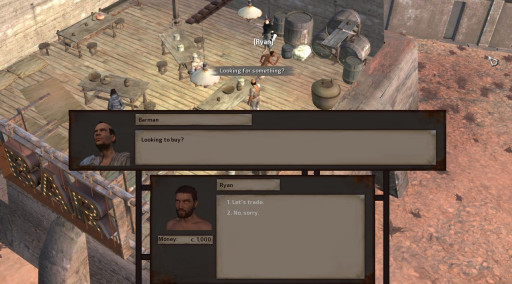
I’m not going to the bar for a drink. Instead, I need to buy myself some food. Your character will get hungry as time passes. This is slowed down significantly if your character is resting in a bed but they still need food.
Somewhat strangely, you don’t need your character to carry any water. Thirst is not a thing in Kenshi.
Buy yourself some dried meat as it is the cheapest and the best bang for your buck, or Cats. You don’t need to worry about manually eating it. As long as your character has food in their inventory, they will automatically eat it themselves when they get hungry enough.
Unfortunately, the bar at The Hub didn’t have any dried meat in stock. So having nothing left for me, I decided to leave town and head for a place with better prospects.
6. Venturing out
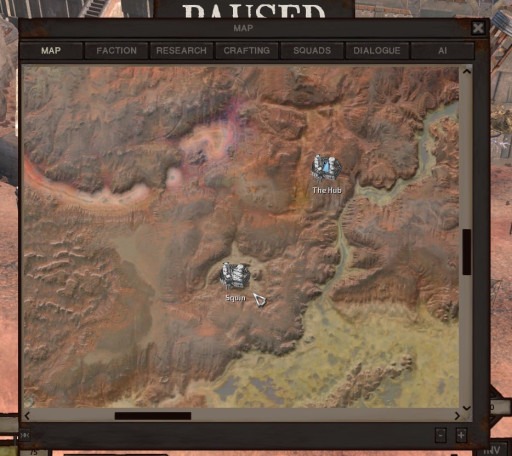
When you start as a wanderer, you have two locations known to you on your map.
Knowing only one other city is this world, Ryan has decided to go to the Shek city of Squin. For he knows that regardless of what the Shek may think of his smooth, flat skin, they will have bars with stocks of food and safe walls guarded by Shek warriors. A perfect place to begin his adventure.
By opening the map with M, you can give your selected characters a long range move order by right clicking anywhere on the map. No matter how long it takes them to get there, they will set off towards it immediately.
Squin is the only other city that comes known on the map to your character. A good thing to note is that places within Kenshi are permanent no matter what playthrough you are on. So if this isn’t your first playthough and you know where the other places are, they won’t have moved.
Don’t worry, your knowledge of the vast lands will improve the more you explore. The only exception to this is places like creature nests and bandit camps as they will appear randomly throughout the game world.
Remember, the world beyond the walls of a safe settlement is dangerous. You will need to be as prepared as possible. This early in the game, your best option is to avoid confrontation and run to safety if you are threatened. Thankfully, Squin is not that far from The Hub.
7. Sneaking and remaining undetected
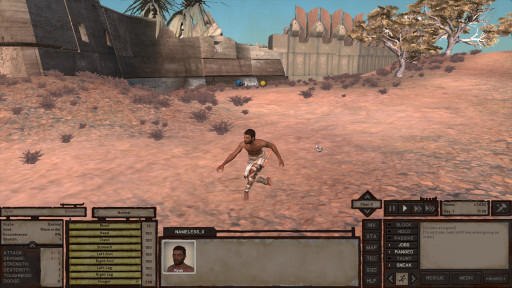
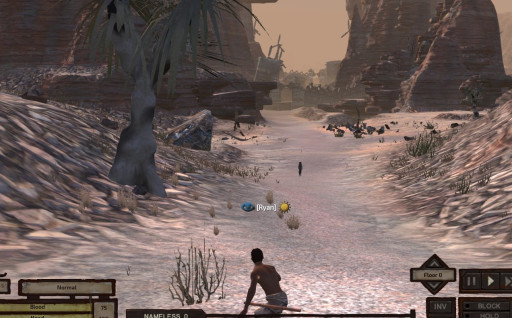
As you can see here, Ryan has the sneak button toggled (Bottom right UI) and has adopted a low, crouched position. Either side of his name, you can see a blue eye to the left and a sun icon to the right. These show whether your character is being observed and the amount of light they are in.
Naturally, you are better hidden at night and in the dark. The eye will change colour depending on whether or not the character is being detected or observed. It will turn yellow if you are about to be spotted and red if you are seen. Small arrows will also point towards whatever person or creature is looking at your or about to look at you. So you know where any threats may be coming from.
Sneaking, even though at this point in the game you won’t be good at it, is the best way to go about travelling at this early point in the game. Firstly, it will reduce your chances of being spotted by threats and secondly, it will let you know if you have been spotted and where those threats may be coming from. Third and final, as I intend on improving Ryan’s stealth abilities for this playthrough, the more you sneak, the better you get at it.
8. Assigning Jobs
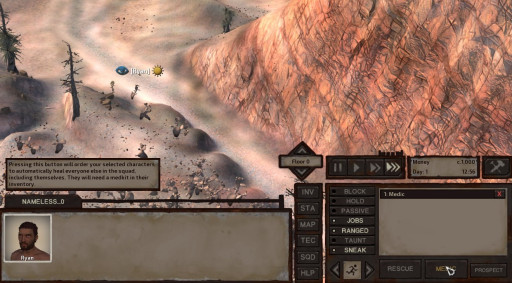
Assigning any job to your characters in Kenshi is pretty simple. When you have the character selected, hold shift and right click on any job that you want them to do automatically. This will queue it in their job queue.
Whether it's operating a machine or hauling items to crates. Building or researching. If you want a character to do it as a one off type job, you can simply right click on the machine you want them to operate or resource you want them to gather. If you want them to do this automatically without your input, you will need to hold shift and right click to add it to the queue.
Jobs are completed in descending order. That means that wherever they are on the list determines their priority. The highest priority will always be first, listed as number 1 on the characters job list. Hence here, Ryan has the medic job listed first. He will automatically heal himself and others in the party. Provided he isn’t fighting or running for his life.
If your character has a lot of jobs in the queue and you want to take them away from their menial labour for whatever reason, you can click on the “Jobs'' button to toggle them off. Then you can move and assign them at your whim.
Jobs like Medic and Rescue will never toggle off. Even with the Jobs button toggled off, characters will always prioritise giving medical attention to themselves and others in the party as long as they have the job listed. It's always good to give every character the medic job and keep them supplied with a medkit. If they're the last one standing, they can treat themselves and others after the fighting is done.
9. Stats, Skills, And Improving Them
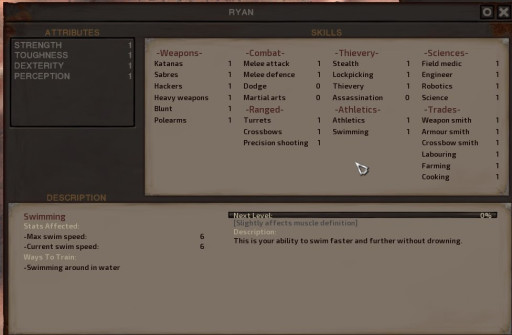
Rather unfairly, my self insert character is hopelessly under equipped to survive and do anything useful. Something I like to believe isn't true but hey ho. Life isn’t fair.
When you start, your character is quite literally a blank slate. They are hopelessly useless and will not survive long without improving their skills. Thankfully, improving stats and skills in Kenshi is the same as improving anything in real life. By simply doing the thing, you will get better at it.
If that doesn’t make too much sense to you, don’t worry. You can also just mouse over and skill and it will tell you how best to improve it. Who’d’ve thunk it that swimming around in water would make you a better swimmer?
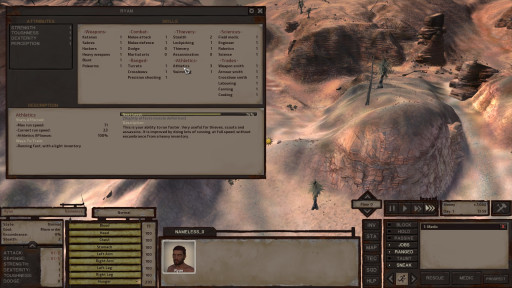
Que some Eye of the Tiger
From Ryan’s very brief excursion on his journey to Squin, his athletic skills are already shooting up along with his sneaking skill. Pretty soon he’ll be a stealthy ninja. As fast as he will be deadly. But that is a long way off. First, he needs to make it to Squin alive.
10. Getting Supplied
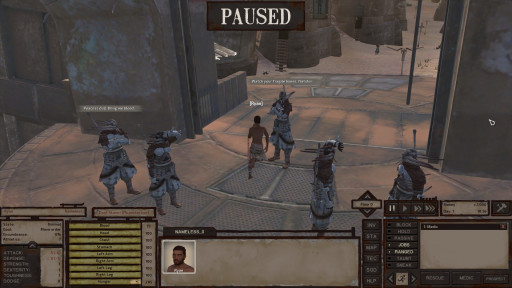
Having made it to Squin unmolested by the denizens of the Border Zone, Ryan needs some supplies to continue on his quest. Fortunately, Squin is a very safe and well stocked town. There are two bars. Both of them are bunk houses where you can rent a bed. A general store, adventure store and a store each for armour and weapons.
With only 1,000 Cats to your name, or less if you managed to pick up some dried meat at The Hub, you’ll need some basic supplies before doing anything else. Thankfully, there is plenty here.
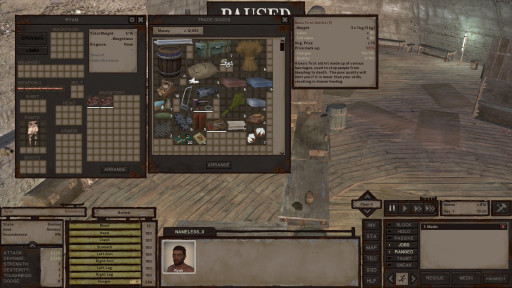
With two pieces of dried meat for eating, the next important thing that Ryan needs is something to bandage his wounds with. Just in case. You should always aim to have every character in your party supplied with one medkit in their inventory. That way, they can treat their own wounds and the wounds of other party members.
For now, food and a medkit should be all you need. You’ll already have a weapon although it won’t really do you a lot of good. It might make you feel a little safer but trust me, you aren’t gonna be vanquishing your foes just yet.
Now that Ryan is supplied, he’s ready for the hard work to begin. Kenshi is a brutal and unforgiving world after all and in order to get anywhere in this life, Ryan is going to need to brave the wastes once more in search of a steady income if he wants to continue keeping himself fed and watered.
11. Making Money
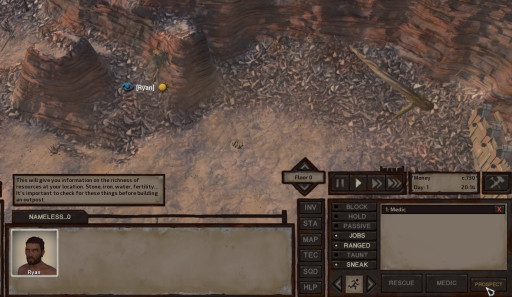
Yes, even in the post-apocalyptic ruins of Kenshi, the harsh wheels of capitalism still reign supreme. To survive this world, Ryan will need more than his wits. He needs some cold, hard Cats.
Thankfully, making money in Kenshi is pretty easy. At least for you the player. For your characters and poor Ryan here, it is going to be hard, back breaking labour. Close to the gates of Squin lies a big resource node of raw copper. A valuable ore that can be sold for quick cash. All you have to do is find it and dig it out of the ground. This is where prospecting comes in.
12. Prospecting
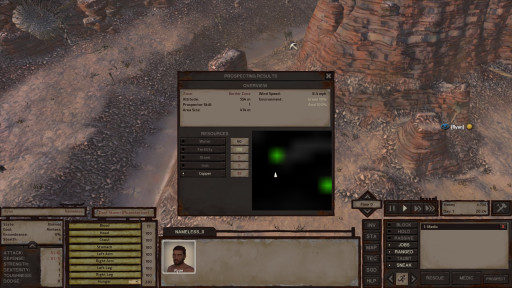
Prospecting is invaluable to you when looking for resources. It comes into play a lot more when you come to build your own base. As you can see from the window above, it tells you where water can be found, the fertility of the ground for growing crops. Where there is good stone for building materials. And right now, for Ryan’s purposes, where ore deposits are.
The little arrow on the mini map isn’t the selected character. It’s actually the camera and where it is looking. You can manipulate the camera to find the resource node. If you want to move the prospecting window to one side so that you can see better, you can drag and click it from the top bar.
While some resource nodes will spawn randomly with each different playthrough that you start, this copper node is actually here no matter what playthrough, so go ahead and use this one as a free tip. It’ll be there just outside of the south gate of Squin.
13. Gathering Resources
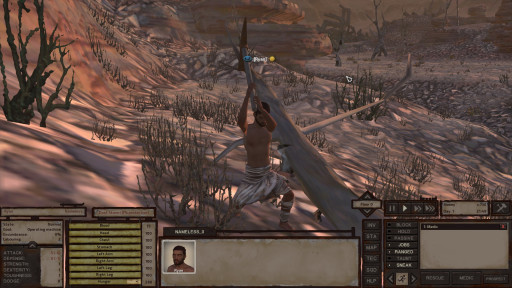
Having found the copper resource, getting to work is as simple at right clicking when your mouse cursor turns into a pickaxe icon. From there, your character will begin the laborious, back breaking task of digging raw copper from the resource node. Hard work for them, for you, you can simply press F4 and watch them work away at super speeds.
I’ve also got Ryan in sneak mode. I want him to keep improving his sneaking skill and I also want him to stay undetected so that he can spot any potential threats before they spot him. As he is still vulnerable, weak, and with no friends to care for him, I need him to be able to sprint back to the safety of Squin if he needs to.
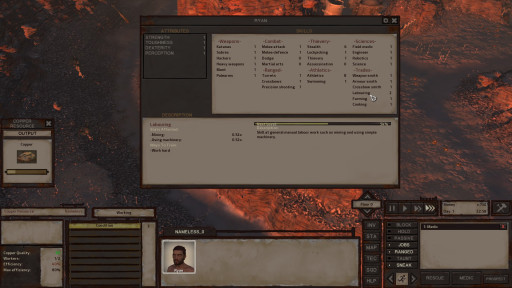
Looking at the stats in the picture above, the labouring skill is already improving as Ryan breaks his back to chip away at the copper. The higher the skill gets, the faster he can gather resources.
Also note the copper resource window on the left. That can be accessed by left clicking on the node itself. This will show all the copper that has been produced through mining and it will be stored there until it is full.
14. Getting Buff
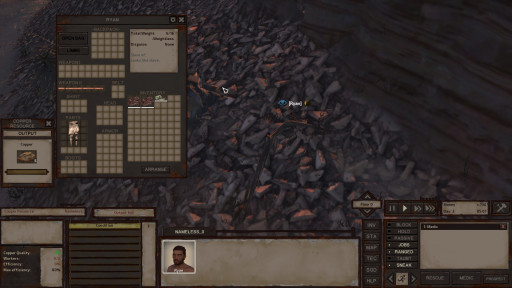
Having worked his butt off right through the night, Ryan now has 5 big lumps of copper ore to sell. Pressing "I" to bring up the inventory, you can get all of the pieces in by left clicking them one at a time or right clicking to get them all.
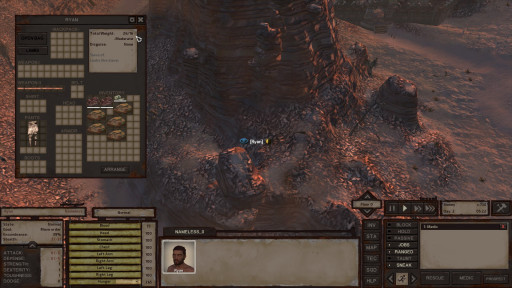
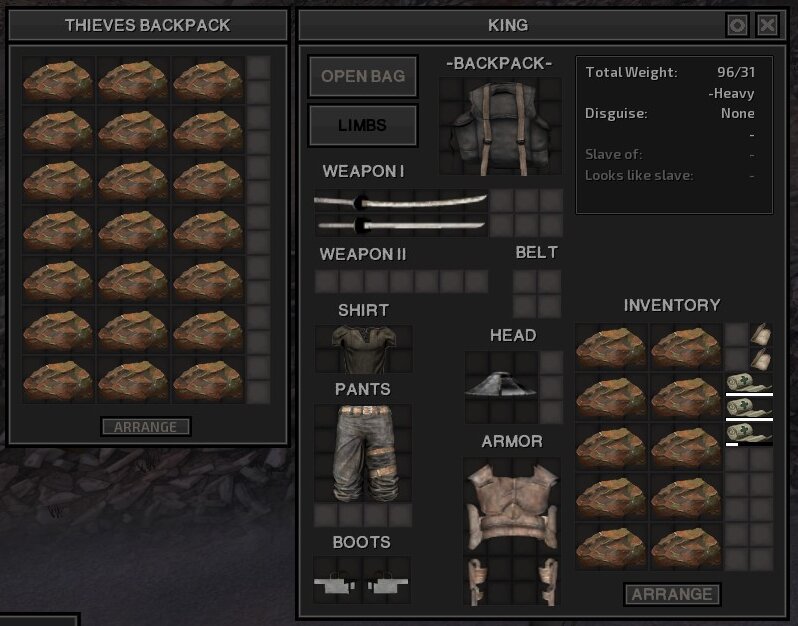
Once you have your copper in your inventory, you’ll notice that they won’t stack. To stack items, you need to have a special traders backpack which can be bought at a travel shop but for now, it’s good to carry these big lumps of copper in your regular inventory.
If you have a look where the mouse cursor is, it shows that the total carried weight is 26/16. This means that the character is 10kg over their maximum carry weight. They can still move around just fine though and this is in fact a good thing.
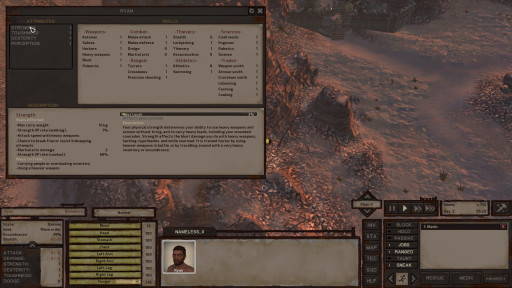
While the athletics skill will improve slower due to being overweight, the strength stat will increase more. Which is awesome because Ryan needs to get buff. Carrying a lot of heavy things around and moving with them is a good way to do that.
You can also improve strength by lugging around dead or unconscious characters or using heavy weapons. As long as you’re over encumbered and moving around. Strength will keep going up.
15. Getting Paid
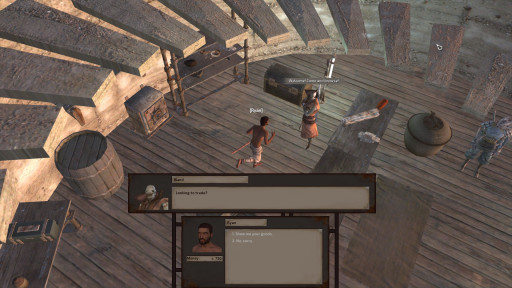
Having lugged that copper all the way back to town, it's time to make a profit from a night's hard work. Just about any shop will buy the copper off of you but be warned, some shops will have more money than others available to actually buy your goods.
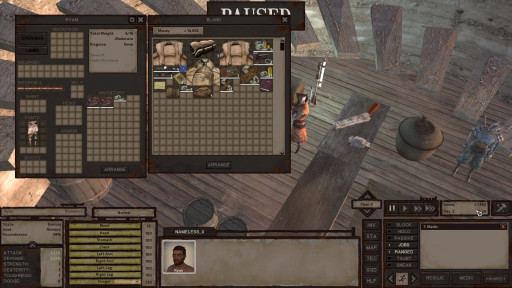
Coming away with 1,590 Cats, Ryan has made enough money to earn himself a nice trip to the bar. With a steady income, he can now buy all the food he needs and if he ever wants to make more money, he can just mine it out of the ground.
16. Recruiting Companions
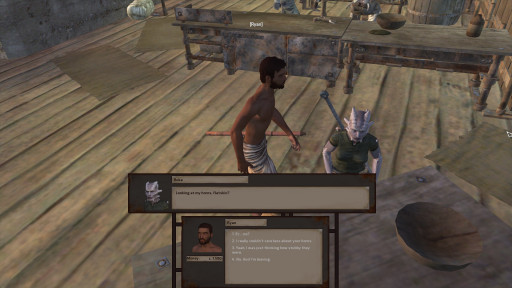
Ruka, a dishonoured, dehorned Shek warrior.
Upon returning to the bar, Ryan happened upon Ruka, a dehorned Shek warrior. Defeated in battle and down on her luck. Lucky for Ryan, she agreed to join in his adventures for free. Thus Ryan is no longer alone in this blighted world.
Recruiting companions is as simple as approaching characters that have speech bubbles over their heads. Right clicking on them, your selected character will approach them and begin a conversation. Not every character is recruitable and nearly all of them will require that you pay them a fee. The better they are, the higher that fee will be.
Eventually, as you go on, you can have multiple squads with plenty of different characters all over the world. You can raise your own faction with legions of followers. Or you can simply wander the waste alone or in a small group. There is no right or wrong way to play the game.
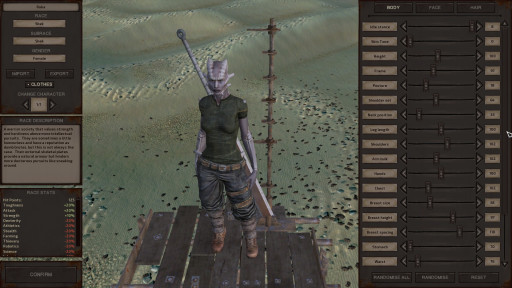
Ruka, the Shek warrior
Once a new character has been recruited, you are given the chance to mould them with the character creator. You can’t change their race, gender or stats but you can mess around with how they look if you want to.
17. Moving As A Party
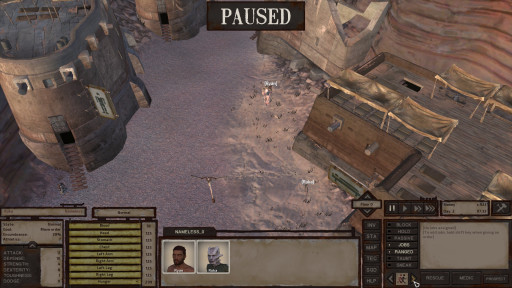
Characters will move at their own pace unless told otherwise.
When you have more than one member in your party, you can select them individually by clicking on their icons or pressing the number key corresponding to their position in the squad. In the above case. Ryan is 1 and Ruka is 2.
To select them all, you can hold shift and click their icons. Hold shift and press their number keys to select which individuals you want to select. Hold the left mouse button and drag a selection square over the characters you want selected or finally, by pressing the Tilde key. That’s the key to the left of the 1 key and right underneath the ESC key.
With them all selected, you can right click anywhere in the game world or on the map to give them a move order. At first, they will move at their own individual speeds. This is fine in a safe setting like Squin but if you want them to move as a group at the pace of the slowest character, press the arrow button next to the running stick man when you have all characters selected.
When you see two stick men in the icon. One red, one black, all characters will move together as a group.
18. Fighting And Getting Better At It.
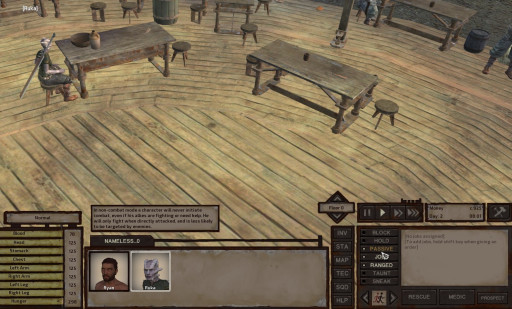
Ruka chilling at the bar being set to passive
Now with a friend to care for him in times of trouble, it’s time to venture out once more. This time, to learn the way of the warrior. By giving and receiving beatings.
As I mentioned before, Kenshi is a game where you improve by doing. You are never going to get better at fighting if you don’t get into fights. This is why it’s always best to have at least one character who is somewhere safe close by so that if the worst should happen they can come to your aid and the game won’t end with you bleeding out alone. Or worse, getting eaten by cannibals.
Make sure you leave your backup character on passive mode. You don’t want them to come running into the middle of a fight and getting beaten down themselves as well with no one to rescue the two of them.
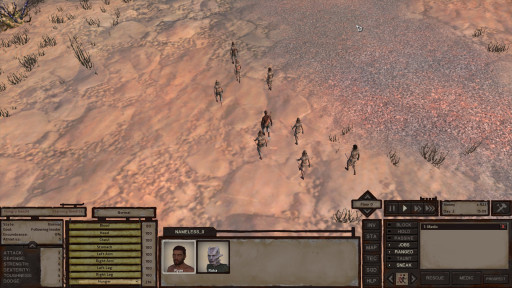
Hungry bandits are rife within the Border Zone
While he was out mining copper and earning his place in this world through hard work, Ryan noticed a group of hungry bandits. Men and women who would rather harass and rob. Stealing the fruits of others' labour. He knew he could not let them pass unpunished.
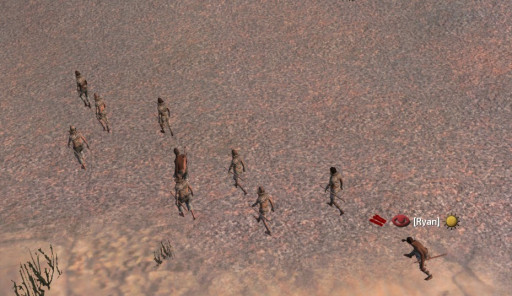
Bandits aren’t taken too kindly in places like Squin
Ryan stealthily approached the bandit at the back of the pack. Hoping to catch them unawares. Alas it did not go as planned for Ryan sucks at sneaking still.
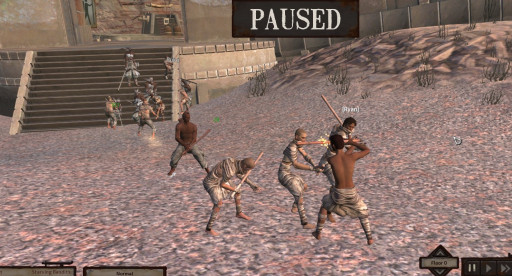
Any character that is currently in combat will have red bars behind their profile in the squad panel.
Fortunately, Ryan was not left to face the bandits alone. As the nearby gate guards of Squin noticed the commotion and came running to put those no good thieves down.
This is the best way to build up your character's combat skills as well as their toughness. With guards nearby that can even out the fight as well as having the safety net of a backup character that can rescue them when things go south.
19. Toughness
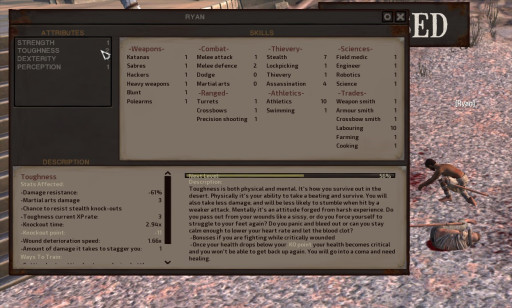
After that first scrap, Ryan is feeling a little worse for wear but still on his feet.
Toughness is a stat in Kenshi that determines, well, how tough your character is. The higher it is, the less likely your character will be knocked out and the better chance they will have of actually getting back up.
Getting knocked down and getting back up again is gonna be key to keeping your character alive. Especially if you want to make them into an unstoppable force of nature further in your play through.
Getting yourself into fights, getting beaten down and still coming back for more is the best way to improve this stat and it's definitely one that you want to improve. You don’t need to put yourself into deadly situations but picking fights with squads of bandits in the early game that will rob you and leave you is a good way to start. You can always come back for revenge later.
20. Looting And Making More Money
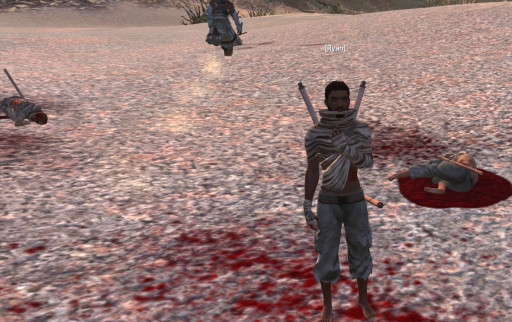
Life’s not fair
While the guards of Squin will arrest most of the bandits that dare to try and cause a ruckus in front of their city, if you’re quick, you can loot them of what little they have and sell it on for more money. This is great if you’re getting sick of mining copper and hell, they’d do the same to you if it was you bleeding out on the floor.
Their clothes will take up a lot of inventory space and won't sell for much. Their weapons, while still pretty cheap, will sell for more and you can carry more of them.
Simply hover your mouse over a downed bandit until you see a spyglass icon. Right click and your character will move to them. Your character’s inventory as well as the inventory of the downed NPC will appear. Take everything you can of value and sell it in town. Rinse and repeat as much as you like.
Be warned! The Shek won't give a crap if you loot bandits but in other parts of the world, looting dead or unconscious characters is considered a crime. Depending on who you are looting.
If you need more inventory space, you can click the arrange button and the items in your inventory will organise themselves a bit better to make more room. Or you can buy a backpack with the profits from your looting.
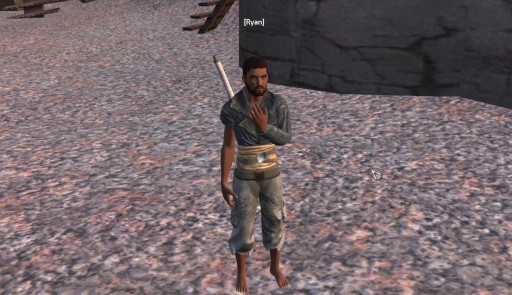
You go, Ryan. Looking a lot more dapper.
21. Building Things
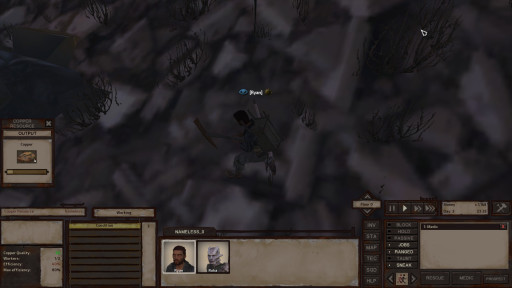
Low light affects the efficiency of working.
Now that Ryan has managed to splash a bit of cash on some better gear and a nice big traders backpack that can carry all of the copper that he wants to mine, he’s getting pretty sick of nearly smashing his toes to pieces with that pickaxe. Working in the dark has its hazards.
So what is there to do? Well, you can build a very simple torch post that will light up the working area so that he can work day and night without skipping a beat. Slaving away without sleep to keep up that grindset.
By pressing the build button on the top right corner of the right UI, or by simply pressing B, the game will pause and it will bring up the build menu. In Kenshi, you can build almost anywhere provided that the terrain allows for it and that it isn’t too close to another faction's settlement.
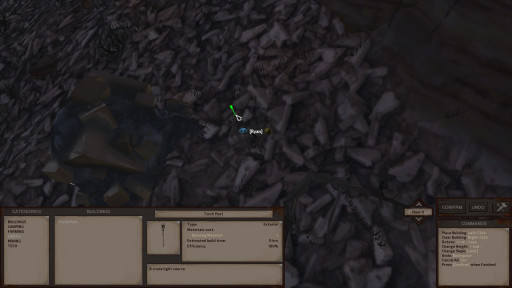
The build menu has all of the buildable structures available to you on the left. In categories and then individual items. More can be unlocked by buying blueprints or by research.
In the build menu, you’ll find all the items that are unlocked to you. When you select an item, it will tell you if it needs to be built inside or outside. How much materials it will cost. How long it will take to build. How efficient it is at its job and lastly, a little bit of info on it.
Once you have found the item that you want to build, in this case it’s the torch post under lights, you can place it down anywhere where the silhouette is green. If it's red, the terrain won’t allow for it to be placed there. If it’s blue, it would be able to be placed if it wasn’t too close to another faction’s settlement.
You can place multiple things down to be built. When you’re happy with where you want everything to be placed, click the confirm button and the game will resume. If characters have the Engineer job queued, they will automatically add materials to the blueprint and start to build it if they have the necessary materials on them. If they don’t and there are stored materials, they will go and get them to build the structure.
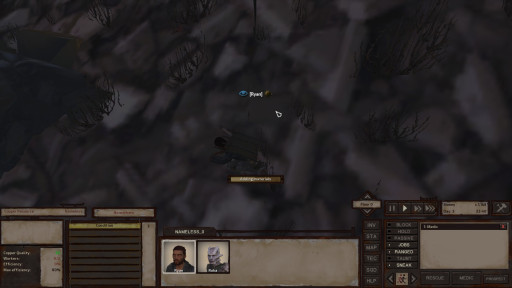
In true Blue Peter fasion, Ryan came prepared with some building materials in his shiney new trade bag
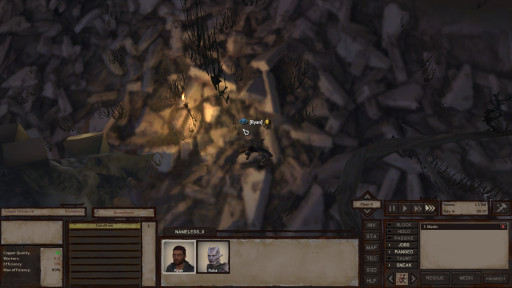
Let there be light!
22. A Place To Call Home
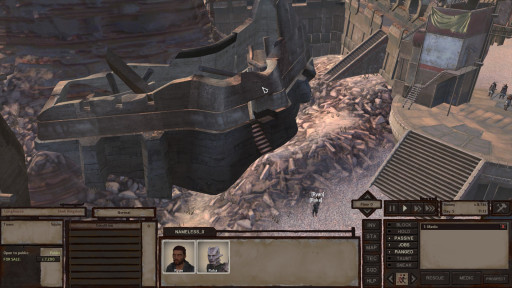
A real fixer upper
After filling up his bag with copper, Ryan can now realise his dream. A dream that the real Ryan has long since given up on. The dream of property ownership. Yes, in Kenshi you can own your own piece of real estate within most cities.
Squin has two of these broken long houses for sale. For 7,200 Cats, you can buy one or even both of them if you want. Once they’re yours, they’re yours for good unless a huge world event happens and the settlement is taken over by another faction.
The benefits of having a property within a city limits are of course safety, a place to store your stuff and characters that you don’t intend on bringing with you. Lastly, you don’t need to build your own power generation. The building will be hooked to the city's grid as well as any work stations and lights inside of it.
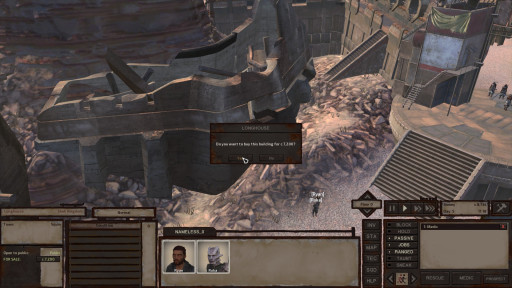
They say it’s always a good investment.
After clicking the broken building a “For Sale” button in the bottom right will be visible. Clicking it will give you a prompt to ask if you want to buy it. Clicking yes will make the building yours but it will still be in a pretty sorry state.
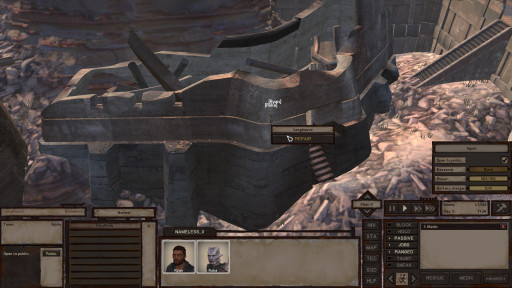
This week on home renovations with Ryan and Ruka, the pair may have bitten off more than they can chew.
When the building is all yours, you’ll want to get to rebuilding it. Holding the right mouse button on the building will give you this option to repair it.
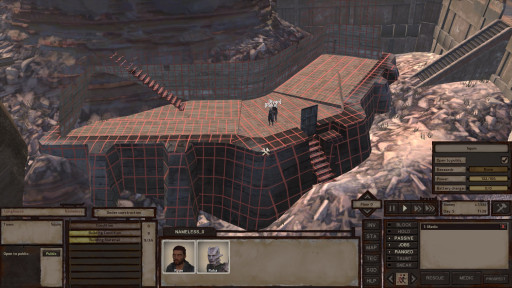
Gotta lotta work to do.
Clicking the repair option will put the building into a sort of blueprint mode. This is how all buildable structures in Kenshi look when they’re in the middle of construction. Bought buildings will be in a state somewhere around halfway to being completed.
You’ll be able to see in the bottom right the condition of the building and how many more building materials you’ll need to get it finished. Thankfully, Squin has a general store just down the way where you can buy them from.
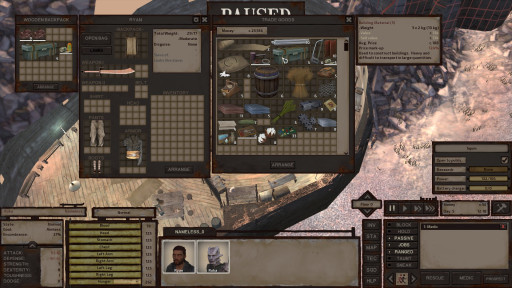
The general store. Good for all things general in purpose.
Ryan didn’t have enough cash left over to buy the rest of the much needed materials. Thankfully, he just went to mine more copper. Something that can also happen is that the store may not have enough materials in stock. Don’t worry about it as stores restock every day. So you might as well go mine some more copper while you wait for some more stock.
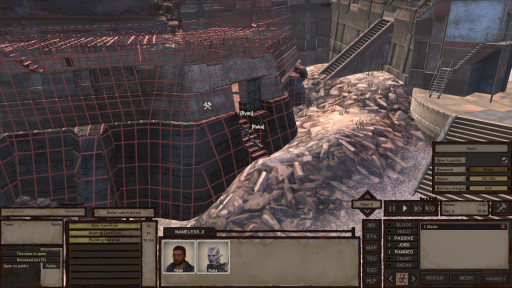
The closer a building or structure is to being completed, the more of it will fill up the blueprint scaffolding.
When you have your materials, select the character that has the materials in their inventory. Right click on the structure and they will add the materials in and get to work. Any other characters can also work on building it but the materials needed to be added first before they can join in.
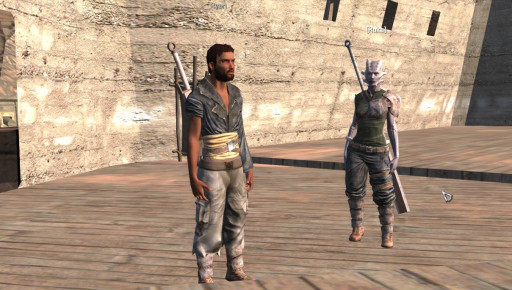
Home sweet home.
Once it’s all built, it's all yours. Sure it might look pretty bland now but you can remedy that later.
23. Research
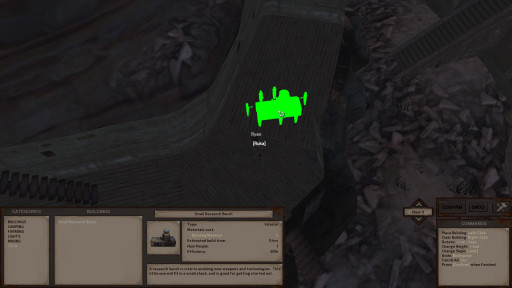
You’ll find the simple research bench under the Tech category in the build menu.
Whether or not you want to, it can be worth doing a few of the very basic bits of research within Kenshi. Even if you don’t intend on settling down with a large settlement somewhere, the first few basic things can go a long way. Especially if you have your own little house in a town somewhere to work out of.
To start, you’ll need to go into the build menu and place down a research bench. It’ll cost you 3 building materials which you can pick up easily from the general store. When placing it, you can use the < and > keys to rotate it so you can get it precisely where you want.
Also, you’ll notice the green mannequins on the blueprint. They simply indicate access points for characters to use the bench. Not all of them need to be available so you can butt it up right against a wall. As long as there is at least one place that a character can access it from, it’ll work just fine.
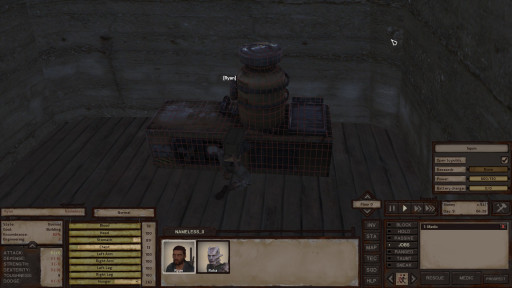
When it’s down, add materials and build it the same as anything else you’re wanting to build.
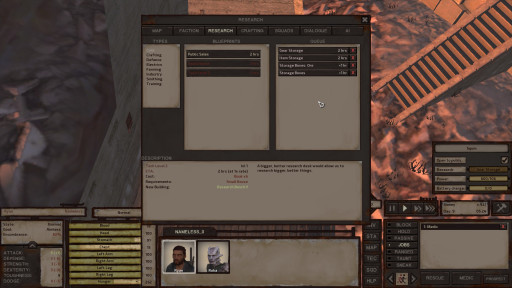
The research screen can be accessed anywhere by pressing T
Now that you’ve got a simple research bench, you can queue up things to get researched to your heart's content. Important ones like item and gear storage are a very good one to have. If you want to go out exploring as a solo or small group, then having a home base to come back to and store things is a must.
There are some things that will require additional things before you can research them. These can be as simple as books that can be bought at a general or travel store, to advanced science books and engineering research that you will need to venture out into ancient ruins to find.
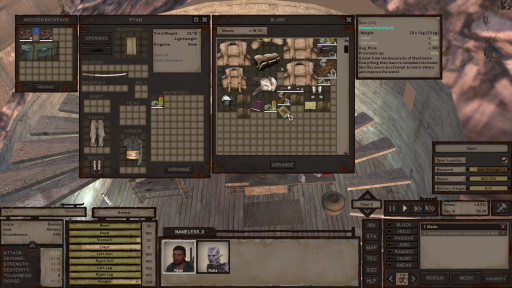
Books found at the adventure/travel store.
When you’ve acquired the necessary items for your chosen research topic, return back to your research bench. Left click on it to bring up its inventory and open your selected characters inventory with I. Right click on the books or other research items and they’ll be put into the bench's inventory. From there, you can spend them as you wish in the research menu.
None of this, however, will work without having a character actually doing the research. Thankfully, while Ryan isn’t very smart, he is a Greenlander. Greenlanders get a bonus to their science experience skill by doing sciency things like research so I’m gonna get him to take a break from busting his butt out there at the copper mine.
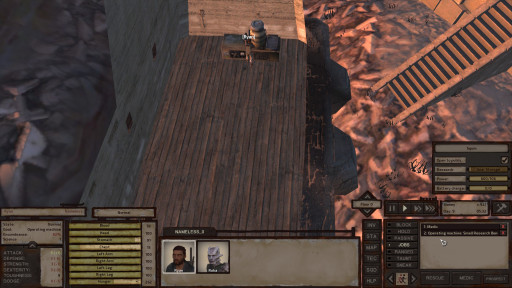
Operating the research bench has been added to Ryan’s jobs. With his jobs toggled on, he’ll automatically research whatever is queued.
By selecting Ryan, holding shift and right clicking the research bench, not only will he begin researching but it will be added to his job queue and now he’ll do it automatically whenever there is stuff to be learned.
24. Automating Jobs
So you’ve got one person researching automatically but what about other jobs? Well you can get your characters to do almost anything on their own. Afterall, without needing to sleep and hardly eating much, they’re basically slaves. Ain’t that right, Ryan?
With Ryan sitting there studying away for all the things I want to put inside their new home, I’ve got Ruka basically doing nothing. So, maybe she should get back out there and start digging up some copper. First though, I’m gonna need somewhere for her to store it all.
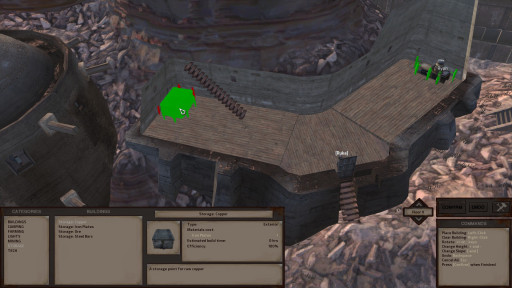
The copper storage box. Specifically for storing lots and lots of it.
Once ore storage has been researched, you can build and place a box anywhere within your longhouse. I want it here in the corner. Out of the way where it can still be accessed easily. At the cost of 1 iron plate, I can send Ruka to the general store to buy one and get cracking.
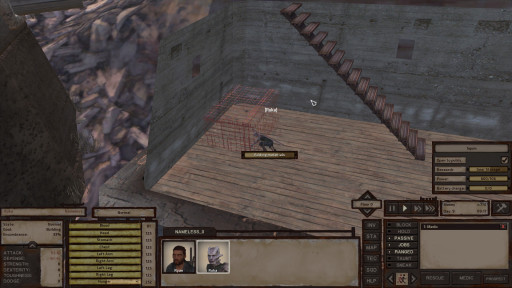
You’re gonna learn to love this box, Ruka
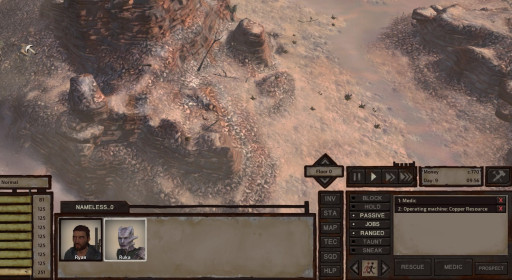
Mining a copper resource is classed as operating a machine in the jobs queue.
Now that the storage box has been completed, Ruka will have a place to put all the ore she mines while Ryan researches. Queuing the job is as simple as having the character you want to assign it to selected. Then, holding the shift key, right click on the resource, i.e. the copper deposit when the mouse cursor is a pickaxe or set of gears. The job will be queued and as long as the jobs button is toggled on.
They will continue to do the job forever until they are attacked by bandits or wild beasts, the box they’ve been filling is full, or you tell them otherwise. You can even queue it in your researchers jobs so that they will go over and mine once they’ve finished the research queue. You really can have your own little pawns running an empire of copper mines.
So with a home base, research going good, money coming in, and bandits to get into practice fights with, you’re all good to go. There is one more thing that definitely comes in handy in the early stages of the game and one that I guarantee you will need.
25. Hiring Mercs
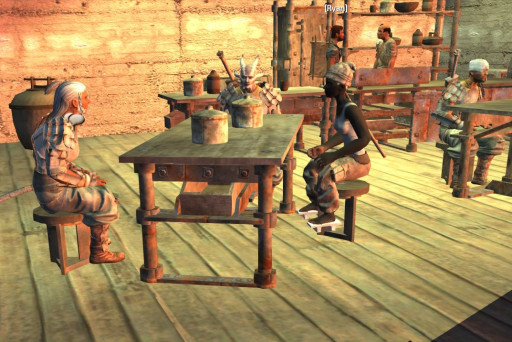
You can spot mercs in most bars in the towns, villages and waystations that you might visit. Noticeable by their badass armour and mean looks.
Mercenaries are widely available and considering how easy it is to make money, they are cheap as chips. Still, always get your money's worth out of them. Here, having made it back to The Hub after sneaking around a camp of Dust Bandits, Ryan felt like he could do the world a favour and rid them from the Border Zone. Unable to do it alone, he hired some mercenaries for a day.
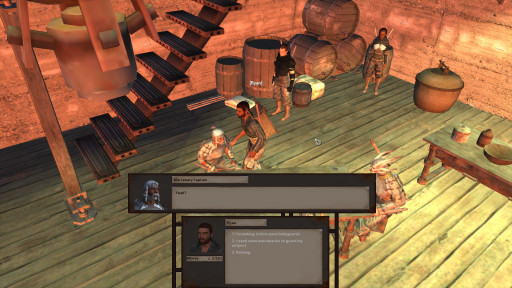
Don't be shy, they like money and you need their work.
When engaging the merc captain in conversation, you have the option of hiring them to guard yourself or your outpost. Guarding an outpost is half the price of body guarding but it's a two day minimum charge. Body guarding can be as little as 24 hours. At 2,000 Cats to get from The Hub to Squin, it's a steal.
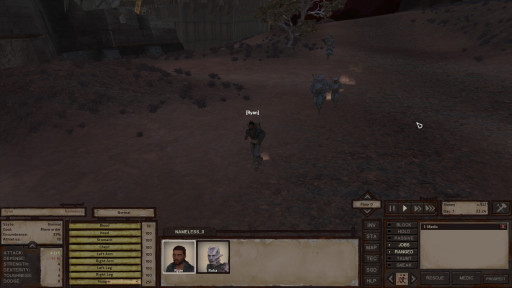
"Come, comrades! There’s knife work that needs doing."
While mercenaries won’t join your party proper, they will follow the character who spoke to their captain and hired them. Body guarding them along the way. In this case, Ryan. If you bring up the factions tab, you’ll find it along from the research and crafting tab, you can see how long you have them contracted for.
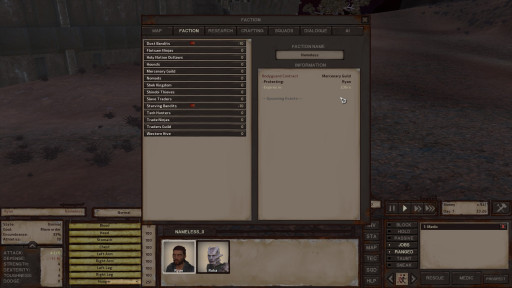
The faction screen shows upcoming events. Such as when the contract with the mercenaries expires.
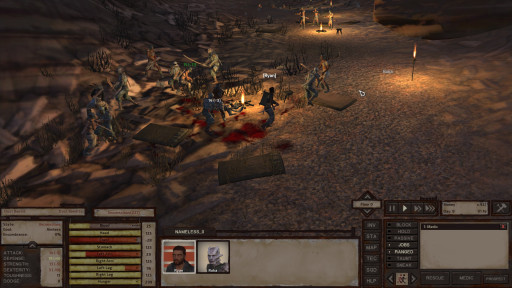
“Bring it, ya dust b***hes!”
Having led his new band of merry hired men, Ryan approached the Dust Bandits that had, for some reason, decided to make camp on the road between The Hub and Squin and gave them what for.
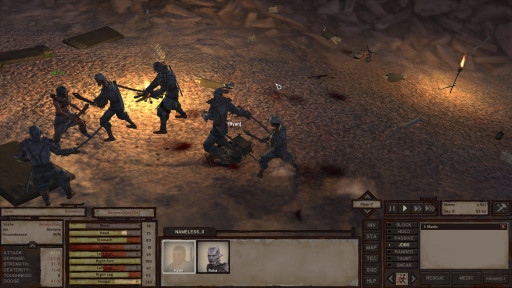
“Ouch!”
Unfortunately, it didn’t go too well for Ryan. He fought the good fight but was eventually bested and beaten down. Still, he got some excellent fighting experience and a few levels in toughness. The next fight, he’d be even deadlier.
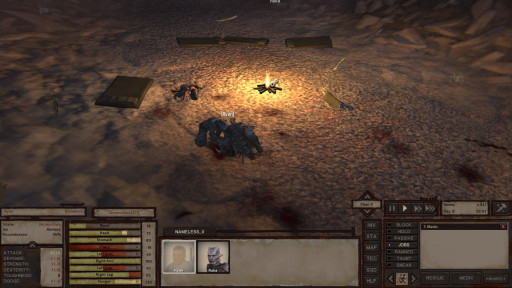
Mercenaries always look after their clientele. Afterall, they pay their wages.
When you’re downed or injured, Mercs will always heal you, although they won’t pick you up. They will however, prevent anyone else that isn’t in your party from picking you up and kidnapping you. You are, afterall, their charge as long as the contract is still valid.
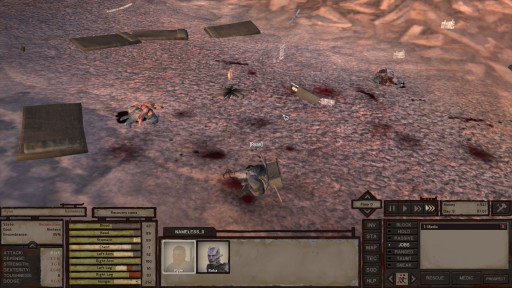
Dawn broke on a broken Ryan
The Mercs will stay with you while you lie there unconscious, however long it takes for you to recover and get back up. Unless the contract runs out then they will literally just leave you lying there. Healed but completely vulnerable to any Ne'er do wells. Thankfully, Ruka was there to come to his aid.
You might notice that when a character is unconscious, they have a countdown timer. Even if it runs down, they might not get back up and instead enter what's called a recovery coma. All that means is that whatever critical body part has been injured beyond its K.O. In this case, Ryan’s chest hasn’t yet healed enough for him to be able to get back up. Once it has, he will get up and be able to walk the good earth once more.
When a character is in a recovery coma, the best thing for them is to be rescued and put in a bed. They’ll still heal if they’re lying in the dirt but it will be much slower and they’ll be vulnerable to being robbed or worse, enslaved.
Conclusion
So that’s it then. What’s in store next time for Ryan or even you, dear reader and potential Kenshi player? Who knows. It’s completely up to you. Kenshi is whatever you make of it and you don’t even need to follow this guide. You can play it whatever way you like.
This guide might be considered to be the easiest or most stable start to the game. Hopefully, it will give you just enough of a jumping off point to get out there and get your feet wet. Or dusty. However you do it, it's all yours for the taking.
You may also be interested in:
[Top 10] Kenshi Best Weapon Shops And Why They're Great
[Top 15] Kenshi Best Mods Everyone Should Use (2022 Edition)
[Top 10] Kenshi Best Weapons And How To Get Them
[Top 5] Kenshi Best Armor And How To Get Them
[Top 10] Kenshi Best Base Locations And Why They're Great (2022 Edition)

