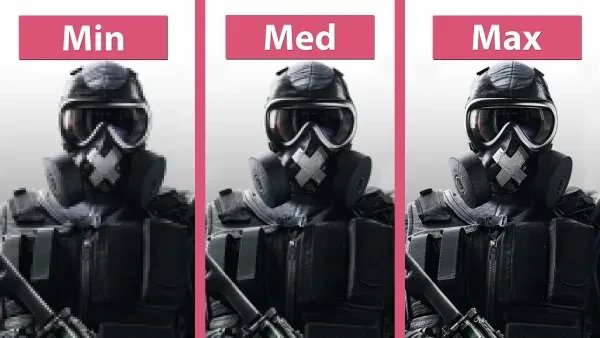
15. Resolution: Is that a shadow or a player?
Practically everyone playing Siege has shot at what looked like an enemy, only to realise it was nothing but a pan, a vase or a shadow on the wall. Or even worse, discovered only in the killcam of your death that the flowerpot you aimed at was, in fact, the non-existent hitbox of Ash’s head.
The best way to solve this problem is to buy a new monitor, or possibly some new glasses, but there is a much cheaper way to fix the problem.
In order to select the game resolution:
- open settings on the home screen
- navigate to the display bar
- Scroll to the appropriate resolution
Though it may seem counter-intuitive, higher is not necessarily better here. To achieve the clearest image on your screen, the best thing to do is make sure the game resolution matches whatever resolution your monitor is.
14. Prioritise Performance (Of Course)
Siege can look amazing, but if you want to win, performance always trumps appearance. This is why we recommend prioritising performance in the settings, ensuring that you always have the best frame rate possible. Luckily for us, Siege provides one simple button to create this,
- Go to settings from the home screen
- Scroll to the “Video” section
- Toggle the “Graphic Mode” to Prioritise Performance
Though prioritising resolution certainly makes the game look good, by prioritising performance you will increase the smoothness of your game, making gaming a more relaxing experience.
13. Stretched Screens: The Aspect Ratio
Equally as important as a resolution to ensure your vision is as best as it can be is the aspect ratio. Just like the resolution, the best aspect ratio you can pick is whatever best matches your monitor, and to change it you need to:
- open settings on the home screen
- navigate to the display bar
- Scroll across for the correct aspect ratio
By ensuring you have the correct ratio, the game should appear more natural and fit better on your screen, making sure you have the best setup to spot and eliminate the enemy.
12. Reflections: The Man In The Mirror
While a nice, picturesque addition to the game, reflections in Rainbow Six provide no gameplay advantage to the player whatsoever. For lower and medium-build PCs, turn reflection quality to low, as it is likely to harm performance and provide no benefit to you when on medium or high settings.
To change this setting:
- Go to settings from the home screen
- Scroll to the “graphics” section
- On the “Reflections Quality” set it to low
For players with more powerful gaming PCs, reflections may make your game look nicer, so as long as they don’t noticeably reduce performance turning them to medium or high should be fine.
11. Shadow Quality: The Medium Meta
Rainbow Six is all about intel, and having more of it than the enemy. To really get the edge on the wider player base, you need to see further and know more, and a great way to do this is with shadows.
Every player model casts a shadow, however these dynamic shadows are only visible to players with shadows set to medium or higher. To change this setting, simply
- Go to settings from the home screen
- Head onto the graphics section
- Find the shadows setting (you may need to scroll down) and select medium or any option higher
After a few games, you’re almost certain to get a kill or avoid a death because you could see the enemy’s shadow, before either of you could actually see each other. This creates a major advantage, especially when watching a well-lit hallway or entrance.
10. Ambient Occlusion: A Pretty, Laggy Mess
Ambient occlusion makes the game’s colours and lighting really pop, and greatly enhances to aesthetics of the game. It also completely destroys performance and FPS for all but the beefiest of PCs. We recommend that for normal gameplay, pretty much everyone should keep ambient occlusion off. To do this,
- Go to settings from the home screen
- Head onto the “Graphics” section
- Scroll down to “Ambient Occlusion” and toggle it off
9. Optic Colour and Opacity
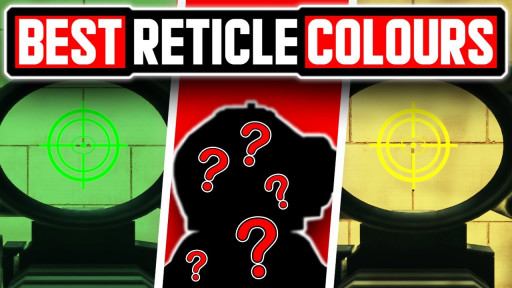
A relatively new addition to Siege in the grand scheme of things, the ability to adjust your optics colour and opacity can be a small but important advantage to have over your opponent.
To find this setting, simply:
- Go to settings from the home screen
- Head onto the accessibility section
- Scroll and use the slider to pick the colour and adjust the opacity
There is no set choice that is better here, but there is a general direction that is best to head in. A higher opacity is of course better – we recommend 100, but anything above 70 should be fine. As for colour, this is almost completely personal preference, though it’s probably a good idea to choose a bright colour such as green, purple, or yellow. And definitely don’t choose black, as this is going to blend in with every wall, floor, and corner in the game.
8. Lens Effects: Glowing Lights
Lens effects are best left off, save for one, very niche advantage. Generally, having lens effects turned off gives a player better visibility and FPS, and for most players having it off is the best choice.
Due to its effect of making light glow more distinctly in the game, when lens effects are on, Valkyrie cameras are incredibly easy to spot, providing a small advantage to the player.
We recommend that players on lower-end or standard PC setups stick to lens effects switched off, but players on more powerful setups may consider lens effects a worthy setting, so long as their computer doesn’t take the usual drop in performance.
To switch lens effects off:
- Go to settings from the home screen
- Scroll to the “Graphics” section
- Toggle the “Lens Effects” setting off
7. Shading
Shading is generally considered an aesthetic option primarily. It will make your game look better and more cinematic, but will not really provide any meaningful advantage for gameplay. If you have a low or medium-end PC build, turning shading to low will possibly give you an advantage in terms of performance.
If you have a powerful PC, shading may be a nice addition to the game, without the negative side effect of harming performance. We recommend keeping it on low, unless your PC can handle it easily. To change this setting:
- Go to settings from the home screen
- Scroll to the “Graphics” section
- Turn the “Shading Quality” option to low
6. Turn VSync Off!
VSync is the setting that synchronises you game to your monitor’s refresh rate. This is designed to stop tearing, but at the cost of FPS. We recommend turning VSync off, giving you better Frames Per Second and a greater chance of quick reaction times.
In order to turn it off,
- Go to settings from the home screen
- Scroll to the “Video” section
- Toggle the VSync setting off
If after doing so you experience tearing in your game (frames not lining up properly), it may be worth turning VSync back on, but for most systems operating without it should be fine.
5. LOD: When Wall Hacks are Bad
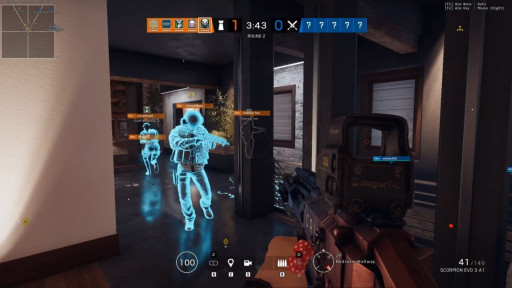
LOD, standing for Level Of Detail, is a strange setting. On the one hand, higher is of course better. On the other hand, setting it low can give you legitimate wallhacks, as objects such as benches, couches and stools disappear at a distance while the enemy player remains loaded.
While this may sound tempting, the trade-off is boxy hitboxes and disgusting graphics, and we recommend sticking with the higher options for this reason. To do this simply:
- Go to settings from the home screen
- Scroll to the “Graphics” section
- Select the “LOD Quality” box and scroll to the desired setting
We recommend selecting “Ultra” for high-end PCs, however the LOD that is best for you will depend on the power of your PC. You may need to test each of the higher settings to find out which one provides the best balance between performance and graphics, and “high” might be more suitable for the majority of R6 players.
4. Low Textures, Elite Gamers
While it may seem that having your textures on high would improve your gaming performance, this is not the case. The texture setting only applies to objects, not players, and by lowering the texture of the environment, you actually increase the contrast between the game world and the players. This means that lower quality textures will give you an advantage as you can more easily spot enemy players.
To lower your texture settings,
- Go to settings from the home screen
- Scroll to the “Graphics” section
- Scroll through and set your textures to low
3. Texture Filtering
Also known as Anisotropic Filtering, texture filtering is essentially designed to sharpen textures at a distance. While this can be an advantage, giving you a clearer picture of enemies at long range, it also takes a toll on your PC’s performance.
Here’s how to change the setting:
- Go to settings from the home screen
- Go to the “Graphics” section
- Scroll down and open the “Texture Filtering” option and select the preferred setting
For higher-end gaming PCs, the anisotropic 8x could be a worthwhile change, but for most computers we recommend a lower setting such as the anisotropic 2x. This should provide a balance between graphical quality and game performance.
2. Brightness
It’s important to have every aspect of the game calibrated to your personal preference, and one that is almost entirely circumstantial is brightness. To change this,
- Go to settings from the home screen
- Go to the “Display” section
- Scroll down and open the brightness tab. Here you can use the slider and the visual aid beneath to set it to your liking
There is no set “best brightness” that will give you an advantage, but ensuring this is set up to best match the light levels in your room, the graphics of your monitor and your own eyesight will help in any game.
1. Outlines & Who Needs Them
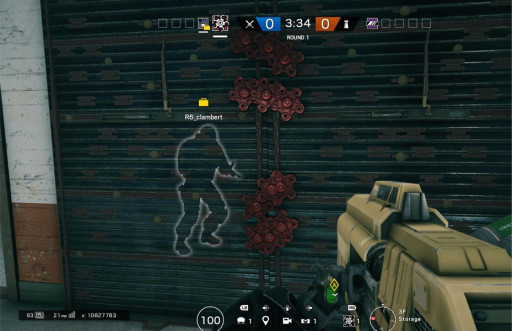
Though they can sometimes be distracting, they can also be a great tool for new players, or players prone to teamkilling. We advise trying out Rainbow with outlines both on and off, to see what’s best for you. Newer players will most likely benefit from having them on, but Siege veterans may find them more an annoyance than anything else.
To change this setting,
- Go to settings from the home screen
- On the general page, open interface preferences
- Scroll down to “Show teammate outlines” and change depending on your preference
You May Also Be Interested In:
- Rainbow 6 Siege Attachment Guide (R6 Best Attachments For Every Weapon)
- [Top 25] Best R6 Settings That Give You An Advantage
- [Top 15] Rainbow 6 Siege Best Graphic Settings
- Rainbow 6 Siege Best Weapon Attachments
- Rainbow 6 Siege Best Operators 2021
- [Top 7] Rainbow 6 Siege Best Defenders
- Rainbow 6 Siege Roles Explained And How To Play Each One
- [Top 10] Rainbow 6 Siege Best Players

